
Subscribe to Our Youtube Channel
Related Manuals for Unigas S10


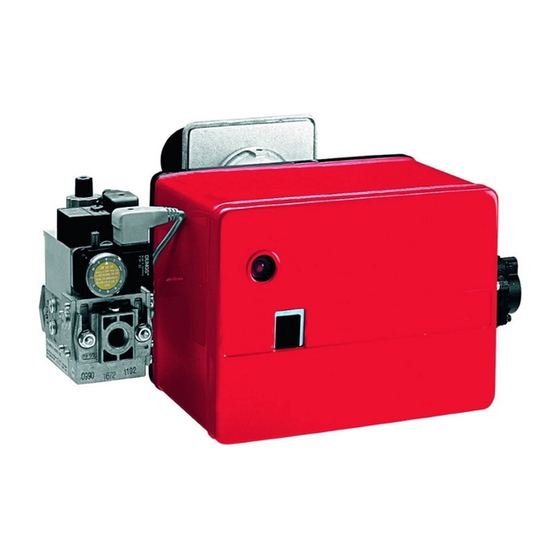
Summary of Contents for Unigas S10
- Page 1 MANUAL OF - INSTALLATION - OPERATION - MAINTENANCE GAS BURNERS DOUBLE STAGE VERSION M03952CC Rev. 02 04/01 Complying with 90 / 396 / CEE GAS DIRECTIVE Technical Documentation CIB Unigas - Campodarsego (PD)
- Page 2 NOTICES THIS MANUAL IS SUPPLIED AS AN INTEGRAL AND ESSENTIAL PART OF THE PRODUCT AND MUST BE DELIVERED TO THE USER. INFORMATION INCLUDED IN THIS SECTION ARE DEDICATED BOTH TO THE USER AND TO PERSONNEL FOLLOWING PRODUCT INSTALLATION AND MAINTENANCE. THE USER WILL FIND FURTHER INFORMATION ABOUT OPERATING AND USE RESTRICTIONS, IN THE SECOND SEC- TION OF THIS MANUAL.
- Page 3 GENERAL INSTRUCTIONS DEPENDING ON FUEL 3b) FIRING WITH GAS, GASOIL OR OTHER FUELS USED GENERAL 3a) ELECTRICAL CONNECTION * The burner shall be installed by qualified personnel and in compliance with regulations and provisions in force; wrong * For safety reasons the unit must be efficiently earthed and installation can cause injuries to people and animals, or installed as required by current safety regulations.
- Page 4 PART I: INSTALLATION TECHNICAL DATA BURNER TYPE Input min. low flame kW min. high flame kW max. high flame kW min. low flame kcal/h 36.120 38.700 min. high flame kcal/h 51.600 55.900 max. high flame kcal/h 120.400 172.000 Fuel natural gas natural gas Category Gas flow rate min.
- Page 5 OVERALL DIMENSIONS (mm) Fig. 4a Fig. 4b B: standard blast tube BL: long blast tube 169.7 169.7 PERFORMANCE CURVES Fig. 5 1 0 0 1 2 0 1 4 0 1 6 0 4 , 5 3 , 5 2 , 5 Fig.
- Page 6 PRESSURE - RATE IN COMBUSTION HEAD CURVES Curves are referred to a null pressure in combustion head! The pressure - gas rate curves are referred to the burner in operation with 3% of O , with the combustion head at the maximum opening, servocontrol at the maximum opening and gas butterfly valve fully opened..
- Page 7 MOUNTINGS AND CONNECTIONS Packing The burners are dispatched in cardboard pakages with dimensions: 760 x 510 x 440 mm (W x H x D). Packing cases of this kind are affected by humidity and are not suitable for stacking. The following are placed in each packing case.
- Page 8 ELECTRICAL CONNECTION Remove the burner cover. Carry out the electrical connections to the multiple con- nector as shown in Fig. 9. Refit the burner cover. Fig. 9 RESPECT THE BASIC SAFETY RULES. MAKE SURE OF THE CONNECTION TO THE EARTHING SYSTEM. DO NOT REVERSE THE PHASE AND NEUTRAL CONNECTIONS.
- Page 9 AIR AND GAS FLOW SETTINGS WARNING! THE SEALED SCREWS MUST NOT BE UNSCREWED! IN A SUCH CASE THE DEVICE WARRANTY IS IMMEDIATELY INVALIDATE! WARNING: During commissioning operations, do not let the burner operate with insufficient air flow (danger of formation of car- bon monoxide);...
- Page 10 Fig. 12 - Burners fitted with Multibloc MB-ZRDLE valve assemblies (Multibloc two-stage) To adjust the burner when testing the system, proceed as follows: High flame calibration 1 Ignite the burner, bring it to high flame, adjust the gas flow-rate (Fig. 12) by loosening the screw VB (not sealed), turn the adjustment nut RP2, anticlockwise to increase the gas flow-rate (+ sign), and clockwise to decrease it (- sign), to increase the gas flow-rate, use the screw (VS) located under the cover C (clockwise increases it, anticlockwise decreases it).
- Page 11 Fig. 13a Fig. 13b Slit indicating the butterfly opening angle Stud TG lock nuts Butterfly valve opening adjustment stud Lock nut VRA Screw for adjusting combustion air to maximum flow-rate Fig. 14 PART I: INSTALLATION...
- Page 12 SERVOCONTROL CAMS SETTING Landis SQN30.151 Berger STA6B3.41 Fig. 15a Fig. 15b Landis SQN70.224A20 Berger STA4.5BO.37/6 Fig. 15d Fig. 15c BLUE ORANGE BLACK MAN - AUTO Servocontrol cams setting The setting procedure is the same for Berger and Landis servocontrols. Refer to the table below for the correct correspondence of cams.
- Page 13 Calibration of air pressure switch Calibration is carried out as follows: Remove the transparent plastic cap. After air and gas setting have been completed, start the burner and, while prepurge phase is running, slowly turn the adju- sting ring nut VR in the clockwise direction until the burner lockout . Read the value on the pressure switch scale and reduce it by 15%.
- Page 14 PART II: OPERATION LIMITATIONS OF USE THE BURNER IS AN APPLIANCE DESIGNED AND CONSTRUCTED TO OPERATE ONLY AFTER BEING CORRECTLY CONNECTED TO A HEAT GENERATOR (E.G. BOILER, HOT AIR GENERATOR, FURNACE, ETC.), ANY OTHER USE IS TO BE CONSIDERED IMPROPER AND THEREFORE DANGEROUS. THE USER MUST GUARANTEE THE CORRECT FITTING OF THE APPLIANCE, ENTRUSTING THE INSTALLATION OF IT TO QUALIFIED PERSONNEL AND HAVING THE FIRST COMMISSIONING OF IT CARRIED OUT BY A SERVICE CENTRE AUTHORISED BY THE COMPANY MANUFACTURING THE BURNER.
- Page 15 PART III: MAINTENANCE At least once a year carry out the maintenance operations listed below. In the case of seasonal servicing, it is recommended to carry out the maintenance at the end of each heating season; in the case of continuous operation the maintenance is carried out every 6 months.
- Page 16 If the power supply to the burner is 230V phase-phase (without a neutral), with the Landis LGB2... o LMG2... flame control device, between the terminal 2 on the board and the earth terminal, an RC Landis RC466890660 filter must be inserted C - Capacitor (22nF/250V) LGB - LMG - Landis flame control device...
- Page 17 ELECTRICAL DIAGRAMS Electrical diagrams 01-320 Rev. 3 e 01-427 - Complete key Operation time counter first stage Operation time counter first stage Flame detection electrode Gas solenoid valve, Ist stage, DUNGS MB-ZRDLE Gas solenoid valve, 2nd stage, DUNGS MB-ZRDLE Fuse Main switch Phase Burner in high flame operation light...
- Page 18 ELECTRICAL DIAGRAMS Electrical diagram 01-320 Rev. 3 PART III: MAINTENANCE...
- Page 19 Electrical diagram 01-427 PART III: MAINTENANCE...
- Page 20 SPARE PARTS PART III: MAINTENANCE...
- Page 21 POS. DESCRIPTION FLAME CONTROL DEVICE LANDIS LGB22 2020430 2020430 FLAME CONTROL DEVICE LANDIS LMG22 2020450 2020450 SOCKET FOR FLAME CONTROL DEVICE 2030415 2030415 GAS PRESSURE SWITCH 2160052 2160052 MULTIBLOC MB-DLE 2190340 2190341 MULTIBLOC MB-ZRDLE (DOUBLE STAGE) 2190358 2190354 SERVOCONTROL BERGER STA6 B 3.41 2480042 2480042 SERVOCONTROL BERGER STA4.5 B0.37/6...
-
Page 22: Table Of Contents
APPENDIX: COMPONENTS CHARACTERISTICS LANDIS LGB 21/22.. FLAME CONTROLLER LANDIS LMG21/22/25 FLAME CONTROLLER GAS MULTIBLOC REGULATOR DUNGS MB-DLE 405-407-410-412-415-420 GAS MULTIBLOC REGULATOR DUNGS MB-ZRDLE VALVE PROVING SYSTEM DUNGS VPS504 APPENDIX: COMPONENTS CHARACTERISTICS... -
Page 23: Landis Lgb 21/22.. Flame Controller
ZV1 Main flame ignition gas valve or BV1 for burners with main LANDIS LGB 21/22.. FLAME CONTROLLER flame supervision Function 1...12 Terminals of the burner flame controls on AGK11's socket The programme run is shown in the diagrams. The required and per- Command signal from flame control missible input signals for the control part and flame supervision part Input signals... - Page 24 Command program in the event of a defect Specifications Supply voltage 220 V AC -15%...240 VAC +10% In the event of a defect the inflow of fuel is interrupted. When the block occurs in the preventilation time (not indicated by the symbol) Frequency 50 Hz -6%...60 Hz +6% the causes may be the air pressostat LP or a premature signal of...
- Page 25 KEY - internal diagram Key - programmer's diagram Block signal start-up (command from regulator “R”) Main relay with "ar" contacts main relay Block relay with "br" contacts burner operation Fuel valve program start position (start up) Dbr1 U bolt flame relay Unblocking button waiting time Detection electrode...
-
Page 26: Landis Lmg21/22/25 Flame Controller
Startup program LANDIS LMG21/22/25 FLAME CONTROLLER Start-up, controlled by LR FEATURES -fan command after the waiting time tw for LMG21/25, or after the The series of equipment LMG.. is interchangeable with the series period t11 for LMG22. LGB.., all diagrams and accessories are interchangeable, the main features are: Waiting time. - Page 27 Control program in the event of fault Diagnosis table If a fault occurs, all outputs will immediately be deactivated (in less Number of flashing than 1s). - Possible causes On restoration of power, a restart will be made with the full progra 2 flashing ** sequence.
-
Page 28: Gas Multibloc Regulator Dungs Mb-Dle 405-407-410-412-415-420
A2 mountable as per DIN EN 1854 GAS MULTIBLOC REGULATOR DUNGS MB-DLE 405-407-410- Pressure regulator Pressure regulator compensated for 412-415-420 residual pressure, leakproof seal when switched off by means of Specifications valve V1 as per DIN EN 88 Class A. Setpoint spring permanently Nominal diameters - Flange with pipe threads as per ISO 7/1 installed (no spring exchange possible). - Page 29 APPENDIX: COMPONENTS CHARACTERISTICS...
- Page 30 APPENDIX: COMPONENTS CHARACTERISTICS...
- Page 31 APPENDIX: COMPONENTS CHARACTERISTICS...
Need help?
Do you have a question about the S10 and is the answer not in the manual?
Questions and answers