Table of Contents
Advertisement
Quick Links
Advertisement
Table of Contents

Related Manuals for RED KOMODO 6K S35


Summary of Contents for RED KOMODO 6K S35
- Page 1 KOMODO ® OPERATION GUIDE KOMODO 6K S35 V1.6 RED.COM...
-
Page 2: Table Of Contents
IMAGE / LUT MENU LENS POWER SHUTTER INDICATORS WHITE BALANCE GPO FUNCTION OUTPUT COLOR SPACE STATUS SETTINGS OUTPUT TONE MAP SYSTEM STATUS HIGHLIGHT ROLL-OFF LANGUAGE MENU DISPLAY PRESET 3D LUT EXPOSURE ADJUST COPYRIGHT © 2022 RED.COM, LLC 955-0190, REV A | ... - Page 3 EDGECODE ZEBRA MODES ZEBRA OVERVIEW PRE-RECORDING CONTENT CALIBRATING THE SENSOR WHEN TO CALIBRATE SENSOR UPGRADING THE FIRMWARE VERIFYING THE FIRMWARE VERSION UPGRADING THE FIRMWARE KOMODO LINK ADAPTOR ANDROID CONFIGURATION APPLE CONFIGURATION COPYRIGHT © 2022 RED.COM, LLC 955-0190, REV A | ...
-
Page 4: Disclaimer
(1) this device may not cause interference, and (2) this strictly “as is” and RED will not be held responsible for issues arising device must accept any interference, including interference that may from typographical errors or user’s interpretation of the language used... - Page 5 CAUTION: If the device is changed or modified without regulated for conformity assessment of telecommunications products permission from RED, the user may void his or her authority and meets the applicable technical requirements, including the limits for to operate the equipment.
-
Page 6: Safety Instructions
OPERATION GUIDE SAFETY INSTRUCTIONS EUROPEAN UNION COMPLIANCE STATEMENTS RED declares that the radio equipment DO NOT use the camera or accessories near water. Avoid exposing described in this document complies with the your camera to moisture. The unit is not waterproof, so contact with... - Page 7 40% to 60%. If batteries will be 3/8-16 mounting points located on the bottom of the camera stored for long periods of time, RED recommends that you check or on the Expander Module. Always verify that the screws are the charge level at least once every six (6) months, and recharge tightened properly.
- Page 8 If the battery leaks and the electrolyte reaches the eyes, do not rub them. Instead, rinse the eyes with clean running water and immediately seek medical attention. Failure to do this may result in eye injury. COPYRIGHT © 2022 RED.COM, LLC 955-0190, REV A | viii...
-
Page 9: Introduction
Adaptors, such as EF-type, PL, and Leica M mount. The KOMODO records using R3D or ProRes formats written to a CFast 2.0 media card. The RED KOMODO is powered by REDVOLT BP batteries or a power cable. Control the KOMODO features with the top Touchscreen, or you can use the screen to watch playback. - Page 10 REDCODE is a compression codec that reduces R3D RAW files into a manageable size, allowing longer recording times on media. The ability to compress RAW data is one of the significant technologies that RED has brought to the industry. GLOBAL SHUTTER This camera employs global shutter technology.
- Page 11 KOMODO OPERATION GUIDE POST PRODUCTION Many non-linear editing systems (NLEs) can open and edit RED footage. Each NLE version may have specific compatibility requirements, such as camera firmware version or camera type. Before shooting, check all compatibility requirements. The following programs can be used to open and/or edit R3D files: REDCINE-X PRO: RED's proprietary application.
-
Page 12: Quick Reference
OPERATION GUIDE 2. QUICK REFERENCE Congratulations new RED KOMODO camera owner. This quick reference topic helps you get familiar with this guide and Camera Body. It includes links to topics about configuring the camera to fit your recording requirements, and for learning the basic operation of the camera. -
Page 13: Camera Components
Lens mount for RF type lenses and adaptors (refer to Lenses and Adaptors) Mic 1 Left Internal Microphone channel Mic 2 Right Internal Microphone channel Tally Light Tally light (refer to Camera Body LEDs and Indicators) COPYRIGHT © 2022 RED.COM, LLC 955-0190, REV A | 5... -
Page 14: Top
Playback Button Opens the Playback screen 1/4-20 Mounting Holes 1/4-20 mounting holes for optional accessories (refer to KOMODO Outrigger Handle) Accessory Port Connection port for accessories (refer to KOMODO Outrigger Handle) COPYRIGHT © 2022 RED.COM, LLC 955-0190, REV A | 6... -
Page 15: Left
Camera Body LEDs) EJECT Button Left battery release button M4 Mounting Holes Two (2) M4 mounting points for accessories Focus Plane Focus plane indicator symbol Beep Speaker Camera beep speaker COPYRIGHT © 2022 RED.COM, LLC 955-0190, REV A | 7... -
Page 16: Right
Displays the camera recording status (refer to Camera Body LEDs) Air Intake Air intake for thermal management Focus Plane Focus plane indicator symbol M4 Mounting Two (2) M4 mounting points for accessories Holes COPYRIGHT © 2022 RED.COM, LLC 955-0190, REV A | 8... -
Page 17: Back
2. WARNING: Always connect the accessories' DC power cable (or batteries) before connecting the BNC SDI cable. Always remove the BNC SDI cable before removing the accessories' DC power cable (or batteries). For more information, refer to Preventing Damge to SDI Outputs. COPYRIGHT © 2022 RED.COM, LLC 955-0190, REV A | 9... -
Page 18: Bottom
One (1) 1/4"-20 mounting hole and one (1) 3/8"-16 mounting hole (refer to KOMODO Expander Module) Registration Points Indented alignment points for the KOMODO Expander Module Service Port For RED service only - DO NOT REMOVE COPYRIGHT © 2022 RED.COM, LLC 955-0190, REV A | 10... -
Page 19: Camera Body Leds
Figure: KOMODO 6K LED, Front ITEM COLOR DESCRIPTION Tally Indicator LED When enabled, this LED is ON when the camera is recording. For information about enabling this LED, refer to Indicators. COPYRIGHT © 2022 RED.COM, LLC 955-0190, REV A | 11... - Page 20 Amber flashing slow Formatting media Red flashing slow Media mounted with >5% and <= 10% of media space available Red flashing fast Media mounted with <= 5% of media space available Recording COPYRIGHT © 2022 RED.COM, LLC 955-0190, REV A | 12...
- Page 21 Media mounted with <= 5% of media space available Power and Record Both flashing green Firmware update in progress Both flashing red Firmware update error (refer to Upgrading the Firmware) COPYRIGHT © 2022 RED.COM, LLC 955-0190, REV A | 13...
- Page 22 DESCRIPTION DC-IN Green DC-IN is present and / or the battery is fully charged Flashing Amber Communicating with, and evaluating the battery Amber Charging connected batteries Error charging the batteries COPYRIGHT © 2022 RED.COM, LLC 955-0190, REV A | 14...
-
Page 23: Batteries
RED.COM. RED shall not be liable for any damage to this product and/or accidents such as malfunction, fire, etc., caused by the failure of incompatible batteries (e.g., a leakage and/or explosion of a battery pack). Please note that repairs arising out of the malfunction of incompatible batteries will not be covered by the warranty for repairs. -
Page 24: Canon
Capacity: 7800 mAh typical / 7350 mAh (55 Wh) minimum Dimensions: Width=1.504", Height=2.773", Depth=2.45" Weight: 11.3 ounces As much as 50% more recording time than the BP-955. 4 LEDs indicate the remaining battery life. COPYRIGHT © 2022 RED.COM, LLC 955-0190, REV A | 16... -
Page 25: Lenses And Adaptors
Image Stabilization - The UI indicates that image stabilization is present Control Ring - The UI menu is enabled and the camera can use the control ring For more information, refer to the Lens menu. COPYRIGHT © 2022 RED.COM, LLC 955-0190, REV A | 17... -
Page 26: Compatible Lenses
2. Align the red dot on the camera mount cap with the red dot on the camera and attach the mount cap to the camera. 3. Turn the camera mount cap clockwise until it clicks in place. -
Page 27: Red Cfast 2.0 Reader
CFast 2.0 card. NOTE: You can use the RED CFast 2.0 card reader with Write-Protect to prevent the Mac OS from indexing your CFast 2.0 card. For more information refer to the How To section (Media Best Practices). -
Page 28: Komodo Link Adaptor
Directly connect the KOMODO Link Adaptor to an iPhone or Android device, and experience a live preview with minimal latency using the RED Control app. Attach a USB-C to Ethernet adapter (not included) to the KOMODO Link Adaptor and you can remotely control the camera using an Ethernet-connected device. -
Page 29: Komodo Wing Grip
NOTE: After 1 hour of inactivity, the touchscreen will go to sleep. Tap the touchscreen or touch any button to wake the touchscreen. The touchscreen will not sleep while the camera is recording. COPYRIGHT © 2022 RED.COM, LLC 955-0190, REV A | 21... - Page 30 Home screen and Menu screen. It also contains status icons for various camera settings and inputs. When you tap the Home/Menu toggle button (RED logo), the camera toggles the display between the menu page and the home page:...
- Page 31 The Histogram section of the LCD home page displays the image color histogram. Tap this area to toggle between this display and the Media display. For more Histogram information, refer to COPYRIGHT © 2022 RED.COM, LLC 955-0190, REV A | 23...
- Page 32 The Camera Designation and Record button on the LCD touchscreen home page displays the camera letter assigned to the camera (refer to Slate Camera ID). You can tap this area to start pre-recording, and to start and stop recording. Pre-recording: Recording: COPYRIGHT © 2022 RED.COM, LLC 955-0190, REV A | 24...
- Page 33 Lock icon in the Status bar displays the lock status. The REC button is not locked and it functions normally. Pressing the Playback button starts and stops playback (refer to Playback for more information). Home Screen Menu Screen COPYRIGHT © 2022 RED.COM, LLC 955-0190, REV A | 25...
- Page 34 Date / Time, Lens, Power, Indicators, GPO, Status Settings, System Status Language Menu English, Chinese, French, German, Japanese, Spanish Maintenance Menu Calibrate, Calibration, Save Log, Reset Defaults, Factory Reset, Upgrade COPYRIGHT © 2022 RED.COM, LLC 955-0190, REV A | 26...
-
Page 35: Status Bar
HOME / MENU BUTTON This button toggles the LCD display between the Home screen and the Menu screen. The arrow on the button changes direction when toggled. Home Screen: Menu Screen: COPYRIGHT © 2022 RED.COM, LLC 955-0190, REV A | 27... - Page 36 This icon displays the temperature (T) and exposure (E) calibration indicators. Gray indicates that the FTPS is not transferring data. • When T is yellow or red, it indicates that the camera requires sensor re-calibration. Green indicates that the camera is transferring FTPS data.
- Page 37 Green indicates that the camera is receiving (Infrastructure). and is locked to a Genlock signal. White antenna indicates that Wi-Fi signal is Red indicates that the camera is receiving and broadcasting (Ad-hoc). is not locked to a Genlock signal. SYNC ICON...
- Page 38 White indicates that the battery is connected and green shows the relative level of charge remaining. Yellow indicates 10 minutes of power remaining. Red indicates less then 5 minutes of power remaining. Gray question mark indicates no communication with the battery and no power.
-
Page 39: Status Page
Displays the communication status and a link to the Wi-Fi settings menu Maintenance Displays the Temperature and Exposure calibration, the external connection status, and a link to the Maintenance Menu COPYRIGHT © 2022 RED.COM, LLC 955-0190, REV A | 31... -
Page 40: Monitoring Tools
Return to the LCD home page by tapping the arrow button The Monitoring tools provide an easy way to toggle many of the monitoring features on and off. When the features are selected, the buttons indicate the selection. COPYRIGHT © 2022 RED.COM, LLC 955-0190, REV A | 32... - Page 41 The SDI Guides switch displays the Monitoring Guides (frame guides and center guide) on the SDI output. The SDI Tools switch displays the Monitoring Tools (false color, peaking, zebra) on the SDI output. COPYRIGHT © 2022 RED.COM, LLC 955-0190, REV A | 33...
- Page 42 When the switches are selected, the gray bar turns green on the left side of the switch. FOCUS The Focus section allows you to enable or disable one of the focus tools. The focus tool button you select will turn red. For information about using the Focus tools, refer to Tools.
- Page 43 The Zebra section allows you to enable or disable the Zebra 1 and Zebra 2 modes. When the modes are selected, the gray bar turns green on the left side of the switch. For information about using the two Zebra modes, refer to Zebra 1 Zebra COPYRIGHT © 2022 RED.COM, LLC 955-0190, REV A | 35...
-
Page 44: Histogram
The histogram displays the darkest image elements at the far left, the midtones in the middle, and the lightest image elements at the far right. This provides a quick visual tool you can use to determine your overall image exposure levels. Overexposed Example Underexposed Example COPYRIGHT © 2022 RED.COM, LLC 955-0190, REV A | 36... -
Page 45: Audio Tools
Return to the LCD home page by tapping the arrow The Audio tools provide an easy way to control many of the audio features. When the features are selected, the buttons indicate the selection. COPYRIGHT © 2022 RED.COM, LLC 955-0190, REV A | 37... - Page 46 Internal Microphone, External, both, or none. Use the sliders to adjust the gain for each channel. You can use the Link button to link channels 1 and 2, or to link channels 3 and 4. This allows you to adjust both of the internal or external channels together. COPYRIGHT © 2022 RED.COM, LLC 955-0190, REV A | 38...
- Page 47 The Audio VU Meter section displays the audio input received by the camera from the four channels. As the input increases, the level indicator changes from green to yellow to orange to red. When the audio input clips, the channel number at the top of the VU meter turns red: COPYRIGHT ©...
-
Page 48: Playback
NOTE: When you open playback, it disables many of the menu settings. PLAYBACK SCREEN The Playback screen displays the clip image along with the following: Clip Slider RGB Exposure Histogram Audio VU Meters Clip Information Playback Screen Buttons CLIP SLIDER COPYRIGHT © 2022 RED.COM, LLC 955-0190, REV A | 40... - Page 49 This gives you a quick way to view your overall image exposure levels. AUDIO VU METERS The Audio VU meters display the audio levels in the played clip. COPYRIGHT © 2022 RED.COM, LLC 955-0190, REV A | 41...
- Page 50 PLAYBACK SCREEN BUTTONS With the Playback screen buttons you can view the Clip list, move one clip back, move one frame back, play/pause, move one frame forward, and move one clip forward. COPYRIGHT © 2022 RED.COM, LLC 955-0190, REV A | 42...
- Page 51 Swipe up and down to scroll through the list of clips. Tap the down arrow to open the clip information screen. When you tap the Load button, the camera loads the clip to the Playback screen. COPYRIGHT © 2022 RED.COM, LLC 955-0190, REV A | 43...
-
Page 52: Red Control App
OPERATION GUIDE RED CONTROL APP The RED Control app provides remote and tethered access to the camera from a device. Access is available through Wi-Fi, USB-C, and Ethernet. The RED Control app is free through the Google Play store and the Apple App store. -
Page 53: Menus
Date / Time, Lens, Power, Indicators, GPO, Status Settings, System Status Language Menu English, Chinese, French, German, Japanese, Spanish Maintenance Menu Calibrate, Calibration, Save Log, Reset Defaults, Factory Reset, Upgrade COPYRIGHT © 2022 RED.COM, LLC 955-0190, REV A | 45... -
Page 54: Image / Lut Menu
Display Preset Adjusts on-set working gamma space 3D LUT Manage the camera's look up tables (LUTs). Opens the Color Decision List (CDL) menu Exposure Adjust Manually fine-tunes the midtone exposure level COPYRIGHT © 2022 RED.COM, LLC 955-0190, REV A | 46... -
Page 55: Iso
REDCINE-X PRO or other editing tools that support R3D files. RED recommends setting the ISO to the default of 800, then adjusting the aperture, lighting, and ND filters to match. The ISO can later be adjusted for fine-tuning. - Page 56 Shutter Angle = (Shutter Speed x Frame Rate x 360) Example: (1/47.95 x 23.98 x 360) = 180 CONVERT SHUTTER ANGLE TO SHUTTER SPEED Shutter Speed = 1/(Frame Rate x 360/Angle) Example: 1/(23.98 x 360/180) = 1/47.95 COPYRIGHT © 2022 RED.COM, LLC 955-0190, REV A | 48...
-
Page 57: White Balance
Auto White Balance The camera automatically sets the color temperature and tint COLOR TEMPERATURE Use Color Temperature to adjust the image's color temperature in Kelvin units (K) or by selecting presets. COPYRIGHT © 2022 RED.COM, LLC 955-0190, REV A | 49... - Page 58 The color temperature presets you can select include: ITEMS DETAILS ITEMS DETAILS Incandescent 2800 K Daylight 5600 K Tungsten 3200 K Cloudy 7000 K Fluorescent 4500 K Shade 8000 K Flash 5500 K COPYRIGHT © 2022 RED.COM, LLC 955-0190, REV A | 50...
- Page 59 Tint range is –100.000 to 100.000. The default Tint setting is 0.000. Use Edit to open the keypad screen where you can enter a specific Tint value. COPYRIGHT © 2022 RED.COM, LLC 955-0190, REV A | 51...
-
Page 60: Output Color Space
Rec. 709 - Standard Color Space for HDTV (default) Rec. 2020 - Standard Color Space for UHD and HDR REDWideGamutRGB - Color space encompassing all of the colors the RED camera can generate without clipping. COPYRIGHT © 2022 RED.COM, LLC... -
Page 61: Output Tone Map
Use Highlight Roll-Off to select the desired highlight compression to use when displaying the camera output. When shooting in R3D format, the camera stores this as metadata, which you can adjust non-destructively in post- production after filming. COPYRIGHT © 2022 RED.COM, LLC 955-0190, REV A | 53... -
Page 62: Display Preset
High Dynamic Range (HDR) images are recorded using the SMPTE-2084 PQ curve. This technology captures and outputs a greater range of luminance than images recorded using Standard Dynamic Range (SDR) methods. COPYRIGHT © 2022 RED.COM, LLC 955-0190, REV A | 54... -
Page 63: 3D Lut
When you are recording in the ProRes format, you can choose to irreversibly encode (bake) the 3D LUT into the recorded file. For more information, refer to the ProRes Color Profile section. COPYRIGHT © 2022 RED.COM, LLC 955-0190, REV A | 55... - Page 64 Import all 3D LUTs from the media to the camera. IN CAMERA LUTS To export and delete 3D LUTs stored in the camera, go to MENU > IMAGE / LUT > 3D LUT > In Camera LUTs. COPYRIGHT © 2022 RED.COM, LLC 955-0190, REV A | 56...
-
Page 65: Cdl
The ungraded shot allows the artist to comp in truly linear light, and the intended look is needed to confirm that the individual plates still hold together after the grade is applied. COPYRIGHT © 2022 RED.COM, LLC 955-0190, REV A | 57... - Page 66 SATURATION A fourth parameter “Saturation” is achieved by converting the out data in a Luma and Chroma component. The Chroma Signal is then multiplied by the “Saturation” parameter. COPYRIGHT © 2022 RED.COM, LLC 955-0190, REV A | 58...
- Page 67 CDL POWER The CDL defines the image settings for the red, green, and blue channel. The three CDL tone curve parameters are Slope, Offset and Power. These algorithms allow the camera to modify the recorded image. The CDL Power settings control the power of the Red, Green, Blue, color data.
- Page 68 OPERATION GUIDE The Camera LCD Menu for CDL Slope: Use the CDL Slope menu to set the slope of the red, green, and blue signals. SLOPE SETTINGS The CDL Slope settings range from 0.00000 to 2.00000. The default CDL Slope settings are 1.00000. The Edit button opens a keypad where you can enter a specific CDL Slope value.
- Page 69 CDL OFFSET The CDL defines the image settings for the red, green, and blue channel. The three CDL tone curve parameters are Slope, Offset and Power. These algorithms allow the camera to modify the recorded image. The CDL Offset settings control the offset of the RGB color data.
- Page 70 OPERATION GUIDE CDL SATURATION The CDL defines the image settings for the red, green, and blue channel. The three CDL tone curve parameters are Slope, Offset and Power. These algorithms allow the camera to modify the recorded image. The CDL Saturation settings control the intensity of the color data.
-
Page 71: Exposure Adjust
Exposure Adjust allows you to adjust the midtone exposure levels while preserving the highlights and shadows, even when changed substantially. The Exposure Adjust setting is expressed in terms of relative exposure value (EV), where each unit represents a 1-stop change in midtone exposure level. COPYRIGHT © 2022 RED.COM, LLC 955-0190, REV A | 63... -
Page 72: Project Settings Menu
Enable and configure a pre-record clip Recording Mode Select Motion or Time-Lapse mode Timelapse Interval Time and Frames per Interval Frame Limit Enable, Frames, and Playback Duration Slate Camera ID and Camera Position COPYRIGHT © 2022 RED.COM, LLC 955-0190, REV A | 64... -
Page 73: Format
When you lower the resolution on the camera, only a portion of the sensor is used. The camera does not downscale from the 6K 17:9 format when recording RAW. NOTE: The anamorphic formats are only available when the project file format is set to R3D (refer to File Format). COPYRIGHT © 2022 RED.COM, LLC 955-0190, REV A | 65... - Page 74 HEIGHT DIAGONAL 6144 3240 27.03 14.26 30.56 6K 17:9 6144 3072 27.03 13.52 30.22 6K 2:1 6144 2574 27.03 11.32 29.30 6K 2.4:1 5760 3240 25.34 14.26 29.08 6K 16:9 COPYRIGHT © 2022 RED.COM, LLC 955-0190, REV A | 66...
- Page 75 5760 3240 8640 3240 25.34 14.26 29.08 6K 16:9 1.5x 6144 3240 8192 3240 27.03 14.26 30.56 6K 17:9 1.3x 6144 3240 7680 3240 27.03 14.26 30.56 6K 17:9 1.25x COPYRIGHT © 2022 RED.COM, LLC 955-0190, REV A | 67...
- Page 76 6K 17:9 1.25x 5120 2700 22.53 11.88 25.47 5K 17:9 4096 2160 18.02 9.50 20.37 4K 17:9 3840 2160 16.90 9.50 19.39 4K 16:9 2048 1080 9.01 4.75 10.19 2K 17:9 COPYRIGHT © 2022 RED.COM, LLC 955-0190, REV A | 68...
-
Page 77: Recording Frame Rate
Recording Frame Rate after the Project Time Base to select a different Recording Frame Rate. A Recording Frame Rate highlighted in yellow will result in playback occurring at a different frame rate than the original recording, and will record varispeed audio. COPYRIGHT © 2022 RED.COM, LLC 955-0190, REV A | 69... -
Page 78: Project Time Base
NOTE: When the Recording Frame Rate is set to a higher speed than the Project Time Base setting, audio is recorded as varispeed audio. FILE FORMAT Use File Format to select the format that the camera uses to record image files. COPYRIGHT © 2022 RED.COM, LLC 955-0190, REV A | 70... - Page 79 R3D REDCODE FILE FORMAT The RED R3D file format records images in a compressed RAW format. In comparison to Apple ProRes, REDCODE RAW data does not bake in image settings like ISO, saturation, or LUTs, allowing more flexibility in post-processing workflows without reducing image quality or dynamic range.
- Page 80 FILE STRUCTURE OF RECORDED APPLE PRORES FILES When you record using ProRes format, this is the file structure of the recorded files on the media: .RDM Folder .RDC Folder .mov COPYRIGHT © 2022 RED.COM, LLC 955-0190, REV A | 72...
-
Page 81: R3D Quality
Data rates subject to change with future updates. For high complexity scenes, VFX, and stills from motion workflows, RED recommends the HQ setting. For cinema (non- VFX) and high-end TV, RED recommends the MQ setting. For TV, online content, documentary and interviews, RED recommends the LQ setting. -
Page 82: Prores Codec
Image / LUT - Applies all Image / LUT settings for Output Color Space, Display Preset, LUT, and NOTE: All ProRes Color Profile settings bake in both the ISO and the White Balance settings. COPYRIGHT © 2022 RED.COM, LLC 955-0190, REV A | 74... -
Page 83: Pre-Record
The default setting is 2 seconds at the default Project Time Base of 23.98 FPS. For more information, refer to Pre-Recording Content. ENABLE Select Enable to toggle Pre-Record on and off. TIME Select Time to choose or enter the number of seconds to pre-record. COPYRIGHT © 2022 RED.COM, LLC 955-0190, REV A | 75... -
Page 84: Recording Mode
Frames to Record displays the number of frames the pre-recorded clip will contain at the current settings. RECORDING MODE Use Recording Mode to select between normal motion recording or time-lapse recording. When you select Timelapse, the Timelapse option is enabled on the menu. COPYRIGHT © 2022 RED.COM, LLC 955-0190, REV A | 76... -
Page 85: Timelapse
INTERVAL TIME Select Interval Time to enter the elapsed time between the group of frames per interval. For example: 60s = 1 minute 3600s = 1 hour 86400s = 1 day COPYRIGHT © 2022 RED.COM, LLC 955-0190, REV A | 77... -
Page 86: Frame Limit
Use Frame Limit to limit the total number of frames recorded per clip. Frame limit applies to both Motion and Timelapse recording modes. The Frame Limit selections include Enable, Frames, and Playback Duration. ENABLE Select Enable to toggle the activation of the Frame Limit feature. COPYRIGHT © 2022 RED.COM, LLC 955-0190, REV A | 78... -
Page 87: Slate
The settings you can assign to a clip include: Camera ID (also populates in the Media menu when formatting media) Camera Position (also populates in the Media menu when formatting media) COPYRIGHT © 2022 RED.COM, LLC 955-0190, REV A | 79... - Page 88 The camera positions you can assign to a clip include the letters A-Z. NOTE: When you select camera positions other than L, and R, the camera position in the SDI output signal HANC data is set to “C.” For more information refer to RED.com/developers. COPYRIGHT © 2022 RED.COM, LLC...
-
Page 89: Audio / Tc Menu
VARISPEED AUDIO Firmware versions 1.5 and higher support recording audio when the camera's Recording Frame Rate is set to a higher speed than the Project Time Base setting (Varispeed mode). COPYRIGHT © 2022 RED.COM, LLC 955-0190, REV A | 81... - Page 90 Port) or it jams the Timecode to its internal real-time clock. The camera stores TOD and Edge Timecode in the R3D file. You can select which one you want to display on the Touchscreen. COPYRIGHT © 2022 RED.COM, LLC 955-0190, REV A | 82...
-
Page 91: Audio Source
NOTE: The headphones can only monitor two channels. You can either monitor channels 1 and 2 (internal microphone) or you can monitor channels 3 and 4 (external port). Refer to Audio Tools for more information. COPYRIGHT © 2022 RED.COM, LLC 955-0190, REV A | 83... -
Page 92: Internal Microphone
The default setting is 0 dB. When you enable Link Left & Right Gain, the adjustments you make to either channel of gain will adjust both channels to the same setting. COPYRIGHT © 2022 RED.COM, LLC 955-0190, REV A | 84... -
Page 93: External Audio
The default setting is 0 dB. When you enable Link Ch 3 & Ch 4 Gain, the adjustments you make to either channel of gain will adjust both channels to the same setting. COPYRIGHT © 2022 RED.COM, LLC 955-0190, REV A | 85... -
Page 94: Headphone
You can enable and disable the headphone audio jack by tapping the Enable toggle to the right (green) and to the left (red). You can adjust the headphone volume from 0 to 100. COPYRIGHT © 2022 RED.COM, LLC 955-0190, REV A | 86... -
Page 95: Timecode Source
Time of Day (TOD) display mode displays the Timecode as the time of day that the frame was recorded. EDGE DISPLAY MODE Edge display mode displays the Timecode as the sequential recording time that has elapsed starting with the first frame. COPYRIGHT © 2022 RED.COM, LLC 955-0190, REV A | 87... -
Page 96: Monitoring Menu
SDI port resolution, frequency, look, guides, tools, overlay, and overlay mode Live Stream Enable or disable Wi-Fi live streaming Tools Various monitoring tools including False Color, Peaking, and Zebra Modes Guides Frame guides and a center guide COPYRIGHT © 2022 RED.COM, LLC 955-0190, REV A | 88... -
Page 97: Lcd
Prism Finder Mode Enable or disable the prism finder mode (horizontally flip the LCD) BRIGHTNESS You can adjust the camera's top LCD brightness from 10% to 100%. The default is 80% COPYRIGHT © 2022 RED.COM, LLC 955-0190, REV A | 89... - Page 98 Use the toggle to enable (default) or disable the camera tools. MAGNIFY Use the toggle to enable or disable (default) LCD magnification. PRISM FINDER MODE Use the toggle to enable or disable (default) the LCD flip view. COPYRIGHT © 2022 RED.COM, LLC 955-0190, REV A | 90...
-
Page 99: Sdi
Ungrounded power from SDI accessories can damage the camera’s SDI port. To avoid this possible damage, attach the power source to the accessory before attaching it to the BNC cable. When using RED Approved Third Party battery plates, unplug the BNC cable prior to hot swapping. - Page 100 FREQUENCY Use Frequency to select one of the following SDI port frequency settings: • 23.98 Hz (default) • 29.97 Hz • 59.94 Hz COPYRIGHT © 2022 RED.COM, LLC 955-0190, REV A | 92...
- Page 101 Use Magnify to enable or disable (default) monitor magnification. Tap the switch to toggle between enabled and disabled. OVERLAY Use Overlay to enable (default) or disable the viewing of the overlay. Tap the switch to toggle between enabled and disabled. COPYRIGHT © 2022 RED.COM, LLC 955-0190, REV A | 93...
- Page 102 • Advanced - many image and camera details are displayed SIMPLE MODE Simple mode displays the clip name and the elapsed time. When the camera is recording, the elapsed time turns red, and a red dot appears in the top right corner.
- Page 103 • Format, File Type, Rate • VU Meter • Elapsed time When the camera is recording, the elapsed time turns red, and a red dot appears in the top right corner. COPYRIGHT © 2022 RED.COM, LLC 955-0190, REV A | 95...
- Page 104 Ungrounded power from SDI accessories can damage the camera’s SDI port. To avoid this possible damage, attach the power source to the accessory before attaching it to the BNC cable. When using RED Approved Third Party battery plates, unplug the BNC cable prior to hot swapping.
-
Page 105: Live Stream
Use Enable to enable or disable (default) the Live Stream feature. QUALITY FACTOR Use Quality Factor, when Live Streaming is enabled, to control the video quality the camera's output stream. Lower quality can stream over a longer distance. COPYRIGHT © 2022 RED.COM, LLC 955-0190, REV A | 97... -
Page 106: Tools
Enable and configure focus indicating modes Log View Enable or disable (default) Log View Zebra 1 Enable and configure Zebra 1 settings Zebra 2 Enable and configure Zebra 2 settings COPYRIGHT © 2022 RED.COM, LLC 955-0190, REV A | 98... - Page 107 False Color Exposure Mode Use false colors to determine an optimal balance between overexposure and underexposure. False Color Video Mode Access scene exposure in varying light without relying on the LCD image brightness. COPYRIGHT © 2022 RED.COM, LLC 955-0190, REV A | 99...
- Page 108 RED FALSE COLOR OVERLAY When the False Color Mode overlays the color red within the subject of interest, or anywhere except bright lights and direct reflections, then the image is likely overexposed. When the False Color Mode does not overlay the color red on the image, then the exposure is likely okay for the selected ISO.
- Page 109 Mode, use the purple and red indicators to adjust your lighting or lens aperture. Use this strategy to achieve an optimal balance between clipping from overexposure and image noise from underexposure. With most scenes, you can often have a surprising range of exposure latitude before excessive red or purple indicators begin to appear.
- Page 110 LCD and on the monitor. However, Log View is not recorded to the file recorded on the media card. Log View is only enabled on R3D files and not on ProRes files. Use the slider to switch from Enabled to Disabled: COPYRIGHT © 2022 RED.COM, LLC 955-0190, REV A | 102...
- Page 111 Zebra 1 is disabled by default. The Zebra 1 mode includes: ITEMS DETAILS Enable Enables red zebra stripes to indicate highlight exposure Low IRE Sets the lower threshold for the indicator High IRE Sets the higher threshold for the indicator COPYRIGHT ©...
- Page 112 Use Zebra 2 to display a second set of diagonal stripes to indicate mid-tone and shadow levels. For more information, refer to Zebra Modes. Zebra 2 is disabled by default. COPYRIGHT © 2022 RED.COM, LLC 955-0190, REV A | 104...
-
Page 113: Guides
Provides a keypad that allows you to set the high threshold for the Zebra stripe. The default setting is 48 IRE. NORMAL VIEW ZEBRA 1 VIEW ZEBRA 2 VIEW GUIDES Use Guides to enable and configure the camera's monitoring guides. COPYRIGHT © 2022 RED.COM, LLC 955-0190, REV A | 105... - Page 114 Line Style Select the Frame Guide line type - solid, dashed or bracket Line Color Select the Frame Guide line color Line Opacity Select the Frame Guide line opacity percentage COPYRIGHT © 2022 RED.COM, LLC 955-0190, REV A | 106...
- Page 115 USER ASPECT RATIO This item is enabled when the User mode is selected. Use the keypad to enter your desired aspect ratio. COPYRIGHT © 2022 RED.COM, LLC 955-0190, REV A | 107...
- Page 116 Use offset to configure the X and Y offset of the Frame Guide. Use the keypad to enter the percentage of offset from center you want to apply to the Frame Guide. COPYRIGHT © 2022 RED.COM, LLC 955-0190, REV A | 108...
- Page 117 Absolute items are only enabled when you select Absolute Mode. LINE STYLE Use Line Style to select the type of line the Frame Guide uses. Select Solid (default), Dashed, or Bracket for the Frame Guide line style. COPYRIGHT © 2022 RED.COM, LLC 955-0190, REV A | 109...
- Page 118 LINE OPACITY Use Line Opacity to select how transparent the Frame Guide line appears. Use Line Opacity to select the percentage of opacity for the Frame Guide line: 50% (default) 100% COPYRIGHT © 2022 RED.COM, LLC 955-0190, REV A | 110...
- Page 119 Percentage of opacity of the guide color TYPE Use Type to select the type of Center Guide to display. Use Type to select a center dot or cross (default) for the Center Guide. COPYRIGHT © 2022 RED.COM, LLC 955-0190, REV A | 111...
- Page 120 Blue Magenta White (default) OPACITY Use Opacity to select how transparent the Center Guide appears. Use Opacity to select the percentage of opacity for the Center Guide: 50% (default) 100% COPYRIGHT © 2022 RED.COM, LLC 955-0190, REV A | 112...
-
Page 121: Media Menu
Removing a label from a CFast media card can possibly deform the card body. Access Eject from the LCD Touchscreen Media menu: For more information, refer to Media Management. COPYRIGHT © 2022 RED.COM, LLC 955-0190, REV A | 113... -
Page 122: Media Info
Displays the recording time remaining on the CFast media card SECURE FORMAT Use Secure Format to format the CFast media card down to the file system level. A secure format allows you to rebuild the card file system. COPYRIGHT © 2022 RED.COM, LLC 955-0190, REV A | 114... - Page 123 Use Camera Position to select the camera position label for the CFast media card. The Camera Position letters you can assign range from A-Z. For more information, refer to Secure Format. COPYRIGHT © 2022 RED.COM, LLC 955-0190, REV A | 115...
- Page 124 Edge Code is equivalent to RUN RECORD as used on broadcast cameras. For more information, refer to Secure Format. COPYRIGHT © 2022 RED.COM, LLC 955-0190, REV A | 116...
- Page 125 ® KOMODO OPERATION GUIDE FORMAT Use Format to execute a secure format of the media. For more information, refer to Secure Format. COPYRIGHT © 2022 RED.COM, LLC 955-0190, REV A | 117...
-
Page 126: Presets Menu
Use the Presets menu to build and select pre-configured settings for the camera: ITEMS DETAILS Create Preset Create camera setting presets On Media Presets Manage presets stored on the media In Camera Presets Manage presets stored in the camera CREATE PRESET COPYRIGHT © 2022 RED.COM, LLC 955-0190, REV A | 118... - Page 127 You can also use the ALL ENABLED SETTINGS checkmark button to select all of the current camera settings as a preset: Click OK to create the preset. The Create Preset screen opens. Use the Create Preset screen to name the preset. COPYRIGHT © 2022 RED.COM, LLC 955-0190, REV A | 119...
-
Page 128: On Media Presets
From In Camera Presets, you can apply the selected preset to the camera, delete the selected preset from the camera, export the selected preset from the camera to the media, or export all of the presets from the camera to the media. COPYRIGHT © 2022 RED.COM, LLC 955-0190, REV A | 120... -
Page 129: Autofocus - Beta Menu
Button that you tap to start the Autofocus feature ENABLE Use Enable to enable or disable the Autofocus - BETA Menu feature. The lens must support autofocus for the camera to use this feature. COPYRIGHT © 2022 RED.COM, LLC 955-0190, REV A | 121... -
Page 130: Mode
Use Size to choose what size area you want the camera to use for the autofocus feature. The lens must support autofocus for the camera to use this feature. The Size selections for the autofocus area are Small (default), Medium, Large, Wide, and Vertical. COPYRIGHT © 2022 RED.COM, LLC 955-0190, REV A | 122... -
Page 131: Position
Lower Left Lower Middle Right The Autofocus Position rectangle displays on the screen: You can move the position manually on the LCD screen. The menu will change to display Custom. COPYRIGHT © 2022 RED.COM, LLC 955-0190, REV A | 123... -
Page 132: Communication Menu
File transfer protocol secure settings *Requires KOMODO Link Adaptor CAMERA Use the Camera Communication menu to select the camera communication settings. Use the Camera communication settings to configure the camera name. COPYRIGHT © 2022 RED.COM, LLC 955-0190, REV A | 124... -
Page 133: Wi-Fi
Disable Wi-Fi or select the camera Wi-Fi settings Ad-Hoc Configure the camera as a Wi-Fi hot spot Infrastructure Settings for connecting to an existing Wi-Fi network Displays the camera device MAC address COPYRIGHT © 2022 RED.COM, LLC 955-0190, REV A | 125... - Page 134 Select the Wi-Fi frequency band Channel Select the optimal channel for the Wi-Fi band Encryption Displays the encryption type Status Displays the connection status IP Address Displays the IP address Netmask Displays the Netmask COPYRIGHT © 2022 RED.COM, LLC 955-0190, REV A | 126...
- Page 135 ® KOMODO OPERATION GUIDE SSID Use the keypad to enter the camera's Wi-Fi network name. PASSPHRASE Use the keypad to enter the camera's Wi-Fi passphrase. COPYRIGHT © 2022 RED.COM, LLC 955-0190, REV A | 127...
- Page 136 Use 2.4 GHz for long range remote control (when not utilizing wireless video streaming) CHANNEL Select the optimal channel for the selected band, one which receives the least interference from the surrounding Wi-Fi signals. ENCRYPTION The camera uses WPA2 security encryption. COPYRIGHT © 2022 RED.COM, LLC 955-0190, REV A | 128...
- Page 137 IP ADDRESS When online and broadcasting a network, the camera displays an IP address. NETMASK When online and broadcasting a network, the camera displays the Netmask for the IP address. COPYRIGHT © 2022 RED.COM, LLC 955-0190, REV A | 129...
- Page 138 Select the IP Assignment mode and add manual addresses IP Address View or enter the Wi-Fi IP address Netmask View or enter the Wi-Fi Netmask address Gateway View or enter the Wi-Fi Gateway (router) address COPYRIGHT © 2022 RED.COM, LLC 955-0190, REV A | 130...
- Page 139 OTHER: The OTHER button opens the OTHER NETWORKS screen where you can manually enter an SSID and a Passphrase. Tap SSID to open the SSID editing screen and enter the desired network SSID: COPYRIGHT © 2022 RED.COM, LLC 955-0190, REV A | 131...
- Page 140 Tap Passphrase to open the Passphrase editing screen and enter the desired passphrase for the network: Tap Connect to connect to the new network: STATUS Displays the connection status of the camera to the selected Wi-Fi network. COPYRIGHT © 2022 RED.COM, LLC 955-0190, REV A | 132...
- Page 141 IP Assignment allows you to select the Infrastructure IP Assignment mode. The Automatic mode detects the available Infrastructure IP address. The Manual mode allows you to manually enter the desired Infrastructure network addresses. COPYRIGHT © 2022 RED.COM, LLC 955-0190, REV A | 133...
- Page 142 Netmask allows you to manually enter the Infrastructure Netmask address when in Manual mode. MANUAL GATEWAY ADDRESS Gateway allows you to manually enter the Infrastructure Gateway (router) address when in Manual mode. COPYRIGHT © 2022 RED.COM, LLC 955-0190, REV A | 134...
- Page 143 ® KOMODO OPERATION GUIDE IP ADDRESS Displays the Infrastructure IP address. NETMASK Displays the Infrastructure Netmask address. GATEWAY Displays the Infrastructure Gateway address. COPYRIGHT © 2022 RED.COM, LLC 955-0190, REV A | 135...
-
Page 144: Serial
The settings you can configure for the serial connection through the Extension Port include: ITEMS DETAILS Baud Rate Select the serial port baud rate IP Address Enter the IP address for the PPP protocol BAUD RATE COPYRIGHT © 2022 RED.COM, LLC 955-0190, REV A | 136... - Page 145 9600 115200* 576000 1500000 19200 230400 921600 2000000 38400 460800 1000000 2500000 57600 500000 1152000 3000000 * Default IP ADDRESS Use the keypad to enter the internet provider's IP address. COPYRIGHT © 2022 RED.COM, LLC 955-0190, REV A | 137...
-
Page 146: Komodo Link Adaptor
CONFIGURE IP When connected to an Ethernet network, this allows you to automatically detect an IP address or to manually enter an IP address, Netmask address, and Gateway (router) address. COPYRIGHT © 2022 RED.COM, LLC 955-0190, REV A | 138... - Page 147 When the link is connected to an Ethernet device and Automatic IP Assignment is enabled, IP Address displays the network IP address. When Manual IP Assignment is enabled, you can select IP Address and manually enter a static IP address. COPYRIGHT © 2022 RED.COM, LLC 955-0190, REV A | 139...
- Page 148 When the link is connected to an Ethernet device and Automatic IP Assignment is enabled, Netmask displays the network Netmask address. When Manual IP Assignment is enabled, you can select Netmask and manually enter a Netmask address. COPYRIGHT © 2022 RED.COM, LLC 955-0190, REV A | 140...
- Page 149 Gateway address (router address). When Manual IP Assignment is enabled, you can select Gateway and manually enter a Gateway (router) address. For more information, refer to the How To section (KOMODO Link Adaptor). COPYRIGHT © 2022 RED.COM, LLC 955-0190, REV A | 141...
-
Page 150: Ftps
Displays the FTPS actions occurring PASSWORD Use Password to enter an FTPS password. When you tap on the password, the Password editing screen appears. The password must contain a minimum of 8 characters. COPYRIGHT © 2022 RED.COM, LLC 955-0190, REV A | 142... -
Page 151: System Settings Menu
Enable or disable the record sounds and the front Tally LED GPO Function Displays Sync Out function Status Settings Shutter mode, aperture increments, and focus length units settings System Status Information about the camera's type, PIN, FW, and runtime COPYRIGHT © 2022 RED.COM, LLC 955-0190, REV A | 143... -
Page 152: Date / Time
The Date / Time menu items include: ITEMS DETAILS Date Date in YYYY-MM-DD format Time 24-hour format Time Zone Global time zones DATE Use Date to enter the date using the touchscreen keypad: COPYRIGHT © 2022 RED.COM, LLC 955-0190, REV A | 144... - Page 153 Use Time to enter the time in 24-hour military format using the touchscreen keypad: TIME ZONE Use Time Zone to select the local time zone for where the camera is located. COPYRIGHT © 2022 RED.COM, LLC 955-0190, REV A | 145...
-
Page 154: Lens
Displays the lens focal distance value Iris Lens Iris menu Image Stabilization Displays the lens image stabilization status Control Ring Enables the lens control ring Control Ring Mode Control Ring Mode settings COPYRIGHT © 2022 RED.COM, LLC 955-0190, REV A | 146... - Page 155 Use Control Ring Mode to select the camera setting you want the Control Ring to adjust. The modes you can select include Aperture (Iris, default), Shutter, ISO, White Balance, LCD Magnify, SDI Magnify, LCD + SDI Magnify, False Color Cycle, Peaking Cycle, and Tools Cycle. COPYRIGHT © 2022 RED.COM, LLC 955-0190, REV A | 147...
-
Page 156: Power
When a battery is connected in the right #2 slot, this displays the battery Amps Power Out Enables or disables the 5 V / 500 mA power out of the Extension Port COPYRIGHT © 2022 RED.COM, LLC 955-0190, REV A | 148... -
Page 157: Indicators
The sounds you can select include: None Beep Double Beep Beep Ascending Beep Descending Money Shutter REC STOP SOUND Rec Stop Sound allows you to select the sound to play when you end a recording. COPYRIGHT © 2022 RED.COM, LLC 955-0190, REV A | 149... - Page 158 Beep Ascending Beep Descending Money Shutter TALLY LIGHT Use Tally Light to enable or disable the front recording tally LED. For more information, refer to the Camera Body LED section. COPYRIGHT © 2022 RED.COM, LLC 955-0190, REV A | 150...
-
Page 159: Gpo Function
Select a time-fraction or an angle for the shutter menu display unit Aperture Increments Select 1/4 or 1/3 f-stop increments Focus Distance Select the focus distance units (Metric or Imperial) White Balance List Mode Select Kelvin or White Balance Presets COPYRIGHT © 2022 RED.COM, LLC 955-0190, REV A | 151... - Page 160 Use Aperture Increments to select one fourth increments or one third increments for the camera f-stop settings. The default is 1/3 Stop. FOCUS DISTANCE Use Focus Distance to select Imperial or Metric units for the Lens Focus Distance display. The default is Imperial. COPYRIGHT © 2022 RED.COM, LLC 955-0190, REV A | 152...
-
Page 161: System Status
Use the System Status menu to view camera information and to view temperature readings. The system status information you can view includes: ITEMS DETAILS Camera Info Camera information Temperature Camera temperatures COPYRIGHT © 2022 RED.COM, LLC 955-0190, REV A | 153... - Page 162 Displays the Celsius temperature of Logic Board 1 Power Board Displays the Celsius temperature of the power IC board Displays the Celsius temperature of the power STM IC Sensor Displays the Celsius temperature of the sensor COPYRIGHT © 2022 RED.COM, LLC 955-0190, REV A | 154...
-
Page 163: Language Menu
French German Japanese Spanish MAINTENANCE MENU The Maintenance menu contains the settings you use to perform various maintenance tasks on your camera. From the camera LCD touchscreen menu, select Maintenance: COPYRIGHT © 2022 RED.COM, LLC 955-0190, REV A | 155... -
Page 164: Calibrate
Do not calibrate immediately after powering on. NOTE: Make sure that the mount cap is installed on the camera before you calibrate the camera. Tap OK on the touchscreen to begin calibrating the camera. COPYRIGHT © 2022 RED.COM, LLC 955-0190, REV A | 156... -
Page 165: Calibration
Every time you calibrate the camera, the User profile is updated. The only time the User profile is removed, is when you perform a Factory Reset. If User calibration is not available, the camera defaults to Factory calibration. Calibrate the camera to generate the new User calibration profile. COPYRIGHT © 2022 RED.COM, LLC 955-0190, REV A | 157... -
Page 166: Save Log
Error: Success: RESET DEFAULTS Use Reset Defaults to reset the camera to the factory default settings. NOTE: Resetting the camera will delete all of your menu settings. COPYRIGHT © 2022 RED.COM, LLC 955-0190, REV A | 158... -
Page 167: Factory Reset
Tap Yes on the touchscreen to reset the camera to the factory settings. UPGRADE Use Upgrade to perform a camera firmware update. For more information about upgrading the firmware, refer to Upgrading the Firmware. COPYRIGHT © 2022 RED.COM, LLC 955-0190, REV A | 159... -
Page 168: How To
This camera uses the WPA2 Wi-Fi protocol. 1. Navigate to the Wi-Fi menu MENU > COMMUNICATION > Wi-Fi. 2. From the Mode option, select Infrastructure. 3. From the Infrastructure menu, select Networks: COPYRIGHT © 2022 RED.COM, LLC 955-0190, REV A | 160... - Page 169 4. Select the network name from the Networks list menu: or tap SCAN to scan for available networks and update the Networks list: 5. Tap CONNECT. The CONNECT screen displays: COPYRIGHT © 2022 RED.COM, LLC 955-0190, REV A | 161...
- Page 170 7. Enter the passphrase for the selected network. The passphrase must use a minimum of 8 characters. 8. Tap OK on the completed Passphrase entry screen. The completed CONNECT screen displays. 9. Tap the Connect button. The camera connects to the selected network: COPYRIGHT © 2022 RED.COM, LLC 955-0190, REV A | 162...
-
Page 171: Power
1. While holding the attached battery, press the Eject Button. 2. Slide and lift the battery out. POWER COMPONENTS You can power the KOMODO camera with the RED KOMODO Power Adaptor, an External DC Power Source, or with the rear-mounted Batteries. -
Page 172: Komodo Power Adaptor
2. Attached battery in the left slot (facing the back of the camera) then the battery attached in the right slot. WARNING: Always attach the power or batteries before attaching the SDI BNC cable. Always remove the SDI BNC cable before removing the power or batteries. COPYRIGHT © 2022 RED.COM, LLC 955-0190, REV A | 164... -
Page 173: Turning On The Camera
® KOMODO OPERATION GUIDE TURNING ON THE CAMERA 1. Attach a power source (Batteries or DC-Input) to the camera. 2. Slide the Power Switch up to the ON position. COPYRIGHT © 2022 RED.COM, LLC 955-0190, REV A | 165... -
Page 174: Turning Off The Camera
This ensures that power is removed from the media and any open data files are closed. Failure to properly eject (unmount) media may result in lost data or corrupted files. To eject (unmount) media from the camera, use the LCD Touchscreen and select Menu > Media. COPYRIGHT © 2022 RED.COM, LLC 955-0190, REV A | 166... - Page 175 NOTE: If you remove media without ejecting (unmounting) first, you receive a warning notification: “Media removed without first ejecting. Data integrity risk.” Always eject media before physically removing the CFast media card to protect your media and footage. COPYRIGHT © 2022 RED.COM, LLC 955-0190, REV A | 167...
-
Page 176: Inserting The Media
3. Close the media door and make sure that the door latch clicks. 4. If needed, format the CFast media card. Refer to Secure Format for more information. COPYRIGHT © 2022 RED.COM, LLC 955-0190, REV A | 168... - Page 177 4. Let the CFast media card cool before gently pulling the card out of the slot. WARNING: The media can get extremely hot. Use caution when removing media. 5. Close the media door and make sure that the door latch clicks. COPYRIGHT © 2022 RED.COM, LLC 955-0190, REV A | 169...
-
Page 178: Secure Format
2. From the Secure Format menu, select the desired Camera Camera Position, Reel Number and Edgecode. Tap the Format button to start the Secure Format process: The confirmation message displays: COPYRIGHT © 2022 RED.COM, LLC 955-0190, REV A | 170... -
Page 179: Media Information
KOMODO OPERATION GUIDE 3. Tap Yes to begin formatting. FORMATTING MEDIA ON A COMPUTER RED recommends that you only format your CFast media card from a computer when you cannot mount the media to the camera. MEDIA INFORMATION Use the Media Info menu to display the CFast media card information. -
Page 180: Clip Naming Convention
Model ID, Serial Number Production Name ® REDCODE Copyright Date and GMT Reel Filename Scene Firmware Version Stereo Setup Frame Guides Take Jam Sync Setting Timecode Lens and Shutter Speed/Angle Parameters Unit COPYRIGHT © 2022 RED.COM, LLC 955-0190, REV A | 172... -
Page 181: Media Best Practices
CFast 2.0 card. INDEXING ON A MAC NOTE: You can use the RED CFast 2.0 card reader with Write-Protect to prevent the Mac OS from indexing your CFast 2.0 card (refer to RED CFast 2.0 Reader). -
Page 182: Monitoring
LCD touchscreen SDI output to a monitor RED Control over Wi-Fi to iOS or Android devices RED Control over KOMODO Link Adaptor to iOS or Android devices KOMODO Link Adaptor over a USB-C to Ethernet adapter to a computer Live Stream LCD TOUCHSCREEN The LCD touchscreen provides a live image from the camera sensor. -
Page 183: Sdi Output To A Monitor
Ungrounded power from SDI accessories can damage the camera’s SDI port. To avoid this possible damage, attach the power source to the accessory before attaching it to the BNC cable. When using RED Approved Third Party battery plates, unplug the BNC cable prior to hot swapping. - Page 184 You can enable or disable the image magnification, the focus and exposure tools, and the guides displayed on images sent to the SDI monitor by using the Monitoring tools (refer to Monitoring Tools). COPYRIGHT © 2022 RED.COM, LLC 955-0190, REV A | 176...
-
Page 185: Red Control
RED CONTROL RED Control allows you to use Wi-Fi to connect to the camera and send monitor images to iOS and Android devices. NOTE: You must enable live streaming under MENU > MONITORING > LIVE STREAM to enable the image feed. -
Page 186: Komodo Link Adaptor
The KOMODO Link Adaptor allows you to use a USB-C cable to connect to the camera and send monitor images in real-time to USB-C devices. Figure: KOMODO Link Adaptor connected to an Android phone with RED Control With the use of an Ethernet to USB-C adapter, you can also connect Ethernet devices. -
Page 187: Exposure
The primary tool for determining the exposure levels is the histogram. It shows the exact luminance levels of the red, green, and blue pixels after you apply the ISO and White Balance settings. Monitors have their own color gamuts and brightness levels which makes the monitor less than optimal for determining the camera's exposure levels. - Page 188 ND filters solutions accordingly. Example of overexposure Example of underexposure with histogram and exposure meter: with histogram and exposure meter: Example of a balanced exposure with histogram and exposure meter: COPYRIGHT © 2022 RED.COM, LLC 955-0190, REV A | 180...
-
Page 189: False Color Exposure Tools
FALSE COLOR EXPOSURE MODE The False Color Exposure mode overlay provides information where the image is close to clipping or already clipping in the highlights (red), midtones (green), and shadows (purple). For more information, refer to False Color Exposure Mode. -
Page 190: Focus
The Edge Peaking mode hides the image and only shows the edges. This provides the best visual representation of the subject that is currently in focus. Example of Edge Peaking mode: COPYRIGHT © 2022 RED.COM, LLC 955-0190, REV A | 182... -
Page 191: Peaking Peaking Mode
SETTING UP TOD TIMECODE To set up TOD Timecode on the camera, perform the following: 1. Open the Audio / Timecode menu: MENU > AUDIO / TC: COPYRIGHT © 2022 RED.COM, LLC 955-0190, REV A | 183... - Page 192 The camera displays the Timecode on the LCD Touchscreen NOTE: The timecode is reset when the camera is turned off, unless an external power source remains connected and powered. COPYRIGHT © 2022 RED.COM, LLC 955-0190, REV A | 184...
-
Page 193: Edgecode
2. Swipe the touchscreen up to scroll down to Timecode Display Mode: 3. Select Timecode Display Mode. The Timecode Display Mode menu opens: 4. Select Edge and tap OK to use Edgecode. The camera displays the Edgecode on the LCD Touchscreen COPYRIGHT © 2022 RED.COM, LLC 955-0190, REV A | 185... -
Page 194: Zebra Modes
2. Set a Low IRE of 98. 3. Set a High IRE of 100. Areas of the image exposed within the IRE range are indicated by red diagonal lines at –45°. The default settings are Low IRE = 98 and High IRE = 100. -
Page 195: Pre-Recording Content
The camera adds the Pre-Record clip to the beginning of your recording. You can touch and hold the Record button on the LCD to disable Pre-Record. For information about enabling and configuring Pre-Record, refer to Pre-Record. COPYRIGHT © 2022 RED.COM, LLC 955-0190, REV A | 187... -
Page 196: Calibrating The Sensor
After each firmware upgrade. UPGRADING THE FIRMWARE Your camera functionality may be upgraded by installing the latest firmware. Make a habit of frequently visiting RED Downloads at www.red.com/downloads to check for new versions of camera firmware, updated operation guides, and post production software. - Page 197 Menu. 8. From the Maintenance menu, tap the OK button next to Upgrade. The Firmware Upgrade confirmation screen displays: 9. Tap Upgrade to confirm. The Firmware Upgrade progress screen displays: COPYRIGHT © 2022 RED.COM, LLC 955-0190, REV A | 189...
- Page 198 12. Select Agree. If you do not agree to the SLA, the camera cannot be used. The SLA continues to display until it is accepted. 13. Recalibrate the camera before recording. COPYRIGHT © 2022 RED.COM, LLC 955-0190, REV A | 190...
-
Page 199: Komodo Link Adaptor
USB-C to connect the camera to an Android device. 1. From the Google Play store, download the RED Control App to the Android device. 2. Connect the Android device to the camera with a USB-C cable. COPYRIGHT © 2022 RED.COM, LLC 955-0190, REV A | 191... - Page 200 ® KOMODO OPERATION GUIDE 3. Navigate to the KOMODO Communication menu and select KOMODO Link Adaptor. 4. Open the Android device settings by tapping the Settings icon (gear). COPYRIGHT © 2022 RED.COM, LLC 955-0190, REV A | 192...
- Page 201 ® KOMODO OPERATION GUIDE 5. Select Connections. 6. Select Mobile Hotspot and Tethering. NOTE: Mobile Hotspot and Tethering is only available on Android devices with cellular capability. COPYRIGHT © 2022 RED.COM, LLC 955-0190, REV A | 193...
- Page 202 ® KOMODO OPERATION GUIDE 7. Enable USB Tethering. The camera displays the Android device's IP address in the KOMODO Link Adaptor screen: COPYRIGHT © 2022 RED.COM, LLC 955-0190, REV A | 194...
- Page 203 ® KOMODO OPERATION GUIDE 8. From the Android device, tap the RED Control icon to open the RED Control app. COPYRIGHT © 2022 RED.COM, LLC 955-0190, REV A | 195...
- Page 204 KOMODO OPERATION GUIDE The RED Control app displays the camera connection icon. 9. Tap the icon to open the RED Control app tools for the tethered camera. From here you can use the RED Control App to monitor and control the camera.
-
Page 205: Apple Configuration
RED Control App to the Apple device. Note: Scroll to the bottom of the user agreement to accept the agreement. 2. Connect the Apple device to the camera with a USB-C cable. COPYRIGHT © 2022 RED.COM, LLC 955-0190, REV A | 197... - Page 206 ® KOMODO OPERATION GUIDE 3. Navigate to the KOMODO Communication menu and select KOMODO Link Adaptor. 4. Open the Apple device settings by tapping the Settings icon. COPYRIGHT © 2022 RED.COM, LLC 955-0190, REV A | 198...
- Page 207 ® KOMODO OPERATION GUIDE 5. Select Personal Hotspot. COPYRIGHT © 2022 RED.COM, LLC 955-0190, REV A | 199...
- Page 208 ® KOMODO OPERATION GUIDE 6. Allow others to join. COPYRIGHT © 2022 RED.COM, LLC 955-0190, REV A | 200...
- Page 209 OPERATION GUIDE 7. The Apple device prompts you to acknowledge that you trust the computer (camera). The camera displays the Apple device's IP address in the KOMODO Link Adaptor screen: COPYRIGHT © 2022 RED.COM, LLC 955-0190, REV A | 201...
- Page 210 ® KOMODO OPERATION GUIDE 8. From the Apple device, tap the RED Control icon to open the RED Control app. COPYRIGHT © 2022 RED.COM, LLC 955-0190, REV A | 202...
- Page 211 KOMODO OPERATION GUIDE The RED Control app displays the camera connection icon. The word LINK is visible after the IP address. 9. Tap the icon to open the RED Control app tools for the connected camera. From here you can use the RED Control App to monitor and control the camera.
-
Page 212: Network Configuration
Ethernet network. 1. Connect the camera to the Ethernet network using the USB-C to Ethernet adapter. 2. From a Wi-Fi-enabled device, select the Wi-Fi connection to which the camera is connected. COPYRIGHT © 2022 RED.COM, LLC 955-0190, REV A | 204... - Page 213 ® KOMODO OPERATION GUIDE 3. Open RED Control on the 4. Tap RE-SCAN. Wi-Fi-enabled device. The camera icon displays. The camera icon displays the camera's Ethernet IP address: COPYRIGHT © 2022 RED.COM, LLC 955-0190, REV A | 205...
- Page 214 5. Tap the camera icon to open the RED Control app tools for the networked camera. 6. Open a browser from a computer connected to the Ethernet network. 7. In the browser address field, enter the camera IP address displayed on the RED Control camera icon. The RED Control tools are displayed in the browser.
-
Page 215: Ftps Configuration
1. Connect your camera to the network with the desired connection method (Ad-Hoc, Infrastructure or hard-wired) and verify the connection. A successful connection is confirmed when the camera displays an IP address in the WiFi or KOMODO Link Adapter settings menus. COPYRIGHT © 2022 RED.COM, LLC 955-0190, REV A | 207... -
Page 216: Software Set-Up (Filezilla)
1. In FileZilla, enter the following settings: Host: ftp:// Camera's IP Address - Example: ftp://192.168.1.93 Username: Username displayed in FTPS menu Password: Password displayed in FTPS menu Port: leave blank COPYRIGHT © 2022 RED.COM, LLC 955-0190, REV A | 208... -
Page 217: Additional Information
The data rate of the FTPS transfer with encryption maxes out at roughly Gigabit Ethernet speeds. Estimated download time for a full 256 GB is approximately 47 minutes when using a wired connection. COPYRIGHT © 2022 RED.COM, LLC 955-0190, REV A | 209... -
Page 218: System Maintenance
OPERATION GUIDE SYSTEM MAINTENANCE All RED products are designed for rugged durability, but precision instruments demand proper care. Follow the instructions in this section to clean, maintain, and store your devices. WARNING: DO NOT rinse or immerse the camera or other accessories in water. Keep dry at all times. -
Page 219: Lcd Screen
DO NOT use any of the items listed below to clean the built-in LCD screen. These products have not been tested on RED products and may cause damage or streaking. • Windex • Solvents • Gas dusters • Compressed air • Rubbing alcohol • Isopropyl alcohol •... -
Page 220: Troubleshooting
OPERATION GUIDE A. TROUBLESHOOTING GENERAL TROUBLESHOOTING TIPS This section describes general troubleshooting tips: Check the current firmware on the camera. If newer firmware is available from RED, download and install that firmware. Check the Known Issues List to see if the issue has already been identified by RED. -
Page 221: Status Iconsb
Gray indicates that no Genlock signal is detected Green indicates that the camera is receiving and is locked to a Genlock signal Red indicates that the camera is receiving and is not locked to a Genlock signal Gray indicates that no synchronization is detected... - Page 222 White indicates that the battery is connected and green shows the relative level of charge remaining Yellow indicates 10 minutes of power remaining Red indicates less than 5 minutes of power remaining Gray question mark indicates no communication with the battery and no power...
-
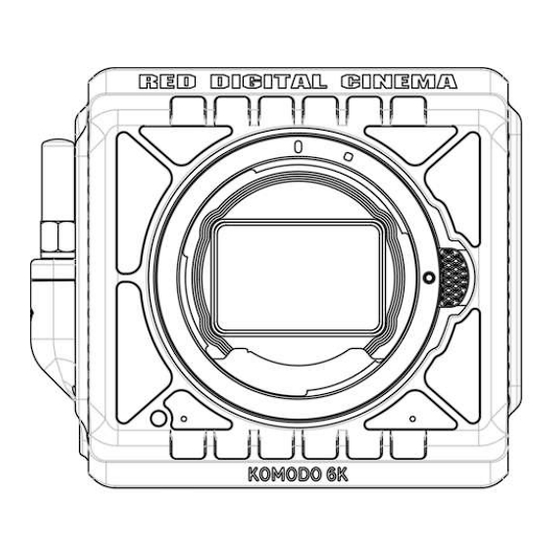
Page 223: Mechanical Drawings
® KOMODO OPERATION GUIDE B. MECHANICAL DRAWINGS NOTE: Dimensions are shown in mm. FRONT VIEW Figure: Camera Front View COPYRIGHT © 2022 RED.COM, LLC 955-0190, REV A | D... -
Page 224: Back Viewe
® KOMODO OPERATION GUIDE BACK VIEW Figure: Camera Back View RIGHT SIDE VIEW Figure: Camera Side View (Right) COPYRIGHT © 2022 RED.COM, LLC 955-0190, REV A | E... -
Page 225: Left Side Viewf
® KOMODO OPERATION GUIDE LEFT SIDE VIEW Figure: Camera Side View (Left) COPYRIGHT © 2022 RED.COM, LLC 955-0190, REV A | F... -
Page 226: Top Viewg
® KOMODO OPERATION GUIDE TOP VIEW Figure: Camera Top View BOTTOM VIEW Figure: Camera Bottom View COPYRIGHT © 2022 RED.COM, LLC 955-0190, REV A | G... -
Page 227: Extension Porth
Signal and Power Ground 1. Not currently supported. 2. The signal path includes a resistor pulling the signal high, which is designed to work with a closure switch connected to GND. COPYRIGHT © 2022 RED.COM, LLC 955-0190, REV A | H... -
Page 228: Dc-Inputi
Connect the 2-pin 0B ODU DC power Adaptor plug to this port to provide the camera with continuous DC power. The RED power Adaptor provides DC power to operate the camera and to recharge the attached Batteries. NOTE: The camera cannot charge batteries while it is turned on. -
Page 229: Ctrl (Rs-232 Control) J
Figure: Front Face of CTRL Port (looking at the back of the KOMODO Expander Module) ODU 00B 4-PIN CONNECTOR SIGNAL DESCRIPTION DIRECTION GROUND Common ground 232 RX RS-232 receive SS/GPO Shutter sync and general purpose output 232 TX RS-232 transmit COPYRIGHT © 2022 RED.COM, LLC 955-0190, REV A | J... -
Page 230: Menu Map
® KOMODO OPERATION GUIDE C. MENU MAP COPYRIGHT © 2022 RED.COM, LLC 955-0190, REV A | K... - Page 231 ® KOMODO OPERATION GUIDE COPYRIGHT © 2022 RED.COM, LLC 955-0190, REV A | L...
-
Page 232: Technical Specifications
Supports Canon EF with full electronic communication using compatible Canon RF mount adapters Max Data Rates Up to 280 MB/s using RED Pro CFast or other qualified CFast 2.0 media cards ® REDCODE 40 FPS at 6K 17:9 (6144 × 3240) Maximum Frame Rates 50 FPS at 6K 2.4:1 (6144 x 2592) - Page 233 RED Control App Access full camera controls and live preview from Android and iOS devices. Available from the Apple App Store and Google Play Store. RED Control works wirelessly or wired over USB-C, using the KOMODO Link Adaptor (sold separately) 1.
Need help?
Do you have a question about the KOMODO 6K S35 and is the answer not in the manual?
Questions and answers