Advertisement
Quick Links
Item No. 1098855 SKu No. 21615085 Model NO. MW080WWBA2RC1
Item No. 888152 SKu No. 21615026 Model NO. MW120WWBA2RC1
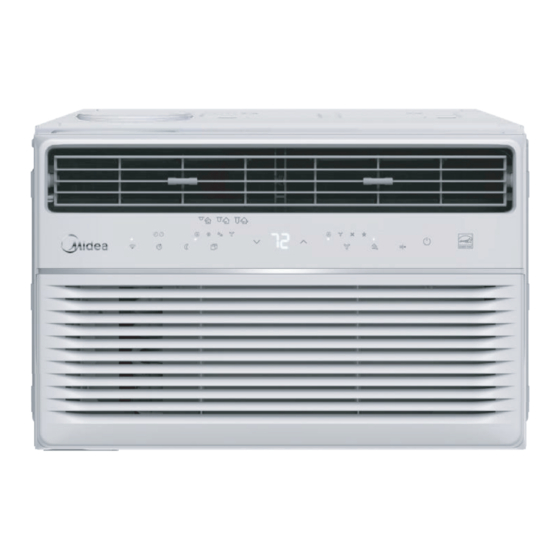
WINDOW AIR CONDITIONER
Owner's Manual
Customer Service / Service à la clientèle:
Our customer service sta is available to help you. For any problem with your purchase, or to receive further
information about this product, please call our toll-free number.
SAVE THIS MANUAL
Keep this manual and the original sales invoice in a safe, dry place for future reference.
Notre personnel du service à la clientèle est disponible pour vous aider. En cas de problème avec votre achat, ou pour
obtenir plus d'informations à propos de ce produit, veuillez composer notre numéro sans frais.
CONSERVEZ CE GUIDE
Conservez ce manuel avec la facture d'origine dans un endroit sûr et sec pour référence future.
Free 3 months
extension of the
original limited warranty
period!* Simply text a
picture of your proof of
purchase to:
1-844-224-1614
*The warranty extension is for the three months
immediately following
the completion of the product's original warranty
period. Individuals do not need to register the
product in order to get all the rights and remedies
of registered owners under the original limited
warranty.
Warranty
1
Limitée
1-866-646-4332
Advertisement

Subscribe to Our Youtube Channel
Related Manuals for Midea MW080WWBA2RC1


Summary of Contents for Midea MW080WWBA2RC1
- Page 1 Item No. 1098855 SKu No. 21615085 Model NO. MW080WWBA2RC1 Item No. 888152 SKu No. 21615026 Model NO. MW120WWBA2RC1 Free 3 months extension of the original limited warranty period!* Simply text a picture of your proof of purchase to: 1-844-224-1614 *The warranty extension is for the three months immediately following the completion of the product’s original warranty...
-
Page 2: Table Of Contents
Owner’s Manual Safety Precautions ........................3 Operating Instructions ......................13 Installation Instructions ....................... 18 Care and Cleaning ......................... 244 Troubleshooting Tips ......................25 Remote Control Instructions ..................... 26 Warranty ........Read This Manual CAUTION... -
Page 3: Safety Precautions
SAFETY PRECAUTIONS This symbol indicates the possibility of death or serious injury. This symbol indicates the possibility of injury or damage to property. WARNING • Plug in power cord plug properly. re due to excess heat generation. • Do not modify power cord length or share the outlet with other appliances as it may re due to overheating. - Page 4 WARNING • Do not open the unit during operation. It may cause electric shock. ammable gas or combustibles, such as gasoline, benzene, thinner, etc. lter is to be removed, do not touch the metal parts of the unit. It may cause injury. the circuit breaker.
- Page 5 NOTE WARNING - Electrical Information WARNING - For your safety Do not, under any circumstances, cut, WARNING - Prevent Accidents remove or bypass the grounding prong. Power supply cord with 3-prong grounding plug and current detection device...
- Page 6 Power Cord Operation NOTES...
- Page 7 IMPORTANT SAFETY INSTRUCTIONS WARNING:...
- Page 8 IMPORTANT SAFETY INSTRUCTIONS WARNINGS (for using R290/R32 ! refrigerant only)
- Page 9 IMPORTANT SAFETY INSTRUCTIONS...
- Page 10 IMPORTANT SAFETY INSTRUCTIONS...
- Page 11 IMPORTANT SAFETY INSTRUCTIONS...
- Page 12 IMPORTANT SAFETY INSTRUCTIONS...
-
Page 13: Operating Instructions
OPERATING INSTRUCTIONS Normal Sounds have a high pitched sound during In front of the unit, you cooling cycle. Droplets of water may hear the sound of hitting condenser rushing air being moved during normal by the fan. operation may cause a trickling sound. - Page 14 Air Conditioner Features (general) WARNING NOTES Air Conditioner Features NOTE Air Directional Louvers Levers Air Direction...
- Page 15 FRESH AIR VENT CONTROL Fig. A (VENT CLOSED) Fig. B (VENT OPEN) Fig. C (VENT & EXHAUST OPEN) The Fresh Air Vent allows the air conditioner to: Recirculate inside air – Vent Closed (See Fig. A) 2. Draw fresh air into the room - Vent Open (See Fig. B) 3.
- Page 16 Air Conditioner Features Electronic Control Operating Instructions Key Pad Features Display Energy Clean Saver Filter TO TURN UNIT ON OR OFF: TO CHANGE TEMPERATURE SETTING: CHECK FILTER FEATURE: TO ADJUST FAN SPEEDS: ENERGY SAVER FEATURE (ECO SLEEP FEATURE:...
- Page 17 TO SELECT THE OPERATING MODE: NOTE Displays DISPLAYS: Error codes: TIMER: AUTO START/STOP FEATURE: NOTES...
-
Page 18: Installation Instructions
INSTALLATION INSTRUCTIONS Window Requirements WARNING - Before You Begin Fig. D OFFSET EXTERIOR WALL INNER WINDOW SILL INTERIOR WALL Wooden Windows Table 1 Tools You Will Need Phillips Screwdriver Level Tools You May Use Flathead Screwdriver Pencil NOTE Ruler or tape measure Scissors or knife... - Page 19 1. Prepare the Window NOTE Mounting Hardware 2. Prepare Air Conditioner Top Rail Hardware Fig. A Fig. A...
- Page 20 Fig. B Fig. C NOTE NOTE 3. Install the Accordion Panels on Air Conditioner NOTE Fig. 1...
- Page 21 “I” section Fig. 2 Fig. 3 Top Rail Bottom Rail Top Rail Top right Top left NOTE Fig. 4 Bottom Rail 4. Secure the Accordion Panels Measure from the cabinet edge H:About ” to ” for 5K) H:About to 1” 3/4”...
- Page 22 Fig. 6 window frame 5. Install Support Bracket Fig. 7A Fig. 7B Fig. 8A Fig.8 Fig. 8C FOAM SEAL Fig. 9 Fig. 10 Fig. 9...
- Page 23 66. Install Weather Stripping (ENERGY STAR models only) Fig. 14 If AC is Blocked by Storm Window Fig. 15 Removing AC From Window...
-
Page 24: Care And Cleaning
CARE AND CLEANING CAUTION Air Filter Cleaning NOTE Cabinet Cleaning Winter Storage... -
Page 25: Troubleshooting Tips
TROUBLESHOOTING TIPS... -
Page 26: Remote Control Instructions
REMOTE CONTROL INSTRUCTIONS Handling the Remote Controller Location of the remote controller CAUTIONS Replacing the Battery NOTE: First remove the insulation piece (if available) and then install the battery according to the following steps. Insulation piece CAUTIONS... - Page 33 1-866-646-4332 from 8 AM to 6 PM EST, Monday to Friday, and 8 AM to 4 PM EST, Saturday. Midea reserves the right to repair or replace the defective product, at its discretion.
-
Page 37: Warranty
Extension gratuite de 3 mois de la période de garantie limitée initiale!* Envoyez simplement une photo de votre preuve d’achat par message texte au : 1-844-224-1614 *L’extension de garantie porte sur les trois mois suivant immédiatement la fin de la période de garantie initiale du produit. Les particuliers n'ont pas besoin d'enregistrer le produit pour obtenir tous les droits et recours des propriétaires enregistrés en vertu de la garantie... - Page 38 ..................
- Page 39 spéci • Branchez la fi che du cordon d’alimentation correctement. Sinon, cela pourrait provoquer l’électrocution ou un incendie en raison d’une production excessive de chaleur. • Ne modifi ez pas la longueur du cordon d’alimentation et ne partagez pas la prise avec d’autres appareils, car cela pourrait provoquer l’électrocution ou un incendie en raison d’une surchauff e.
- Page 40 • N’ouvrez pas l’appareil pendant le fonctionnement. Cela peut provoquer une décharge électrique. • N’utilisez pas le cordon d’alimentation à proximité de gaz ou de combustibles infl ammables, tels que l’essence, le benzène, le diluant, etc. Cela peut provoquer une explosion ou un incendie. •...
- Page 41 La classi ous à la classi quali...
- Page 45 ) ) ) )...
- Page 52 POUR METTRE EN MARCHE OU ÉTEINDRE L’UNITÉ: POUR CHANGER LE RÉGLAGE DE TEMPÉRATURE: FONCTION CONTRÔLE DE FILTRE: POUR AJUSTER LES VITESSES DE VENTILATEUR: FONCTION D’ÉCONOMIE D’ÉNERGIE(ECO): FONCTION VEILLE: POUR SÉLECTIONNER LE MODE DE FONCTIONNEMENT:...
- Page 53 ÉCRANS: Codes d’erreurs : TIMER: FONCTION AUTO START/STOP:...
- Page 60 éri ez le ez le ous que le er le ec un chi eau du chi...
- Page 62 soleil de chau Pièce d'isolation Côté positif(+)vers le haut...
- Page 69 à un technicien au 1-866-646-4332, du lundi au vendredi de 8 h à 18 h HNE, le samedi de 8 h à 16 h HNE. Midea se réserve le droit de réparer ou remplacer le produit défectueux à sa discrétion.
- Page 72 Mettez-vous à l'aise...
Need help?
Do you have a question about the MW080WWBA2RC1 and is the answer not in the manual?
Questions and answers