Advertisement
Advertisement

Related Manuals for Midea MWTF-24CM


Summary of Contents for Midea MWTF-24CM
- Page 1 Before using your air conditioner, please read this manual carefully and keep it for future reference. WINDOW/WALL TYPE ROOM AIR CONDITIONER Prior to installation this air-conditioning unit must be submitted for approval by the utility service which provides electricity.
-
Page 2: Table Of Contents
CONTENTS 1. IMPORTANT SAFETY INSTRUCTIONS..........2 POINTS FOR USING AIR CONDITIONER ..........3 3. UNIT PARTS IDENTIFICATION ..............4 4. AIR CONDITIONER FEATURES..............5 5. CARE AND CLEANING ................7 6. INSTALLATION..................8 7. TROUBLESHOOTING TIPS..............11 8. SPECIFICATIONS ................12 NOTE: This User s Manual provides specific operating instructions for your model. -
Page 3: Important Safety Instructions
IMPORTANT SAFETY INSTRUCTIONS For your safety WARNING Do not store or use gasoline or other flammable vapors and liquids in the vicinity of this or any other appliance. Avoid fire hazard or electric shock. Do not use an extension cord or an adaptor plug. -
Page 4: Points For Using Air Conditioner
POINTS FOR USING AIR CONDITIONER WARNING To reduce the risk of fire, electric shock, or injury to persons, read the IMPORTANT SAFETY INSTRUCTIONS before operating this appliance. NOTE: If the air conditioner is turned off, wait 3 minutes before restarting. This allows pressure inside the compressor and equalize. -
Page 5: Unit Parts Identification
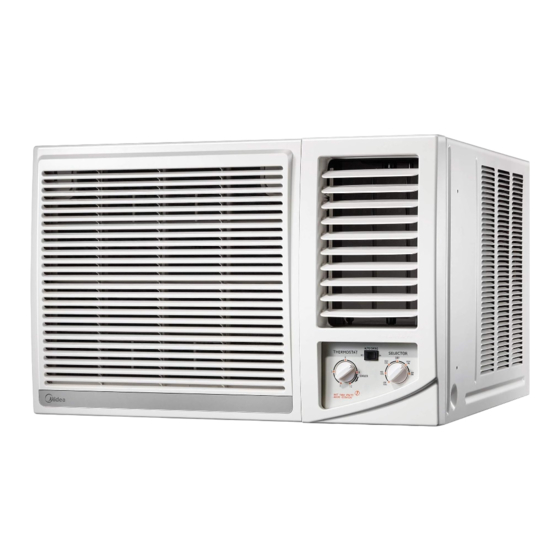
UNIT PARTS IDENTIFICATION 1. Front panel 2. Air filter 3. Frame 4. Cabinet 5. Air inlet grille (outdoor side) 6. Air outlet grille 7. Operation knob 8. Power supply cord and plug ACCESSORIES Screw(Fasten the front panel) Drain Plug(option) Seal Drain Pan (option) 1. -
Page 6: Air Conditioner Features
AIR CONDITIONER FEATURES AUTO SWING SELECTOR SELECTOR THERMOSTAT THERMOSTAT HIGH HIGH COOL HIGH POWER COOLER COOL COOLER HIGH COOL COOL COOL WAIT THREE MINUTES BEFORE RESTARTING WAIT THREE MINUTES BEFORE RESTARTING POWER indicator(some models without): This indicator light remains on when the unit is on and goes off when the SELECTOR is on position. - Page 7 THERMOSTAT Thermostat The thermostat is used to set the desired room THERMOSTAT temperature when the unit is being operated in the COOL MODE. To set the desired room temperature, rotate the thermostat switch to the desired setting. After the set temperature is achieved the thermostat will automatically start and stop the compressor in order to maintain the desired set temperature.
-
Page 8: Care And Cleaning
Vertical air flow adjustment (manually) To adjust vertical air flow direction, adjust any one of the horizontal louver blades. When turning up or down the horizontal louver blades, always keep horizontality the top or bottom blades. This can effectively prevent water drops condensed on the front panel of the unit. -
Page 9: Installation
CARE AND CLEANING(CONTINUED) Hold the slot under the front panel, then uplift it onwards, and remove the front panel. Pinch the handle under the air filter and make the air filter arched, remove it from the underside to upside. Wash the filter using liquid dishwashing detergent and warm water. Rinse filter thoroughly. Gently shake excess water from the filter. - Page 10 INSTALLATION(CONTINUED) Less than C more than D Scrape If the wall thickness is more than scrape the wall as shown above. Wall thickness is less than C Less than More thanA more thanA More than B Make rear side lower so that water will drain out smoothly.
- Page 11 Installation Steps Step 1. Remove the front panel and the air filter 1. Hold the slot under the front panel, then uplift it outwards, and remove the front panel (See Fig.1). 2. Pinch the handle under the air filter and make the air filter arched, remove it from the slot from underside to upside (See Fig.2).
-
Page 12: Troubleshooting Tips
Step 4. Install the frame 1. Install the frame. (see Fig.9) 2. Fix the screws on the frame. (see Fig.3) Step 5. Install the front panel and the air filter. 1. Install the air filter into the frame's slot from upside to underside. -
Page 13: Specifications
Problem Solution Dirty air filter- air restricted. Clean air filter. Refer to Care and Cleaning section. Air conditioner cooling, but room Thermostat set too warm. Turn thermostat clockwise to a colder setting. is too warm- NO Air directional louvers positioned improperly. Position louvers for better air distribution. ice forming on cooling coil behind Front of units is blocked by drapes, blinds, furniture, etc. - Page 14 Minimum norminal cross-sectional area of conductors: Rated current of appliance Nominal cross-sectional area (mm ) 0.75 Suggest Minimum Wire Size AWG: American Wire Gage Appliance Amps AWG Wire Size...
- Page 15 CS355-U 2200019053...
Need help?
Do you have a question about the MWTF-24CM and is the answer not in the manual?
Questions and answers