Advertisement
Available languages
Available languages
en
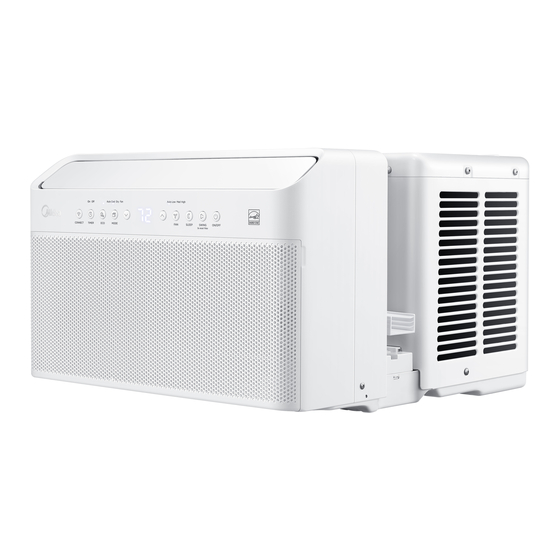
USER MANUAL
Window Air Conditioner
MAW
Capacity: 10000BTU/h
Warning notices: Before using
this product, please read this
manual carefully and keep it for
future reference. For additional
support, please call customer
service at 1-866-646-4332.
The design and specifications are
subject to change without prior
notice for product improvement.
Consult with your dealer or
the manufacturer for details.
MW10MSWBA4RCM
version E - 09 - 2020 (PREVIEW06)
midea.com
version B - 02 - 2020
Advertisement

Subscribe to Our Youtube Channel
Related Manuals for Midea MAW


Summary of Contents for Midea MAW
- Page 1 1-866-646-4332. The design and specifications are subject to change without prior notice for product improvement. Consult with your dealer or the manufacturer for details. MW10MSWBA4RCM version E - 09 - 2020 (PREVIEW06) midea.com version B - 02 - 2020...
-
Page 2: Table Of Contents
Owner’s Manual SAFETY PRECAUTIONS ................3 OPERATING INSTRUCTIONS ..............8 INSTALLATION INSTRUCTIONS .............. 13 CARE AND CLEANING ................25 TROUBLESHOOTING TIPS ..............26 REMOTE CONTROL AND APP INSTRUCTIONS ........28 WARRANTY ....................35 Read This Manual Inside you’ll find many helpful hints on how to use and maintain your air conditioner properly. -
Page 3: Safety Precautions
SAFETY PRECAUTIONS To prevent injury to the user or other people and property damage, the instructions shown here must be followed. Incorrect operation due to ignoring of instructions may cause harm or damage. The level of risk is shown by the following indications. This symbol indicates a hazardous situation which, if not WARNING avoided, could result in death or serious injury. - Page 4 WARNING • Do not disassemble or modify unit. It may cause failure and electric shock. • Do not damage or use an alternate power cord. It may cause fire and electric shock. If the power cord is damaged, it must be replaced by the manufacturer or an authorized service center or a similarly qualified person in order to avoid a hazard.
- Page 5 CAUTION • Do not clean the air conditioner with water. Water may enter the unit and degrade the insulation which could lead to electric shock. • Do not put a pet or house plant where it will be exposed to direct air flow. This could injure the pet or harm the plant.
- Page 6 Operation of Current Device The power supply cord contains a current Plug in & measuring device that detects damage to the power cord. Test your power supply press RESET cord as follows: RESET Plug in the air conditioner. 2. The power supply cord will have TWO TEST buttons on the plug head.
- Page 7 • Be aware that the refrigerants may not contain an odor. • Keep ventilation openings clear of obstruction. • Unit is only to be serviced by a Midea authorized servicer, please call Customer Service at 1-866-646-4332 for support. • Flammable refrigerant R32 is used within air conditioner. Please follow the instructions carefully to handle, install, clean, and service the air conditioner to avoid damage or hazard.
-
Page 8: Operating Instructions
OPERATING INSTRUCTIONS Normal Sounds High Pitched Chatter Vibration Sound of Rushing Air Unit may vibrate and In front of the unit, you may hear the sound of rushing air being moved by the fan. Gurgle/Hiss Trickling Sound noises may be heard Sound Performance The following table shows the sound performance data for these window air conditioners. - Page 9 Air Conditioner Operation WARNING To reduce the risk of fire, electrical shock, or injury to people or property, read the SAFETY PRECAUTIONS before operating this appliance. Outdoor temp.: 18°C ~ 43°C / 64°F ~ 109°F Cooling Operation Indoor temp.: 16°C ~ 32°C / 60°F ~ 90°F NOTICE •...
- Page 10 Air Conditioner Features ELECTRONIC CONTROL OPERATING INSTRUCTIONS Before you begin, thoroughly familiarize yourself with the control panel as shown below and all its functions, then follow the symbol for the functions you desire. The unit can be controlled by the control panel, remote control, smart phone app or voice control. CONNEXION VENT VEILLE...
- Page 11 4. EC0 Button To operate on DRY mode: Press the ECO button to initiate the Energy • In this mode, the air conditioner will Saver function. This function is available generally operate as a dehumidifier. on COOL, DRY, and AUTO (only AUTO- Since the conditioned space is a closed COOLING and AUTO-FAN) modes.
- Page 12 9. SWING Button Error codes: Use the SWING button to initiate the The unit may stop operation due to a auto swing feature for the outlet louver. malfunction with the unit. If this occurs, When the auto swing is on, pressing the an error code may appear on the display SWING button can stop the louver at the like below.
-
Page 13: Installation Instructions
INSTALLATION INSTRUCTIONS Installation Video Scan the QR code with your mobile device to watch an installation video of the Midea U. Page 13 ... - Page 14 Window Requirements WARNING - Before You Begin Your air conditioner is designed to install in Read these instructions completely standard double hung windows with opening and carefully. widths of 558mm to 914mm (22 to 36 inches) and a window height of 349mm (13.75”). •...
- Page 15 Installation Hardware 1/2” Type B Screw Window Sash Lock 1/4” Type B Screw Window Sash Foam Main Bracket Window Sealing Foam Bracket Sealing Foam Right Extension Arm (For 26”-36” windows) Additional Side Arm Foam Right Extension Arm – Short 1” Type A Screw (For 22”-26”...
- Page 16 2. Prepare the Bracket Remove the air conditioner, bracket and hardware from the carton and set on a flat surface. Fig. 2 Center Adjust Adjust A. Pressing the Spring Push Pin, adjust the Left Extension Arm out and then install the Right Extension Arm.
- Page 17 Vinyl Lip OUTSIDE INSIDE OUTSIDE INSIDE Wooden Windows Vinyl-Clad Windows Fig. 5 Vinyl Type Windows with a Lipped Sill A1. Secure the bracket to the windowsill by drilling 1/8” pilot holes and installing the 1/2” Type A screws as shown in Fig. 6. 1/2”...
- Page 18 C. Insert the Main Support Pin through the holes the Main Support and Angled Support Arm. Using the numbers on the Main Support, repeat the adjustment for the other Angled Support Arm matching the hole number from the first support arm. Fig.
- Page 19 4. Install Air Conditioner NOTICE Measure the width of your window track (the vertical track your window slides up and down in) before installing your air conditioner. If it measures 1/2“ or less, flip the Anti-Tip Bracket so the small end faces out, then continue with your air conditioner installation.
- Page 20 C. Next, you must install the Open Window Brackets using the provided screws as shown. Fig. 16 Use the 1/2” Type B screw. WARNING Failing to install the Open Window Brackets Use the 1/4” could cause injury or property damage. Type B screw.
- Page 21 B. Apply Window Sealing Foam to the Side Arm Foam as shown. Note that the Window Sealing Foam attaches to the side next to the air conditioner.” Vinyl Type Windows with Lipped Sill Wooden Type Windows with Flat Sill Air Conditioner Side Side Arm Foam Air Conditioner Side Side Arm Foam...
- Page 22 Top view D. The Anti-Tip Brackets must be extended into the The factory installed 1/2“ screw window track opening (the must be re-used to secure the vertical track your window Anti-Tip Bracket. Failing to use slides up and down in) until this screw could damage the they stop.
- Page 23 E. Install a strip of Window Sealing Foam to the bottom of your lower sash sealing any small gaps between the window and air conditioner. Then close the window and check for gaps. Fill any gaps with the included foam as needed.
- Page 24 Final Check: Review the installation and check for any gaps or openings to the outdoor air. Cover these gaps with the provided foam ensuring no outdoor air leaks inside. See image for areas to check for gaps. Check for Gaps Check for Gaps Fig.
-
Page 25: Care And Cleaning
CARE AND CLEANING CAUTION Clean your air conditioner occasionally to keep it looking new. Be sure to unplug the unit before cleaning to prevent shock or fire hazards. Air Filter Cleaning The air filter should be checked at least once every two weeks to see if cleaning is necessary. -
Page 26: Troubleshooting Tips
TROUBLESHOOTING TIPS Before calling for service, review this list. It may save you time and expense. This list includes common occurrences that are not the result of defective workmanship or materials in this appliance. Problem Solution Wall plug disconnected. Push plug firmly into wall outlet. Circuit breaker tripped. - Page 27 Problem Solution Air conditioner Dirty air filter- air restricted. Clean air filter. turns on and Outside temperature extremely hot. Set FAN speed to a higher off rapidly. setting to bring air past cooling coils more frequently. Check for potential obstructions blocking the outdoor intake/ exhaust.
-
Page 28: Remote Control And App Instructions
REMOTE CONTROL AND APP INSTRUCTIONS Handling the Remote Control Location of the remote control Use the remote control within a distance of 8m (26 ft). from the air conditioner, pointing it towards the unit. The unit will beep when it receives a signal. CAUTION •... - Page 29 Remote Control Specifications Rated Voltage 3.0V ( Dry batteries R03/LR03x2) Signal Receiving Range 8m (26ft) Environment -5 °C ~ 60 °C (23°F ~ 140°F) Function Buttons MODE ON/OFF Turns the unit on or off. Switches the operating modes as follows: TEMP Auto Cool...
- Page 30 Remote Screen Indicators Information is displayed when the remote control is powered on. Sleep mode display Comfort Sense feature display Wireless control feature display Low battery detection display (If flashes) MODE display Transmission Indicator Displays the current mode, Lights up when remote including: sends signal to indoor unit.
- Page 31 Setting the TIMER TIMER ON/OFF - Set the amount of time after which the unit will automatically turn on/off. TIMER ON SETTING Press TIMER ON Press up or down button for Point remote to unit and wait button to initiate the multiple times to set the desired 1sec, the TIMER ON will be ON time sequence.
- Page 32 OS may or may not be supported until a new version is released. Your specific mobile phone or problems in your network may prevent the system from working and Midea will not be responsible for any problems that could be caused by incompatibility or network issues.
- Page 33 Apple QR code Scan to download app. • You can also go to Google Play or App Store and search for Midea Air. NOTICE All the images in this manual are for reference only, your product and app may look slightly different.
- Page 34 CREATE YOUR ACCOUNT • Make sure your smartphone is connected to your wireless router and your wireless router has a working 2.4GHz internet connection. • It is recommended to activate your account immediately to be able to recover your password by email. 6.1 Press “Sign Up”.
-
Page 35: Warranty
(failure, missing part, etc.), please contact one of our service technicians at our toll- free service line at 1-866-646-4332 from 8 AM to 6 PM EST, Monday to Friday, and 8 AM to 4 PM EST, Saturday. Midea reserves the right to repair or replace the defective product, at its discretion. - Page 37 1-866-646-4332. La conception et les spécifications sont susceptibles d'être modifiées sans préavis pour améliorer le produit. Consultez votre revendeur ou le fabricant pour plus de détails. MW10MSWBA4RCM version EB -0 092 -2 2002200 (PREVIEW06) midea.com...
- Page 38 Manuel du propriétaire PRÉCAUTIONS DE SÉCURITÉ INSTRUCTIONS D'UTILISATION INSTRUCTIONS D'INSTALLATION LES SOINS ET LE NETTOYAGE CONSEILS DE DÉPANNAGE TÉLÉCOMMANDE ET INSTRUCTIONS DE L'APPLICATION GARANTIE Lire ce manuel Vous trouverez à l'intérieur de nombreux conseils utiles sur l'utilisation et l'entretien de votre climati- seur.
- Page 39 PRÉCAUTIONS DE SÉCURITÉ Pour éviter de blesser l'utilisateur ou d'autres personnes et de causer des dommages matériels, les instructions indiquées ici doivent être suivies. Une utilisation incorrecte due à l'ignorance des instructions peut causer des dommages ou des dégâts. Le niveau de risque est indiqué par les indications suivantes.
- Page 40 AVERTISSEMENT • Ne pas démonter ou modifier l'appareil, car cela pourrait provoquer une panne et un choc électrique. • N'endommagez pas et n'utilisez pas un autre cordon d'alimentation, car cela pourrait provoquer un incendie et un choc électrique. Si le cordon d'alimentation est endommagé, il doit être remplacé par le fabricant ou un centre de service agréé...
- Page 41 ATTENTION • Ne nettoyez pas le climatiseur avec de l'eau, car l'eau pourrait pénétrer dans l'appareil et dégrader l'isolation, ce qui pourrait entraîner un choc électrique. • Évitez de placer un animal de compagnie ou une plante d'intérieur dans un endroit où il sera exposé...
- Page 42 Fonctionnement du dispositif de courant Le cordon d'alimentation contient un appareil de Branchez et appuyez mesure du courant qui détecte les dommages sur RÉINITIALISER causés au cordon d'alimentation. Testez votre cordon d'alimentation comme suit : 1. Branchez le climatiseur. RÉINITIALISER 2.
- Page 43 • Sachez que les réfrigérants peuvent ne pas contenir d'odeur. • Maintenez les ouvertures de ventilation libres de toute obstruction. • L'appareil ne doit être réparé que par un réparateur agréé Midea, veuillez appeler le service clientèle au 1-866-646-4332 pour obtenir de l'aide.
- Page 44 INSTRUCTIONS D'UTILISATION Sons normaux Bruit aigu Les compresseurs à haut rende- ment peuvent avoir un son aigu pendant le cycle de refroidisse- ment. Vibration Le bruit de l'air qui s'engouffre L'appareil peut vibrer et faire du bruit en raison Devant l'appareil, vous d'une mauvaise pouvez entendre le bruit de construction des murs...
- Page 45 Fonctionnement du climatiseur AVERTISSEMENT Pour réduire le risque d'incendie, de choc électrique ou de blessure aux personnes ou aux biens, lisez les PRÉCAUTIONS DE SÉCURITÉ avant d'utiliser cet appareil. Température extérieure : 18 °C ~ 43 °C / 64 °F ~ 109 °F Fonctionnement refroidissement Température intérieure : 16 °C ~ 32 °C / 60 °F ~ 90 °F...
- Page 46 Caractéristiques des climatiseurs MODE D'EMPLOI DE LA COMMANDE ÉLECTRONIQUE Avant de commencer, familiarisez-vous avec le panneau de contrôle comme indiqué ci-dessous et toutes ses fonctions, puis suivez le symbole correspondant aux fonctions que vous souhaitez. L'appareil peut être commandé par le panneau de contrôle, la télécommande, l'application smart phone ou la commande vocale.
- Page 47 4. Bouton ÉCO Pour fonctionner en mode SEC : Appuyez sur le bouton ÉCO pour lancer la • Dans ce mode, le climatiseur fonctionne fonction d'économie d'énergie. Cette fonction est généralement comme un déshumidificateur. disponible en modes FROID, SEC et AUTO Comme l'espace conditionné...
- Page 48 Codes d'erreur : 9. Bouton BALANCEMENT L'appareil peut s'arrêter de fonctionner en Utilisez le bouton BALANCEMENT pour lancer la fonction de balancement automatique de la raison d'un dysfonctionnement de l'appareil. grille de sortie. Lorsque la fonction de balance- Dans ce cas, un code d'erreur peut apparaître sur l'écran comme ci-dessous.
- Page 49 INSTRUCTIONS D'INSTALLATION Vidéo d'installation Scannez le code QR avec votre appareil mobile pour regarder une vidéo d'installation du Midea U.
- Page 50 AVERTISSEMENT Avant Exigences relatives aux fenêtres commencer Votre climatiseur est conçu pour être installé dans des fenêtres à guillotine double standard dont la largeur d'ouver- Lisez ces instructions complètement et ture est comprise entre 558 mm et 914 mm (22 à 36 pouces) attentivement.
- Page 51 Matériel d'installation Vis 1/2 po de type B Serrure pour châssis de fenêtre Vis 1/4 po de type B Mousse pour châssis de fenêtre Support principal Mousse d'étanchéité pour fenêtre Mousse de scellement des Bras d'extension droit (pour les supports fenêtres de 26 à...
- Page 52 2. Préparez le support Retirez le climatiseur, le support et le matériel du carton et posez-les sur une surface plane. Fig. 2 Centrer Ajuster Ajuster A. En appuyant sur la goupille de poussée à ressort, ajustez le bras d'extension gauche et installez ensuite le bras d'extension droit.
- Page 53 Lèvres en vinyle EXTERIEUR EXTERIEUR INTÉRIEUR INTÉRIEUR Fenêtres revêtues de vinyle Fenêtres en bois Fig. 5 Fenêtres de type vinyle avec un rebord à lèvres A1. Fixez le support au rebord de la fenêtre en perçant des trous pilotes de 1/8 po et en installant les vis de 1/2 po de type A comme indiqué...
- Page 54 C. Insérez la broche du support principal dans les trous du support principal et du bras de support angulaire. En utilisant les numéros du support principal, répétez l'ajustement pour l'autre bras de support angulaire en faisant correspondre le numéro du trou du premier bras de support.
- Page 55 4. Installer un climatiseur AVIS Mesurez la largeur du rail de votre fenêtre (le rail vertical dans lequel votre fenêtre coulisse de haut en bas) avant d'installer votre climati- seur. Si elle mesure 1/2 po ou moins, retournez le support antibasculement de manière à ce que la petite extrémité...
- Page 56 C. Ensuite, vous devez installer les supports de fenêtre ouverte à l'aide des vis fournies, comme indiqué. Fig. 16 Utilisez la vis 1/2 po de type B. AVERTISSEMENT Le fait de ne pas installer les supports de fenêtre Utilisez la vis 1/4 po ouverte peut causer des blessures ou des de type B.
- Page 57 B. Appliquez la mousse d'étanchéité pour fenêtres sur la mousse pour bras latéraux comme indiqué. Remarquez que la mousse d'étanchéité pour fenêtre se fixe sur le côté à côté du climatiseur. Fenêtres de type vinyle avec appui à lèvres Fenêtres en bois avec appui plat Côté...
- Page 58 Les supports antibasculement Vue de dessus doivent être prolongés dans La vis 1/2 po installée en usine l'ouverture du rail de la fenêtre doit être réutilisée pour fixer le (le rail vertical dans lequel votre support antibasculement. Le fait fenêtre coulisse de haut en bas) de ne pas utiliser cette vis pourrait endommager le climatiseur.
- Page 59 E. Installez une bande de mousse d'étanchéité pour fenêtres au bas de votre châssis inférieur, afin d'étanchéifier les petits espaces entre la fenêtre et le climat- iseur. Fermez ensuite la fenêtre et vérifiez qu'il n'y a pas d'interstices. Remplissez les interstices avec la mousse fournie, si nécessaire.
- Page 60 Contrôle final : Examinez l'installation et vérifiez qu'il n'y a pas de trous ou d'ouver- tures vers l'air extérieur. Couvrez ces espac- es avec la mousse fournie en vous assurant qu'il n'y a pas de fuite d'air extérieur à l'intérieur. Voir l'image pour les zones à vérifier.
- Page 61 LES SOINS ET LE NETTOYAGE ATTENTION Nettoyez votre climatiseur de temps en temps pour qu'il ait l'air neuf. Veillez à débrancher l'appareil avant de le nettoyer afin d'éviter tout risque de choc ou d'incendie. Nettoyage du filtre à air Le filtre à air doit être vérifié au moins une fois toutes les deux semaines pour voir si un nettoy- age est nécessaire.
- Page 62 CONSEILS DE DÉPANNAGE Avant d'appeler le service après-vente, consultez cette liste. Cela peut vous faire gagner du temps et de l'argent. Cette liste comprend des cas courants qui ne sont pas le résultat d'un défaut de fabrication ou de matériaux dans cet appareil. Problème Solution La prise murale est débranchée.
- Page 63 Solution Problème Filtre à air sale - air restreint. Filtre à air propre. Le climatiseur se La température extérieure est extrêmement élevée. Réglez la vitesse du ventilateur à un niveau met en marche et plus élevé pour que l'air passe plus fréquemment devant les serpentins de refroidissement. s'arrête rapidement.
- Page 64 TÉLÉCOMMANDE ET INSTRUCTIONS DE L'APPLICATION Manipulation de la télécommande Emplacement de la télécommande Utilisez la télécommande à une distance de 8 m (26 ft) du climatiseur, en la dirigeant vers l'appareil. L'appareil émet un bip lorsqu'il reçoit un signal. ATTENTION •...
- Page 65 Spécifications de la télécommande Tension nominale 3,0V (batterie sèches R03/LR03x2) Portée de réception des signaux 8m (26ft) -5 °C ~ 60 °C (23°F ~ 140°F) Environnement Boutons de fonction MARCHE/ARRÊT MODE Permet d'allumer ou d'éteindre l'appareil. Les modes de fonctionnement sont commutés comme suit : Auto→Froid →Sec→Vent TEMP...
- Page 66 Indicateurs d'écran à distance Les informations sont affichées lorsque la télécommande est allumée. Affichage du mode veille Affichage de la fonction de la commande ComfortSense Affichage des fonctions de commande sans fil Affichage de détection de batterie faible (si clignote) Affichage du MODE Indicateur de transmission Affiche le mode actuel, y compris :...
- Page 67 Réglage de la minuterie MINUTERIE EN MARCHE/ARRÊT - Définissez la durée après laquelle l'appareil s'allume/éteint automatiquement. RÉGLAGE MINUTERIE EN MARCHE Pointez la télécommande vers l'appareil et Appuyez sur le boutonMI- Appuyez plusieurs fois sur le bouton haut ou attendez 1sec, MINUTERIE NUTERIE EN MARCHE pour bas pour régler l'heure souhaitée de mise en...
- Page 68 être pris en charge jusqu'à la sortie d'une nouvelle version. Votre téléphone portable spécifique ou des problèmes dans votre réseau peuvent empêcher le système de fonctionner et Midea ne sera pas responsable des problèmes qui pourraient être causés par une incompatibilité ou des problèmes de réseau.
- Page 69 Code QR Apple Code QR Android Scanner pour télécharger l'application. • Vous pouvez également aller sur Google Play ou App Store et rechercher Midea Air. AVIS Toutes les images de ce manuel sont données à titre indicatif, votre produit et votre application peuvent être légèrement différents.
- Page 70 CRÉATION DE VOTRE COMPTE • Assurez-vous que votre smartphone est connecté à votre routeur sans fil et que ce dernier dispose d'une connexion internet 2,4 GHz en état de marche. • Il est recommandé d'activer votre compte immédiatement pour pouvoir récupérer votre mot de passe par courrier électronique.
- Page 71 à notre ligne de service gratuite au 1-866-646-4332 de 8h à 18h EST, du lundi au vendredi, et de 8h à 16h EST, le samedi. Midea se réserve le droit de réparer ou de remplacer le produit défectueux, à sa discrétion.
- Page 72 Mettez-vous à l'aise...
Need help?
Do you have a question about the MAW and is the answer not in the manual?
Questions and answers