Rotex RRGA06DAV3 Installation Manual
Hide thumbs
Also See for RRGA06DAV3:
- Installer's reference manual (112 pages) ,
- Installer's reference manual (112 pages)

Related Manuals for Rotex RRGA06DAV3


Summary of Contents for Rotex RRGA06DAV3
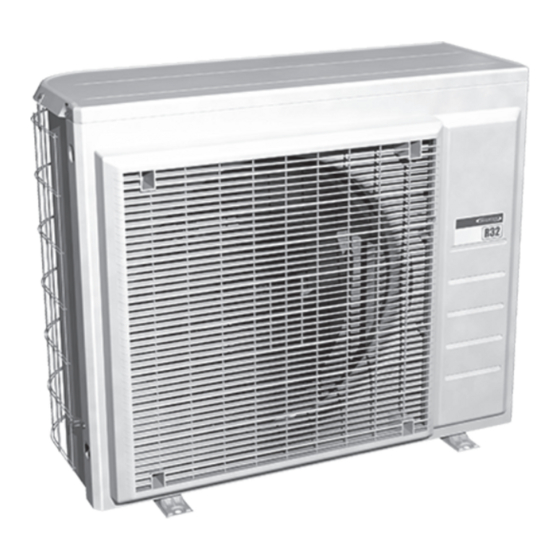
- Page 1 Installation manual ROTEX HPSU low temperature Bi‑bloc RRGA04DAV3 Installation manual RRGA06DAV3 English ROTEX HPSU low temperature Bi‑bloc RRGA08DAV3...
- Page 2 2P491692-2A...
- Page 3 2P491692-2A...
-
Page 4: Table Of Contents
▪ Installer reference guide: 1 About the documentation ▪ Preparation of the installation, good practices, reference data,… About this document..............▪ Format: Digital files on the ROTEX homepage 2 About the box ▪ Addendum book for optional equipment: Outdoor unit................ -
Page 5: To Remove The Accessories From The Outdoor Unit
If necessary, install a snow cover or shed and a pedestal. (mm) (mm) Air outlet Air inlet The outdoor unit is designed for outdoor installation only, and for the following ambient temperatures: Cooling mode 10~43°C Heating mode –25~25°C RRGA04~08DAV3 Installation manual ROTEX HPSU low temperature Bi‑bloc 4P496756-1 – 2017.06... -
Page 6: Installation
(mm) Maximum snowfall height Option 2: On plastic mounting feet In this case, you can use the bolts, nuts, washers and spring washers delivered with the unit as accessories. Installation manual RRGA04~08DAV3 ROTEX HPSU low temperature Bi‑bloc 4P496756-1 – 2017.06... -
Page 7: To Install The Outdoor Unit
▪ (1) Put the unit into position (using the sling to the left and Drain pan the handle to the right). U-beams ▪ (2) Remove the sling (by pulling 1 side of the sling). ▪ (3) Fix the unit. RRGA04~08DAV3 Installation manual ROTEX HPSU low temperature Bi‑bloc 4P496756-1 – 2017.06... -
Page 8: To Prevent The Outdoor Unit From Falling Over
There is no moisture in the outdoor unit system. This procedure is finished. 1 Connect the liquid refrigerant connection from the indoor unit to the liquid stop valve of the outdoor unit. Installation manual RRGA04~08DAV3 ROTEX HPSU low temperature Bi‑bloc 4P496756-1 – 2017.06... -
Page 9: Charging Refrigerant
To connect the electrical wiring on the outdoor unit 1 Fill in the label as follows: Contains fluorinated greenhouse gases 1 Remove the switch box cover. RXXX GWP: XXX GWP × kg 1000 RRGA04~08DAV3 Installation manual ROTEX HPSU low temperature Bi‑bloc 4P496756-1 – 2017.06... -
Page 10: Finishing The Outdoor Unit Installation
Liquid pipe insulation Finishing tape 2 Install the service cover. Starting up the outdoor unit 3× See the indoor unit installation manual for configuration and commissioning of the system. 12 3 Installation manual RRGA04~08DAV3 ROTEX HPSU low temperature Bi‑bloc 4P496756-1 – 2017.06... -
Page 11: Technical Data
Compressor accumulator Muffler Compressor Thermistor (outdoor air) Thermistor (heat exchanger) Thermistor (compressor discharge) S1PH High pressure switch (automatic reset) Electronic expansion valve Solenoid valve (4‑way valve)(ON: cooling) Heating Cooling RRGA04~08DAV3 Installation manual ROTEX HPSU low temperature Bi‑bloc 4P496756-1 – 2017.06... -
Page 12: Wiring Diagram: Outdoor Unit
Printed circuit board (main) PCB2 Printed circuit board (service) Switching power supply Thermal protector Q1DI # Earth leakage circuit breaker Insulated gate bipolar transistor (IGBT) Thermistor (air) Thermistor (heat exchanger) Installation manual RRGA04~08DAV3 ROTEX HPSU low temperature Bi‑bloc 4P496756-1 – 2017.06... - Page 16 Unsere Partner im Ausland Our partners abroad • Unsere Partner im Ausland Nos partenaires à l’étranger • Le nostre sedi all'estero Neustros representantes en el extranjero Nasi partnerzy za granicą • Naši partneři v zahraničí http://de.rotex-heating.com > ueber-rotex > international 4P496756-1 2017.06...
Need help?
Do you have a question about the RRGA06DAV3 and is the answer not in the manual?
Questions and answers