Table of Contents
Advertisement
Quick Links
Advertisement
Table of Contents

Related Manuals for GME CP30


Summary of Contents for GME CP30
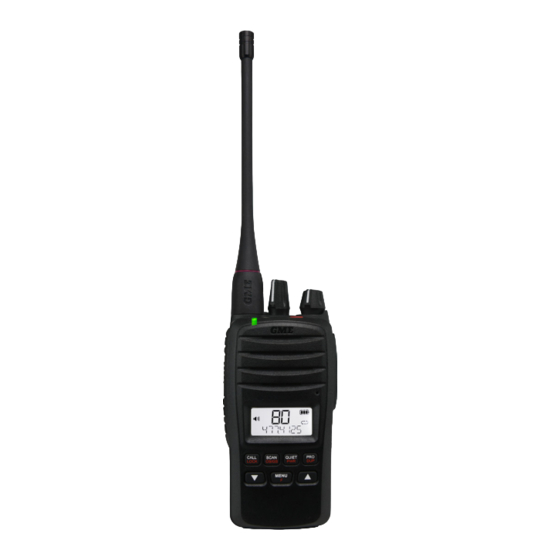
- Page 1 CP30 5W UHF CB Radio with Programmable Channels INSTRUCTION MANUAL...
-
Page 2: Table Of Contents
PREFACE ....................1 Emergency Channels ..................2 Telemetry Channels ..................2 Important Advice..................3 INTRODUCTION ..................4 IN THE BOX ....................4 CP30 KEY FEATURES ................4 CP30 ACCESSORIES .................5 DETAILED FEATURES ................6 Transmit (TX) ....................6 Receive (RX) ....................6 Scanning and Memory Functions ..............6 Privacy Functions ..................7 Physical Properties ..................7... - Page 3 Roger Beep ....................28 Microphone Gain ..................28 Voice Scrambler ..................29 Narrow Band Filter ...................29 Silent Squelch Tail ..................30 Dynamic Volume Control ................31 Audio Boost ....................31 LCD Backlight ...................32 Display Options ..................32 Beeps .......................34 Channel Announce ...................34 Message Text ...................35 CP30 INSTRUCTION MANUAL...
- Page 4 PRIVATE AND RECEIVE-ONLY CHANNELS ..........63 MENU ....................65 PROGRAMMABLE KEYS & BUTTONS .............74 MENU OPTIONS ................89 - 90 CTCSS TONE FREQUENCIES ..............90 DCS CODES ...................91 UHF CB OPERATING FREQUENCIES ............92 CP30 SPECIFICATIONS ..............93 - 95 GME WARRANTY AGAINST DEFECTS ..........96 - 98 CP30 INSTRUCTION MANUAL...
-
Page 5: Preface
PREFACE Copyright Notice GME Pty Ltd reserves all rights to this document and the information contained herein. Reproduction, use or disclosure to third parties without express permission is strictly prohibited. © 2023 GME Pty Ltd, Sydney, Australia Safety Information The CP30 is a radio transmitting device. -
Page 6: Emergency Channels
In the event that additional telemetry / telecommand channels are approved by the ACMA, these channels shall be added to those currently listed where voice transmission is inhibited. Currently, transmissions on channels 61, 62 and 63 are also inhibited and these channels are reserved for future allocation. CP30 INSTRUCTION MANUAL... -
Page 7: Important Advice
• Always switch off your radio where notices restrict the use of two-way radio or mobile telephones. • Use only GME approved rechargeable battery packs with the supplied charger. • Avoid storing or charging your radio in direct sunlight. •... -
Page 8: Introduction
INTRODUCTION The GME CP30 radio is designed, engineered and manufactured in Australia and is ideal for users who demand the ultimate in handheld UHF Communications. Please read this user manual thoroughly. It provides information on the features, parts, controls and specifications of the CP30 radio. -
Page 9: Cp30 Accessories
240V Dual Unit Desktop Charger CC28 Nylon Case PS005 AC Adaptor for LC009 Heavy Duty Leather Case BCD022 & BCD023 AE4028 450-520 MHz BCM002 6-Bay Multicharger Wideband Antenna BCV012 Car Kit Charger with BP028 2600mAh Li-Ion Battery 12V Adaptor CP30 INSTRUCTION MANUAL... -
Page 10: Detailed Features
CB Channels: 80 channels 477 MHz UHF CB / PRS • Receive Only Channels: 119 (user enabled) 403-520 MHz • Advanced Power Saving Feature: Allows the CP30 to ‘sleep’ during periods of inactivity to conserve battery power. • Digital Signal Strength Meter: Displays the incoming signal strength in digital format. -
Page 11: Privacy Functions
Keypad Lock: Prevents accidental key presses from disrupting the normal operation of your radio. • LED Backlight: For night viewing with automatic time-out. • Channel Announce: An audible voice that speaks the channel number whenever a channel is selected. CP30 INSTRUCTION MANUAL... -
Page 12: Signal Processing
This prevents your squelch from opening to unwanted interference and ensures that incoming signals remain clear and undistorted even when they are slightly off-frequency. • Dynamic Volume Control: Automatically compensates for variations in received audio level resulting in a constant audio output level to the speaker. CP30 INSTRUCTION MANUAL... -
Page 13: Default Settings
Press: Enable Secondary UHF CB / PRS Function Keys Outside Menu: Channel Up / Down Hold: Access Menu Features Note: Default key functions can only be changed via the CP30 dealer programmer. Contact your Authorised GME Commercial dealer. CP30 INSTRUCTION MANUAL... -
Page 14: Display
If left unused your radio’s battery pack may slowly discharge over time. If you have not used your CP30 for some time, you should recharge the battery pack before use. -
Page 15: Removing The Battery
Alternatively, the battery can be removed and charged separately by inserting it into the slot at the rear of the desktop charger compartment. CP30 INSTRUCTION MANUAL... -
Page 16: Charging The Battery
Green LED - Fully charged CHARGER LED INDICATORS Red LED - Charging Green LED - Fully charged Rear LED Front LED Single Desktop Dual Desktop Rear LED Charger (BCD022) Charger (BCD023) Front LED Single Desktop Dual Desktop Charger (BCD022) Charger (BCD023) CP30 INSTRUCTION MANUAL... -
Page 17: Battery Low Alert
Ultra-Low transmit power until the battery is depleted. Full Medium Recharge In-Vehicle Charging Insert radio vertically into mounting bracket 12V In-Vehicle Lighter Power Plug Mounting Bracket Power Indicator Car Kit Charger (BCD002) CP30 INSTRUCTION MANUAL... -
Page 18: General Operation
To access the secondary functions printed in Red you need to first press the MENU key. ‘F’ will be displayed to indicate you are in Function mode. While ‘F’ is displayed, press the desired Red key within 10 seconds to activate that function. CP30 INSTRUCTION MANUAL... -
Page 19: Selecting Channels
The microphone is quite sensitive so it is not necessary to raise your voice or shout. Release the PTT when you have finished talking. When transmitting, the status LED lights Red and the icon appears on the LCD. CP30 INSTRUCTION MANUAL... -
Page 20: Receiving
Receiving When there are no incoming signals, the CP30 will remain in standby mode with the receiver muted. If the battery save function has been enabled the CP30 will also sleep for short periods of time to conserve battery power. -
Page 21: Signal Strength Meter
Signal Strength Meter The CP30 has a digital signal strength meter that is, by default, displayed in logarithmic format at the bottom of the LCD as numbers from 0 to 9+ (with 9+ being the strongest). The signal meter display can be changed via the DISPLAY setting in the main menu to show the signal strength in linear format (with 0 being a weak signal and 60 being a strong signal). -
Page 22: Default Key Functions
Squelch Level The Squelch level sets the sensitivity of the Squelch to incoming signals. The level can be set to suit your operating environment. The CP30 has nine preset Squelch sensitivity settings from 1-9. CP30 INSTRUCTION MANUAL... - Page 23 The default Squelch setting on the CP30 is 3 which should suit most conditions. The squelch level can be adjusted from by pressing the Channel Selector knob (default setting) or via the radio menu.
-
Page 24: Priority Channel
To Recall the Priority Channel Briefly press the desired Priority Channel key. The CP30 will immediately switch to the selected Priority Channel and PRI1 or PRI2 will be displayed briefly to indicate the Priority Channel memory you have selected. -
Page 25: Triple Watch
Hold the key on the top panel to activate Triple Watch. TW - xx will appear (where xx will alternate between your two Priority Channels) and the icon will animate. The radio is now watching all three channels. CP30 INSTRUCTION MANUAL... -
Page 26: Scan Groups
NOTE: Network scan (NETWK) is disabled by default and if required will need to be enabled through the CP30’s menu. It will not appear under the OS/GS key until it has been enabled (see NETWORK SCAN later in this manual). -
Page 27: Duplex
1–8 and 41–48. When Duplex is enabled on one of these channels, the CP30 will receive on the selected channel but will transmit 30 channels higher. i.e. if channel 1 is selected the CP30 will receive on channel 1 but transmit on channel 31. See the table below. -
Page 28: Pro Key
Pro Key Assignments A summary of possible key assignments are as follows. For further details about the specific function mentioned, refer to corresponding section of this instruction manual. CP30 INSTRUCTION MANUAL... -
Page 29: Lock Key
The LOCK key is used to lock the keypad to prevent unintentional key presses from altering your radio settings. When the keys are locked, only PTT, LOCK, F and the On/Off Volume control will continue to function. If any other key is pressed, LOCKED is displayed. CP30 INSTRUCTION MANUAL... -
Page 30: Transmit Power
100mW Time-Out Timer The CP30 has a built-in time-out timer that automatically limits transmissions to a maximum of 3 minutes of continuous operation. This feature is required by the ACMA to prevent accidental blocking of a frequency, should your PTT key become jammed or be otherwise pressed accidentally. -
Page 31: Menu Functions
When the desired setting is displayed, press the key to exit the menu or wait a few seconds for the menu to time-out. NOTE: You can also press the SQUELCH key to open the Squelch and listen for signals on the channel before transmitting. CP30 INSTRUCTION MANUAL... -
Page 32: Roger Beep
0 to 9. The default setting is 0. MENU When the desired setting is displayed, press the key to exit the menu or wait a few seconds for the menu to time-out. CP30 INSTRUCTION MANUAL... -
Page 33: Voice Scrambler
1-40. This feature provides additional compatibility with older 40-channel radios. Switching the filter Off increases the tolerance of the CP30 receiver to older wideband 40 channel radios or to signals that might be slightly off frequency. -
Page 34: Silent Squelch Tail
Rotate the Channel Selector knob or press the keys to select ON or OFF. When the desired setting is displayed, press the MENU key to exit the menu or wait a few seconds for the menu to time-out. CP30 INSTRUCTION MANUAL... -
Page 35: Dynamic Volume Control
1-40. Generally users have compensated for these differences by adjusting the volume control for each incoming signal. The CP30 has a unique GME feature called Dynamic Volume Control (DVC) that automatically compensates for these variations in received audio level. When activated, this feature automatically adjusts the received audio level resulting in a constant audio output level to the speaker. -
Page 36: Lcd Backlight
LCD in the space below the channel number. The default setting is S-MET which displays the incoming signal strength in logarithmic format using values from 0-9+ To Select a Different Display Option: MENU Hold the key to access the menu. The last selected menu item will be displayed. CP30 INSTRUCTION MANUAL... - Page 37 Similarly opening the squelch with the Squelch key displays SQLCH OPn alongside the icon. If desired these text messages can be switched off so that only the associated icon is displayed. CP30 INSTRUCTION MANUAL To enable or disable the Message Texts:...
-
Page 38: Beeps
Beeps The CP30 uses beeps to provide audible feedback whenever a key is pressed or to notify you of various alarms and timers. The Beep setting can be adjusted in the menu. To Adjust the Beep Setting: MENU Hold the key to access the menu. -
Page 39: Message Text
The Power Save function is designed to conserve power and extend the battery life by letting the radio sleep during periods of inactivity. If you intend to use your CP30 for long periods of time between charges you should consider using the power saving mode. -
Page 40: Radio Information
MODEL: Displays your radio’s model name. • SERNO: Displays your radio’s serial number. • FWVER: Displays your radio’s firmware (operating software) version. • HWVER: Displays your radio’s hardware (PCB assembly) version. • OWNID: Displays your radio’s own SelCall Ident. CP30 INSTRUCTION MANUAL... -
Page 41: Factory Reset
Factory Reset The CP30 has a factory reset option that allows you to restore the radio back to its out-of-the-box settings. Activating the factory reset will delete any changes you have made to the radio including any receive-only channels, scan memories and CTCSS/DCS settings and will reset all the menu settings to their defaults. -
Page 42: Scanning
When a signal is found, scanning will pause to allow the signal to be heard and will resume scanning when the channel is clear again. Scan Groups The CP30 features four scan groups – Open Scan1, Open Scan2, Group Scan and Network Scan. MENU... -
Page 43: Adding And Removing Scan Channels
The ‘nuisance’ channel will be completely removed from the scan group for the duration of that scan session. To restore the channel, simply stop and restart the scan session using the key. Turning the radio Off then On SCAN OS/GS again will also restore the channel. CP30 INSTRUCTION MANUAL... -
Page 44: Open Scan Mode
5 seconds, the scan will resume automatically. e.g. Scanning channels 1–8 in Open Scan. The CP30 has two separate Open Scan memories labelled OPEN1 and OPEN2. Their operation is identical but each can be independently programmed with a range of different channels. -
Page 45: Group Scan Mode
In addition, if you press the PTT key at any time, the radio will always transmit on the Priority Channel. e.g. Scanning channels 1–8 with Priority Channel 20 in Group Scan CP30 INSTRUCTION MANUAL... - Page 46 OS/GS Operating in the Group Scan Mode In Group Scan mode, the CP30 scans all the channels programmed into the Group Scan memory with the selected Priority Channel being scanned every fifth channel. If a signal is heard on a scan channel, the scan will pause on that channel and remain there while the channel is busy and for 5 seconds after it has become clear, as long as there are no signals on the selected Priority Channel.
-
Page 47: Network Scan Mode
To Enable Network Scan and Select a CTCSS/DCS Tone MENU Hold the key to access the menu. The last selected menu item will be displayed. Rotate the Channel Selector knob or press the buttons until NETSCN is displayed. CP30 INSTRUCTION MANUAL... - Page 48 IMPORTANT: If adding channels to your Network Scan, please consider the following: The transmitter on your radio is inhibited on channels 22, 23 and channels 61, 62, 63 as required by the ACMA. These channels are therefore unsuitable for use as Network Scan channels. CP30 INSTRUCTION MANUAL...
- Page 49 The other radios scanning in the group will then locate the new channel, allowing the conversation to continue seamlessly without any input from the user. CP30 INSTRUCTION MANUAL...
- Page 50 PRI1 or PRI2 key. The Network Scan will be cancelled, and the radio will jump straight to the selected Priority Channel. When your conversation has finished, press the SCAN key to restore the Network Scan. OS/GS CP30 INSTRUCTION MANUAL...
-
Page 51: Ctcss And Dcs
CTCSS Tone Set Compatibility The GME CTCSS tone set comprises a table of 50 tones made up of the standard CCIR-38 Tone Set plus an additional 12 tones added to the end. If communicating with other brands of radios that only use the CCIR-38 tone set, you should select from one of the first 38 tones to ensure compatibility with these models. - Page 52 (DCS) icon should be visible on that If CTCSS/DCS tones are set to ‘OFF’, any attempt to activate the Silent mode will be ignored. channel. 2. Hold the Squelch key. The (DCS) or (CTCSS) icon will disappear from that channel. CP30 INSTRUCTION MANUAL...
- Page 53 CTCSS/DCS codes while the channel is busy. Press for DCS tones or CTCSS tones. When the correct code is selected, the mute will open and you will be able to hear the signal in the speaker. CP30 INSTRUCTION MANUAL...
-
Page 54: Selcall
Each radio is identifiable by its own SelCall Ident allowing it to be called either individually or as part of a group. If your CP30’s Ident is called by another radio, your radio will alert you to the call. If you are unavailable when the call is received, the callers Ident will be displayed on your radio allowing you to call them back on your return. -
Page 55: Call Menu
The Ident will flash 3 times to confirm it has been saved. MENU To edit the Alpha Name, briefly press to toggle to the Alpha mode then hold MENU . The left-hand character will be flashing. CP30 INSTRUCTION MANUAL... - Page 56 Repeat steps 5, 6 & 7 to enter the desired characters or numbers into the field. Hold MENU to save. The field will flash 3 times to confirm it has been saved. to return to the CALL sub-menu. Press CALL LOCK Press again to return to normal operation. CALL LOCK CP30 INSTRUCTION MANUAL...
- Page 57 The field will flash 3 times to confirm it has been saved. 11. Press again to return to normal operation. to return to the CALL sub-menu. Press CALL LOCK Press again to return to normal operation. CALL LOCK CP30 INSTRUCTION MANUAL...
- Page 58 LOCK Rotate the Channel Selector knob or press the keys to cycle to the DIAL option then press to select. MENU The last sent or received SelCall Ident will be displayed with the right- hand digit flashing. CP30 INSTRUCTION MANUAL...
-
Page 59: Receiving A Selcall
If the incoming SelCall is from a person in your contact list, you can choose to display either their Ident or their name on the LCD. Displaying their name makes it much easier to identify them from other contacts. CP30 INSTRUCTION MANUAL... - Page 60 PRO key may have a different operation. In this case follow the steps below to switch between the Alpha and Ident modes. The quiet mode mutes the CP30’s receiver to prevent any incoming signals from being heard in the speaker until your SelCall Ident is received. This allows you to Press to enter the CALL Menu.
- Page 61 1. Select any channel that has been tagged for Quiet operation. will be visible. 2. Briefly press the key. will change to all channels tagged for Quiet operation will now be open to all incoming signals. CP30 INSTRUCTION MANUAL...
-
Page 62: Scanning In Quiet Mode
Scanning while in the quiet mode allows you to monitor a group of Quiet channels or a combination of Quiet and Open channels. NOTE: For Open and Group Scanning only. Your radio cannot receive SelCalls while using Network Scan. CP30 INSTRUCTION MANUAL... - Page 63 Ident or Alpha Name will be displayed. The channel will now be open for normal communications. TIP: To ensure reliable SelCall detection when scanning in the Open Scan mode, it is recommended that you restrict the number of channels in the Scan group to less than 20. CP30 INSTRUCTION MANUAL...
-
Page 64: Group Calling
Receiving a Group call is identical to receiving a normal SelCall except that the alarm sound is a double beep instead of the normal single beep. The caller’s Ident or Alpha Name appears on the display in the usual way. CP30 INSTRUCTION MANUAL... -
Page 65: Conserving Your Battery Power
5 seconds of inactivity (i.e. no transmission or reception). As soon as a signal is received or any keys are pressed, the CP30 will wake up again. This sleep function is automatic and by itself can greatly extend the battery life in standby mode by many hours. -
Page 66: Cp30 Menu Tree
CP30 MENU TREE Busy Lockout Roger Beep Power Save LCD Backlight Beeps Channel Announce DW/TW Dynamic Volume Control SQL Level Display Audio Boost Recall Power Save Microphone Gain Beep Narrowband Filter Audio Boost Pro Key Display Options S-Met Message Text... -
Page 67: Private And Receive-Only Channels
Alpha label to help identify that channel. Private (transmit) channels must be programmed using the Dealer Programmer (Contact your Authorised GME Commercial dealer). Receive only channels can be programmed through the radio’s menu. - Page 68 Auto setting for LCD backlight will turn it off after a few seconds of inactivity. Quiet mode If QUIET mode is selected, the CP30 will remain ‘muted’ on Quiet channels even if they are busy unless your SelCall Ident is received.
-
Page 69: Menu
MENU The CP30 Menu provides a convenient method of customising the radio’s functions and settings. To access the Menu: Hold the MENU key. The last selected Menu item will be displayed. Rotate the Channel Selector knob or press the keys to step through the various Menu items. - Page 70 On receive-only channels - displays N/A since there are no transmissions. • On CB and private channels - allows you to view the transmitter power setting. BSYLK: • On receive-only channels - displays OFF since there are no transmissions on the channel. CP30 INSTRUCTION MANUAL...
- Page 71 ADD is displayed. MENU Press to select. The CP30 will respond with ADD? and the next available receive-only channel number will be flashing. To cancel and exit without adding a receive-only channel: MENU Briefly press .
- Page 72 If the channel is a new receive-only channel, 403.000 is displayed otherwise the last entered frequency is displayed. NOTE: 403.000 MHz is the lowest frequency you can program into the CP30. MENU Hold the key to edit the frequency. The cursor will flash in the 10 MHz digit position.
- Page 73 Repeat the process to enter up to 6 characters for the desired name. MENU When the desired name is displayed, hold to save. The name will flash as it is saved. Press MENU to exit the menu. CP30 INSTRUCTION MANUAL...
- Page 74 If the channel is a CB or Receive-only channel and no tone is enabled under CTCSS/DCS in the main menu, CTCSOF is displayed. Otherwise, GLOBAL is displayed to indicate the channel is using the CTCSS/DCS tone defined under CTCSS/DCS in the main menu. CP30 INSTRUCTION MANUAL...
- Page 75 If the channel is a CB channel CB is displayed. If the channel is a Receive-only channel RXONLY is displayed. iii. If the channel is a Private channel PRIVATE is displayed. Press to exit the menu. MENU CP30 INSTRUCTION MANUAL...
- Page 76 Busy Lockout is enabled or is configured to follow the user configurable global setting. iii. If the channel is a Receive-only channel, OFF is displayed since the radio is unable to transmit on a Receive-only channel. Press MENU to exit the menu. CP30 INSTRUCTION MANUAL...
- Page 77 (Open1, Open2 or Group), select the Receive-only or Private SCAN channel then press and hold the key until the radio beeps. will be OS/GS displayed on that channel. For more details on scanning, see the section on ‘Scanning’ in this manual. CP30 INSTRUCTION MANUAL...
-
Page 78: Programmable Keys & Buttons
6 programmable keys that can be configured as shortcuts to frequently used features. All of the programmable keys are supplied with Default Key Settings as covered on Page 9. An Authorised GME Commercial dealer can over-ride these defaults with shortcuts to frequently used features that may better suit your commercial needs. - Page 79 (press). Emergency Button: This button is allocated for the Emergency / Duress feature which needs to be enabled by a GME Commercial dealer via the Dealer Programmer and can have 2 separate emergency functions (press/hold).
- Page 80 Channel Announce menu. Rotate the Channel Selector knob or press the keys to switch the Channel Announce setting ON or OFF. Press the MENU key to exit or wait a few seconds for the menu to time-out. CP30 INSTRUCTION MANUAL...
- Page 81 Press the programmed Dynamic Volume Control Menu key to access the Dynamic Volume Control menu. Rotate the Channel Selector knob or press the keys to select ON or OFF. Press the key to exit or wait a few seconds for the menu to time-out. MENU CP30 INSTRUCTION MANUAL...
- Page 82 Emergency NOTE: This feature is enabled via the programmer, contact your Authorised GME Commercial dealer. Press the programmed Emergency button, (Top-Red Button) to immediately send a designated Emergency SelCall transmission to other radios in your group. During this time your radio will sound an alarm and display EMERGENCY. The emergency SelCall transmissions will continue until cancelled by the Exit Emergency button.
- Page 83 NOTE: If the selected channel and the priority channel are the same, Dual Watch will not start and SCAN ERROR will be displayed. In this case please select another channel. CP30 INSTRUCTION MANUAL...
- Page 84 OFF on the selected channel. This will TAG or UNTAG the selected channel for Quiet SelCall operation. Select ON to tag the selected channel. • is displayed on the selected channel • Select OFF to un-tag the selected channel. disappears from the selected channel. Channel is un-tagged Channel is tagged CP30 INSTRUCTION MANUAL...
- Page 85 Press the programmed Recall Channel key to immediately recall to a preset channel. The recall channel may have been saved using the Set Channel To Key option above or may have been preset by the dealer software. CP30 INSTRUCTION MANUAL...
- Page 86 RSSI Press the programmed RSSI key to temporarily display the incoming signal strength in dBm in the area below the channel display. Press any key to return to the normal display. CP30 INSTRUCTION MANUAL...
- Page 87 Silent ON enables the Silent mode to allow CTCSS/DCS control of your selected channel. When enabled, your radio remains quiet to all incoming signals except those that are using the same CTCSS or DCS code as your radio. CP30 INSTRUCTION MANUAL...
- Page 88 Press the programmed Subtone key to access the CTCSS/DCS menu. Rotate the Channel Selector knob or press the key to enable CTCSS or DCS and select a suitable tone. • Rotate the Channel Selector knob clockwise or press the to select CTCSS tones 01 to 50. CP30 INSTRUCTION MANUAL...
- Page 89 SelCall Alpha Toggle View a SelCall contact as either a numeric Ident or an alpha name. Press the programmed SelCall Alpha Toggle key to switch the SelCall Alpha setting ON or OFF. CP30 INSTRUCTION MANUAL...
- Page 90 • When the squelch is closed, SQLCH CLS will appear and the receiver will remain quiet. Press the key to exit or wait a few seconds for the menu to time-out. MENU CP30 INSTRUCTION MANUAL...
- Page 91 At each key press the radio will display 5W, 1W or 100MW. When 5W is selected the radio will transmit at maximum power. When 1W is selected the icon is displayed. When 100mW is selected the icon is displayed. 100mW CP30 INSTRUCTION MANUAL...
- Page 92 Rotate the Channel Selector knob or press the key to cycle the Transmitter Power. The radio will display 5W, 1W or 100MW. MENU Press the key to exit or wait a few seconds for the menu to time-out. CP30 INSTRUCTION MANUAL...
-
Page 93: Menu Options
Specify Type of Channel NAME Name an RX-only Channel View the name of a CB Channel RXFRQ Receive Frequency CHAN Channel TXFRQ Transmit Frequency RXTONE Receive Tone TXTONE Transmit Tone TXPWR Transmit Power BSYLK Busy Lockout SelCall SelCall CP30 INSTRUCTION MANUAL... -
Page 94: Ctcss Tone Frequencies
118.8 186.2 177.3 79.7 123.0 192.8 183.5 82.5 127.3 203.5 189.9 85.4 131.8 210.7 196.6 88.5 136.5 218.1 199.5 91.5 141.3 225.7 206.5 94.8 146.2 233.6 229.1 97.4 151.4 241.8 254.1 100.0 156.7 250.3 103.5 162.2 69.4 CP30 INSTRUCTION MANUAL... -
Page 95: Dcs Codes
DCS CODES DCS CODE DCS CODE DCS CODE DCS CODE DCS CODE DCS CODE 10 1 10 2 1 14 1 15 CP30 INSTRUCTION MANUAL... -
Page 96: Uhf Cb Operating Frequencies
Telemetry I SelCall use only. Voice transmission is inhibited as required by AS/NZS4 365.2011 Guard band channel. Transmission is inhibited as required by AS/NZ 4365.2011 Repeater input channesl (Duplex) Repeater output channels (Duplex) Officially designated call channel Road channel Caravan and motorhome 4WD I Offroad CP30 INSTRUCTION MANUAL... -
Page 97: Cp30 Specifications
18 h / 21 h / 22 h (5 W, power saving OFF / LO / HI) 24 h / 33 h / 34 h (1 W, power saving OFF / LO / HI) Operating Time: 30 h / 49 h / 52 h (100 mW, power saving OFF / LO / HI) CP30 INSTRUCTION MANUAL... - Page 98 CP30 SPECIFICATIONS (CONT.) TRANSMITTER High: 5 W RF Output: Low: 1 W Ultra-Low: 100 mW Frequency Stability: ± 2.5 PPM Modulation: Spurious Emission: < -34 dBm Adjacent Channel Power: < -67 dBm Maximum Deviation: ± 2.5 kHz Audio Harmonic Distortion: 0.4% @ 1kHz / 1.5kHz Deviation...
- Page 99 -20° C to +60° C Ingress Protection: IP67 (dust tight and waterproof) Accessory Connector: GME 3.5 mm / 2.5 mm stereo jack NOTE: All values are typical unless otherwise stated and are subject to change without notice or obligation. MIL-STD 810G...
-
Page 100: Gme Warranty Against Defects
GME WARRANTY AGAINST DEFECTS This warranty against defects is given by GME Pty Ltd ACN 000 346 814 (We, us, our or GME). Our contact details are set out in clause 2.7. This warranty statement only applies to products purchased in Australia. Please contact your local GME distributor for products sold outside of Australia. - Page 101 If so, they will email you a product RMA (Return Material Authorisation). Products that are authorised to be returned to GME must include the following: RMA form (Return Material Authorisation) A copy of your proof of purchase, the faulty product,...
- Page 102 3.1 This warranty will not apply in relation to: (a) Goods modified or altered in any way. (b) Defects and damage caused by use with non GME products. (c) Repairs performed other than by our authorised representative. (d) Defects or damage resulting from misuse, accident, impact or neglect.
Need help?
Do you have a question about the CP30 and is the answer not in the manual?
Questions and answers