Advertisement
Installation Instructions for WPO2 Series
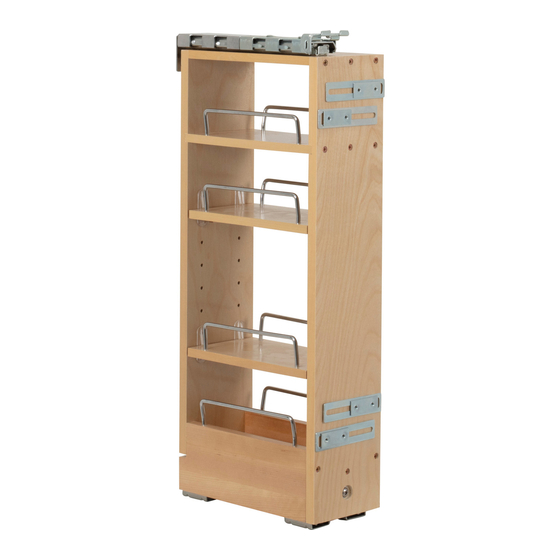
"No Wiggle" Wall Pullout Organizer
Important:
Before you begin, make sure you familiarize yourself with all
of the parts and fully read the instructions.
Customer Service:
A toll-free customer help line is available weekdays between
7:00 am and 6:00 pm Central Time at 800-463-0660.
Tools Needed:
Screw gun or Phillips screwdriver and tape measure.
NOTE: If screw gun has a clutch, set to lowest setting so as to not
over tighten and/or strip screws.
Parts Identification:
A
(1 pc.)
"No Wiggle"
Wall Pullout
Organizer Unit
B
(1 pc.)
Base Runner
G
Mechanism
C
(1 pc.)
Rear Support
Bracket
D
(4 pcs.)
#1/4-20 Truss
Head Machine
Screws
E
(4 pcs.)
#1/4 Washer
F
(4 pcs.)
#10 x 1/2 Pan
Head Phillips
Wood Screw
G
(5 pcs.)
#8 x 5/8" Flat
Head Phillips
Wood Screw
H
(3 pcs.)
#8 x 5/8" Pan
Head Phillips
Wood Screw
__
C
H
A
F
B
E
D
To watch the WPO2 installation
video, scan the QR code or visit
the link below:
https://delivr.com/2zu57
Step 1: Prepare Organizer for Installation
Remove the Organizer from Slide Base by releasing the
four (4) pre-installed screws. Keep these screws in a safe
place for later use.
Step 2: Slide Base Installation
Install the slide base from the inside of the wall cabinet's
base panel with the #10 wood screws.
After installation, pull out the slide base upper portion to
test and ensure smooth operation.
Advertisement
Table of Contents

Related Manuals for HARDWARE RESOURCES WPO2 Series


Summary of Contents for HARDWARE RESOURCES WPO2 Series
- Page 1 Installation Instructions for WPO2 Series “No Wiggle” Wall Pullout Organizer Important: To watch the WPO2 installation Before you begin, make sure you familiarize yourself with all video, scan the QR code or visit of the parts and fully read the instructions.
- Page 2 Step 3: Mark Rear Mounting Bracket Step 4: Install Rear Mounting Bracket Peel off the cover of the Apply inward force with a double-sided tape tool Peel off the double-sided tape on the rear bracket, and temporarily secure Organizer to the Slide Base with two After removing the organizer from the slide base, the rear (2) 5/16 machine screws.
Need help?
Do you have a question about the WPO2 Series and is the answer not in the manual?
Questions and answers