Table of Contents

Subscribe to Our Youtube Channel
Related Manuals for Grizzly T10460


Summary of Contents for Grizzly T10460
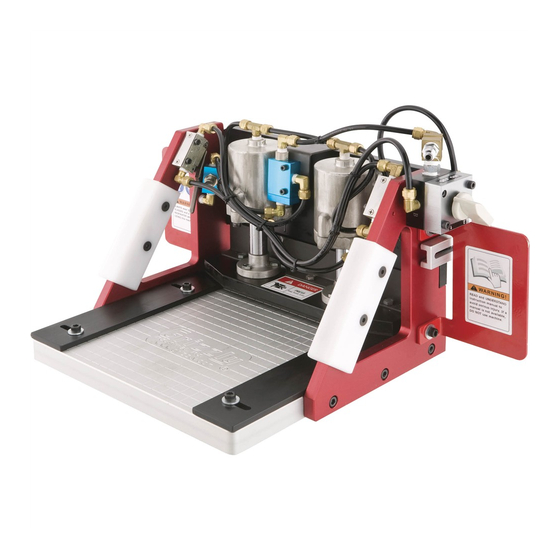
- Page 1 MODEL T10460, T10462 & T10464 PANEL SHAPING JIG OWNER'S MANUAL (For models manufactured since 01/12) WARNING: NO PORTION OF THIS MANUAL MAY BE REPRODUCED IN ANY SHAPE OR FORM WITHOUT THE WRITTEN APPROVAL OF GRIZZLY INDUSTRIAL, INC.
- Page 2 This manual provides critical safety instructions on the proper setup, operation, maintenance, and service of this machine/tool. Save this document, refer to it often, and use it to instruct other operators. Failure to read, understand and follow the instructions in this manual may result in fire or serious personal injury—including amputation, electrocution, or death.
-
Page 3: Table Of Contents
Table of Contents INTRODUCTION ..........2 SECTION 4: ACCESSORIES ......17 SECTION 5: MAINTENANCE ......18 SECTION 6: SERVICE ........18 SECTION 1: SAFETY ........5 SECTION 7: PARTS ........19 SECTION 2: SETUP ......... 8 WARRANTY & RETURNS ......25 SECTION 3: OPERATIONS ...... -
Page 4: Introduction
INTRODUCTION Manual Accuracy Contact Info your jig may not exactly match the manual Machine Description www.grizzly.com... - Page 5 Identification Figure 1. To reduce the risk of serious injury when using this machine, read and understand this entire manual before beginning any operations.
- Page 6 Machine Data Sheet Machine Data Sheet MODEL T10460, T10462, T10464 PANEL SHAPING JIG Model Number T10460 T10462 T10464 Product Dimensions Shipping Dimensions Pneumatic Construction...
-
Page 7: Section 1: Safety
SECTION 1: SAFETY For Your Own Safety, Read Instruction Manual Before Operating this Machine The purpose of safety symbols is to attract your attention to possible hazardous conditions. This manual uses a series of symbols and signal words intended to convey the level of impor- tance of the safety messages. - Page 8 DISCONNECTING POWER SUPPLY. GUARDS & COVERS. NEVER STAND ON MACHINE. APPROVED OPERATION. STABLE MACHINE. DANGEROUS ENVIRONMENTS. AWKWARD POSITIONS. ONLY USE AS INTENDED. UNATTENDED OPERATION. USE RECOMMENDED ACCESSORIES. MAINTAIN WITH CARE. CHILDREN & BYSTANDERS. CHECK DAMAGED PARTS. REMOVE ADJUSTING TOOLS. MAINTAIN POWER CORDS. SECURING WORKPIECE.
- Page 9 Additional Safety Instructions for Jig OPERATING MACHINERY. FEEDING WORKPIECE. STARTING MACHINE. SHOP SAFETY. DEPTH OF CUT. KICKBACK. SHAPING CONTOURED WORK. HAND POSITIONING. BLIND CUT WHEN POSSIBLE. SAFETY GUARDS. STACKED CUTS. TABLE SIZE. STOCK LENGTH/SHAPE. DISCONNECT AIR. AIR PRESSURE. STOCK CONDITION.
-
Page 10: Section 2: Setup
SECTION 2: SETUP Unpacking This jig presents seri- ous injury hazards to untrained users. Read through this entire man- ual to become familiar please call us immediately at with the controls and (570)546-9663. operations before using the jig! Otherwise, filing a freight claim can be difficult. Wear safety glasses dur- ing the entire setup pro- cess! - Page 11 Box 1: (Figures 2) Site Considerations " Shaper Table Size " Placement Location Figure 3 Figure 3. Figure 2. Children and visitors may be seriously injured if unsu- If you cannot find an item on this list, pervised around machinery. carefully check the jig and the packaging Lock entrances to the shop materials.
- Page 12 Attaching Guards Test Run Figure 4 Troubleshooting Page 20 To verify the jig runs correctly: Figure 4. Air Connection Figure 5 Quick-Disconnect In-Line Piping Oiler Fittings Filter Male Female Regulator (Optional) Your Tool Filter Water Lead-In Automatic Separator Hose Main Air Oiler (Optional) Supply Hose...
-
Page 13: Section 3: Operations
WE STRONGLY REC- OMMEND that you read books, review industry trade magazines, or get formal training before beginning any projects. Regardless of the content in this section, Grizzly Industrial will not be held liable for accidents caused by lack of training. - Page 14 Workpiece Basic Controls Inspection ON/OFF Control Valve Figure 6 Before shaping, inspect all workpieces for the following: Material Type: Foreign Objects: Figure 6. Clamping Switches Large/Loose Knots: both Wet or "Green" Stock: Excessive Warping: Figure 7.
- Page 15 Adjusting Airflow Adjustments Figure 8 Adjusting Clamp Height To adjust the cylinder bracket height: Figure 9 Figure 8. Figure 9. Important: The cylinder bracket must be fas- tened with the (6) M6-1 x 20 cap screws to operate safely.
- Page 16 Positioning Workpiece Template Mounting Bracket Figure 12 Figure 10 Figure 12. Installing Templates Figure 10. To install the rear fence: Figure 13 Figure 11 Figure 13. Figure 11. Note: To install the coping fences simply reverse the above steps.
- Page 17 Miter Bar Rub Collar Figure 16 Figure 14. Figure 16. Figure 14. Clamping Workpiece Figure 17 Always ensure that the jig base will clear the cutterhead or kickback could occur, caus- ing personal injury or property damage. Vertical Fence Figure 15 Figure 17.
- Page 18 Using Jig Tip: To prevent tear-out in the workpiece shape end grain first. Wood is less likely to tear while edge-shaping, so any tearout from end grain shaping can be removed. Use a sacrificial backing block between the workpiece and the coping fence as needed to further reduce tearout (see Figure 19).
-
Page 19: Section 4: Accessories
To minimize this risk, only install accessories recommended for this machine by Grizzly. NOTICE Refer to the newest copy of the Grizzly Catalog for other accessories available for this machine. Figure 23. H7274—Pressure Regulator T10461—T10460 Arched Door Templates... -
Page 20: Section 5: Maintenance
SECTION 5: MAINTENANCE Cleaning Always disconnect air to the jig before performing maintenance. Failure to do this may result in seri- ous personal injury. Schedule Lubrication Daily Check Weekly Maintenance SECTION 6: SERVICE Note: Please gather the serial number and manufacture date of your jig before calling. Troubleshooting... -
Page 21: Section 7: Parts
SECTION 7: PARTS T10460/T10462/T10464 Main Breakdown... - Page 22 BUTTON HD CAP SCR M5-.8 X 16 PT10462016 SQUARE TEMPLATE 16" (T10462) PT10460040 SLIDING TABLE SUPPORT PT10464016 SQUARE TEMPLATE 24" (T10464) PT10460041 BASE 11-1/2 X 12" (T10460) PT10460017 LEFT TEMPLATE HOLDER PT10462041 BASE 11-1/2 X 16" (T10462) PCAP01M CAP SCREW M6-1 X 16 PT10464041 BASE 11-1/2 X 24"...
- Page 23 T10460/T10462/T10464 Pneumatic REF PART # DESCRIPTION REF PART # DESCRIPTION PT10460009 CYLINDER ASSEMBLY PT10460110 DOUBLE SWITCH PT10460101 T-CONNECTOR 1/8" NPT X 6 X 6MM PT10460111 L-CONNECTOR 1/4" X 6MM PT10460102 MALE CONNECTOR 1/8" NPT X 6MM PT10460112 BLOCK 1/4" NPT X 1/4" X 1/4"...
- Page 24 Safety labels help reduce the risk of serious injury caused by machine hazards. If any label comes off or becomes unreadable, the owner of this machine MUST replace it in the original location before resuming operations. For replacements, contact (800) 523-4777 or www.grizzly.com.
- Page 25 WARRANTY CARD The following information is given on a voluntary basis. It will be used for marketing purposes to help us develop better products and services. Of course, all information is strictly confidential. Note: We never use names more than 3 times. _____________________________________________________________________ _________________________________________________________________________________ _________________________________________________________________________________...
-
Page 27: Warranty & Returns
WARRANTY & RETURNS 1 year... - Page 28 ® Buy Direct and Save with Grizzly – Trusted, Proven and a Great Value! ~Since 1983~ Visit Our Website Today For Current Specials! ORDER 24 HOURS A DAY! 1-800-523-4777...
Need help?
Do you have a question about the T10460 and is the answer not in the manual?
Questions and answers