Table of Contents
Advertisement
Quick Links
Advertisement
Table of Contents

Related Manuals for amiad Filtomat M102C


Summary of Contents for amiad Filtomat M102C
- Page 1 AMIAD Water Systems Ltd. Filtomat M100 Series Electronically Controlled Models: M102C, M103C Serial number: Order number: Catalogue number: Filtration degree: Tested by: Installation, Operation and Maintenance Instructions Ref: 910101-000349 / 09.2020 Original Instructions...
- Page 2 . Amiad assumes that all users understand risks involved within this file and/or its attached materials. This document is given in good faith and is not intended to impose any obligation to Amiad. While every effort has been made to ensure the information in this manual is accurate and complete, we would appreciate if you can bring any errors or omissions to the knowledge of Amiad or consult Amiad experts or its authorized representatives if you have any questions.
-
Page 3: Table Of Contents
Parts Drawing Section 2 .......................... 26 PARTS SCHEDULE Section 3 ........................27 Parts Drawing Section 3 .......................... 28 Amiad Limited Warranty ........................29 With any inquiry please quote the Filter Serial Number, located on the filter housing. M102C, M103C Electronically Controlled 910101-000349 / 09.2020... -
Page 4: Specifications
Specifications General Maximum flow rate 176USgpm Consult manufacturer for optimum flow depending on filtration degree & water quality. Min. working pressure 2.0bar 30psi Or lower if pressure is increased for flushing Max. working pressure 8bar 115psi Filter area Total Filtration 1300cm 202in Area... -
Page 5: Safety Instructions
Always observe standard safety instructions and good engineering practices whilst working in the filter’s vicinity. Use the filter only for its intended use as designed by Amiad, any misuse of the filter may lead to undesired damage and may affect your warranty coverage. -
Page 6: Commissioning
Operation procedures exactly as described in this manual. Commissioning the filter should be done by an authorized Amiad technician, do not attempt to commission the filter unaccompanied since this may lead to undesired damage and may affect your warranty coverage. -
Page 7: Maintenance
Maintenance Before any maintenance or non-regular operation please read the following: Servicing the filter should be done only by technicians authorized by Amiad. Disconnect the filter from the power supply and lock the Main Power Switch. Disconnect the compressed air supply, release the residual pressure and lock the Pneumatics Main Valve. -
Page 8: Dimensional Drawing M102C Flange
Dimensional Drawing M102C Flange M102C, M103C Electronically Controlled 910101-000349 / 09.2020 Page 8 of 30... -
Page 9: Dimensional Drawing M102C Thread
Dimensional Drawing M102C Thread M102C, M103C Electronically Controlled 910101-000349 / 09.2020 Page 9 of 30... -
Page 10: Dimensional Drawing M103C Flange
Dimensional Drawing M103C Flange M102C, M103C Electronically Controlled 910101-000349 / 09.2020 Page 10 of 30... -
Page 11: Dimensional Drawing M103C Thread
Dimensional Drawing M103C Thread M102C, M103C Electronically Controlled 910101-000349 / 09.2020 Page 11 of 30... -
Page 12: Introduction
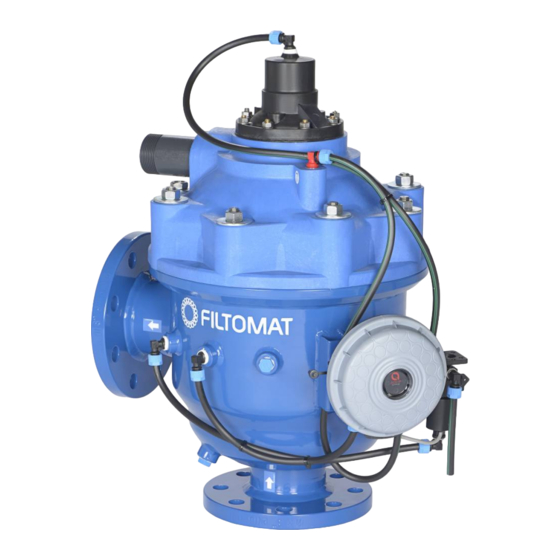
The Electronically Controlled FILTOMAT M100 is a sophisticated, yet easy-to-operate automatic filter, with a self- cleaning mechanism driven by a hydraulic turbine and controlled by Amiad’s Electronic controller. The FILTOMAT M100 is designed to work with various types of screens with filtration degrees from 500 to 80 micron, and is available in 2"... -
Page 13: Self-Cleaning Cycle
Self-Cleaning Cycle The automatic self-cleaning cycle described below takes several seconds and does not interrupt the supply of process water. Water flows from the inlet through the coarse and fine screens to the outlet. At a pre-set pressure differential (0.5 bar ; 7 psi) the controller activates the piston and opens the flushing valve. -
Page 14: Installation
Installation Read these instructions carefully before installing and operating the filter. Design Recommendations If a prolonged pipeline fill time causes a temporary high flow and low pressure condition, it is recommended that you install a pressure sustaining valve downstream of the filter. The pressure-sustaining valve will ensure a controlled fill-up of the line. -
Page 15: Preparations
Preparations Before using the filter for the first time, go through the following check-list carefully. No special training is required to carry out these activities. Check that the upstream pressure at the filter inlet is more than 2bar (30psi) during the rinse cycle. ... -
Page 16: Maintenance
Maintenance NOTE: Depressurize the filter before maintenance (close inlet, and then outlet valve). Checking the Filter 1. Remove the filter cover by unscrewing the fastening nuts. 2. Extract the fine screen and clean if necessary. Cleaning may be performed by hosing the screen from outside-in, and/or with a nylon brush. -
Page 17: Servicing
Servicing NOTE: Depressurize the filter before maintenance (close inlet, and then outlet valve). Draining the Filter 1. Close the inlet valve 2. Close the outlet valve. 3. Open the drain valve to release pressure. To avoid water draining onto the area around the filter, install a drain hose onto the drain valve. - Page 18 3. Using the special tool, pull the screen out of the housing. (CAT. NO. 710103-001107) Removing the Screen 4. Reinstall by lubricating O-ring seals with silicone grease and pushing the filter screen into the housing. The screen assembly should be slightly below the surface of the housing as in the figure below. Screen Seated Properly M102C, M103C Electronically Controlled 910101-000349 / 09.2020...
-
Page 19: Servicing The Suction Scanner
Servicing the Suction Scanner 1. Open the filter housing as described previously. 2. To replace a nozzle, remove the two bolts and nuts holding the nozzle and install a new nozzle, noting that the inlet of the nozzle is aligned over the outlet hole of the suction scanner tube. Remove bolts and nuts to replace nozzle... - Page 20 6. Take care that rubber seals and valve parts face the correct direction when assembling. Valve Parts Disassembled 7. Notice the position of the large housing cover gasket. The conical surface faces the other half of the housing. Conical surface Housing Gasket M102C, M103C Electronically Controlled 910101-000349 / 09.2020...
-
Page 21: Servicing The Piston
Servicing the Piston 1. Remove the nuts holding the piston housing, and carefully open the housing so that the spring does not jump out. Piston Housing Open 2. Note the directions the parts face before reassembling. Piston Assembly M102C, M103C Electronically Controlled 910101-000349 / 09.2020 Page 21 of 30... -
Page 22: Parts Schedule Section 1
Parts Schedule Section 1 CAT. NUMBER Description Qty. MATERIAL 710105-xxxxxx M102C Filter Housing RAL5010 PLOYESTER Various 710105-xxxxxx M103C Filter Housing RAL5010 PLOYESTER Various 700101-000614 MOLDED WEAVEWIRE SCREEN S/ST316L 1300SQ.CM 130MIC M100 NBR SEALS 770102-000217 DOWTY O-RING SEAL 674 ID=208.92MM TH=6.99MM NBR 55 SHORE NO FLASH 770104-000156 HYDRAULIC SEAL NATURAL 55 SHORE LID M102-104 S/ST 316... -
Page 23: Parts Drawing - #1
Parts Drawing - #1 M102C, M103C Electronically Controlled 910101-000349 / 06.2019 Page 23 of 30... -
Page 24: Parts Drawing - #2
Parts Drawing - #1 (cont..) M102C, M103C Electronically Controlled 910101-000349 / 06.2019 Page 24 of 30... -
Page 25: Parts Schedule Section 2
Parts Schedule Section 2 CAT. NUMBER Description Qty. MATERIAL 700190-001727 Cover Assembly M102C/3C(L)/4C Various 710103-000816 Cover 8 Holes M10X(X)(L) 770106-000028 DIAPHRAGM M102C/104C NATURAL RUBBER 710101-000703 Spring Guide M102/3(B)(C) S/ST 316L 760107-000070 Spring S/St302 S/ST 302 710101-000702 Plug Guide Spring M102/3 S/ST 316L 710103-000984 Diaphragm Cover M102C/104C... -
Page 26: Parts Drawing Section 2
Parts Drawing Section 2 6.21 6.18 6.13 6.18 6.14 6.15 6.22 6.20 6.16 6.19 6.11 6.19 6.17 6.10.1 6.10 6.10 6.11 6.10.1 6.12 M102C, M103C Electronically Controlled 910101-000349 / 06.2019 Page 26 of 30... -
Page 27: Parts Schedule Section 3
PARTS SCHEDULE Section 3 CAT. NUMBER Description Qty. MATERIAL 700190-001724 Dirt Collector Assembly 3 Nozzles M102C/M103C Various 700190-001739 Rotor Assembly M102C/104C Verious 4.1.1 710103-001349 Bearing Lower Male S/ST316 MX02L/3/4(P) S/ST 316 4.1.2 710103-001088 Housing Bearing Rotor Brass Brass 700190-001725 Dirt Collector Sub Asse,bly (3N)Std M102/3 Verious 4.2.1 710103-001096... -
Page 28: Parts Drawing Section 3
Parts Drawing Section 3 4.1.1 4.1.2 4.2.8 4.2.7 4.2.6 4.2.4 4.2.3 4.2.1 4.2.5 4.2.3 4.2.5 4.2.3 4.2.2 M102C, M103C Electronically Controlled 910101-000349 / 06.2019 Page 28 of 30... -
Page 29: Amiad Limited Warranty
In no event shall Amiad be liable to the Buyer or any third party for any damages to property, or for any intangible or economic loss, including loss of profits, loss of customers or damage to reputation, for any damages, including indirect, special, consequential damages, or punitive damage arising out of or in connection with this Warranty, or arising out of or in connection with the product's performance or failure to perform, even if it has been advised of the possibility of such damages. - Page 30 Manufacturer Amiad Water Systems Ltd. D.N. Galil Elyon 1, 1233500, Israel. Tel: +972 4690 9500 | Fax: +972 48141159 | Email: info@amiad.com European Authorised Representative for CE Obelis s.a. Bd Général Wahis 53, 1030 Brussels, Belgium. Tel: +(32) 2732 5954 | Fax: +(32) 27326003 | Email: mail@obelis.net...
Need help?
Do you have a question about the Filtomat M102C and is the answer not in the manual?
Questions and answers