Advertisement
Available languages
Available languages
Quick Links
H-8966, H-8967
H-9652, H-10192
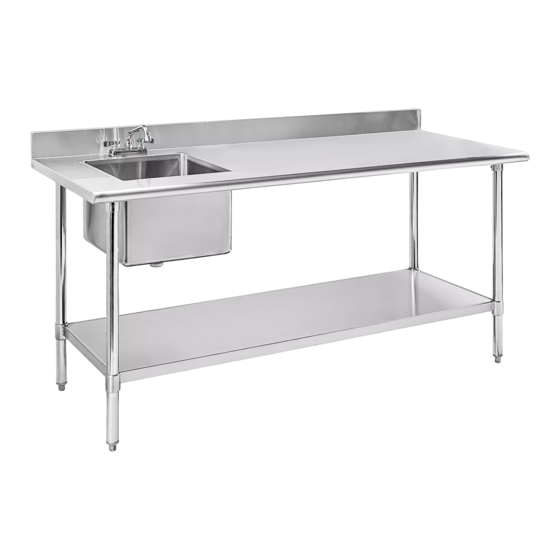
STAINLESS STEEL
WORKTABLE
WITH SINK
TOOLS NEEDED
5/32" Allen Wrench
(included)
Tongue and
Groove Pliers
Faucet Deck
Plastic Gasket x 1
8" Faucet x 1
Rubber Gasket x 2
PAGE 1 OF 12
1-800-295-5510
uline.com
Undershelf x 1
Faucet Kit
Faucet Deck x 1
Nut with Washer x 2
PARTS
Tabletop x 1
Set Screw x 16
(x 24 for H-10192)
Drain Basket x 1
Drain Basket
Rubber Gasket x 1
Para Español, vea páginas 5-8.
Pour le français, consulter les pages 9-12.
Leg with
Adjustable Feet x 4
(x 6 for H-10192)
Drain Basket Kit
Drain Basket
Lock Ring x 1
Drain Basket
Paper Gasket x 1
0123 IH-8966
Advertisement

Related Manuals for U-Line H-8967


Summary of Contents for U-Line H-8967
- Page 1 Para Español, vea páginas 5-8. Pour le français, consulter les pages 9-12. H-8966, H-8967 1-800-295-5510 H-9652, H-10192 uline.com STAINLESS STEEL WORKTABLE WITH SINK TOOLS NEEDED 5/32" Allen Wrench (included) Tongue and Groove Pliers PARTS Tabletop x 1 Leg with Undershelf x 1...
-
Page 2: Unit Assembly
UNIT ASSEMBLY With the undershelf on its side, push the legs through the collars to the desired height. To ensure exact height, mark desired height on each leg with magic marker or grease pencil. (See Figure 1) NOTE: Each leg must be at the same height or shelf collars could fail. - Page 3 DRAIN AND FAUCET ASSEMBLY Remove drain basket from packaging and Drain Basket Figure 5 disassemble. Insert drain basket into hole in the center of the sink with threads protruding underneath top. Place drain basket rubber gasket, paper gasket and lock ring underneath sink onto drain basket threads and turn clockwise to secure basket to sink.
-
Page 4: Plumbing Connections
PLUMBING CONNECTIONS • To connect sink drain basket to drain, you will need • Hot and cold water supply lines require 1/2" outer a 1½" diameter P-trap (PVC, stainless steel or chrome). diameter piping. Recommended material is copper or cross-linked polyethylene (PEx). 1-800-295-5510 uline.com PAGE 4 OF 12... - Page 5 H-8966, H-8967 800-295-5510 H-9652, H-10192 uline.mx MESA DE TRABAJO DE ACERO INOXIDABLE CON TARJA HERRAMIENTAS NECESARIAS Llave Allen de 5/32" (incluida) Pinzas de Extensión PARTES 1 Cubierta 1 Repisa Inferior 16 Tornillos de Sujeción 4 Patas con Bases (24 para H-10192)
- Page 6 ENSAMBLE DE LA UNIDAD Con la repisa inferior de lado, inserte las patas a través de los aros a la altura deseada. Para garantizar la altura exacta, marque la altura deseada en cada pata con un marcador de agua o un lápiz de cera. (Vea Diagrama 1) NOTA: Cada pata debe estar a la misma altura o los aros de las repisas podrían dañarse.
- Page 7 ENSAMBLE DEL DESAGÜE Y LLAVE Retire la canasta de desagüe del empaque y Canasta de Desagüe Diagrama 5 desármela. Inserte la canasta en el orificio central de la tarja con las roscas sobresaliendo debajo de la cubierta. Coloque el empaque de goma, de papel y el anillo de cierre de la canasta de desagüe debajo de la tarja sobre las roscas de la canasta y gire en sentido de las manecillas del reloj...
-
Page 8: Conexiones De Plomería
CONEXIONES DE PLOMERÍA • Para conectar la canasta de desagüe de la tarja al • Las líneas de suministro de agua caliente y fría desagüe, necesitará una trampa para lavabo de requieren tubería de 1.2 cm (1/2") de diámetro 3.8 cm (1½") de diámetro (PVC, acero inoxidable o exterior. - Page 9 H-8966, H-8967 1-800-295-5510 H-9652, H-10192 uline.ca TABLE DE TRAVAIL EN ACIER INOXYDABLE AVEC ÉVIER OUTILS REQUIS Clé Allen de 5/32 po (inclus) Pince multiprise PIÈCES Surface de table (plateau) x 1 Tablette inférieure x 1 Vis de réglage x 16...
- Page 10 MONTAGE DE L'ENSEMBLE 1. Avec la tablette inférieure posée sur le côté, poussez les montants à travers les colliers jusqu'à la hauteur souhaitée. Pour vous assurer d'une hauteur exacte, marquez la hauteur souhaitée sur chacun des montants à l'aide d'un crayon-marqueur ou d'un crayon gras.
- Page 11 INSTALLATION DU DRAIN ET DU ROBINET Retirez la crépine de l'emballage et démontez-la. Crépine Figure 5 Insérez la crépine dans le trou central de l'évier en laissant dépasser les fils sous la partie supérieure. Placez les joints en caoutchouc et en papier pour crépine, ainsi que la bague de serrage sur le filetage de la crépine sous l’évier.
-
Page 12: Raccords De Plomberie
RACCORDS DE PLOMBERIE • Pour raccorder la crépine de l'évier au drain, il vous • La tuyauterie d'alimentation en eau chaude et froide faut un siphon en P de 3,8 cm (1½ po) de diamètre doit avoir un diamètre extérieur de 1,2 cm (1/2 po). (en PVC, en acier inoxydable ou chromé).
Need help?
Do you have a question about the H-8967 and is the answer not in the manual?
Questions and answers