Table of Contents
Advertisement
Quick Links
PART #: F-411RPL-AT1-EU
US PATENT NUMBERS: [7,249,386 B2] [D507,769 S]
MANDATORY – LEAVE THIS MANUAL WITH LIFT OWNER
Check entire box and inside all packing materials for parts. Before beginning assembly, read the
instructions and identify parts using the figures and parts listed in this document. It is critical that all
parts be carefully inspected by the installer prior to installation to ensure that no damage occurred in
transit and that a damaged part is not used. If any damage occurred in transit, Aqua Creek Products,
LLC must be notified within three days of receipt of unit. Proper installation cannot be overstressed, as
an improper installation voids Aqua Creek's warranty and may affect the safety of the user.
9889 GARRYMORE LANE
MISSOULA, MT 59808
1-888-687-3552
FAX: 406-549-2602
1.
READ AND FOLLOW ALL INSTRUCTIONS. LIFT SAFETY CAN ONLY BE ENSURED IF THE LIFT
IS INSTALLED AND OPERATED PROPERLY – AS PER THESE INSTRUCTIONS.
2.
WARNING- TO REDUCE RISK OF INJURY, DO NOT PERMIT CHILDREN TO USE THIS
PRODUCT UNLESS THEY ARE CLOSELY SUPERVISED AT ALL TIMES.
3.
WARNING- DO NOT PERMIT CHILDREN TO PLAY ON THIS PRODUCT.
4.
WARNING- NEVER APPLY DIRECT WATER PRESSURE TO ELECTRONIC COMPONENTS.
5.
DO NOT USE THE RANGER LIFT FOR WATER-DRAFTS OVER 30.5cm (DECK TO WATERLINE).
6.
NEVER OPERATE THIS LIFT UNDER LOAD WITH NO WATER (DRY POOL).
7.
WARNING – FOR SAFETY REASONS NEVER SWIM ALONE.
8.
SAVE A COPY OF THESE INSTRUCTIONS.
AQUA CREEK, LLC 2016
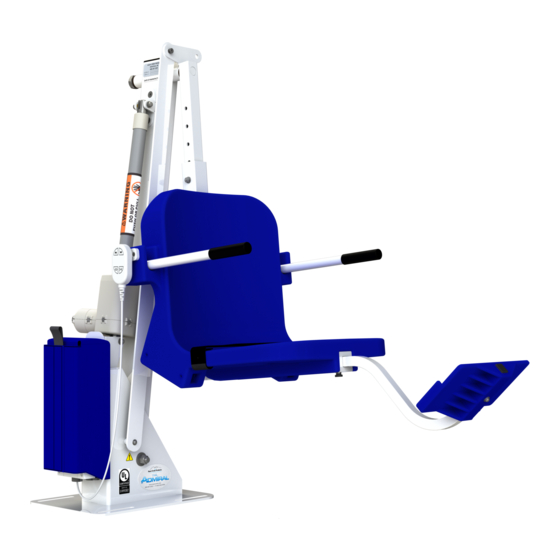
RANGER-AT LIFT
350 LB. [158 kg] MAXIMUM CAPACITY
- READ CAREFULLY-
WARNING
IMPORTANT SAFETY INSTRUCTIONS
8/29/16
Advertisement
Table of Contents

Related Manuals for Aqua Creek Products Ranger F-411RPL-AT1-EU


Summary of Contents for Aqua Creek Products Ranger F-411RPL-AT1-EU
- Page 1 If any damage occurred in transit, Aqua Creek Products, LLC must be notified within three days of receipt of unit. Proper installation cannot be overstressed, as an improper installation voids Aqua Creek’s warranty and may affect the safety of the user.
- Page 2 RANGER-AT LIFT TABLE OF CONTENTS PAGE DESCRIPTION PACKING LIST ADA INSTALLATION GUIDELINES ANCHOR INSTALLATION; CORE-DRILL RETRO-FIT ANCHOR INSTALLATION; SAW-CUT RETRO-FIT ANCHOR INSTALLATION; NEW CONSTRUCTION RANGER-AT LIFT ASSEMBLY INSTRUCTIONS 24V BATTERY OP & INSTALL INSTRUCTIONS BATTERY MAINTENANCE RANGER-AT LIFT OPERATING INSTRUCTIONS 13-15 RANGER-AT LIFT HEADREST (OPTIONAL) 16-17...
- Page 3 RANGER-AT LIFT 1. RANGER-AT LIFT W/ FOOTREST 2. 24V BATTERY 3. BATTERY CHARGER W/ MOUNTING PLATE & POWER CORD 4. SAFETY BELT 5. HANDSET REMOTE...
- Page 4 INSTALLATION: ADA GUIDELINES ADA REQUIREMENTS: The RANGER-AT LIFT is designed and manufactured to be 100% ADA compliant. But for the installed lift to be 100% compliant the installation must meet the requirement for CLEAR DECK SPACE as shown in the diagram to the left. To be compliant, install the lift at 37cm minimum from the pool edge, and make sure the deck has the required CLEAR DECK SPACE as shown.
-
Page 5: Anchor Installation: Core-Drill Retro-Fit
ANCHOR INSTALLATION: CORE-DRILL RETRO-FIT NOTE: FOR DECKS 6” [15.2cm] THICK, 2500PSI STRENGTH MINIMUM Required Materials & Tools: Core drill and 1-1/2” core drill bit Tape Measure Marking Pen suitable for writing on concrete Hammer Cold Chisel Torpedo Level High Strength 2 part construction epoxy* Black electrical tape (Optional) Masking tape *Aqua Creek recommends either Hilti™... - Page 6 Allow for a way to bond at least one of the anchor inserts according to your local code requirements. This is typically accomplished with 8-AWG solid-copper wire attached to the pool’s bonding grid. For more information see NEC Article 680.26. Before putting epoxy into the holes and setting the anchor inserts, you will want to test fit the anchor inserts in the pre-drilled holes first to make sure they line up properly.
-
Page 7: Anchor Installation: Saw-Cut Retro-Fit
ANCHOR INSTALLATION: SAW-CUT RETRO-FIT Required Materials & Tools: Concrete saw with Diamond blade Tape Measure 4’ long Straight edge or chalk line Sledge Hammer Cold Chisel Torpedo Level Sting line Concrete & Concrete tools #4 Rebar 1) Locate the anchor plate, four (4) anchor inserts with nuts and mounting hardware). -
Page 8: Anchor Installation: New Construction
ANCHOR INSTALLATION: NEW CONSTRUCTION For installations where a new deck is being poured, or where a dedicated pad is being poured just for the pool lift, the concrete must satisfy the requirements outlined on page 4. For convenience here are the requirements again; YOUR POOL DECK MUST BE AT LEAST 122cm LONG BY 122cm WIDE BY 15.2cm THICK. - Page 9 RANGER-AT LIFT - ASSEMBLY INSTRUCTIONS Attach Seat belt to the seat as shown. Install the RANGER-AT LIFT onto the four (4) anchors using the supplied 1/2 x 1-1/2” stainless steel hex-head bolts and 1/2" stainless steel flat washers. Make sure all bolts are tight before using the lift.
- Page 10 24V BATTERY SYSTEM OPERATING AND INSTALLATION INSTRUCTIONS The RANGER-AT Lift Battery system comes with a 24v sealed rechargeable battery, wall mount charging unit (with mounting bracket), control box, and a waterproof handheld controller. The control box is mounted to the RANGER-AT Lift has a plug- in socket for both the actuator and the handheld controller.
-
Page 11: Battery Maintenance
BATTERY MAINTENANCE 1. RECHARGE THE BATTERY AS OFTEN AS POSSIBLE. The battery power unit is a sealed lead acid battery pack. Frequent recharges will prolong the battery life and maintain a high cold amperage capacity. THE BATTERY CAN BE STORED ON THE CHARGER WHEN NOT IN USE. - Page 12 RANGER-AT LIFT OPERATING INSTRUCTIONS: NOTE: CHECK ALL NUTS & BOLTS FOR TIGHTNESS AND FOR WORN PARTS BEFORE EACH USE. NEVER OPERATE THE LIFT WITH THE ARMRESTS FLIPPED UP. The RANGER-AT Lift should always be in the full up or deck position before a user attempts to transfer into the chair.
- Page 13 THE (OPTIONAL) HEADREST ASSEMBLY The HEADREST ASSEMBLY attaches directly to the chair assembly, and is adjustable for optimum comfort. The components of the HEADREST ASSEMBLY are shown below, along with the chair to show how it attaches. The wing-nuts allow for quick adjustment without having to remove the assembly from the chair.
- Page 14 INSTALLING THE HEADREST PAD The ADJUST BRACKET must be removed from the assembly to install or remove the HEADREST PAD. When installing the pad thread the bracket through the top loops first and then press the flaps together (hooks & loops fastener) to complete the installation. To remove the pad, reverse this procedure.
- Page 15 NOTE: The INTEGRATED HEADREST ASSEMBLY will work on all 2 generation 46cm wide Aqua Creek Products’ chairs*. The 46cm chair comes standard on all Aqua Creek Products’ Scout, Ranger, Pro Pool and Patriot pool lifts. *(The 2 generation 46cm wide chair has the slots for the INTEGRATED HEADREST, where the 1 generation 46cm wide chair does not).
-
Page 16: Care Of Your Lift
BEFORE using the RANGER-AT Lift. You can call our customer service at 1-888-687-3552 to order any parts. 2. Aqua Creek Products, LLC lifts shall be grounded per local codes. 3. At least ONCE A WEEK, the RANGER-AT Lift must be cleaned with fresh water. - Page 17 If the lift is used MONTHLY follow the same steps as above. Also check the nuts and bolts to make sure they are securely fastened (this is always a good idea, no matter how often or infrequently the lift is used). Also make sure to store the battery on the charger and not on the lift.
-
Page 18: Troubleshooting Guide
TROUBLESHOOTING GUIDE Before troubleshooting make sure the battery is fully charged. If the lift doesn’t move when the handset button is pressed: When you can’t get the lift to move check the following things: 1. Make sure the battery is fully charged: A. - Page 19 If the battery is fully charged and the lift is not moving then: 2. Check all cords: A. Check that the cords are properly plugged in. Start by unplugging the remote and the actuator cord from the control box. Once these cords are removed check the ends for corrosion or damage.
- Page 20 If the lift stops moving over the water and is stuck: 4. Then try pushing the emergency button: A. If the lift gets stuck out over the water use a pen or pencil tip and stick it into the emergency button on the front of the control box to retract the lift.
- Page 21 RANGER-AT1-EU LIFT: PARTS LIST ITEM NO. QTY PART NUMBER DESCRIPTION PPB-100-10 PRO POOL-AT BASE ASSEMBLY PPF-200-11 PRO POOL-AT MAIN FRAME ASSEMBLY A-2012ARM-R1 PRO POOL-AT CHAIR ARM ASSEMBLY A-2012SRS PRO POOL-AT SEAT SUPPORT ASSEMBLY L-2014FBL-PAT-R2 PRO POOL-AT CONTROL ARM A-8980PPAF-AT PRO POOL-AT ACTUATOR ASSEMBLY SA-0904CA-A 18"...
- Page 22 SEAT ASSEMBLY: PARTS LIST ITEM NO. QTY. PART NUMBER DESCRIPTION P-901 CHAIR, PLASTIC, 18" BLUE P-2100FLA-38 CHAIR II ARMREST TUBE P-1208HSB BRACKET, PLASTIC, HANDSET BRACKET RUBBER HAND GRIPS GRIP, RUBBER HAND GRIP SFL 12 X 3/4 SCREW, 316 SS, #12 X 3/4", FHSMS WF 1/4 WASHER, FLAT, 1/4, 316 SS BB 1/4 X 3-1/4...
- Page 23 RANGER LIFT (ITEM #’s F-409RPL-AT1, F-411RPL-AT1, F-411RPL-R-AT1, F-411RPL-AT1-EU) Aqua Creek Products, LLC (a.k.a. Aqua Creek) warrants to the original end user purchaser that products manufactured by Aqua Creek when properly installed in accordance with assembly and installation instructions, and properly used and maintained, shall be free from defects in material and workmanship for a period of two (2) years from the date of original purchase, provided that Aqua Creek receives prompt notice in writing of any defect or failure and satisfactory proof thereof.
Need help?
Do you have a question about the Ranger F-411RPL-AT1-EU and is the answer not in the manual?
Questions and answers