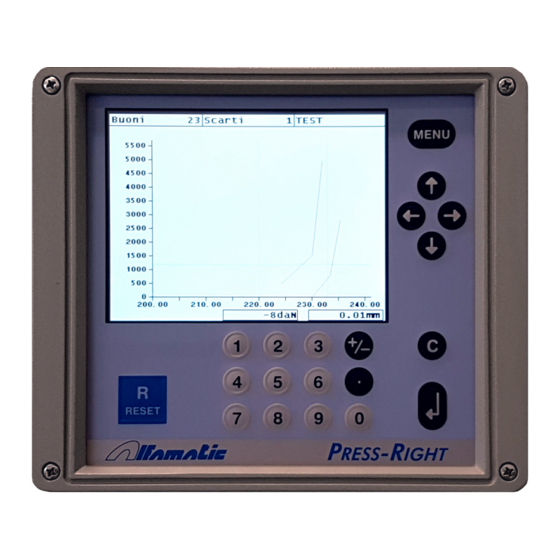
ALFAMATIC Press-Right User Manual
For pneumatic and hydraulic presses
Hide thumbs
Also See for Press-Right:
- User manual (53 pages) ,
- Installation manual (21 pages) ,
- User manual (53 pages)

Related Manuals for ALFAMATIC Press-Right


Summary of Contents for ALFAMATIC Press-Right
- Page 1 U S E R M A N U A L RESS IGHT FOR PNEUMATIC AND HYDRAULIC PRESSES • User manual...
- Page 2 RESS- IGHT...
-
Page 3: Table Of Contents
Control of position-force curve................... 5 Absolute and relative positions .................. 6 Installation of Press-Right ..................8 Getting started ...................... 9 The keyboard of Press-Right ..................9 First approach ......................9 Setting the display ....................10 The main menu ....................... 10 The jobs ...................... - Page 4 11 Password ......................34 12 Field bus ......................35 12.1 Organization ......................35 12.2 Status e Control ...................... 35 12.3 Modbus/TCP ......................36 12.4 PROFINET e EtherNet/IP ..................36 12.5 Strings ........................38 12.6 Execution of commands ..................39 12.7 Table ........................39 RESS- IGHT...
-
Page 5: General Information
1 General information Press-Right is a measuring instrument which, connected to a press, guarantees the quality control of the production processes. Connected to a position transducer and a force transducer, it continuously detects the instantaneous position and force. Notes on control theory During machining on sample pieces, the data relating to the position of the cylinder and the force exerted by it are recorded;... -
Page 6: Absolute And Relative Positions
Press-Right may set both the absolute and the relative positions. In order to measure the contact point on the manufactured piece, Press-Right use the force... - Page 7 The accuracy of the measured contact position cannot be high. It depends on the cylinder speed and, in particular, on the type of piece to be manufactured. For example, in shrinking operations, the two pieces have chamfered edges; as a result, the conctact position varies also based on the chamfer and the force used to position a piece into the other.
-
Page 8: Installation Of Press-Right
2 Installation of Press-Right For the installation of the device on the machine, please refer to the specific manual. RESS- IGHT... -
Page 9: Getting Started
3 Getting started This chapter will walk you through the basics of programming and using the Press-Right instrument. To better illustrate the operations, it is advisable to carry out the tests in practice; to do this it is very useful to have an elastic support of adequate strength to simulate repeated machining. -
Page 10: Setting The Display
First let's create a simple job: • Touch the menu button • Touch the item JOBS LIST • Touch the item CREATE A NEW JOB • Enter the name that identifies the job (example TEST 1) and press the OK key. Note: in the rest of this manual, when it is indicated, for example, select the JOBS command, we intend to touch the menu button, then toch... - Page 11 item displays the values measured during the last cycle. SHOW MEASURED VALUES The item allows the configuration of the instrument to be changed. TOOLS The item is used to reset the workpiece counter to zero. RESET COUNTERS RESS- IGHT...
-
Page 12: The Jobs
4 The jobs The Press-Right stores all settings (parameters, band and counters) for different jobs in an internal memory. Each group of settings is called a 'Job'. Each job has its own name. In the main menu you will find the item . -
Page 13: Job Selection Via Tools Recognition
After activating this option, it is possible to assign up to seven codes to each job in the menu EDIT JOB > PROPERTIES AND OPTIONS > CODES OF THE JOB Job selection via tools recognition Sensors can be connected to the machine to automatically recognise the equipment used. The equipment can be the tool, the set-up or simply an electric selector switch. -
Page 14: Changing Job Codes
Changing Job Codes To assign codes to the job, first select the job and then go to the menu EDIT JOB > . Depending on the configuration it will PROPERTIES AND OPTIONS > CODES OF THE JOB be possible to enter the identification codes and the equipment identification number. Notes: When the code entry window is displayed, it is possible to use the barcode reader to automatically enter the job identification code. -
Page 15: The Graph
4.12 The graph The menu item allows you to modify the values of the graph EDIT JOB > GRAPH SETUP axes to enlarge and show the interesting part of the position-force curve. AUTO RANGE This function adapts the scale of the graph to display the curve of the last machining performed. -
Page 16: Phase Management
4.15 Channel management Up to six force transducers can be connected to the Press-Right to monitor as many force- displacement curves. While each force transducer detects the force of one channel, there is only one position transducer in common for all channels. It is possible to exclude one or more channels from the control using the EDIT JOB >... -
Page 17: Management Of Supplementary Control Signals
The functions described in this chapter are available only if at least one input has been configured for testing (TEST). For supplementary control signal number 1 (TEST 1), the Press-Right can also activate an associated digital output before performing the check. In this case, the input status check is performed after a preset time. - Page 18 During pressing The supplementary control check is performed during the pressing process. Use as enable The signal is used to enable or disable the start.
-
Page 19: Parameters
To set the stop values, use the command EDIT JOB > STOP VALUES Press-Right can stop the press when the force reaches a certain value (Stopping force) or when the press reaches a certain height (Stopping force). Figure 3 The press is stopped even when the maximum acquisition time expires. - Page 20 5.1.2.1 Stop with mechanical stop. In most cases the press is used to carry out a driving up to a mechanical stop. In this case the curve will be similar to the one in Figure 4, i.e. the force will be zero for the entire approach stroke, once the piece is reached (at the contact level) the force will begin to increase until the mechanical stop is reached where it will increase up to the maximum force value of the press (vertical part of the curve).
-
Page 21: Control Limits
If the piece resists the impact force, once the test is over, the maximum height measured by the Press-Right will be equal to the bending that the piece has had. It will then be possible to verify whether the deflection obtained is the one expected using the height limits. -
Page 22: How To Setup Job
Peak force limits They control the force reached during machining. For a piece to be classified as good, the maximum force achieved must be above the minimum force limit and below the maximum force limit. Contact detection threshold The sensing force is the force threshold used to determine if contact has been made with the piece. -
Page 23: Check Points
Check points Check points are additional tools for controlling the curve. Up to five check points can be defined. Each check point can be used to: Check force Measure and check the force at a predetermined position. This check point is also useful for having a discrete value at the end of pressing to be displayed or sent via field bus. -
Page 24: Job Accessories
Ask for the piece code By activating this option, before the execution of each piece, you are asked to enter a numerical code that identifies the piece itself. The piece code can also be set via fieldbus or via a barcode reader. To show the piece code options, it is necessary to activate the TOOLS >... -
Page 25: The Tolerance Range
6 The tolerance range The tolerance range is used to control the curve and consequently to control the quality of the piece. The tolerance range consists of two lines called the upper border and the lower border. For the piece to be classified as good the points representing the curve cannot be above the upper edge, and cannot be below the lower edge. -
Page 26: Detete The Tolerance Range
You can add a point by dividing the segment following the active point in two. To do this, press the command. Add new point It is possible to delete the active point with the command. Delete point When using the arrow keys, it is possible to change the step by pressing the Change size command. -
Page 27: Rejected Parts
This message appears when the start signal is removed before the end of the cycle. Time expired The pressing lasted too long. You can increase the maximum time by reducing the acquisition frequency via the Press-Right Setup program. "Additional" beyond the maximum The additional transducer value is higher than the additional maximum limit. -
Page 28: Management Of Reject
"Additional" below the minimum The additional transducer value is lower than the additional minimum limit. "Supplementary" control The supplementary control causes the reject. High speed The speed is higher than the maximum speed limit. Low speed The speed is below the minimum speed limit. Maximum position exceeded The maximum position reached exceeded the maximum position limit. - Page 29 For example, recoverable and irrecoverable waste can be separated. When there is a special waste, the Press-Right activates the second rejected output and counts the piece separately. In this way it is possible to know for example how many...
-
Page 30: Measured Values
8 Measured values The Press-Right stores the displacement-force curve and measures certain quantities that can be controlled thanks to the limits. The stored curve can be analyzed with the analysis cursor. The measured quantities can be displayed at the end of each process and can be read by an external controller via serial. -
Page 31: The Tools Menu
9 The tools menu Using the tools menu, you can configure the Press-Right. When the Press-Right is already connected to the machine, there is no need to configure it. In this menu there are the following submenus: DISPLAY OPTIONS Allows you to change the view. -
Page 32: Special Configurations
Transducer of additional force It is possible to collect a small force transducer to the instrument for greater precision in operations requiring reduced forces. The Alfamatic precision transducer has been designed to withstand the maximum force exerted by the cylinder. - Page 33 10.2.2 RFID pad writing To write the equipment identification number you need to access the menu TOOLS > CONFIGURE > ELECTRICAL CONNECTIONS > EQUIPMENT. 10.2.3 Selection of gear to be used To indicate the tool to be used for the operation you must access the menu Properties> CONTROL MANAGEMENT.
-
Page 34: Password
11 Password The Press-Right can store a list of users with their identification codes. To identify the user, a password is used. The password consists of a visible initial digit and three hidden digits. Each user must have a different initial digit from all other users. For example, the password 2345 indicates user number 2 with password 345. -
Page 35: Field Bus
12 Field bus The Press-Right instrument can communicate via Modbus TCP (standard), PROFINET (optional) or EtherNet/IP (optional) fieldbuses. 12.1 Organization The instrument has a list of registers that can be read or written via fieldbus communication. Each register has an address. From the fieldbus the registers can be accessed by indicating the address of the register. -
Page 36: Modbus/Tcp
The CONTROL_WORD_OUTPLC output word contains the commands to be given to the instrument (register 24). The contents of 11 input words (VAR1_INPLC ... VAR11_INPLC) and 11 output words (VAR1_OUTPLC ... VAR11_OUTPLC) are configurable by the user using the "Press-Right Setup" software. - Page 37 The default content of these words is as follows: 12.4.1 Access by address/data Initialization Load in CTRL_OUTPLC the value 0x00 Wait for CTRL_INPLC to contain 0x00 Reading a 16-bit register. Load into INDEX_OUTPLC the address of the register. Load into CTRL_OUTPLC the value 0x40 Wait for CTRL_INPLC to contain 0x10 Read the value from PV_INPPLC Load into CTRL_OUTPLC the value 0x00...
-
Page 38: Strings
To install the GSD file in the library you must select tools > manage device description file. In the library it is located in Additional field equipment > PROFINET IO > General > Alfamatic > PressRight. The Device name and address is set from TIA: Open TIA, under "Online Accesses"... -
Page 39: Execution Of Commands
The following registers will have the following contents: register 1000 will contain "jo" 0x4A6F register 1001 will contain "b " 0x6220 register 1002 will contain "2 " 0x3200 12.6 Execution of commands Writing in the CONTROL_WORD_OUTPLC will command the press. The command must be written until the command busy bit of STATUS_WORD_INPLC becomes high;... - Page 40 version 2.19) Write 30 to Set new Order number (&45) (from version 1.92) Write 32 to Reset rejected (from version 3.35) ToolA ID of tool A (from version 2.19) UINT16 42 Read only ToolB ID of tool B (from version 2.19) UINT16 43 Read only ToolC...
- Page 41 ContactForce Force for contact sens (from version 1.94) UINT16 1025 Write/read PeakPosMin Value minimum of reached position UINT16 1027 Write/read PeakPosMax Value maximum of reached position UINT16 1028 Write/read PeakForceMin Value minimum of reached force UINT16 1029 Write/read PeakForceMax Value maximum of reached force UINT16 1030 Write/read InitPosMin...
- Page 42 CP4par2 Second value of check point 4 UINT16 1049 Write/read CP4par3 Third value of check point 4 UINT16 1050 Write/read CP4par4 Fourth value of check point 4 UINT16 1051 Write/read CP4par5 Fifth value of check point 4 UINT16 1052 Write/read CP5par1 First value of check point 5 UINT16...
- Page 43 Issue B BIT0: MAX POSITION UINT16 2001 Read only BIT1: MIN POSITION BIT2: MAX CONTACT BIT3: MIN CONTACT BIT4: MAX CHECK POINT BIT5: MIN CHECK POINT BIT6: TEST INPUT 2 BIT7: TEST INPUT 3 Issue C BIT4: MAX FORCE UINT16 2002 Read only BIT5: MIN FORCE BIT6: MAX BAND...
Need help?
Do you have a question about the Press-Right and is the answer not in the manual?
Questions and answers