
Related Manuals for Bartscher 110530


Summary of Contents for Bartscher 110530
- Page 1 Instructions for Installation, Use and Maintenance 110530 110531 110532 COD.: 3000E APPLICARE ETICHETTA Ed. 08 - 02/2018 MATRICOLA...
- Page 2 Thank you for choosing our appliance. The installation, use and maintenance instructions given in this manual have been prepared to ensure the long life and correct operation of your appliance. Follow these instructions carefully. We have designed and manufactured this appliance according to the latest technological developments.
-
Page 3: Table Of Contents
TRANSLATION OF THE ORIGINAL INSTRUCTIONS SUMMARY Page WARNINGS INSTALLER SECTION 1. MACHINE INSTALLATION 1.1 Dataplate 1.2 Reception of the appliance 1.3 Water connection 1.3.1 Water supply characteristics 1.4 Electrical connection 1.5 Temperature adjustment 1.6 Rinse aid dispenser operation (pict. 1 - 2) 1.7 Peristaltic rinse aid dispenser operation (optional - pict. -
Page 4: Warnings
WARNINGS This instruction booklet must be kept with the dishwasher for future consultation. If the dishwasher is sold or transferred to another user, make sure the booklet always goes with the appliance so that the new owner can have the necessary information on operation and the relative instructions. - Page 5 Shut the water supply valve(s). Disregarding the aforesaid prescriptions is a serious misuse and can cause damages and injures to property and people, and will relieve the manufacturer from whatever liability. • The user must not carry out any repair and/or maintenance operations. In any case contact qualifi...
-
Page 6: Machine Installation
ATTENTION: At the end of installation make sure to remove the parts of this booklet relevant to the installer, for future consultation. 1. MACHINE INSTALLATION 1.1 Dataplate RoHS IPXX ° kcal Model FAMIGLIA PRODOTTO FAMILY PRODUCT FAMILLE DU PRODUIT FAMILIA PRODUCTO ANNO E=2010 - 2011 FAMILIE DES PRODUKTES... -
Page 7: Reception Of The Appliance
INSTALLER SECTION 1.2 Reception of the appliance After removing the packing, ensure that the appliance has not been damaged in transport. If it has, inform the retailer. If safety has been compromised, do not install the machine. Double check the fi rm tightness of all hose-clamps on piping, nuts and bolts, and fasteners, that might come loose with the transport, to prevent water dripping or leakages, or other damages, during the machine's operation. -
Page 8: Electrical Connection
INSTALLER SECTION 1.4 Electrical connection The electrical connection must be made according to current technical standards. Ensure that the mains voltage corresponds to the value given on the machine dataplate. It is necessary to install a suitable omni-polar automatic fuse switch sized according to the absorption that assures the complete disconnection from the network in an overvoltage category III condition. -
Page 9: Peristaltic Rinse Aid Dispenser Operation (Optional - Pict. 3)
INSTALLER SECTION 1.7 Peristaltic rinse aid dispenser operation (optional - pict. 3) Operation: The rinse aid dispenser is a peristaltic pump. The rinse aid dispenser is also activated when the tank is loaded. Water connection: Make sure that the green product suction tube is inserted on the special fi tting and that the small fi... -
Page 10: Technical Data And Useful Information On Pumps
INSTALLER SECTION 3. TECHNICAL DATA AND USEFUL INFORMATION ON PUMPS 3.1 Washing pump When the dishwasher has not been used for some time, check that the washing pump turns freely. To do this, operate using a screwdriver in the special slot on the ventilating side of the motor shaft. In case of blocking, turn the main switch off... -
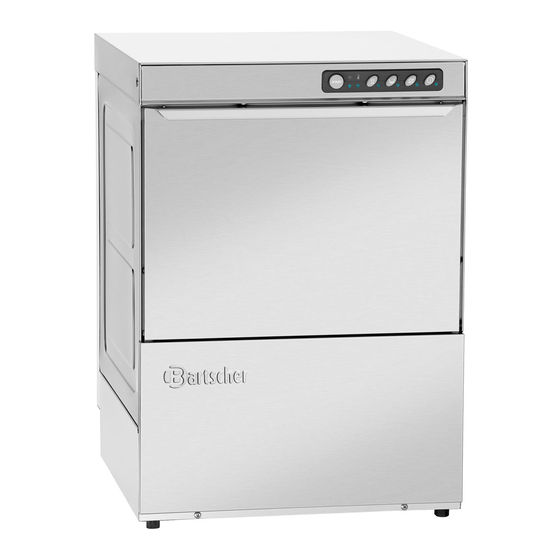
Page 11: User Section
USER SECTION 4. CONTROL PANEL AND RELATIVE SYMBOLS CONTROLS INDICATORS 1) Main switch 0-1 a) Power on indicator 2) Cycle START button b) Tub full indicator 3) Cooling glasses button (optional) c) Washing cycle indicator 4) Regeneration START button (optional) d) Regeneration cycle indicator 5) Manual empty button (optional) e) Temperature indicator... -
Page 12: Cutlery And Crockery Loading
USER SECTION 5.1 Cutlery and crockery loading Before cutlery and crockery loading in the machine, coarsely clean them from the leftover food. It isn't necessary to rinse the cutlery an crockery under water. ATTENTION: Do not wash articles polluted with petrol, paint, chips of steel or iron, ash, sand, wax, lubricant grease. -
Page 13: Discharge Pump System (Optional)
USER SECTION 5.4 Discharge pump system (optional) To drain completely the wash-tank keep the machine ON, extract the overfl ow pipe and shut the door. Press the button (5 - see chap. 4) for at least a second: the discharge pump will automatically drain the wash-tank. When the drain is completed, turn the machine OFF. -
Page 14: Compliance With Hygiene Regulations And H.a.c.c.p
USER SECTION 5.6 Compliance with hygiene regulations and H.A.C.C.P. • The machines are equipped with a temperature indicator (e - chap. 4) which lights up when the boiler and the tub have reached the preset temperature (values set by the manufacturer). It is recommended to wait for this light to go on before starting the next cycle. •... -
Page 15: Alarms
USER SECTION 7. ALARMS TYPE OF ALARM CAUSE REMEDIES Flashing of the cycle lamp Missed refi ll of water in the wash-tank Verify the full opening of the water inlet valve or the right positioning of the overfl ow pipe. Switch the machine OFF and ON to reset the alarm Missed heating of the water boiler (in Boiler thermostat or boiler heating element out of order. -
Page 16: Troubleshooting
USER SECTION Removal of food: Carefully scrape food from the dishes using lukewarm water in moderation to help in the removal of animal fat. To successfully remove caked on material, soaking in hot water is recommended. Note: Wash dishes as soon as possible to prevent hardening of the deposits and compromising the eff ectiveness of the washing. - Page 17 USER SECTION Type of Problem Possible Causes Cure Streaks and spots on Too much rinse aid Decrease the amount of rinse aid by turning the fi ne- glasses and dishes adjustment screw on the dispenser (see paragraphRinse aid dispenser) The water is too hard Check the water hardness.
-
Page 18: Eu Declaration
USER SECTION 11. EU DECLARATION The machine purchased is in compliance with the norms stated in the EU declaration attached to the machine in original. Please fi nd attached below the facsimile of this declaration, with the general data of the machine purchased. For the absorption data refer to the data-plate on the machine.
Need help?
Do you have a question about the 110530 and is the answer not in the manual?
Questions and answers