Table of Contents
Advertisement
Quick Links
30
3
3
30
30
30
30
30
3 0
3
3000EN
00
00
00EN
00
EN
EN
EN
03
0
0 3
3
10/2022
10
0
/2022
USER
U
U S
S ER
ed. 03 - 10/2022
LEGGERE ATTENTAMENTE LE ISTRUZIONI PRIMA DI INSTALLARE LA MACCHINA
READ THE INSTRUCTIONS CAREFULLY BEFORE INSTALLING THE MACHINE
LIRE ATTENTIVEMENT LES INSTRUCTIONS AVANT D'INSTALLER LA MACHINE
LESEN SIE VOR DER INSTALLATION DES GERÄTES AUFMERKSAM DIE VORLIEGENDEN
GEBRAUCHSANLEITUNGEN
LEER ATENTAMENTE LAS INSTRUCCIONES ANTES DE INSTALAR LA MÁQUINA
ВНИМАТЕЛЬНО ПРОЧИТАЙТЕ ЭТИ ИНСТРУКЦИИ, ПРЕЖДЕ ЧЕМ ПРИСТУПАТЬ К УСТАНОВКЕ МАШИНЫ
LER ATENTAMENTE AS INSTRUÇÕES ANTES DE INSTALAR A MÁQUINA
EN
- Istruzioni per l'uso e la manutenzione
IT
Ç
110540
110541
110542
Advertisement
Table of Contents

Subscribe to Our Youtube Channel
Related Manuals for Bartscher 110540


Summary of Contents for Bartscher 110540
- Page 1 /2022 USER S ER - Istruzioni per l'uso e la manutenzione ed. 03 - 10/2022 110540 110541 110542 LEGGERE ATTENTAMENTE LE ISTRUZIONI PRIMA DI INSTALLARE LA MACCHINA READ THE INSTRUCTIONS CAREFULLY BEFORE INSTALLING THE MACHINE LIRE ATTENTIVEMENT LES INSTRUCTIONS AVANT D'INSTALLER LA MACHINE LESEN SIE VOR DER INSTALLATION DES GERÄTES AUFMERKSAM DIE VORLIEGENDEN...
- Page 2 Vi ringraziamo per aver acquistato un nostro apparecchio. Le istruzioni per l’installazione e la manutenzione nonché il suo impiego, che troverete sulle pagine che seguono, sono state preparate per assicurare una lunga vita e un perfetto funzionamento del vostro apparecchio. Seguite attentamente queste istruzioni.
-
Page 3: Table Of Contents
TRANSLATION OF THE ORIGINAL INSTRUCTIONS Contents Page WARNINGS 1. MACHINE INSTALLATION 1.1 Dataplate 1.2 Reception of the appliance 1.3 Hydraulic connection 1.3.1 Water supply characteristics 1.4 Electrical connection 1.5 Ventilation/Steam evacuation 2. MACHINE DESCRIPTION 2.1 Machine description 2.2 Machine features 3. -
Page 4: Warnings
WARNINGS This instruction booklet must be kept with the dishwasher for future consultation. If the dishwasher is sold or transferred to another user, make sure the booklet always goes with the appliance so that the new owner can have the necessary information on operation and the relative instructions. - Page 5 • Do not open the machine door when operating. In any case, the machine has a special safety device which immediately stops the unit if the door is open, thus preventing water spillage. Always switch the machine completely off and drain the water tank, before accessing inside.
- Page 6 Note: The manufacturer declines any responsibility for accidents to people or any damage deriving from failure to observe the above listed instructions. ATTENTION: DO NOT INSERT HANDS AND/OR TOUCH THE PARTS LOCATED AT THE BOTTOM OF THE WASH TANK AND/OR AT THE END OF THE WASH CYCLE.
-
Page 7: Machine Installation
1. MACHINE INSTALLATION 1.1 Dataplate IPXX A Power source B Total power installed C Dynamic Pressure D Envelope protection degree E Total electricity absorption ° ° Model Model DW XXXX ANNO YEAR ANNÉE AÑO JAHR S/N DW X xxxxxxx RoHS IPXX °... -
Page 8: Reception Of The Appliance
1.2 Reception of the appliance Before accepting the machine, verify that all the data on the data-plate corresponds to the required ones and to the ones of the available electrical supply (see paragr. Dataplate). After removing the packing, ensure that the appliance has not been damaged in transport. If so, do notify the seller immediately about the problem. -
Page 9: Electrical Connection
1.4 Electrical connection Electrical connection must be carried out in compliance with the legislation in force and the relevant technical standards. Make sure that the voltage is the same as reported on the data-plate. It is necessary to install a suitable omni-polar automatic fuse switch sized according to the absorption that assures the complete disconnection from the network in an overvoltage category III condition. -
Page 10: Machine Description
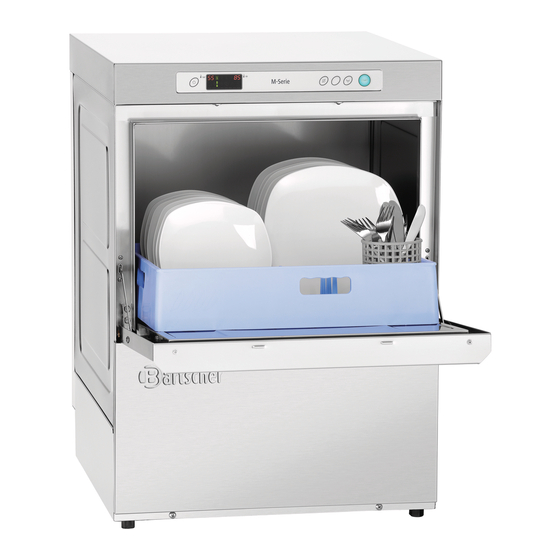
2. MACHINE DESCRIPTION 2.1 Machine description Control panel Wall-hung main power switch: installation serviceman supply and care, according to local laws Door Standard equipment for machine with a 500 mm rack: nr. 1 500x500 mm plates rack nr. 1 500x500 mm glasses rack nr. - Page 11 Option B) nr. 2 round racks Ø 400 mm nr. 1 cutlery basket nr. 1 support for round rack nr. 1 saucers holder Standard equipment for machine with a 370x370 mm rack: Option A) nr. 2 370x370 mm square nr. 1 cutlery basket glasses racks nr.
-
Page 12: Machine Features
Option B) nr. 2 Round racks Ø 350 mm nr. 1 cutlery basket nr. 1 support for round rack nr. 1 saucers holder OPTIONAL: Detergent dispenser Drain pump Water softener 2.2 Machine features The machine has a noise level below 70 dB(A). -
Page 13: Control Panel And Relative Symbols
3. CONTROL PANEL AND RELATIVE SYMBOLS CONTROLS A) Switching – On / STAND BY key B) Regeneration key (option) C) Extra cold rinse key (optional) D) Drain Push-button (optional) E) START push-button to start up cycle / select cycle F) Display INDICATORS F1) Cycle scrolling bar F2) Tank filling indicator... -
Page 14: Operation
4. OPERATION • Check that the filter is correctly fitted in its seat (Pict. 1 - Pict. 2). • The filter must be cleaned after every 20 wash cycles and whenever necessary. • DO NOT use the appliance without the filter.. •... -
Page 15: Cutlery And Crockery Loading
• The button START will flash when the cycle is completed. Note: At cycle end with the door closed, dishes do not get dried Take out the baset or keep the door open to allow the evaporation and the drying of the dishes. For machines equipped with supplementary cold rinse:... -
Page 16: Use Of Detergent (Optional)
Crockery and cutlery not suitable for dishwasher Not suitable for dishwasher: • Wooden crockery and cutlery or with wooden parts; water at high temperature causes deformation to wood. Also the adhesives used are not suitable for treatment in the dishwasher; a consequence could be the handles detachment. •... -
Page 17: Regeneration Device (Optional)
4.5 Regeneration device (optional) Should the machine be equipped with a water-softener circuit, this will be fully automatic. When needed, a 120” regeneration cycle will automatically activate. During this phase, the regeneration indicator lights up. If needed the cycle can be activated even during the wash-tank loading. If the activation is made during the wash-cycle, this will be longer. -
Page 18: Compliance With Hygiene Regulations And H.a.c.c.p
4.6 Compliance with hygiene regulations and H.A.C.C.P. • When starting the machine ON, no wash-cycle will be starting until the set boiler and wash-tank temperatures are reached. During operation, the machine will not start the rinse cycle till the set boiler temperature is reached. •... -
Page 19: Maintenance
5. MAINTENANCE WARNING: The machine is not protected against water jets, therefore do not use pressure cleaning systems. Contact your cleaning products retailer for detailed instructions on the methods and products to use for periodic sanitizing of your appliance. DO NOT use bleach or chlorine-based detergents for cleaning the appliance. -
Page 20: Special Maintenance
5.2 Special Maintenance Once or twice a year have a qualified technician inspect the machine: Clean the electrovalve filter. To remove residual deposits. To check the watertight of the seals for water loading and unloading connections. Check the perfect state and/or wear of the components. If a component is damaged or oxidized replace it immediately with genuine spare parts only Check the efficiency of the dispensers Check the efficiency of the door safety switch. - Page 21 WATER LOAD FAILED The machine wash-tank was not filled in the maximum foreseen time limit. Contact Technical Service. TANK PROBE FAIL The circuit board does not detect the wash-tank sensor. Contact Technical Service. TANK OVERHEATING The wash-tank temperature exceeded 90 °C. Contact Technical Service.
-
Page 22: Environmental Aspects
7. ENVIRONMENTAL ASPECTS 7.1 Packing The packing consists of the following: • a wood pallet; • a nylon bag (LDPE); • multi-layered cardboard; • polystyrene foam (PS); • polypropylene support (PP). All above materials, shall be disposed and treated in accordance with the Local Laws in force. 7.2 Disposal The equipment is marked with the symbol (see Pict. -
Page 23: Troubleshooting
9. TROUBLESHOOTING Type of Problem Possible Causes Cure The appliance The main switch is turned off Turn on the switch does not start The water tap is closed Open the water tap Clean the rinsing arm nozzles, the pipes and the The appliance The rinsing arm nozzles or the electrovalve filter electrovalve filter. - Page 24 Type of Problem Possible Causes Cure Decrease the amount of rinse aid by turning the Too much rinse aid fine-adjustment screw on the dispenser (see paragraph Rinse aid dispenser) Check the water quality. Water must not exceed 8 The water is too hard °f (5 °d) in hardness Streaks and spots Fill the salt container (coarse salt: 1-2 mm grains)
Need help?
Do you have a question about the 110540 and is the answer not in the manual?
Questions and answers