Table of Contents
Advertisement
Advertisement
Table of Contents

Related Manuals for FScurtis NxB/V Series


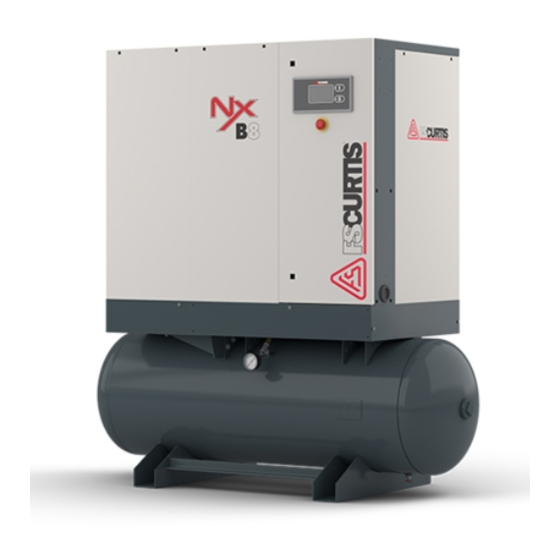
Summary of Contents for FScurtis NxB/V Series
- Page 1 NxB/V Series Operator Manual 4 – 15 kW WARNING...
- Page 6 Design and function Overview Fig. 1: Standard screw compressor with belt drive 3 - 15 kW)
- Page 7 The basic construction is the same for all screw compressor variants. The position or look of the assemblies may vary from the illustration Fig. 2: Overview of the assemblies: Screw compressor with frequency converter, refrigeration dryer (optional) and air receiver (optional)
-
Page 8: Brief Description
Enclosure panels Brief description Fig. 3: Enclosure panels Assembly description Controller Drive unit For detailed information about the controller installed, consult the separate Controller documentation. Fig. 4: Screw compressor with V-belt drive... -
Page 9: Compressor Airend
Compressor airend Fig. 7: Compressor airend Fig. 5: Screw compressors with V-belt drive and frequency convertor Intake filter Fig. 6: Standard intake filter... -
Page 10: Oil Separator Tank
Oil separator tank Air/oil separator Fig. 10: Air/oil separator Fig. 8: Oil separator tank Minimum pressure and non return valve Fig. 11: Minimum pressure and non-return valve Fig. 9: Relief valve (1) -
Page 11: Cooling Air Fan
Coolers Cooling air fan Fig. 12: Coolers Fig. 14: Screw compressor with air receiver (optional), refrigeration dryer (optional) and/or frequency converter 3–15 kWn Oil filter The forced ventilation and bleeding equipment must be dimensioned so that the required supply and exhaust air Fig. -
Page 12: Refrigeration Dryer
Refrigeration dryer Interfaces Fig. 15: Refrigeration dryer Fig. 16: Screw compressor with frequency converter, air receiver (optional) and refrigeration dryer (optional) 3– 15 kW Depending on the variant, a hose for discharging the condensate may already be attached to the condensate drain;... - Page 13 Safety Symbols in these instructions...
-
Page 14: Proper Use
Proper use This symbol indicates tips and recommendations and information for efficient and fault-free operation. [Button] "Display"... -
Page 15: General Safety
General safety Safety devices Position of the safety devices Fig. 18: Screw compressor with refrigeration dryer (optional), tank (optional) and/or frequency converter 3 – 15 kW ) -
Page 16: Environmental Protection
Description of the installed safety devices Environmental protection Fig. 19: Emergency stop button... -
Page 17: Instructions On The Machine
Instructions on the machine... -
Page 19: Technical Data
Technical data For more information refer to the technical data sheet. Serial tag Fig. 20: Serial tag... - Page 20 General specifications Operating conditions Consumables...
-
Page 21: Inspection On Receipt Of Delivery
Transportation, packaging and storage Safety instructions for Packaging transportation Symbols on the packaging Inspection on receipt of delivery Issue a complaint in respect of each defect immediately following detection. Damage compensation claims can only be asserted within the applicable complaint deadlines. - Page 22 Storage Transportation Under some circumstances there may be notes about storage on the packaging that extend beyond the requirements named here. Adhere to these accordingly. Fig. 21: Transportation with a fork lift...
-
Page 23: Installation And Commissioning
Installation and commissioning Safety instructions for the installation and commissioning... -
Page 24: Installation
Requirements in the installation location Fig. 22-2: Shipping spacer Ventilation Installation Remove shipping spacers Fig. 22-1: Shipping spacer... -
Page 25: Connection To The Compressed Air Network
Chapter 3 ‘Technical data’ on page 19 Chapter 3 ‘Technical data’ on page 19 Fig. 23: Overview illustration of air duct connection The forced ventilation and bleeding equipment must be dimensioned so Chapter 3 ‘Technical data’ that the required supply and exhaust on page 19 air can be supplied and extracted taking into account the existing residual... -
Page 26: Connecting To The Power Supply
Connecting to the power supply The prerequisite for the correct installation is the presence of a professionally-planned, installed and maintained compressed air network and an additional shut-off valve installed at the entrance to the compressed air network. Relief valves are to be placed ahead of any potential blockage point, including but not limited to shut-off valves, heat exchangers and discharge silencers. -
Page 27: Checking The Oil Level
Checking the oil level Fig. 26: Intake valve fastening screw Fig. 25: Inspection glass Chapter 7.4.8 ‘Replacing the oil/changing the oil filter’ on page 43 Start up lubrication of the compressor airend... -
Page 28: Switching On After Installation
Switching on after installation controller docu- mentation Work after the initial commissioning Fig. 27: Checking the oil level in the inspection glass Chapter 7.4.3 ‘Checking the oil level/topping up the oil’ on page 40... -
Page 29: Setting Parameters
Chapter 7.4.5 ‘Checking the compressor temperature’ on page 42 Setting parameters Refer to the controller documentation. If the compression temperature is sufficiently high, this ensures that the air humidity taken in does not form condensation. Frequent switching on and off of the screw compressor can prevent the compressor from reaching the required operating temperature Chapter 7.4.4 ‘Checking the build-up... -
Page 30: Safety Instructions For Operation
Operation Safety instructions for operation Controller Refer to the controller documentation for information on how the screw compressor is operated. -
Page 31: Maintenance
Maintenance Safety instructions for maintenance... -
Page 33: Spare Parts
The use of non-approved spare/replacement parts will invalidate the warranty. Maintenance schedule Spare parts... - Page 35 NX BELT DRIVE MAINTENANCE CHECKING BELT TENSION...
- Page 36 BELT TENSIONING INSTRUCTIONS...
- Page 37 CHANGING BELTS CHECKING PULLEY ALIGNMENT...
- Page 38 BUSHING/SHEAVE ASSEMBLY AND TORQUE INSTRUCTIONS...
- Page 39 o V-belt section XPZ o Smallest pulley diameter on drive 3.15”...
-
Page 40: Maintenance Work
Maintenance work Necessary maintenance work appears on the display of the controller as a warning Controller documentation. Checking for leaks Checking the oil level/topping up the oil Checking the electrical connections Fig. 28: Inspection glass... -
Page 41: Checking The Build Up Of Condensation
Fig. 30: Filler pluge Fig. 29: Filler plug Checking the build up of condensation If the compression temperature is sufficiently high, this ensures that the air humidity taken in does not form condensation. Frequent switching on and off of the screw compressor can prevent the compressor from reaching the required operating temperature. -
Page 42: Checking The Compressor Temperature
Checking the compressor temperature Since the condensate is heavier than the oil, after longer downtimes, it collects on the bottom of the oil separator tank. Fig. 31: Oil drain Inspect/clean coolers controller documen- tation Chapter 7.4.3 ‘Checking the oil level/topping up the oil’... -
Page 43: Checking The Drive Unit
out of rather than into the machine. In case of severe dirt buildup, consult the manufacturer. Checking the drive unit Fig. 33: Oil drain Replacing the oil/changing the oil filter Fig. 34: Filler nozzle Fig. 32: Filler nozzle... -
Page 44: Replacing The Air/Oil Separator
controller documentation Chapter 7.4.3 ‘Checking the oil level/topping up the oil’ on page 40 Fig. 37: Removing the oil filter Fig. 35: Filler nozzle controller documentation Chapter 7.4.3 ‘Checking the oil level/topping up the oil’ on page 40 Replacing the air/oil separator Fig. -
Page 45: Replacing The Intake Filter
Replacing the intake filter Fig. 38: Unfastening the air/oil separator Fig. 40: Unfastening the clamp on the intake filter Fig. 39: Air/oil separator... - Page 46 Measures after maintenance has been performed Service and maintenance log)
- Page 47 Faults Safety instructions for fault clearance...
-
Page 48: Fault Displays
Fault displays controller documentation... - Page 49 Fault table Chapter 7.4.8 ‘Replacing the oil/changing the oil filter’ on page 43 Chapter 7.4.3 ‘Checking the oil level/topping up the oil’ on page 40 Chapter 7.4.6 ‘Inspect/clean coolers ’ on page 42 Chapter 7.4.10 ‘Replacing the intake filter’ on page 45 Chapter 7.4.9 ‘Replacing the air/oil separator’...
- Page 50 Controller documentation "Oil temperature too low" Controller documentation Controller documentation "remote" Controller documentation Controller documentation ‘Clean/replace return line’ on page 51 Chapter 7.4.9 ‘Replacing the air/oil separator’ on page 44 Controller documentation...
-
Page 51: Work For Fault Clearance
Work for fault clearance Parts List). Commissioning after remedied fault Controller documentation Controller docu- mentation Fig. 41: Return line... - Page 57 Index...
- Page 59 Appendix Bolt tightening torque requirements 10.1 Oil change intervals at elevated temparatures 10.2...
Need help?
Do you have a question about the NxB/V Series and is the answer not in the manual?
Questions and answers