
Related Manuals for vacuubrand VACUU-VIEW


Summary of Contents for vacuubrand VACUU-VIEW
- Page 1 Vacuum gauge VACUU·VIEW VACUU·VIEW extended Instructions for use Original instructions EN OI no.: 20901330...
- Page 2 +49 9342 808‑5660 Fax: +49 9342 808‑5555 Email: info@vacuubrand.com Web: www.vacuubrand.com Thank you for purchasing this product from VACUUBRAND GMBH + CO KG VACUUBRAND GMBH + CO KG. You have chosen a modern and technically high quality product. 20901330_EN_VVIEW (extd)_V1.11_230223...
-
Page 3: Table Of Contents
Contents TABLE OF CONTENT Introduction User information ....... . . 5 1.2 About this document. - Page 4 Contents 5.3 Adjustment ........31 5.3.1 Sensor adjustment, in general .
-
Page 5: Introduction
Contact us ƒ plete manual or download the manual on our website: www.vacuubrand.com Contact us regarding any questions about this product, if you ƒ need further information, or to provide us with feedback. When contacting our Customer Service Department, please be ƒ... -
Page 6: About This Document
Copyright The content of this manual is protected by copyright. Only copies Copyright © for internal use are allowed, e. g., for professional training. © VACUUBRAND GMBH + CO KG 1.2 About this document About this document 1.2.1 1.2.1 Display conventions... -
Page 7: Handling Instructions (Action Steps)
Introduction 1.2.2 1.2.2 Handling instructions (action steps) Handling instructions (action steps) Action step (single step) Presentation convention operating > Do the described step. steps 5 Result of action Handling instructions (multiple steps) 1. first step 2. next step 5 Result of action Follow steps in the described order. -
Page 8: Term Definition
Introduction 1.2.4 1.2.4 Term definition Term definition VACUU·BUS Bus system by VACUUBRAND Product specific ® terms VACUU·SELECT Vacuum controller, controller with touchscreen; ® consisting of operating panel and vacuum sen‑ sor. VACUU·BUS 4‑pin round connector for the bus system from ®... -
Page 9: Safety Instructions
Safety instructions Safety instructions Safety instructions The complete information of this chapter must be observed by all persons working with the herein described product. Use the product only when it is in proper working condition. 2.1 Intended use Intended use VACUU·VIEW is a laboratory instrument for the measure‑... -
Page 10: General Safety Instructions
Safety instructions 2.3 General safety instructions General safety instructions 2.3.1 2.3.1 Safety precautions Safety precautions > Use the gauge only if you have understood its function and this Safety precautions manual. > Please note that adhering process media can pose danger to humans and the environment. -
Page 11: Atex Equipment Category
ATEX equipment category 3 G; flammable substances as a mixture with air: gases, vapors. > Only use VACUUBRAND devices if they are in perfect work‑ ing condition. ATEX approval only applies to the internal, wetted parts of ATEX category the of the product, not to its surroundings. -
Page 12: Proper Disposal
Safety instructions Restrictions on operating conditions Meaning for devices marked with X: Explanation of usage conditions X The devices have a low mechanical protection and must be ƒ Example extract installed so that they cannot be mechanically damaged from type plate the outside;... -
Page 13: Product Description
Product description Product description Product description Goods arrival Check the shipment for transport damage and completeness. Goods arrival > Report any transit damage immediately to the supplier. NOTICE NOTICE Condensate could damage the gauge. A large difference in temperature between storage location and installation location can cause condensation. -
Page 14: Vacuu·view Vacuum Gauge
Product description 3.1 VACUU·VIEW vacuum gauge VACUU·VIEW vacuum gauge The gauge as stand‑alone version will be supplied with wall power Gauge description supply plug. The gauge includes a vacuum sensor and is equipped and designs with an illuminated display for pressure display. The gauge is high‑ ly, chemically resistant. -
Page 15: Device View
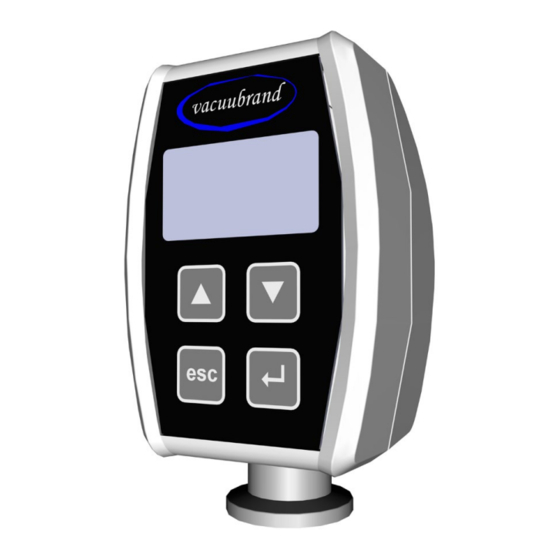
Product description 3.1.2 3.1.2 Device view Device view Front and rear side Side view VACUU·VIEW Display Operating elements Small flange KF DN16, inside thread G1/4” ` Material: PP black VACUU·VIEW ` Material: Aluminium + PPS VACUU·VIEW extended Rating plate (here VACUU·VIEW) Connection cable, 2 m ` for connection to wall power supply plug... -
Page 16: Application Example
Product description 3.2 Application example Application example Example VACUU·VIEW direct installation Wall power supply, wall power supply plug Plug connector, connection cable (each 2 m) Vacuum chamber, tank, apparatus VACUU·VIEW vacuum gauge (Stand-alone version including wall power supply plug) Vacuum valve Vacuum hose Diaphragm pump, vacuum pump... -
Page 17: Connection And Operation
Connection and operation Connection and operation Connection and operation 4.1 Connection Connection 4.1.1 4.1.1 Installation Installation Never install the measuring instrument too close to hot equip‑ IMPORTANT! ment, like on top of a rotary vane pump, in order to avoid incor‑ rect measurements or damages to the sensor. -
Page 18: Vacuum Connection
Connection and operation 4.1.2 4.1.2 Vacuum connection Vacuum connection > Maximum admissable pressure at vacuum sensor: 1.5 bar/ IMPORTANT! 750 Torr (absolute). > Pollution and damages, especially at the flange, could affect the measurement. > If possible assemble the vacuum gauge vertically; this pre‑ vents condensate accumulation. -
Page 19: Electrical Connection
> NOTICE NOTICE The CE/UKCA mark and a cTÜVus mark (see rating plate) may be voided if not using a VACUUBRAND power supply. Use a VACUUBRAND wall power supply plug or another > VACUUBRAND peripheral device (e. g., controller VACUU·SELECT) to provide the supply voltage. - Page 20 Connection and operation Prepare wall power supply plug 1. Take the wall power supply kit out of the packaging. Prepare connection 2. Select the mains plug that fits to your mains socket. 3. Connect the mains plug to the metal contacts of the wall pow‑ er supply plug.
-
Page 21: Controller, Gauge And Vacuu·bus
® ® VACUU·BUS is a communication system for peripheral acces‑ Meaning ® sories that are connected to VACUUBRAND controller or gauge. VACUU·BUS components will be automatically detected by ® VACUU·SELECT/CVC 3000/DCP 3000. By uniform connectors and Y adapter the bus‑system can be extended with up to 32 peripherals. - Page 22 Connection and operation Connection example VACUU·BUS mit VACUU·VIEW ® Example VACUU·VIEW as VACUU·BUS ® component (client) VACUU·SELECT, CVC 3000 VACUU·SELECT, CVC 3000* (or DCP 3000 3000*) Connection cable (power supply via VACUU·BUS) VACUU·VIEW – Rough vacuum measurement VACUU·VIEW extended – Rough‑ until fine vacuum measure‑ ment * Options with CVC 3000 or DCP 3000: ` using the RS 232 interface with an external application for...
-
Page 23: Operation
Connection and operation 4.2 Operation Operation The operation is limited to the pre‑settings about pressure unit and display settings, such as the sensitivity of the touch panel. Aside from that, version information can be displayed and factory settings or updates can be loaded. Operation of the gauge is un‑ necessary during the running measurement. -
Page 24: Operating Elements
Connection and operation 4.2.2 4.2.2 Operating elements Operating elements The front side of the gauge consists of a glass with a touch‑sensi‑ tive control pad including 4 keys. Operating elements Meaning touch keys Arrow up ` Menu selection ` Navigate upwards ` Increase value Arrow down down... -
Page 25: Menu Structure
Connection and operation 4.2.3 4.2.3 Menu structure Menu structure The display with text Menu Menu in the footer can be called up by any touch key. The menu language is English. VACUU·VIEW Menus Menu structure or press any key Pressure reading Call‑up selection menus Menus ` Settings... - Page 26 Connection and operation Menu Settings Adjustment option for Settings Menu Settings Menu Settings Unit Default settings pressure unit ` mbar ` hPa ` Torr Adjustment Sensor adjustment ` ATM (700‑1080 mbar) ` Vacuum (0 mbar) 20901330_EN_VVIEW (extd)_V1.11_230223...
- Page 27 Connection and operation Menu Settings Menu Settings Touch Adjust sensitivity of the touch panel ` High ` Media ` Low Display Adjust brightness and contrast ` Backlight: 10% – 100 ` Contrast: 10% – 100 Menu Info Call‑up version information Menu Info Menu Info Info...
- Page 28 Connection and operation Service menu Service menus 20901330_EN_VVIEW (extd)_V1.11_230223...
- Page 29 Connection and operation Service menu Service menu Update To perform software updates Service menus ` Start update Factory Reset to factory settings Settings ` reset to Factory Settings Diagnostics* Call‑up diagnostics menu ` Adjustment from software version V1.04 ` Measurements ` Raw Values from software ` Other Values...
-
Page 30: Operation
Operation Operation Operation 5.1 Vacuum measurement Vacuum measurement Directly after mains connection the gauge VACUU·VIEW (extended) starts measuring and displaying pressure reading. Also when connected to a VACUU·BUS system, pressure read‑ ® ing starts immediately. The measurement starts immediately after switching on CVC 3000 or DCP 3000 CVC 3000... -
Page 31: Adjustment
Operation 5.3 Adjustment Adjustment NOTICE NOTICE For pressure < 5 mbar the VACUU·VIEW extended measures the pressure-dependent thermal conductivity of gas. The gauge is factory adjusted for air. For gases with higher mass, this may (<5 mbar) result in incorrect measurements. ·... -
Page 32: Adjustment At Atmospheric Pressure
Operation 5.3.2 5.3.2 Adjustment at atmospheric pressure Adjustment at atmospheric pressure Perform sensor adjustment at atmospheric pressure 1. Call up the menu Settings/Adjustment menu Settings/Adjustment. Sensor adjustment at atmospheric pressure 2. If necessary, correct the value to the precise atmospheric pressure in accordance with the reference gauge by pressing the arrow keys. -
Page 33: Adjustment To Reference Pressure
Operation 5.3.3 5.3.3 Adjustment to reference pressure Adjustment to reference pressure Adjustment VACUU·VIEW to reference pressure 1. Connect the gauge VACUU·VIEW to a vacuum pump which Adjustment at reference pressure pumps to a precise vacuum, e. g., down to 2 mbar. >... -
Page 34: Adjustment Under Vacuum
Operation 5.3.4 5.3.4 Adjustment under vacuum Adjustment under vacuum NOTICE NOTICE The adjustment at vacuum for VACUU·VIEW extended always occurs to the final measured value with 0 mbar. An adjustment to a reference vacuum value is not possible. Pump down to an ultimate vacuum as low as possible. >... -
Page 35: Service Menus
Service menus Service menus Service menus 6.1 Update Update NOTICE NOTICE Damage to the gauge due to incorrect execution of updates. Gauges may be damaged by incorrect or unauthorized proce‑ dure. Please note that you must have the necessary authorizations >... - Page 36 Download and start update software 1. Download the ZIP file with updates for your device from Download update VACUUBRAND homepage onto your computer. file 2. Unzip the ZIP file: Right‑click on the ZIP file Extract to... Extract to... 3. Open the extracted folder.
-
Page 37: Update Gauge
Service menus 6.1.2 6.1.2 Update gauge Update gauge > Please regard that you ever need to use the gauge and then IMPORTANT! promptly switch to the Update window on your monitor. > Also note that the time window in which the update applica‑ tion searches a connected device, takes 20 seconds. - Page 38 Service menus 4. Wait until the update is completely loaded. Perform software update 5 The following prompt appears in the update application: 5 Update succeeded. 5 The display of the gauge is switched on again. IMPORTANT! > Regard the warm‑up time also after updating the gauge. 20901330_EN_VVIEW (extd)_V1.11_230223...
-
Page 39: Factory Settings
Service menus 6.2 Factory Settings Factory Settings Reset to factory settings 1. Call up menu Service/Factory Settings menu Service/Factory Settings Factory settings 2. Press Enter to start Reset. Enter 5 Factory settings loaded. 20901330_EN_VVIEW (extd)_V1.11_230223... -
Page 40: Submenu Diagnostics
> Please send us photos of the displayed values. As well IMPORTANT! measured under vacuum as at atmospheric pressure. > Email the photos to: service@vacuubrand.com > Details about the product type and serial number from the rating plate are also required. 20901330_EN_VVIEW (extd)_V1.11_230223... -
Page 41: Resolving Problems
Resolving problems Resolving problems Resolving problems CAUTION Malfunction because of incorrect repair by the customer. The gauge is not intended for the repair by customer. Never open the vacuum gauge. > If the gauge is defective, please send it to our >... -
Page 42: Fault - Cause - Remedy
Resolving problems 7.2 Fault – Cause – Remedy Fault – Cause – Remedy Fault Fault ` Possible cause Resolving problems 3Remedy Over Pressure Pressure too high. Vent the system or appara‑ tus. Measuring range exceeded. Reduce pressure. Perform sensor adjustment. Call‑up diagnostics menu and inform our Service about the status. - Page 43 Resolving problems Fault Fault ` Possible cause 3Remedy No display No power, wall power Check power supply, connect supply plug defective wall power supply plug to a or not connected. socket. Possible error during USB serial port No driver installed for Install the driver for the an update RS485/USB interface.
- Page 44 Service department. > For practical help in contact with our Service department also use 6.3 Submenu Diagnostics on page 40 6.3 Submenu Diagnostics on page 40 1 -> Phone: +49 9342 808-5660, Fax: +49 9342 808-5555, service@vacuubrand.com 20901330_EN_VVIEW (extd)_V1.11_230223...
-
Page 45: Cleaning
Cleaning Cleaning Cleaning Clean the sensor to remove malfunctions that are caused by a polluted sensor. We recommend to clean the sensor before ad‑ justment. This chapter does not contain descriptions for the decontam‑ IMPORTANT! ination of the product. This chapter describes only simple cleaning and care measures. -
Page 46: Appendix
Appendix Appendix Appendix 9.1 Technical information Technical information Designs Vacuum gauge – Rough vacuum VACUU·VIEW Vacuum gauge – Fine vacuum VACUU·VIEW extended 9.1.1 9.1.1 Technical data Technical data Ambient conditions Technical data (US) Ambient temperature 10–40 °C 50–104 °F Working temperature 10–40 °C 50–104 °F Transport and storage tem‑... - Page 47 Appendix Power Surge Category Technical data Interface VACUU·BUS ® Vacuum data VACUU·VIEW (US) Measuring range, 1100–0,1 mbar 825–0.1 Torr absolute Accuracy of < ±1 mbar/hPa/Torr, ±1 digit measurement (after adjustment, constant temperature) Measuring principle Ceramic diaphragm (alumina), capacitive, gas type independent, absolute pressure Temperature coefficient <...
-
Page 48: Wetted Materials
Appendix Display Technical data Type LC display (LCD) Brightness control Pressure reading switchable: mbar, Torr, hPa Weight and dimensions* (US) Weight 190 g 0.4 lb Dimension sheet 103 mm x 62 mm x 50 mm 4 in. x 2.4 in. x 2 in. * without wall power supply 9.1.2 9.1.2 Wetted materials... -
Page 49: Rating Plate
Appendix 9.1.3 9.1.3 Rating plate Rating plate In case of malfunction, please note type and serial number > on the rating plate. When contacting our service department, name us product > type and serial number. With this information we can offer selective support and advice for your product. -
Page 50: Ordering Information
Purchase original accessories and spare parts from your spe‑ specialized trade cialized distributor or through international sales offices of VACUUBRAND GMBH + CO KG. Information about the complete product range are > available in the current product catalog. -
Page 51: Service
Appendix 9.3 Service Service Take advantage of the comprehensive service range of Service offer and VACUUBRAND GMBH + CO KG. service range Service in detail product guidance and practical solutions, ƒ fast delivery of spare parts and accessories, ƒ professional maintenance, ƒ... -
Page 52: Index
Appendix 9.4 Index Index Index Accessories ....50 Gauge description ....14 Action step . - Page 53 Appendix Index Sensor adjustment (vacuum) ..34 Service menus ... . . 28 Service range ....51 Servicing handling .
-
Page 54: Overview Menu Structure Vacuu·view (Extended)
Appendix 9.5 Overview menu structure Vacuu·View (extended) Overview menu structure Vacuu·View (extended) 20901330_EN_VVIEW (extd)_V1.11_230223... -
Page 56: Declaration Of Conformity (Ec)
Déclaration CE de conformité Déclaration CE de conformité Hersteller / Manufacturer / Fabricant: VACUUBRAND GMBH + CO KG · Alfred‑Zippe‑Str. 4 · 97877 Wertheim · Germany Hiermit erklärt der Hersteller, dass das Produkt konform ist mit den Bestimmun‑ gen der Richtlinien: Hereby the manufacturer declares that the device is in conformity with the directives: Par la présente, le fabricant déclare, que le dispositif est conforme aux directives:... -
Page 57: Declaration Of Conformity (Uk)
Declaration of Conformity Manufacturer: VACUUBRAND GMBH + CO KG · Alfred‑Zippe‑Str. 4 · 97877 Wertheim · Germany Hereby the manufacturer declares that the device is in conformity with the directives: Electrical Equipment (Safety) Regulations 2016 (S.I. 2016 No. 1101, as ƒ... - Page 58 Appendix 9.8 Declaration of Conformity Declaration of Conformity 符合性声明 符合性声明 – China RoHS 2 – China RoHS 2 – a “Product Conformity Assessment” (PCA) procedure was performed. As defined in GB/T 26572 the “Maximum Con- centration Value” limits (MCV) apply t •...
- Page 59 Appendix 表示该有毒有害物质在该部件所有均质材料中的含量均在GB/T 26572规定的限量要求以下。 表示该有毒有害物质至少在该部件某一均质材料中的含量超出GB/T 26572规定的限量要求。 电池、玻璃器皿和配件可能不属于所附设备所包含的内容,它们可能有各自单独的EFUP标记和/或可能正在维 护其部件EFUP标记的更新。 除上表所示信息外,还需声明的是,这些部件并非是有意用铅( )、 汞 ( )、铬( )、六价铬 ( )、多溴联苯( )或多溴二苯醚( )来制造的。 – 20901330_EN_VVIEW (extd)_V1.11_230223...
-
Page 60: Cu Certificate
Appendix 9.9 CU Certificate CU Certificate 20901330_EN_VVIEW (extd)_V1.11_230223... - Page 61 20901330_EN_VVIEW (extd)_V1.11_230223...
- Page 62 20901330_EN_VVIEW (extd)_V1.11_230223...
- Page 63 20901330_EN_VVIEW (extd)_V1.11_230223...
- Page 64 VACUUBRAND > Support > Manuals Manufacturer: VACUUBRAND GMBH + CO KG VACUUBRAND GMBH + CO KG Alfred‑Zippe‑Str. 4 Alfred‑Zippe‑Str. 4 97877 Wertheim 97877 Wertheim GERMANY GERMANY Phone: Head office +49 9342 808‑0 Sales +49 9342 808‑5550 Service +49 9342 808‑5660 Fax: +49 9342 808‑5555...
Need help?
Do you have a question about the VACUU-VIEW and is the answer not in the manual?
Questions and answers