Table of Contents
Advertisement
Quick Links
Advertisement
Table of Contents

Related Manuals for Bauhn P61330


Summary of Contents for Bauhn P61330
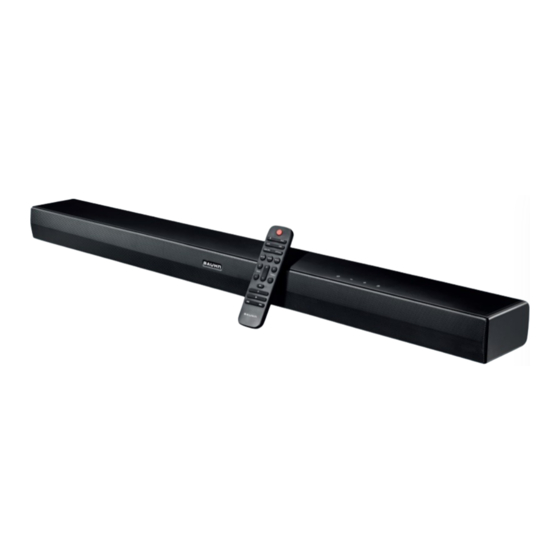
- Page 1 User Manual 2.1 CHANNEL SOUNDBAR WITH BUILT-IN SUBWOOFER P61330...
-
Page 2: Table Of Contents
Contents Contents About this user manual ................... 5 Explanation of symbols ..................5 Proper use ....................... 7 Safety information ..................8 Setting up the device safely ................8 Power supply ..................... 10 Handling batteries .................... 10 Ambient temperature ..................12 Faults ........................13 Package contents ................... 13 Device overview .....................14 Top ........................14 Control buttons ....................14... - Page 3 Contents Setting the equaliser sound effects ..............28 Setting the treble and bass ................28 Playback control in USB/Bluetooth® mode ...........28 Maintenance ....................29 Cleaning ......................29 Storing the device when not in use .............. 30 Troubleshooting .................... 30 Declaration of conformity ................31 Trademark information ..................31 Disposal ......................32 Technical specifi...
-
Page 4: About This User Manual
About this user manual About this user manual Thank you for choosing our product. We hope you enjoy using it. Read the safety instructions carefully before using the device for the fi rst time. Note the warnings on the device and in the user manual. Always keep the user manual close to hand. - Page 5 About this user manual Protection class II Electrical appliances in protection class II are electrical appliances that permanently have double and/or reinforced insulation and do not have the option of connecting a protective earth. Indoor use Devices with this symbol are only suitable for use indoors. Symbol for direct current Symbol for alternating current The Australian Regulatory Compliance Mark (RCM) is a single...
-
Page 6: Proper Use
Proper use Proper use The device is used to play back audio signals. The soundbar is designed for connecting to televisions. Other devices such as portable CD or MP3 players, computers/notebooks, smartphones and stereo systems can also be connected. The device is only intended for private use and not for industrial/ commercial use. -
Page 7: Safety Information
Safety information Safety information WARNING! Risk of injury due to improper handling. − This device is not intended to be used by people (including children) with reduced physical, sensory or mental capacity or with a lack of experience and/or knowledge unless they use the device under the supervision of a person responsible for their safety or if they have been given instructions about how to use the device safely. - Page 8 Safety information − Do not use the device in areas where there is a risk of explosion. This includes e.g. fuel pumps, fuel storage areas or areas in which corrosive agents are processed. This device should also not be used in areas where the air is contaminated with particles (e.g.
-
Page 9: Power Supply
Safety information Power supply WARNING! Risk of injury due to electric shock! There is a risk of electric shock due to live wires. − The power points must be located near the device and be easily accessible. Lay the cord in such a way that no-one can step on it or trip over it. - Page 10 Safety information WARNING! Risk of chemical burns! The remote control contains two AAA batteries. If these batteries are swallowed, they can cause severe internal chemical burns within 2 hours that may lead to death. − If you suspect your child has swallowed a battery immediately call the 24-hour Poisons Information Centre on 13 11 26 for fast, expert advice.
-
Page 11: Ambient Temperature
Safety information − Never expose the batteries to excessive heat (such as sunlight, fi re or similar). − Store batteries in a cool and dry place. Extreme direct heat can damage the batteries. Do not expose the device to extreme sources of heat. -
Page 12: Faults
Package contents Faults − If the device or the power cord is damaged, turn off the power point immediately and pull out the plug. − Do not use the device or its accessories if they show signs of damage or if you see smoke or hear abnormal noises during operation. -
Page 13: Device Overview
Device overview Device overview LED indicator light • Red: In STANDBY mode • Green: In AUX mode • Flashing green: In USB mode • Blue: In Bluetooth mode • Orange: In Optical mode • White: In HDMI ARC mode Rubber feet Control buttons Switch on the soundbar / switch to standby mode Decrease volume... -
Page 14: Rear View
Device overview Rear view Attachment points for mounting on wall Connections Connection socket for power cord (100–240 V 50/60 Hz) Socket for TV and other audio output devices (3.5 mm jack) USB port (5 V 500 mA) for playing MP3 fi les Output socket for ARC-capable TV and other audio output HDMI ARC devices OPTICAL... -
Page 15: Remote Control
Device overview Remote control Switch on the soundbar / switch to standby mode PAIR In Bluetooth mode: activate pairing mode / disconnect already paired Bluetooth device Select USB operating mode Select Optical OPTICAL operating mode Increase / decrease TREBLE +/- treble Mute / unmute soundbar... -
Page 16: Preparation For Use
Preparation for use HDMI ARC Select HDMI ARC operating mode Select AUX operating mode Select Bluetooth operating mode Preparation for use Inserting batteries into the remote control Before fi rst use or if the device no longer responds to the remote control, or only responds poorly, the batteries must be inserted or changed. -
Page 17: Setting Up / Mounting Soundbar
Preparation for use Setting up / mounting soundbar You have the option of using the soundbar either on a horizontal surface (Fig. 2 Version A) or mounted on a wall using the supplied wall brackets (Fig. 2 version B). Version A – using soundbar on a horizontal surface NOTICE! Risk of damage! There is a risk that the devices may be damaged if not set up... - Page 18 Preparation for use Version B – fi xing soundbar onto a wall WARNING! Risk of injury due to electric shock! There is a risk of electric shock due to live wires. − Select a suitable location to set up the device and make sure that you do not damage concealed electrical wires or installation cables when drilling.
-
Page 19: Connecting External Devices
Connecting external devices − Hang the soundbar with the wall attachment screws onto the mounting slots on the wall brackets (D). 796 mm Connecting external devices You can connect a range of different audio output devices to the soundbar, such as a television, an MP3 or CD player, a receiver, a computer, a USB stick, etc. -
Page 20: Connecting External Device Via Aux
Connecting external devices Connecting external device via AUX Audio cable with 2 × 3.5 mm diameter jacks To connect an audio output device to the soundbar using the device’s headphone output socket (see Fig. 4, A), you need an audio cable with 2 × 3.5 mm diameter jacks (included). -
Page 21: Connecting An External Device Using The Optical Socket
Connecting external devices Connecting an external device using the optical socket OPTICAL Digital amplifi ers or televisions with optical digital output can be connected to the soundbar using the OPTICAL socket (see Fig. 5). You need a digital optical cable (not included). -
Page 22: Connecting Devices Using Hdmi Arc
Connecting external devices Connecting devices using HDMI ARC HDMI (ARC) HDMI ARC Proceed as follows to connect your television with the soundbar using HDMI ARC (see Fig. 6): − Set the volume on the television to a moderate level. − Switch off the television and the soundbar. −... -
Page 23: Connecting Usb Storage Devices
Connecting external devices HDMI ARC (Audio Return Channel) ARC not only enables audio signals to be received via HDMI but also allows them to be returned via the same cable. In order to use HDMI ARC functions, all connected components must support HDMI ARC. -
Page 24: Setting Up The Soundbar
Setting up the soundbar Setting up the soundbar Connecting the soundbar to mains power − Ensure that all required devices are connected to the soundbar. − Connect the supplied power cord to the AC~ socket on the soundbar and connect the other end to a readily accessible mains power point (see Fig. 8). Switching on the soundbar / switching to standby mode −... -
Page 25: Connecting An External Device Via Bluetooth
Connecting an external device via Bluetooth® Connecting an external device via Bluetooth® Bluetooth operation allows the wireless reception of audio signals from an external Bluetooth-capable audio output device. Make sure that the distance between the two devices is no more than 8 metres. Only one Bluetooth device can ever be connected to the soundbar at the same time. -
Page 26: Operation
Operation If you have connected the soundbar to a Bluetooth device that supports the A2DP profi le as well as the AVRCP profi le (Audio Video Remote Control), the soundbar is used as the output medium and the audio signals are only outputted from the soundbar. -
Page 27: Muting The Soundbar
Operation Muting the soundbar − Press the button on the remote control to mute the audio output on the soundbar. − Press the button on the remote control again or one of the volume buttons on the soundbar or on the remote control to unmute the sound output. -
Page 28: Maintenance
Maintenance Maintenance WARNING! Risk of injury due to electric shock! − Never try to open or repair the device yourself. There is a risk of electric shock. Please contact our Service Centre if you are having technical problems with your device. -
Page 29: Storing The Device When Not In Use
Storing the device when not in use Storing the device when not in use − If you are not going to use the device for an extended period, disconnect it from mains power and store it in a cool, dry place. −... -
Page 30: Declaration Of Conformity
− Point the remote control directly at the front of the soundbar. Declaration of conformity MEDION AG hereby declares that the product P61330 (MD 44330) conforms to all relevant Australian requirements. Trademark information The HDMI logo and High-Defi nition Multimedia Interface are registered trademarks of HDMI Licensing LLC. -
Page 31: Disposal
Disposal Disposal For more information on recycling visit arl.org.au Case Insert Card PACKAGING The product has been packaged to protect it from damage during transport. The packaging is made of materials that can be recycled in an environmentally friendly manner. DEVICE Old devices must not be disposed of with normal household waste. -
Page 32: Technical Specifi Cations
Technical specifi cations Technical specifi cations Soundbar Mains connection: 100–240 V ~ 50/60 Hz Power consumption (in operation): 25 W Power consumption (in standby mode): < 0.5 W Output power: 15 W x 2 + 30 W RMS (built-in subwoofer) Dimensions (W×H×D): Approx. -
Page 33: Privacy Statement
Privacy statement Privacy statement Dear customer, We wish to inform you that we, MEDION AG, Am Zehnthof 77, D-45307 Essen, Germany process your personal data as a data controller. For matters regarding data protection, we are supported by our company data protection offi cer who can be contacted at MEDION AG, Datenschutz, Am Zehnthof 77, D-45307 Essen;... -
Page 34: Service Information
Service information Service information Please contact our Customer Service team if your device ever stops working the way you want or expect it to. There are several ways for you to contact us: • In our Service-Community, you can meet other users, as well as our staff, and you can exchange your experiences and pass on your knowledge there. -
Page 35: Legal Notice
Legal Notice Legal Notice Copyright © 2022 Date: 15.11.2022 All rights reserved. Version: V2.0 These operating instructions are protected by copyright. Mechanical, electronic and any other forms of reproduction are prohibited without the written permission of the manufacturer. Copyright is owned by the distributing company: MEDION AG Am Zehnthof 77 45307 Essen... -
Page 36: Warranty Details
2.1 CHANNEL SOUNDBAR WITH BUILT-IN SUBWOOFER Warranty Details REGISTER YOUR PURCHASE AT www.aldi.com.au/en/about-aldi/product-registration/ TO KEEP UP-TO-DATE WITH IMPORTANT PRODUCT INFORMATION The product is guaranteed to be free from defects in workmanship and parts for a period of 12 months from the date of purchase. Defects that occur within this warranty period, under normal use and care, will be repaired, replaced or refunded at our discretion. -
Page 37: Repair And Refurbished Goods Or Parts Notice
2.1 CHANNEL SOUNDBAR WITH BUILT-IN SUBWOOFER Repair and Refurbished Goods or Parts Notice REGISTER YOUR PURCHASE AT www.aldi.com.au/en/about-aldi/product-registration/ TO KEEP UP-TO-DATE WITH IMPORTANT PRODUCT INFORMATION Unfortunately, from time to time, faulty products are manufactured which need to be returned to the Supplier for repair. Please be aware that if your product is capable of retaining user-generated data (such as fi... - Page 38 Made in China BAUHN IS A REGISTERED TRADEMARK OF HANDS (IP) HOLDINGS PTY DISTRIBUTED BY: ALDI STORES 1 SARGENTS ROAD MINCHINBURY NSW 2770 www.aldi.com.au AFTER SALES SUPPORT 711730 1 300 884 987 australia@medion.com YEAR MODEL: WARRANTY 04/2023 MD 44330...
Need help?
Do you have a question about the P61330 and is the answer not in the manual?
Questions and answers