
Related Manuals for Polycom SoundPoint IP 600 SIP 1.6.x


Summary of Contents for Polycom SoundPoint IP 600 SIP 1.6.x
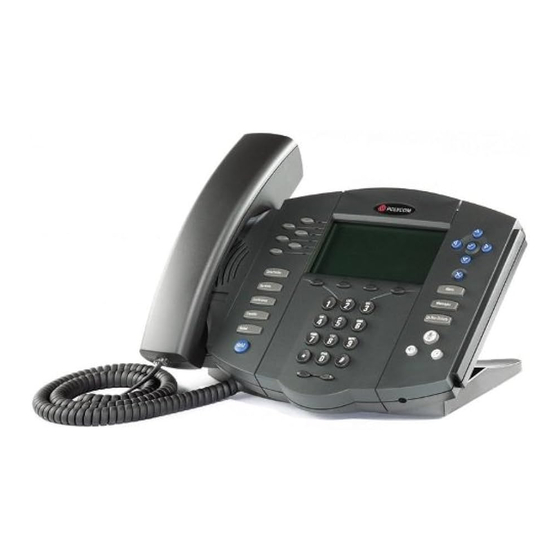
- Page 1 User Guide SoundPoint IP 600 SIP 1.6.x ® October 27, 2005 Get user manuals: See SafeManuals.com...
-
Page 2: Table Of Contents
Contents Introduction ..........1 Parts List ........... 1 Installing SoundPoint IP 600 SIP ....2 ® Connecting Network and Power Source ......2 Connecting the Handset and Optional Headset ....3 Attaching the Base............3 Features ............ 4 Key Descriptions ......... 5 Using SoundPoint IP 600 SIP ....... - Page 3 Modifications ..............22 Installation Instructions............ 22 Plug Acts as Disconnect Device ........22 Industry Canada (IC)............22 CE & VCCI Mark ............22 Polycom Limited Warranty and Limitation Liability ......22 Exclusions ..........23 Warranty Exclusive........23 Service Agreements........23 Limitations of Liability .......
-
Page 4: Introduction
If you are SoundPoint IP 600 SIP package. Check missing any items, please contact your ® this list before installation to ensure that system administrator. Polycom SoundPoint IP 600 SIP ® Power Adapter (specification varies according to country) Directories... -
Page 5: Installing Soundpoint
Point IP 600 SIP phone. If you require review and can also be found at www. ® additional information or assistance with polycom.com. your new phone, please contact your sys- tem administrator. Connecting Network and Power Source AC Power Option... -
Page 6: Connecting The Handset And Optional Headset
2. Connect the headset (optional accessory) to the headset jack on the back of the phone. For information on headsets, please visit www.polycom.com and choose the Support link. Attaching the Base 1. Place all cords in the recessed area 2. Align the two protrusions on the above the modular jacks as shown. -
Page 7: Features
Features Line Indicators Individual multi-color LEDs display a dynamic call state. Display Control Keys Line/Speed Dial Keys Use the arrow keys Use these keys to activate to scroll through the up to six lines or speed displayed information. dials that can be assigned to your phone. -
Page 8: Key Descriptions
Key Descriptions Feature Key Description Allows for hands-free communication during calls. Mutes audio transmission locally during calls. Allows users to place and receive calls through an optionally con- Directories nected headset. Directories Directories Services Menu Services Line or Speed Dial keys with LED indicators. Call Lists Services Menu... -
Page 9: Using Soundpoint Ip 600 Sip
Call Lists Messages joe@205.173.1.24 followed by Status, Platform Menu Directories Redial PQRS WXYZ Buddy Status sip: jane@polycom.com Phone. The IP address is listed together with Hold Hold Services Messages Do Not Disturb PQRS WXYZ other phone information. My Status OPER... -
Page 10: Answering A Call
Answering a Call Using the Handset: Conference Directories ick up the handset. Services Using Hands-Free Speakerphone Mode: Menu Call Lists Incoming calls may be ignored Press , or with the handset on hook press the Messages by pressing the Reject soft key or line key with the active indicator, or the Answer Buddy Status during ringing. -
Page 11: General Key Use
Menu Directories Directories Menu Messages Services Services Messages General Key Use Do Not Disturb Conference Conference Do Not Disturb To navigate through menus and to enter data, Transfer Transfer these are useful tips: Redial PQRS PQRS WXYZ WXYZ Redial 5. To enter text using the dialpad, press Hold Hold 1. -
Page 12: Call Timer
transfer or press the Split soft key to Transfer may be cancelled during estab- lishment by pressing the Cancel soft key. put the first call on hold and keep the second call as the active call . The original call is resumed. Call Timer Call duration on an active call is monitored through a local call timer. -
Page 13: Do Not Disturb
Menu Messages Do Not Disturb Press to prevent the phone from (Optional) If multiple lines are in use, Do Do Not Disturb ringing on incoming calls. A flashing icon Not Disturb can be set on a line-by-line and text on the display indicates that Do basis. -
Page 14: Ring Type
Ring Type Many ring types are available. Users can 3. Using the arrow keys, highlight the desired ring type. Press the Play soft select different rings to distinguish be- tween lines or to have a different ring from key to hear the selected ring type. Conference Directories 4. -
Page 15: Speed Dial
3. Enter first and/or last name from the 5. Speed Dial Index, Ring Type and keypad. Press the 1/A/a soft key Divert Contact may be left blank. to select between numeric and up- 6. Use to switch between per/lower case alphanumeric modes. Enabled and Disabled settings for Press the Encoding soft key to access the last four fields. -
Page 16: Multiple Lines
To dial a number assigned to a Line Key, simply press the line key directly opposite the number on the display. To remove a Speed Dial entry: 3. Delete the Speed Dial Index number 1. Press and select Contact Conference Directories using the then... -
Page 17: Multiple Call Appearances
Multiple Call Appearances Each line on the phone can be configured to have one or more call appearances. More than one call appearance is useful if there is an active call and an incoming call arrives on the same line. In the example shown, extension 9301 is in an outbound call with 9304. -
Page 18: Shared Lines
Shared Lines The phone supports shared lines shared line is indicated by a different line icon. In the diagram, the first line is private and the second line is shared. If two phones share a line, an incoming call to that number will cause both phones to ring. -
Page 19: Distinctive Ringing / Call Treatment
Distinctive Ringing / Call Treatment Users can set distinctive incoming ringing tones for contacts in their local directory. This allows identifica- tion of a contact by a specific ring tone. To set a distinctive ring for a local contact: value). See Ring Type in this 1. -
Page 20: Phone Reboot
Phone Reboot Periodically, the phone may require a user reboot. Reasons for this include accepting a new configuration or new software. There are two ways to reboot the phone: Menu Directories Services Messages ► Simultaneously press and hold the Mes- Conference Do Not Disturb sages, Microphone Mute, and Volume... -
Page 21: Presence / Status / Buddy Lists
Menu To send a text message: 6. Press the Select soft key to choose 1. Press Messages 2. Select Instant Messages. from various pre-scripted short mes- 3. (Optional) If multiple lines are in sages, Do Not Disturb use, first select from which line to send a message. - Page 22 To view and change Presence settings: Menu 1. Press and select Features 3. Choose Buddy Status to monitor and Presence. the status of the contacts within Messages 2. Choose My Status to change your your buddy list. This can also be accessed by pressing the Buddies soft own status (online, busy, etc.).
-
Page 23: Troubleshooting
Troubleshooting No Dial-Tone Verify power is correctly applied to the Verify if dial tone is present on any other SoundPoint IP 600 SIP phone: audio paths: ® • Check that the display is illuminated. • Switch between handset, headset (if •... -
Page 24: Safety And Compliance
No Response from Feature Key Presses Verify phone is in active state: • Make a call to the phone to check • Press followed by System Menu Directories for inbound call display and ring- Status and Server Status to confirm Services Messages ing as normal. -
Page 25: Modifications
Modifications In accordance with Part 15 of the FCC by Polycom, Inc. could void the user’s Rules, the user is cautioned that any chang- authority to operate the equipment. es or modifications not expressly approved Installation Instructions Installation must be performed in accor- L’Installation doit être exécutée confor-... -
Page 26: Exclusions
Polycom Responsibility for loss or damage does not warrants any replaced or repaired product transfer to Polycom until the returned item or part for ninety (90) days from shipment, is received by Polycom. The repaired or... -
Page 27: Limitations Of Liability
Limited Warranty and Limitation of Polycom, the Polycom logo design, and Liability. SoundPoint are trademarks of Polycom, All rights reserved under International and Inc. - Page 28 Permission is hereby granted, free of IS”, WITHOUT WARRANTY OF ANY charge, to any person obtaining a copy of KIND, EXPRESS OR IMPLIED, IN- this software and associated documenta- CLUDING BUT NOT LIMITED TO THE tion files (the “Software”), to deal in the WARRANTIES OF MERCHANTABIL- Software without restriction, including ITY, FITNESS FOR A PARTICULAR...
- Page 29 Milpitas, CA 95035 ©2005 Polycom, Inc. All Rights Reserved. Polycom®, SoundPoint®, and the Polycom logo design are registered trademarks of Polycom, Inc. in the U.S. and various countries. All other trademarks are the property of their respective companies. 1725-11619-001 Rev. C Get user manuals: See SafeManuals.com...
Need help?
Do you have a question about the SoundPoint IP 600 SIP 1.6.x and is the answer not in the manual?
Questions and answers