Table of Contents
Advertisement
Quick Links
Advertisement
Table of Contents

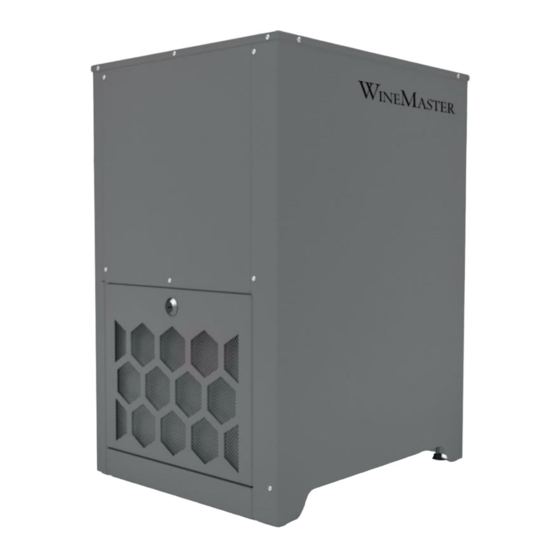
Summary of Contents for WINEMASTER WINEOUT25X
- Page 1 Installation and operating instructions (Keep it in a safe place). WINEOUT25X INFORMATION ON THE RATING PLATE ON THE APPLIANCE : 08/03/2023 1. Model : ……………………………..2. Serial number : ………………………….. 3. Date of purchase : …………………………...
-
Page 2: Table Of Contents
Winemaster Connect ................14 4.1. Thermostat connection ................14 4.2. Connecting the WINEMASTER® air conditioner ........15 4.3. Setting the temperature of the WINEMASTER® COOLER ....... 15 4.4. Setting the unit of measurement ............16 4.5. CARE AND MAINTENANCE OF THE WINEMASTER ®... - Page 3 08.03.2023 VERSION Introduction You have just acquired a WINEMASTER® air conditioner and we thank you for your confidence. From its conception to its marketing, everything has been done to offer you an exclusive and high quality product. The result of the work of a whole team which finds in this philosophy an always greater motivation to satisfy you, we hope that your WINEMASTER®...
- Page 4 08.03.2023 VERSION General Features WINE OUT25X Weight of the device 45kg Device dimensions (mm) H.700 X W.503 X D.498 Temperature setting Preset à 12°C, ajustable entre 8 et 18°C Max outdoor temperature 40°C Cooling capacity 550 W à 15°C • Electric power supply 230/240V-50 Hz + 3 m of cable •...
-
Page 5: Space Planning
→ The suction and the rejection of the air allowing its cooling is done by means of two ducts crossing the wall. 2.1. Warm air discharge If the WINEMASTER® air conditioner rejects hot air in a room (air conditioner installed in a room), this one must be well ventilated : Maximum temperature and not permanent ≤ 40°C Ideal temperature ≈... -
Page 6: Cellar Insulation
6. INSULATED DOOR IMPORTANT The validity of the warranty of the WINEMASTER® air conditioner is linked to the strict respect of the values of the table "Choice of insulation" for all the walls of the cellar (including floor, ceiling and door) as well as to the perfect continuity of the insulation and to an installation in conformity with the notice. -
Page 7: Wall, Ceiling And Floor Insulation
08.03.2023 VERSION Choice of insulation Volume of air- Thickness of expanded Thickness of extruded Thickness of polyurethane conditioned polystyrene (mm) polystyrene (mm) (mm) λ λ λ room (m = 0.044 W.m = 0.030 W.m = 0.025 W.m Wall, ceiling and floor insulation 2.2.1. -
Page 8: Insulation Of Other Elements
- Insulate the existing door with the same type of insulation as for the cellar walls. Insert a seal (in foam for example) between the door and the frame of the door, on all its periphery. - Use a WINEMASTER ®... -
Page 9: Installing The Winemaster ® Air Conditioner
08.03.2023 VERSION 3. INSTALLING THE WINEMASTER ® AIR CONDITIONER THE UNIT MUST BE INSTALLED IN ACCORDANCE WITH NATIONAL ELECTRICAL INSTALLATION REGULATIONS. Make sure you choose the right location for the air conditioner : - Choose the ideal location: shortest possible duct length... - Page 10 Please, note that if the appliance is placed on the floor, the template is intended for the minimum height of the feet. Place the drilling template against the exterior wall where the WINEMASTER® air conditioner will be installed Outside...
- Page 11 08.03.2023 VERSION Fix the air conditioner on the brackets : Unfold the brackets and fix them to the wall - Place the air conditioner on the brackets - Screw the 4 M8 nuts and washers (13 mm wrench) Insert the pipes on the air conditioner WINE OUT25X Page 12 UIDE...
-
Page 12: Installation Of The Water Outlet And The Power Cable
08.03.2023 VERSION 3.1. Installation of the water outlet and the power cable If the power cable is damaged, it must be replaced by the manufacturer, its service department or similarly qualified persons in order to avoid a hazard . 1. DRAINING HOSE Ø19mm X 1.5 meter. - The condensation water is drained through a flexible hose integrated in the air conditioner. -
Page 13: Thermostat And Electrical Connection
4. THERMOSTAT AND ELECTRICAL CONNECTION 4.1. Winemaster Connect The machine is already equipped with the device for the Winemaster Connect application. This must be connected to the digital card with an Ethernet cable (classic 6). The cable is designed to be routed through the cable duct behind the machine. -
Page 14: Connecting The Winemaster® Air Conditioner
- If the cellar temperature is lower than the thermostat setting: the compressor does not start. Only the fan on the cellar side runs. 4.4. Setting the temperature of the WINEMASTER® COOLER The set temperature is set on the thermostat :... -
Page 15: Setting The Unit Of Measurement
08.03.2023 VERSION Setting the unit of measurement The temperature measurement unit can be changed to °C or °F : Unlock the thermostat by making a long press on the symbol Press once on the symbol Previous menu Select the PRO menu and Validate menu press the middle symbol Next menu... -
Page 16: Care And Maintenance Of The Winemaster ® Air Conditioner
® CONDITIONER 5.1. Filter change Open the honeycomb grid Clean the WINEMASTER filter and the honeycomb grid Close the grid properly TO DO FOR THE FILTER : - Control: every 3 months - Clean: 1 time per year →... -
Page 17: Warranty
- The exchange of parts or their repair under the warranty cannot have the effect of extending the warranty. WINEMASTER can in no case be held responsible for the direct or indirect consequences related to the non- functioning of the air conditioner. The warranty is limited to the product supplied by WINEMASTER.


Need help?
Do you have a question about the WINEOUT25X and is the answer not in the manual?
Questions and answers