Canon imageFORMULA DR-M140 Service Manual
First edition
Hide thumbs
Also See for imageFORMULA DR-M140:
- User manual (83 pages) ,
- Reference manual (56 pages) ,
- Brochure & specs (33 pages)

Related Manuals for Canon imageFORMULA DR-M140


Summary of Contents for Canon imageFORMULA DR-M140
- Page 1 FIRST EDITION MY8-13AR-000 AUG. 2011 COPYRIGHT © CANON ELECTRONICS INC. 2011 CANON DR-M140 FIRST EDITION...
- Page 2 COPYRIGHT © CANON ELECTRONICS INC. 2011 Use of this manual should be strictly supervised to avoid disclosure confidential information.
- Page 3 Bulletins to gain a correct and deeper understanding of the machine. This is one way of fostering response for ensuring prolonged quality and function, and for investigating the cause of trouble during troubleshooting. Quality Assurance Center Canon Electronics Inc. COPYRIGHT © CANON ELECTRONICS INC. 2011 CANON DR-M140 FIRST EDITION...
-
Page 4: Table Of Contents
VII. PARTS LAYOUT ON EACH PCB ..2-19 4. Installing the Software......4-2 1. Control PCB ........2-19 5. Connecting to a Computer ....4-3 2. Operation PCB........2-20 6. Power On ..........4-3 COPYRIGHT © CANON ELECTRONICS INC. 2011 CANON DR-M140 FIRST EDITION... - Page 5 3. Serial Number/Other ......5-20 4. Write Setting to Text ......5-21 Scan Check ........... 5-22 1. Scan Check ........5-22 2. Manual Shading ....... 5-24 Firm Load ..........5-24 COPYRIGHT © CANON ELECTRONICS INC. 2011 CANON DR-M140 FIRST EDITION...
-
Page 7: General Description
CHAPTER 1 GENERAL DESCRIPTION PRODUCT OUTLINE......1-1 III. USER OPERATION ........ 1-7 I I. NAME OF PARTS ........1-6 COPYRIGHT © CANON ELECTRONICS INC. 2011 CANON DR-M140 FIRST EDITION... -
Page 9: Product Outline
“Windows” is a trademark of Microsoft Corporation in the U.S. and other countries. Other company names and product names mentioned in this document are registered trademarks or trademarks of the respective companies. COPYRIGHT © CANON ELECTRONICS INC. 2011 CANON DR-M140 FIRST EDITION... -
Page 10: Main Specifications
Sensor operation mode 600dpi or 300dpi Effective reading width 219mm Light source 3-color (RGB) LED, Single-side illumination Background color White Image data memory 32MB *Used for the working memory together. Table 1-101a COPYRIGHT © CANON ELECTRONICS INC. 2011 CANON DR-M140 FIRST EDITION... - Page 11 27 to 255g/m (0.04 to 0.30mm) *Minimum size in normal (52x74mm): 127 to 209g/m *Maximum size (LGL size: 216x356mm): 52 to 209g/m *Maximum size (B5 size: 176x250mm): for 27g/m Table 1-101b COPYRIGHT © CANON ELECTRONICS INC. 2011 CANON DR-M140 FIRST EDITION...
- Page 12 2) Double feed detection by ultrasonic sensor Operation/Indication 1) Button: Power, Start, Stop, Job Select, DFR 2) LED: Job No. (7-segment), Power, DFR, Separate 3) Lever: OPEN, Feed selection Table 1-101c External dimensions (mm) Figure 1-101 COPYRIGHT © CANON ELECTRONICS INC. 2011 CANON DR-M140 FIRST EDITION...
-
Page 13: Precautions
This machine must not arbitrarily be modified or remade. If it is, use may be forcibly suspended. change specifications disassemble reassemble this machine, follow instructions described in this manual and the service information. COPYRIGHT © CANON ELECTRONICS INC. 2011 CANON DR-M140 FIRST EDITION... -
Page 14: Name Of Parts
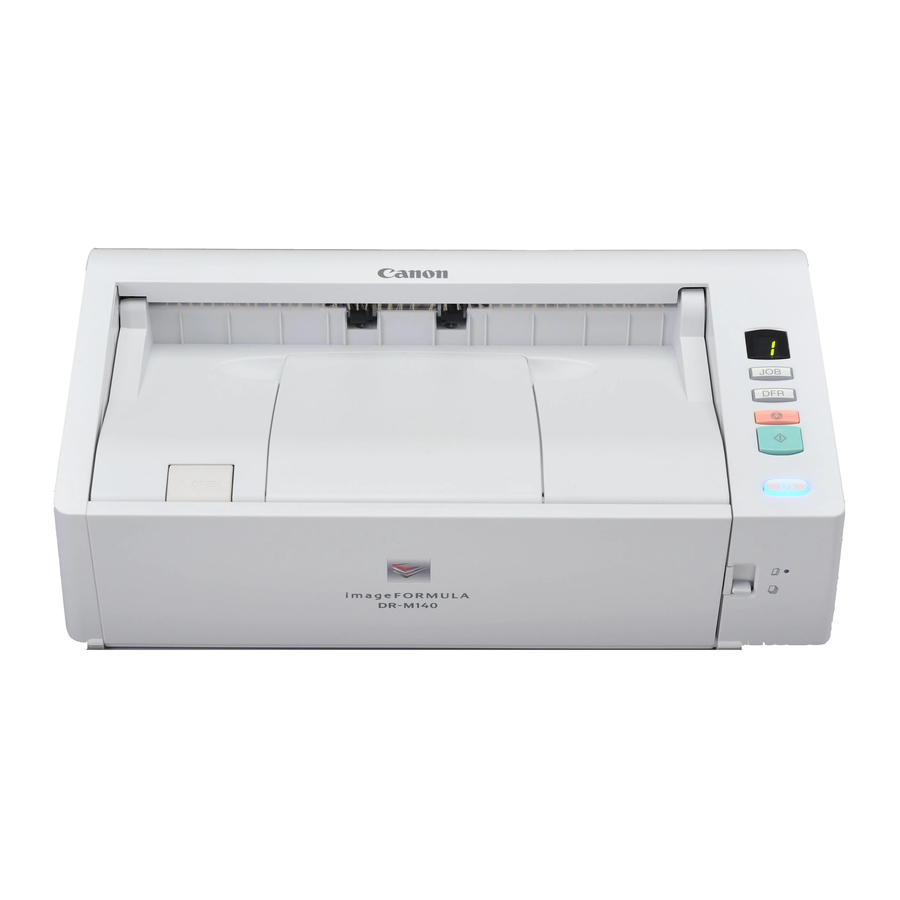
Operating Panel Figure 1-202 Figure 1-203 Kensington slot Job No. indicator Straight path tray Job select button USB connector DFR (Double Feed Release) button Power connector Stop button Start button COPYRIGHT © CANON ELECTRONICS INC. 2011 CANON DR-M140 FIRST EDITION... -
Page 15: User Operation
Open width. the document feed tray. Furthermore, open the document eject extension support if necessary. Figure 1-304 Figure 1-301 Figure 1-305 Figure 1-302 COPYRIGHT © CANON ELECTRONICS INC. 2011 CANON DR-M140 FIRST EDITION... -
Page 16: Scanning
4) Click the Start button to start the scan. 2) When the main screen is displayed, click [Scan First]. Note: Since [Scan First] is enabled by default, this operation is not required. Figure 1-309 Figure 1-307 COPYRIGHT © CANON ELECTRONICS INC. 2011 CANON DR-M140 FIRST EDITION... - Page 17 Note: The button names vary depending on Figure 1-313 the output method. Figure 1-314 Figure 1-311 7) When the output is complete, the finished screen is displayed. Figure 1-312 COPYRIGHT © CANON ELECTRONICS INC. 2011 CANON DR-M140 FIRST EDITION...
-
Page 18: Clearing Paper Jams
1) Remove any remaining documents from the document feed tray. Figure 1-315 2) Pull up the OPEN lever and open the upper unit. Figure 1-316 3) Remove any jammed documents. Figure 1-317 1-10 COPYRIGHT © CANON ELECTRONICS INC. 2011 CANON DR-M140 FIRST EDITION... -
Page 19: Functions & Operation
POWER SUPPLY........2-17 READING SYSTEM ........ 2-6 VI. LAYOUT OF ELECTRICAL COMPONENTS ... 2-18 III. FEED SYSTEM ........2-8 VII. PARTS LAYOUT ON EACH PCB..2-19 I V. CONTROL SYSTEM ......2-13 COPYRIGHT © CANON ELECTRONICS INC. 2011 CANON DR-M140 FIRST EDITION... -
Page 21: Outline
This system is comprised of an image converted from AC power with the AC processing section and a feed control adapter, to the control PCB of this section. machine. COPYRIGHT © CANON ELECTRONICS INC. 2011 CANON DR-M140 FIRST EDITION... -
Page 22: Feed Path
Eject roller (follower) Registration roller (drive) Straight path tray Registration roller (follower) Stopper Straight eject roller (drive) Flapper Straight eject roller (follower) Reading unit (lower) U-turn roller (drive) Reading unit (upper) COPYRIGHT © CANON ELECTRONICS INC. 2011 CANON DR-M140 FIRST EDITION... -
Page 23: Motor Drive
Control PCB Feed motor Pickup roller Feed roller One-way clutch Retard roller (including torque limiter) Feed selection lever Main motor Registration roller Straight eject roller U-turn roller Eject roller Figure 2-103 COPYRIGHT © CANON ELECTRONICS INC. 2011 CANON DR-M140 FIRST EDITION... -
Page 24: Electrical Circuits
Skew sensor (R) PCB drive PCB Sensor Sensor Operation PCB CIS unit (back) Document sensor Sensor Switch CIS unit (front) Main motor Control PCB Sensor Feed motor USB interface AC adapter Figure 2-104 COPYRIGHT © CANON ELECTRONICS INC. 2011 CANON DR-M140 FIRST EDITION... -
Page 25: Timing Chart
Start Document sensor Pre-registration sensor Post-registration sensor Feed motor Main motor Read front surface Read back surface Figure 2-105 COPYRIGHT © CANON ELECTRONICS INC. 2011 CANON DR-M140 FIRST EDITION... -
Page 26: Reading System
PCB. prevent reading speed from decreasing, the image data is divided into four and output in parallel. The reading unit consists of CIS unit, guide, and case. COPYRIGHT © CANON ELECTRONICS INC. 2011 CANON DR-M140 FIRST EDITION... -
Page 27: Shading
PCB recording document does not cause dirt on it. Note the shading correction value. that executing shading while the reading COPYRIGHT © CANON ELECTRONICS INC. 2011 CANON DR-M140 FIRST EDITION... -
Page 28: Feed System
Straight eject roller (follower) Document sensor detection point U-turn roller (drive) Pre-registration/skew sensor detection point U-turn roller (follower) Ultrasonic sensor detection point Eject roller (drive) Post-registration sensor detection point Eject sensor detection point COPYRIGHT © CANON ELECTRONICS INC. 2011 CANON DR-M140 FIRST EDITION... - Page 29 When this torque exceeds the retard roller torque, the retard roller rotates in the direction pushing the document into the scanner due to the torque limiter. COPYRIGHT © CANON ELECTRONICS INC. 2011 CANON DR-M140 FIRST EDITION...
- Page 30 However, if the lever is in none separate feed, the retard roller is allowed to rotate freely, and the document is fed by the rotation of the feed roller. Figure 2-304 2-10 COPYRIGHT © CANON ELECTRONICS INC. 2011 CANON DR-M140 FIRST EDITION...
-
Page 31: Feed Error Detection
Non-removal Jam The machine starts scanning while the document is detected by the registration sensor and eject sensor, and still remains inside this machine. 2-11 COPYRIGHT © CANON ELECTRONICS INC. 2011 CANON DR-M140 FIRST EDITION... - Page 32 Figure 2-306 “double feed” because the detection time is short. Furthermore, the ranges within 10mm from the leading and trailing edges are not judged. 2-12 COPYRIGHT © CANON ELECTRONICS INC. 2011 CANON DR-M140 FIRST EDITION...
-
Page 33: Control System
Document sensor (LED) Ultrasonic driver PCB Sensor control Flapper microcontroller sensor (IC14) Document sensor PCB Document Post- Pre- Ultrasonic eject registration registration sensor sensor sensor sensor (receiver) Figure 2-401 2-13 COPYRIGHT © CANON ELECTRONICS INC. 2011 CANON DR-M140 FIRST EDITION... - Page 34 Controls the ultrasonic sensor and other sensors for microcontroller detecting documents IC16 Motor driver For driving the feed motor IC17 Motor driver For driving the main motor Table 2-401 2-14 COPYRIGHT © CANON ELECTRONICS INC. 2011 CANON DR-M140 FIRST EDITION...
-
Page 35: Image Processing
Scanner controller Shading correction One-dimensional gamma correction Reordering Resolution conversion Three-dimensional gamma correction JPEG compression Computer Driver JPEG decompression Resolution conversion Deskew Size detection Skip blanks etc. Figure 2-402 2-15 COPYRIGHT © CANON ELECTRONICS INC. 2011 CANON DR-M140 FIRST EDITION... - Page 36 Whether to perform processing inside the machine computer varies depending on the settings, even for the same processing, in consideration of the overall efficiency. 2-16 COPYRIGHT © CANON ELECTRONICS INC. 2011 CANON DR-M140 FIRST EDITION...
-
Page 37: Power Supply
(4 hours). Power switch Control PCB 24 V 24 V AC adapter Each DC DC/DC voltage converter Figure 2-501 2-17 COPYRIGHT © CANON ELECTRONICS INC. 2011 CANON DR-M140 FIRST EDITION... -
Page 38: Layout Of Electrical Components
Base unit (lower) PCB1 Operation PCB Base unit (right) PCB2 Document sensor PCB Upper unit PCB3 Ultrasonic drive PCB Upper unit PCB4 Skew sensor (R) PCB Upper unit PCB5 Table 2-601 2-18 COPYRIGHT © CANON ELECTRONICS INC. 2011 CANON DR-M140 FIRST EDITION... -
Page 39: Parts Layout On Each Pcb
ON: 250 msec, OFF: 250 msec (2 time/second) → Firmware fault Blinking 3 (intermittently) (ON: 125 msec, OFF: 125 msec) × 4 times, OFF: 1 sec → EPROM fault Table 2-702 2-19 COPYRIGHT © CANON ELECTRONICS INC. 2011 CANON DR-M140 FIRST EDITION... -
Page 40: Operation Pcb
J201 (10P) Back: Control PCB PS201 Front: Separation sensor DPS201 7 segments LED SW201 Power switch SW202 Start switch SW203 Stop switch SW204 DFR switch SW205 JOB switch Table 2-703 2-20 COPYRIGHT © CANON ELECTRONICS INC. 2011 CANON DR-M140 FIRST EDITION... -
Page 41: Disassembly & Reassembly
The machine shown in the photographs of the figures in this chapter may be different from some mass-produced machines. EXTERNAL PARTS......... 3-1 III. UPPER UNIT......... 3-10 I I. BASE UNIT ..........3-4 READING UNIT........3-14 COPYRIGHT © CANON ELECTRONICS INC. 2011 CANON DR-M140 FIRST EDITION... -
Page 43: External Parts
. Take care because there is a cable connected to the back of the control panel. Then, remove connector Figure 3-102 COPYRIGHT © CANON ELECTRONICS INC. 2011 CANON DR-M140 FIRST EDITION... -
Page 44: Bottom Cover / Feed Tray
Assemble the main body from the rear side, and insert the cables for the operation PCB in the cable guide, and ensure that the cables do not get caught in parts. Figure 3-104 COPYRIGHT © CANON ELECTRONICS INC. 2011 CANON DR-M140 FIRST EDITION... -
Page 45: Document Eject Tray
Furthermore, document eject extension tray can also be removed. Figure 3-107 Note: To remove the tray without bending it, you should remove the upper unit first. Figure 3-106 COPYRIGHT © CANON ELECTRONICS INC. 2011 CANON DR-M140 FIRST EDITION... -
Page 46: Base Unit
Upper Lower (J111) (J110) Figure 3-202 Figure 3-204 3) Remove the 6 screws (M3xL4) and remove the control PCB from the mounting plate. COPYRIGHT © CANON ELECTRONICS INC. 2011 CANON DR-M140 FIRST EDITION... -
Page 47: Main Motor
3) Remove screws (M3, Do not get the cables caught in parts. self-tapping), and then remove the main motor (with belt). Figure 3-208 Figure 3-206 COPYRIGHT © CANON ELECTRONICS INC. 2011 CANON DR-M140 FIRST EDITION... -
Page 48: Feed Motor
Figure 3-209 3) Unhook the 2 pairs of fitting parts and remove the cable guide Figure 3-211 5) Remove the belt and gears Figure 3-212 Figure 3-210 COPYRIGHT © CANON ELECTRONICS INC. 2011 CANON DR-M140 FIRST EDITION... -
Page 49: Registration Roller (Drive)
The edge of the grounding fitting parts . The link shaft also plate should touch the bottom side of the comes loose at the same time. mounting plate. Figure 3-215 COPYRIGHT © CANON ELECTRONICS INC. 2011 CANON DR-M140 FIRST EDITION... -
Page 50: Straight Eject Roller (Drive)
. Next, unhook the fitting part at the edge of the gear , and remove the gear and the bearing. Then, remove the straight eject roller Figure 3-217 COPYRIGHT © CANON ELECTRONICS INC. 2011 CANON DR-M140 FIRST EDITION... - Page 51 CHAPTER 3 DISASSEMBLY & REASSEMBLY Figure 3-219 COPYRIGHT © CANON ELECTRONICS INC. 2011 CANON DR-M140 FIRST EDITION...
-
Page 52: Upper Unit
. Then, disconnect the connector unhook the 2 pairs of fitting parts , and remove the skew sensor (R) PCB Figure 3-302 3) Remove the ultrasonic drive PCB Figure 3-301 Figure 3-303 3-10 COPYRIGHT © CANON ELECTRONICS INC. 2011 CANON DR-M140 FIRST EDITION... -
Page 53: Follower Roller
(Page 3-3) 2) To remove the follower roller for the registration roller, remove the upper light guide by referring to the procedure in "Ultrasonic Drive PCB". (Page 3-10) Figure 3-305 3-11 COPYRIGHT © CANON ELECTRONICS INC. 2011 CANON DR-M140 FIRST EDITION... -
Page 54: U-Turn Unit
U-turn unit Note: Since the damper will come loose and the upper unit will close suddenly when the screws are removed, you should close unit before performing the work. 3-12 COPYRIGHT © CANON ELECTRONICS INC. 2011 CANON DR-M140 FIRST EDITION... -
Page 55: Upper Unit
Figure 3-310 3-13 COPYRIGHT © CANON ELECTRONICS INC. 2011 CANON DR-M140 FIRST EDITION... -
Page 56: Reading Unit
Note: Take care when handling the leading end of the cable, which is split into thin cables. Care is also required for the thin connector. 3-14 COPYRIGHT © CANON ELECTRONICS INC. 2011 CANON DR-M140 FIRST EDITION... -
Page 57: Upper Reading Guide
Ensure that there is no dust or dirt on the CIS unit and reading glass. There should not be any raised parts or gaps in any of the fitting parts. 3-15 COPYRIGHT © CANON ELECTRONICS INC. 2011 CANON DR-M140 FIRST EDITION... -
Page 58: Lower Reading Guide
Ensure that there is no dust or dirt on the CIS unit and reading glass. There should not be any raised parts or gaps in any of the fitting parts. 3-16 COPYRIGHT © CANON ELECTRONICS INC. 2011 CANON DR-M140 FIRST EDITION... -
Page 59: Installation & Maintenance
CHAPTER 4 INSTALLATION & MAINTENANCE INSTALLATION ........4-1 III. MAINTENANCE ........4-6 I I. PARTS TO BE REPLACED ....4-4 COPYRIGHT © CANON ELECTRONICS INC. 2011 CANON DR-M140 FIRST EDITION... -
Page 61: Installation
Microsoft Windows XP Microsoft Windows XP x64 Edition Microsoft Windows Vista (32/64 bit edition) Microsoft Windows 7 (32/64 bit edition) Note: For details on each version, refer to the “User Manual”. COPYRIGHT © CANON ELECTRONICS INC. 2011 CANON DR-M140 FIRST EDITION... -
Page 62: Removing The Packing Material
3) Load the setup disk into the DVD drive of the computer. 4) The setup menu starts automatically. 5) Click [Typical Installation]. Figure 4-102 Figure 4-104 Finish the installation by following the on-screen messages. Figure 4-103 COPYRIGHT © CANON ELECTRONICS INC. 2011 CANON DR-M140 FIRST EDITION... -
Page 63: Connecting To A Computer
Refer to the “User Manual” for the details. Figure 4-105 Note: To turn the power OFF, hold down the power button until the light goes off. COPYRIGHT © CANON ELECTRONICS INC. 2011 CANON DR-M140 FIRST EDITION... -
Page 64: Parts To Be Replaced
Note: The items above are assigned as service parts and an exchange roller kit is assigned as commercially available products for a set. Table 4-201 2) Replaced by service technicians None COPYRIGHT © CANON ELECTRONICS INC. 2011 CANON DR-M140 FIRST EDITION... -
Page 65: Major Parts List
A reading glass attached Lower Reading Guide MF1-4738-000 A reading glass attached Feed motor MH7-1183-000 Main motor MH7-1182-000 AC adapter MG1-4558-000 Outside of China AC adapter (China) MG1-4565-000 China only Table 4-202 COPYRIGHT © CANON ELECTRONICS INC. 2011 CANON DR-M140 FIRST EDITION... -
Page 66: Maintenance
Table 4-301 2) Locations to be cleaned • • Reading glass Roller Retard roller Roller unit Reading glass Roller Figure 4-301 Figure 4-302 COPYRIGHT © CANON ELECTRONICS INC. 2011 CANON DR-M140 FIRST EDITION... - Page 67 Start Windows, login with administrator privileges. • Click the [Start] button on the computer, and then click [All Programs], [Canon DR-M140], and [Canon imageFORMULA Figure 4-305 Utility] in order. • The [Canon imageFORMULA Utility] starts, and the screen is displayed.
-
Page 68: Service Maintenance
CHAPTER 4 INSTALLATION & MAINTENANCE 2. Service Maintenance • Select [Canon DR-M140 USB] and then click [Properties]. this machine, periodical maintenance item by the service technicians is specified. However, when visiting a user, check whether the reading glasses and the rollers are dirty. -
Page 69: Troubleshooting
CHAPTER 5 TROUBLESHOOTING ERROR DISPLAY ........5-1 OPERATION TROUBLESHOOTING ..5-38 SERVICE MODE .........5-2 IMAGE TROUBLESHOOTING ....5-42 III. TROUBLESHOOTING LIST ....5-37 VI. AFTER REPLACING PARTS ....5-47 COPYRIGHT © CANON ELECTRONICS INC. 2011 CANON DR-M140 FIRST EDITION... -
Page 71: Error Display
A paper jam has been detected The following shows an example of an A double feed was detected error message when using CaptureOnTouch. during scanning A skew was detected Other errors Table 5-101 Figure 5-101 COPYRIGHT © CANON ELECTRONICS INC. 2011 CANON DR-M140 FIRST EDITION... -
Page 72: Service Mode
When you select an operation button on the initial screen, the corresponding screen is displayed allowing you to execute each of the service modes. The main screens are shown below. Dcon Check Figure 5-201 COPYRIGHT © CANON ELECTRONICS INC. 2011 CANON DR-M140 FIRST EDITION... - Page 73 CHAPTER 5 TROUBLESHOOTING Get Status Analog Scan Check Extended Setting Firm Load Registration of Firm Figure 5-202 Figure 5-203 COPYRIGHT © CANON ELECTRONICS INC. 2011 CANON DR-M140 FIRST EDITION...
- Page 74 Displays the scanned image (back surface). (Scanning Modes) Selects the various scanning parameters. Zoom Enlarges the displayed image. Scan Executes a scan. Manual Shading Manually adjusts the shading correction value. Table 5-201a COPYRIGHT © CANON ELECTRONICS INC. 2011 CANON DR-M140 FIRST EDITION...
- Page 75 Deletes registered firmware. Add Note Adds remarks to the registered firmware. Application information Displays the service tool (EXE file) version. Simulation mode Executes simulated operation without connecting to the scanner. Table 5-201b COPYRIGHT © CANON ELECTRONICS INC. 2011 CANON DR-M140 FIRST EDITION...
-
Page 76: How To Install
“Modified date” of each file before executing. Reference: Folders and files The files needed by the integrated tool should be saved in the same folder. COPYRIGHT © CANON ELECTRONICS INC. 2011 CANON DR-M140 FIRST EDITION... -
Page 77: How To Start And Finish
For DR-M140.DLL only Figure 5-204 5) Password dialogue box appears, and enter six characters as “market” and select [OK]. When there are other DLLs Figure 5-205 Figure 5-207 COPYRIGHT © CANON ELECTRONICS INC. 2011 CANON DR-M140 FIRST EDITION... -
Page 78: Application Information
How to finish Figure 5-209 Either select [ : Close] on the operation screen or select [Exit Application] from the [File] menu in the toolbar. COPYRIGHT © CANON ELECTRONICS INC. 2011 CANON DR-M140 FIRST EDITION... -
Page 79: Simulation Mode
Operation Procedure 1) Clean feed path, roller, and reading glass. 2) Place piece registration adjustment sheet. Make sure to set the document guides to fit the sheet to prevent skews. COPYRIGHT © CANON ELECTRONICS INC. 2011 CANON DR-M140 FIRST EDITION... - Page 80 4) A screen is displayed to check the adjustment sheet. Check that the sheet is placed correctly and select [OK]. Figure 5-212 5) The adjustment proceeds automatically while progress screens displayed. 5-10 COPYRIGHT © CANON ELECTRONICS INC. 2011 CANON DR-M140 FIRST EDITION...
-
Page 81: Light Adjustment
“none separate”, a confirmation between the document guides. screen is displayed. Set the lever to “none separate” and then select [OK] in the screen. Figure 5-217 Figure 5-214 5-11 COPYRIGHT © CANON ELECTRONICS INC. 2011 CANON DR-M140 FIRST EDITION... -
Page 82: Max Document Size
Do not turn OFF the machine or perform any operations until the warning screen disappears. Figure 5-220 Figure 5-219 7) After the adjustment is complete, the warning screen disappears. 5-12 COPYRIGHT © CANON ELECTRONICS INC. 2011 CANON DR-M140 FIRST EDITION... -
Page 83: Sleep
[After 1 hour.] and [After 4 screen. hour.]. Change the setting as necessary and select the [OK] button. Figure 5-221 Figure 5-222 5-13 COPYRIGHT © CANON ELECTRONICS INC. 2011 CANON DR-M140 FIRST EDITION... - Page 84 [Current Rollers] may take on an invalid value, you should check the counter for the [Current Rollers] after exiting 5-14 COPYRIGHT © CANON ELECTRONICS INC. 2011 CANON DR-M140 FIRST EDITION...
-
Page 85: Firm Load
Figure 5-223 5) When finished, the progress screen disappears and the main menu screen returns. When the firmware is changed, a reset is automatically executed internally. 5-15 COPYRIGHT © CANON ELECTRONICS INC. 2011 CANON DR-M140 FIRST EDITION... -
Page 86: Dcon Check
Note: Although the mark lights up if the upper unit is open, this does not confirm the correct operation. You should confirm the operation by actually moving the unit as described. 5-16 COPYRIGHT © CANON ELECTRONICS INC. 2011 CANON DR-M140 FIRST EDITION... - Page 87 At this time, the LED beside the lever pressed, the corresponding mark lights. also lights up. 3) Rear Flapper Figure 5-228 If you open the straight path tray, the flapper sensor lights up. 5-17 COPYRIGHT © CANON ELECTRONICS INC. 2011 CANON DR-M140 FIRST EDITION...
-
Page 88: Motor/Feed Test
Otherwise, it will not operate correctly. 2) After setting motor operation conditions and placing the appropriate paper, select [Feed Test] to start feeding. Select [Feed Test] again to stop the 5-18 COPYRIGHT © CANON ELECTRONICS INC. 2011 CANON DR-M140 FIRST EDITION... -
Page 89: Get Status
E036 and E041 are displayed as the error that are processed first. Note: For errors during the mechanical feed mode, the time is not displayed because computer connected. 5-19 COPYRIGHT © CANON ELECTRONICS INC. 2011 CANON DR-M140 FIRST EDITION... -
Page 90: Check Device
Serial number data is saved on the control PCB. If this PCB is replaced, enter the serial number shown on the rating label at the main body and select “Set” on the right side. 5-20 COPYRIGHT © CANON ELECTRONICS INC. 2011 CANON DR-M140 FIRST EDITION... -
Page 91: Write Setting To Text
2) When the save screen is displayed, set the save location. 3) The information is saved. The following shows some of the details in the file that is saved. Figure 5-234 5-21 COPYRIGHT © CANON ELECTRONICS INC. 2011 CANON DR-M140 FIRST EDITION... -
Page 92: Scan Check
Used to change the shading Scan correction value. This is not Click this button to begin the scan. normally used. For details, refer to the other section. Table 5-205 5-22 COPYRIGHT © CANON ELECTRONICS INC. 2011 CANON DR-M140 FIRST EDITION... - Page 93 You should restart after exiting service mode. Furthermore, if you become unable to perform operations while using service mode, you should reset the computer and scanner. 5-23 COPYRIGHT © CANON ELECTRONICS INC. 2011 CANON DR-M140 FIRST EDITION...
-
Page 94: Manual Shading
3) After setting, select [Set]. Select [Initial Values] to return to [0]. Select [Cancel] to return to the values before changing. 4) Actually scan a document and check the image. 5-24 COPYRIGHT © CANON ELECTRONICS INC. 2011 CANON DR-M140 FIRST EDITION... -
Page 95: Firm Registration
The “Product Name” and “Firmware version” are displayed on the firmware registration screen. Figure 5-240 2) The following screen is displayed only if there are no firmware already registered. Select [OK]. 5-25 COPYRIGHT © CANON ELECTRONICS INC. 2011 CANON DR-M140 FIRST EDITION... - Page 96 [Firm Load] screen on the next contains the setting conditions is saved restart or when returning from another at the same time. The following shows screen. an example of the folder. Figure 5-244 5-26 COPYRIGHT © CANON ELECTRONICS INC. 2011 CANON DR-M140 FIRST EDITION...
-
Page 97: Firm Load
Firm Load in the “Main Menu” screen. 1) Select [Firm Load]. Figure 5-247 3) Writing starts automatically and the progress screen is displayed. Figure 5-249 2) When file selection screen displayed, select the file. 5-27 COPYRIGHT © CANON ELECTRONICS INC. 2011 CANON DR-M140 FIRST EDITION... -
Page 98: Analog
Options for the drop-down box are shown below. • Registration sensor • Door sensor • Double feed sensor • Document sensor • Separation sensor • Flapper sensor • Skew sensor 5-28 COPYRIGHT © CANON ELECTRONICS INC. 2011 CANON DR-M140 FIRST EDITION... -
Page 99: Extended Setting
±1.0 of the factory Mode, resolution, and size. value, ±3.0 of the user value. [Scan] button [Set] button Executes a scan. Sets the adjustment values. Table 5-206 5-29 COPYRIGHT © CANON ELECTRONICS INC. 2011 CANON DR-M140 FIRST EDITION... -
Page 100: Registration Adjustment
The values that are set at that time are displayed. Scan Manual Registration Adjustment Re-scan Scale parameter adjustment Re-scan Check the final image Figure 5-252 Figure 5-253 5-30 COPYRIGHT © CANON ELECTRONICS INC. 2011 CANON DR-M140 FIRST EDITION... - Page 101 For example, if the value is already [0.4], then enter [-0.6] if you want to add 1mm to make the reading start 1mm earlier, or enter [1.4] if you want to subtract 1mm. 5-31 COPYRIGHT © CANON ELECTRONICS INC. 2011 CANON DR-M140 FIRST EDITION...
-
Page 102: Scaling Rate Control
Service tool: You can use the TKM-0271 test sheet or a hand-made test sheet as 5-32 COPYRIGHT © CANON ELECTRONICS INC. 2011 CANON DR-M140 FIRST EDITION... - Page 103 “0.0”, set the setting value to “0.67”. After you have set the value, click the [Set] button. In the below figure, [Factory Scale for separate mode] is set. Figure 5-257 5-33 COPYRIGHT © CANON ELECTRONICS INC. 2011 CANON DR-M140 FIRST EDITION...
- Page 104 Or, replace the rollers. 7) Place the adjustment sheet and scan again. Check the displayed image. Note: Repeat the procedure again if the adjustments were corrected properly. 5-34 COPYRIGHT © CANON ELECTRONICS INC. 2011 CANON DR-M140 FIRST EDITION...
-
Page 105: Other Functions
[Full] or [Mini]. The default setting is [Mini]. If you need the [Full] information, set to [Full] and click the [OK] button. Then, perform the steps to reproduce the problem and 5-35 COPYRIGHT © CANON ELECTRONICS INC. 2011 CANON DR-M140 FIRST EDITION... - Page 106 Although the content of the log files cannot interpreted generic software, it can be displayed in text format by using a dedicated application. Here is an example: Figure 5-262 Figure 5-261 5-36 COPYRIGHT © CANON ELECTRONICS INC. 2011 CANON DR-M140 FIRST EDITION...
-
Page 107: Troubleshooting List
Software ware tion dust ment All black/all white/all streaked. Too dark/too light. Streaks in image. Image slanted. Wrong image size. Text cannot be seen. Moire in image. Table 3-302 5-37 COPYRIGHT © CANON ELECTRONICS INC. 2011 CANON DR-M140 FIRST EDITION... -
Page 108: Operation Troubleshooting
AC adapter Does replacing the AC Done. adapter fix the problem? Control PCB Is the cable connected? Connect the connectors Operation PCB correctly. Replace the PCB. Table 5-401 5-38 COPYRIGHT © CANON ELECTRONICS INC. 2011 CANON DR-M140 FIRST EDITION... -
Page 109: No Scanner Is Found
Each sensor PCB Was the problem solved by Done. replacing the PCB? Control PCB Was the problem solved by Done. replacing the control PCB? Table 5-403 5-39 COPYRIGHT © CANON ELECTRONICS INC. 2011 CANON DR-M140 FIRST EDITION... -
Page 110: Scanner Does Not Feed Properly
Each sensor PCB Was the problem solved by Done. replacing the PCB? Control PCB Was the problem solved by Done. replacing the control PCB? Table 5-404 5-40 COPYRIGHT © CANON ELECTRONICS INC. 2011 CANON DR-M140 FIRST EDITION... -
Page 111: Scanning Speed Is Slow
Is the USB hub supported? Use a USB hub that supports it. The log file setting is Is the log file setting set to Set to [Mini]. [Full] [Full]? Table 5-405 5-41 COPYRIGHT © CANON ELECTRONICS INC. 2011 CANON DR-M140 FIRST EDITION... -
Page 112: Image Troubleshooting
Too light Streaks 1 Streaks 2 Streaks 3 Slanting Skew correction Wrong size Auto size Has shadows Original document Missing leading Margin at leading Stretched Compressed edge edge Table 5-501 5-42 COPYRIGHT © CANON ELECTRONICS INC. 2011 CANON DR-M140 FIRST EDITION... -
Page 113: All Black/All White/All Streaked
Setup of “Contrast” “Contrast” setup properly? Change the setup. Light Adjustment Have executed Light Execute the Adjustment? adjustment. Table 5-503 5-43 COPYRIGHT © CANON ELECTRONICS INC. 2011 CANON DR-M140 FIRST EDITION... -
Page 114: Streaks In Image
You can correct the slant of an image using image processing. Feeding documents Are documents fed straight? Perform the checks in “IV. RESOLVING MALFUNCTIONS, 4.The Document Does Not Feed Properly”. Table 5-505 5-44 COPYRIGHT © CANON ELECTRONICS INC. 2011 CANON DR-M140 FIRST EDITION... -
Page 115: Wrong Image Size
Was the problem solved by Done. setting to a special mode such [Advanced Text Enhancement] etc.? Setup of Was the problem solved by Done. “Brightness” changing the setup of “Brightness”? Table 5-507 5-45 COPYRIGHT © CANON ELECTRONICS INC. 2011 CANON DR-M140 FIRST EDITION... -
Page 116: Moire In Image
Cause/Faulty Step Check Item Result Action Locations Setup of “Moire Is “Moire Reduction” set? Set it. Reduction” Increase the resolution. Set to “High Quality Moire Reduction”. Table 5-508 5-46 COPYRIGHT © CANON ELECTRONICS INC. 2011 CANON DR-M140 FIRST EDITION... -
Page 117: After Replacing Parts
[Regist Adjustment] service mode. Furthermore, execute the regist manual adjustment in [Extended Setting] screen if necessary. 5-47 COPYRIGHT © CANON ELECTRONICS INC. 2011 CANON DR-M140 FIRST EDITION... -
Page 119: Appendix
APPENDIX GENERAL CIRCUIT DIAGRAM ....A-1 LIST OF SPECIAL EQUIPMENT .... A-2 COPYRIGHT © CANON ELECTRONICS INC. 2011 CANON DR-M140 FIRST EDITION... -
Page 121: General Circuit Diagram
CIS unit (front) Main motor Feed motor Flapper sensor Control PCB Door sensor Ultrasonic sensor (receiver) Back: Document sensor (transmitter) Pre-registration sensor Post-registration sensor Eject sensor AC cable AC adapter COPYRIGHT © CANON ELECTRONICS INC. 2011 CANON DR-M140 FIRST EDITION... -
Page 123: List Of Special Equipment
Note: Rank notation: A: Equipment that each service technician must carry. B: Equipment that can be shared among a group of 5 service technicians. C: Equipment that each workshop needs to have. COPYRIGHT © CANON ELECTRONICS INC. 2011 CANON DR-M140 FIRST EDITION... - Page 125 Prepared by Quality Assurance Center Canon Electronics Inc. 3-5-10 Shibakoen, Minato-ku Tokyo 105-0011, Japan FIRST EDITION: AUG. 2011 (63999)
- Page 126 0811SZ...
Need help?
Do you have a question about the imageFORMULA DR-M140 and is the answer not in the manual?
Questions and answers