
Related Manuals for Diesse Chorus Autosampler


Summary of Contents for Diesse Chorus Autosampler
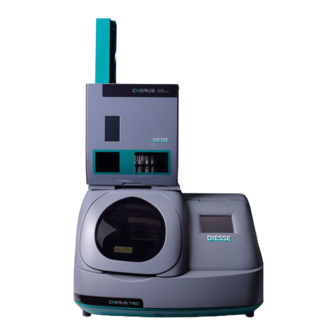
- Page 1 Installation guide Autosampler software version 0.20 – October 03 2017 Chorus Trio CPU 2010 4.0.6.39 software version – September 07 2017 Revision 0 October 26 2017...
-
Page 2: Table Of Contents
CALIBRATOR TEST TUBE PARAMETERS.................... 37 DEFAULT VALUES ............................. 38 FIRMWARE UPDATE..........................39 TOUCH SCREEN CALIBRATION ......................40 SCREENSHOT CAPTURING ........................41 AUTOSAMPLER CHORUS MODELS This guide applies to the following Chorus Autosampler models: MODEL CODE 81210 Chorus Autosampler Rev.0 10.26.2017... -
Page 3: Technical Specifications
Installation guide 1. TECHNICAL SPECIFICATIONS Instrument size Packaging size Length: 365mm Length: 500mm Height: 581mm Height: 581mm Depth: 288mm Depth: 288mm Weight: 10Kg Weight: 2Kg The dimensions refer to the closed instrument. Weight is distributed over 4 legs. Features Insertion devices section Installation category: II 30 positions for tubes Pollution degree: 2... -
Page 4: Storage And Transportation
Given the size and weight of the instrument, handling can only be performed by one person. Chorus Autosampler is a precision instrument and must be handled with care. Improper operation could damage internal components and cause mechanical damage. For instrument storage and handling, environmental conditions specified in section 1 must be respected. -
Page 5: Preparation And Checks Before Installation
Installation guide 3. PREPARATION AND CHECKS BEFORE INSTALLATION The following conditions must be met for operator and instrument safety: 1. The power source (installation category II) must be compatible with the electrical and voltage specifications indicated on the electric power plate supplied on the rear of the instrument; it is advisable that the efficiency of the electrical system is periodically verified. -
Page 6: Installation Requirements And Materials
Installation guide 4. INSTALLATION REQUIREMENTS AND MATERIALS Autosampler: 1. Chorus Autosampler [Ref. 81210] 2. Installation guide 3. Latest version of the Autosampler firmware available in USB pen drive 4. USB connection cable 5. Power cord 6. Assembly screws and washers 7. -
Page 7: Unpacking
Installation guide 5. UNPACKING Proceed with the unpacking steps as described and shown in the photographic sequence: 1. Cut the adhesive tape sealing the box (indicated by the arrow) with a dedicated tool: Fig. 2 - Box closed and open 2. - Page 8 Installation guide Now the instrument can be extracted from the packaging. Grab the instrument with both hands, and pull upwards by avoiding to hold it by the thinner and protruding part (shown in the following figure with the arrow and label "NO"). SI (YES) Fig.
-
Page 9: Placement
Fig. 6- Chorus Autosampler placement The table on which Chorus + Chorus Autosampler system is placed must be able to bear the weight of the two instruments, and it shall not exceed 90 cm in height, to provide the operator with an ergonomically correct position while entering touch screen controls of the preparation module. - Page 10 The two holes in the first image are assigned one (B) to the insertion of the motor of the Samples Rack Plate for Chorus Autosampler (which protrudes from the carter, see Fig. 9) and the other (A) to the input of the arm with tips for transferring samples to strips in Chorus.
-
Page 11: Installation
Installation guide 7. INSTALLATION Chorus Autosampler comes with no removable blocks. For installation proceed as follows: 1. place the instrument on top of the plate described in the previous paragraph, making sure to insert the motor protruding from the carter into the hole specifically designed for this operation. For more details refer to Fig. - Page 12 Installation guide Fig. 12 - Instrument stop front holes 5. Place the D component of Fig. 11 on the instrument carter in correspondence of the visible hole with the slot length parallel to the instrument's side (Fig. 12) and stop the instrument by screwing the A- B-C components group inserted into each other in this sequence, as shown in Fig.
- Page 13 Installation guide The screws are on the back of the instrument (4) and one on each side, in the position indicated in Fig. 14. Fig. 15 - Machine without back panel – Screws and slotted inserts holes 7. It is now possible to see two holes that are placed on two opposite corners of the inner compartment (see Fig.
- Page 14 Installation guide o Press the key to access the service menu. The first image will appear, as shown in Fig. 17. Fig. 17 - Access to service menu Press the arrow on the label “SERVICE”. The second image will appear, as shown in Fig. 17, containing information about the instrument firmware version and a virtual keypad.
- Page 15 Installation guide Fig. 18 - “Top Z “configuration o Go to page 3/14 to set the position of the spindle axis that will grab the tip. Place the tips into the rotor. It is important that the spindle is in the axis with the tip, therefore at the centre of its diameter, to ensure a correct grip.
- Page 16 13. Once you have found the correct position, that is, where the tip is in the centre of the strip well, screw Chorus Autosampler firmly into Chorus with the help of the components described in step 3. 14. Replace and screw the back panel.
- Page 17 9. 18. Exit the service menu to save the parameters. 19. Connect the USB cable on one side to the Chorus Autosampler (flat part) and on the Chorus on the other, as shown in Fig. 21. 20. Connect the power cord socket (use the power cord supplied with the instrument) to the socket on the left side of the instrument (as shown in Fig.
- Page 18 Installation guide Fig. 22 - Side hole cover Rev.0 10.26.2017...
-
Page 19: Functional Starting Procedure
Installation guide 8. FUNCTIONAL STARTING PROCEDURE To set the instrument parameters it is necessary to enter the pages of the service menu. Take the following steps: 1. Turn the machine on using the switch, which must have the symbol "O" sticking out 2. - Page 20 Installation guide pages, will be displayed, as shown in Fig. 25. To scroll, simply press the buttons depicting the purple arrows, at the bottom right and left. 6. To exit the service, press the green arrow at the left bottom. When a parameter is changed, to be saved, it is also necessary to exit the service menu.
-
Page 21: Setting Dispensing Position
Installation guide SETTING DISPENSING POSITION Fig. 26 - Setting dispensing parameters The second page of the service menu contains the parameters for the position that the arm with tip should acquire when transferring samples to Chorus, so in axis with the centre of the well and very close to its bottom. -
Page 22: Tip Picking Adjustment
Installation guide DETECT Key that enables a level search in the calibration of tip vertical position. The search begins 200 steps less than what is written in “Z Axis”, and runs for about 400 steps. If a level change is found, the value will be automatically saved in the “Z Axis”... - Page 23 Installation guide an inner one with respect to the centre of the samples rack rotor, and parameters are divided in the same way, both on the outer position and on the inner position. Parameter values can be changed (increasing or decreasing) using the arrows (single 10 steps, double 100 steps) by selecting the value, and entering the new value on the virtual keypad that appears automatically.
-
Page 24: Sample Collection Setting
Installation guide SAMPLE COLLECTION SETTING Fig. 28 - Sampling setting The fourth page of the service menu contains the parameters for the position that the robotic arm must acquire when collecting samples. These are distributed on two concentric circles, that is, on an outer row and an inner one with respect to the centre of the samples rack rotor, and parameters are divided in the same way, both on the outer position and on the inner position. -
Page 25: Barcode Reader Position Setting
Installation guide S1 Test By pressing this key, the robotic arm moves to the position indicated in “X Axis” parameter, and the plate rotates the steps indicated in “Plate” parameter. The robotic arm descends vertically to a position very close to the tip, so the position can be verified. - Page 26 Installation guide shown in Fig. 31, or on one of the two ends of the window obtained for reading codes on the plastic test tube rack. Parameter values can be changed (increasing or decreasing) using the arrows (single 5 steps, double 10 steps) by selecting the value, and entering the new value on the virtual keypad that appears automatically.
-
Page 27: Rotor Parameters
Installation guide Fig. 32 - Barcode reader positioning In case of a barcode reader malfunction not due to beam positioning problems, just press the "Factory" key to reprogram this component. ROTOR PARAMETERS Fig. 33 - Samples plate setting The sixth service menu page contains parameters for the samples rack rotor. Details are in the following table. -
Page 28: Axis Parameters
Installation guide Vmin Minimum speed during activity Vmax Maximum speed during activity Acceleration ramp during activity Deceleration ramp during activity Unit Conversion coefficient mm - steps PosEnd “End” Fixed position Tfull Brake Time: time interval during which the motor is supplied with current to switch from the motion phase to the maintenance phase Thold Duration of motor maintenance phase... -
Page 29: Diluter Parameters
Installation guide Unit Conversion coefficient mm - steps PosEnd “End” Fixed position Tfull Brake Time: time interval during which the motor is supplied with current to switch from the motion phase to the maintenance phase Thold Duration of motor maintenance phase DILUTER PARAMETERS Fig. -
Page 30: Z Axis Parameters
Installation guide Tfull Brake Time: time interval during which the motor is supplied with current to switch from the motion phase to the maintenance phase Thold Duration of motor maintenance phase Z AXIS PARAMETERS Fig. 36 - Z axis settings The ninth service menu page contains the parameters for calibrating Z axis position, which is calculated in relation to the samples rack rotor. -
Page 31: Tip Grabbing Parameters
Installation guide 2. Press “Read” key 3. In “Data” the desired data is shown To write a new value into Eeprom: 1. In “Offset” type the desired address 2. In “Data” type the desired value 3. Press “Write” key TIP GRABBING PARAMETERS Fig. - Page 32 Installation guide FUNCTIONS FUNCTION Test Key that enables the arm to move horizontally to the tip position specified in the “Test Position”, and vertically to the height provided in the parameters of the previous table. Unload Key enabling tip release. The arm moves to the “Home”...
-
Page 33: Level Research Settings
Installation guide Go to the Z axis service menu page: 9/14 In the “Eep Direct Access” section, type 0068 in the “Offset” field to directly access 0x0068 cell Enter the desired value in the “Data” field and press “Write” ... - Page 34 Installation guide PARAMETERS PARAMETER Proximity steps Number of steps to be taken when approaching the liquid before activating the level search procedure (air blowing out of the tip). DEFAULT: 100 Extra steps Number of steps to subtract or add to those indicating the level threshold found by the sensor: a negative number moves the tip out of the liquid, a positive number determines the tip being inserted...
-
Page 35: Pressure Control Procedure
The table is organized in columns: 1. Volume: volume amount required for the test (values defined in the IFUs of DIESSE Diagnostics Senese S.p.A kits.) 2. Load: Additional microliters to the volume specified in step 1 (for example: 50) to ensure that at least the microliters required are actually aspirated 3. -
Page 36: Sample Test Tube Parameters
Installation guide The two values in the second and fourth columns are increases of the volume specified in the “Volume” column. The value of these increases depends on the characteristics of the instrument diluter. Table compilation is carried out during the testing of the instrument. “Air preload vol.”... -
Page 37: Calibrator Test Tube Parameters
Installation guide Fig. 43 - Test tube detailed parameters “Min level height” and “Max level height” parameters are those that can be used to set the minimum and maximum levels for level search. 8.13 CALIBRATOR VIAL PARAMETERS Fig. 44 - Calibrator description The fourteenth page of the service menu contains the descriptive parameters of the vial containing the calibrator or positive control. -
Page 38: Default Values
Installation guide 9. DEFAULT VALUES Pages from 10/14 to 14/14 contain descriptive parameters of devices used in the instrument, and default values used for level search and for correct calibration of tips and samples positions. When installing, carefully check that the following values are those set in the instrument. Page 10/14 and 11/14 Fig. -
Page 39: Firmware Update
Installation guide FIRMWARE UPDATE The machine firmware update is done via a USB pen drive. The procedure is the following: 1. turn off the instrument 2. insert USB pen drive 3. turn on the instrument 4. wait for the launching software screen to appear Fig. -
Page 40: Touch Screen Calibration
Installation guide TOUCH SCREEN CALIBRATION Press the screen for a few seconds when the instrument is turned on. The following image will appear, as shown in Fig. 48. Fig. 48 - Start-up screen Immediately after, the following image will appear, as shown in Fig. 49. Fig. -
Page 41: Screenshot Capturing
Installation guide SCREENSHOT CAPTURING To capture screenshots: 1. insert a USB pen drive into the input on the instrument 2. go to the service menu input page 3. type the following password “9-9-9-9-1” 4. the instrument will emit a beep 5.
Need help?
Do you have a question about the Chorus Autosampler and is the answer not in the manual?
Questions and answers