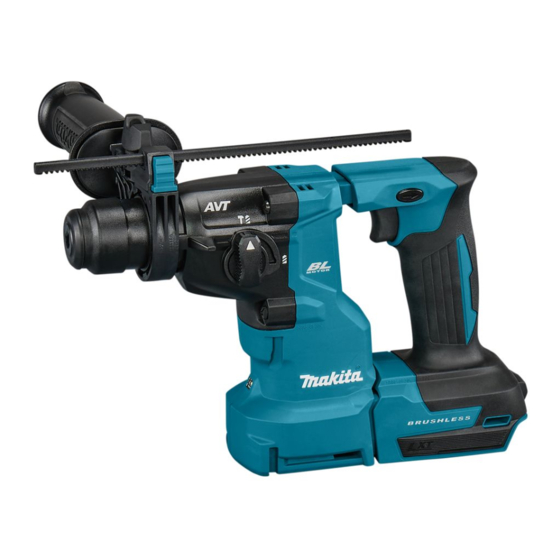
Makita DHR183 Instruction Manual
Cordless rotary hammer
Hide thumbs
Also See for DHR183:
- Instruction manual (121 pages) ,
- Instruction manual (21 pages) ,
- Instruction manual (119 pages)
Table of Contents
Advertisement
Quick Links
Advertisement
Table of Contents

Related Manuals for Makita DHR183


Summary of Contents for Makita DHR183
- Page 1 INSTRUCTION MANUAL Cordless Rotary Hammer DHR183 Read before use.
-
Page 2: Specifications
SPECIFICATIONS Model: DHR183 Drilling capacities Concrete 18 mm Steel 13 mm Wood 24 mm No load speed 0 - 1,100 min Blows per minute 0 - 5,000 min Overall length (with BL1860B) 288 mm Rated voltage D.C. 18 V Net weight 2.1 - 2.9 kg... -
Page 3: Safety Warnings
Uncertainty (K) : 3 dB (A) use (taking account of all parts of the operating Model DHR183 with DX16 cycle such as the times when the tool is switched Sound pressure level (L ) : 90 dB(A) - Page 4 Do not expose power tools to rain or wet con- Always wear protective goggles to protect ditions. Water entering a power tool will increase your eyes from injury when using power tools. The goggles must comply with ANSI Z87.1 in the risk of electric shock.
- Page 5 When using the tool, do not wear cloth work Safety instructions when using long drill bits with gloves which may be entangled. The entangle- rotary hammers ment of cloth work gloves in the moving parts may Always start drilling at low speed and with the result in personal injury. bit tip in contact with the workpiece. At higher speeds, the bit is likely to bend if allowed to rotate Battery tool use and care freely without contacting the workpiece, resulting...
- Page 6 Avoid storing battery cartridge in a con- CAUTION: Only use genuine Makita batteries. tainer with other metal objects such as Use of non-genuine Makita batteries, or batteries that nails, coins, etc. have been altered, may result in the battery bursting Do not expose battery cartridge to water causing fires, personal injury and damage. It will or rain.
-
Page 7: Functional Description
Indicating the remaining battery capacity FUNCTIONAL DESCRIPTION Only for battery cartridges with the indicator Press the check button on the battery cartridge to indi- cate the remaining battery capacity. The indicator lamps CAUTION: Always be sure that the tool is light up for a few seconds. switched off and the battery cartridge is removed before adjusting or checking function on the tool. Installing or removing battery cartridge CAUTION:... -
Page 8: Overheat Protection
Charge the battery(ies) or replace it/them with Fig.4 recharged battery(ies). Let the tool and battery(ies) cool down. ► 1 . Lamp If no improvement can be found by restoring protection NOTE: Use a dry cloth to wipe the dirt off the lens of system, then contact your local Makita Service Center. the lamp. Be careful not to scratch the lens of lamp, or Switch action it may lower the illumination. NOTE: When the tool is overheated, the lamp flashes. In this case, release the switch trigger and WARNING: Before installing the battery car-... -
Page 9: Electronic Function
To avoid rapid wear on the mode after the switch trigger is released, have the tool change mechanism, be sure that the action mode serviced at a Makita service center. changing knob is always positively located in one • Constant speed control of the action mode positions. -
Page 10: Depth Gauge
To install the side grip, follow the steps below. Insert the drill bit into the tool. Turn the drill bit and push it in until it engages. Loosen the thumb screw on the side grip. After installing the drill bit, always make sure that the drill bit is securely held in place by trying to pull it out. Fig.8 ► 1 . Thumb screw Fig.11 ► 1 . - Page 11 Adjust the depth gauge by moving it back and forth Install the dust cup set so that the claws of the while pressing the lock button. After the adjustment, dust cup fit in the slits on the side grip. release the lock button to lock the depth gauge. NOTE: Make sure that the depth gauge does not touch the main body of the tool when attaching it. Dust cup Optional accessory Use the dust cup to prevent dust from falling over the tool and on yourself when performing overhead drilling operations.
- Page 12 Removing the drill bit Hold the root of dust cup and pull it out. NOTE: If it is difficult to remove the dust cup set, To remove the drill bit, pull the chuck cover down all the remove the claws of the dust cup one by one by way and pull the drill bit out. swinging and pulling the root of the dust cup. Fig.18 ► 1 . Drill bit 2. Chuck cover Fig.20 Removing the dust cup set ► 1 .
- Page 13 16. In the event the tool is dropped, it must be tagged and removed from service, and should be inspected by a Makita Factory or Authorized Service Center. 17. Do not hang the tool on your waist. Heated tool and its accessory may touch your skin and burn injury result.
-
Page 14: Dust Collection System
Installing or removing DUST COLLECTION SYSTEM NOTICE: Before installing the dust collection system, clean the joint parts of the tool and the dust collection system. Foreign matters on the joint Optional accessory parts may cause it difficult to install the dust collection The dust collection system is designed to collect dusts system. If any dust remains on the air duct, the dust effectively when the concrete drilling operation. comes into the tool and causes jam in the airflow or breakage of the tool. To install the dust collection system, insert the tool completely into the dust collection system until the tool is locked in place with a little click. Fig.25 ► 1 . Dust collection system CAUTION:... - Page 15 Adjusting nozzle position Beating dust on the filter CAUTION: CAUTION: Do not point the nozzle at yourself Do not turn the dial on the dust or others when releasing the nozzle by pushing case while the dust case is removed from the the guide adjustment button.
- Page 16 Remove the dust case while pressing down the Replacing filter of dust case lever of the dust case. Remove the dust case while pressing down the lever of the dust case. Fig.31 ► 1 . Lever Fig.34 Open the cover of the dust case. ► 1 .
-
Page 17: Operation
Gently lay the rubber edge of the sealing cap Replacing sealing cap down over the rim of the nozzle head opening from bottom to top. Insert a flat-blade screwdriver into one of the grooves placed on the sides of the nozzle head. Tilt the flat-blade screwdriver at an angle to squeeze and pop the cube hook of the sealing cap out. Then peel the rubber edge of the sealing cap away from the rim of the nozzle head opening. - Page 18 Hammer drilling operation Set the action mode changing knob to the symbol. Attach the chuck adapter to a keyless drill chuck to which 1/2"-20 size screw can be installed, and then CAUTION: There is tremendous and sudden install them to the tool. When installing it, refer to the twisting force exerted on the tool/drill bit at the time of section “Installing or removing drill bit”.
-
Page 19: Maintenance
To maintain product SAFETY and RELIABILITY, repairs, any other maintenance or adjustment should be performed by Makita Authorized or Factory Service Centers, always using Makita replacement parts. OPTIONAL ACCESSORIES CAUTION: These accessories or attachments are recommended for use with your Makita tool specified in this manual. The use of any other accessories or attachments might present a risk of injury to persons. Only use accessory or attachment for its stated purpose. If you need any assistance for more details regard- ing these accessories, ask your local Makita Service Center. - Page 20 Makita Europe N.V. Jan-Baptist Vinkstraat 2, 3070 Kortenberg, Belgium Makita Corporation 3-11-8, Sumiyoshi-cho, Anjo, Aichi 446-8502 Japan 885A17-224 www.makita.com 20221116...
Need help?
Do you have a question about the DHR183 and is the answer not in the manual?
Questions and answers