Advertisement
Quick Links
Important before assembly:
Read these instructions carefully before assembling or using the product.
Please check the contents of the boxes before attempting to assemble this product. The instructions will
have a checklist of parts and fittings.
Assemble the product as close to its intended final location/room as possible.
Health & Safety:
This product or some parts of this product will be heavy. Please use an assistant when lifting.
Please keep small parts out of reach of children.
Always use on a level, even surface.
DO NOT jump on the product or any of its parts.
DO NOT use this product if any parts are missing, damaged or worn.
DO NOT use this product unless all fixings are secured.
Further instructions are on the following pages.
Please keep these instructions for future reference.
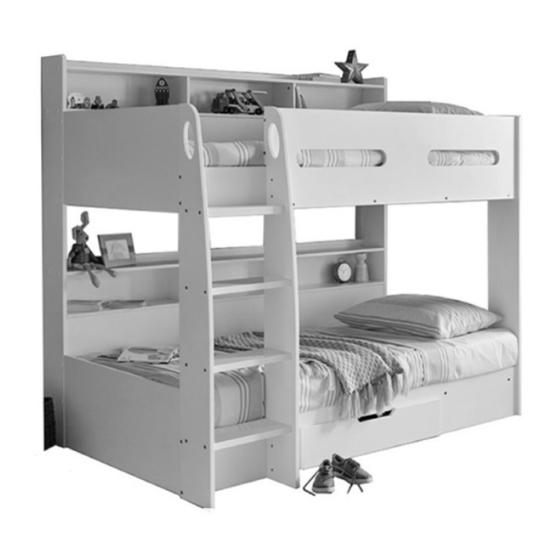
Oliver Bunk Bed
Assembly Instructions
.
www.happybeds.co.uk
Advertisement

Related Manuals for Happy Beds Oliver


Summary of Contents for Happy Beds Oliver
- Page 1 Oliver Bunk Bed Assembly Instructions Important before assembly: Read these instructions carefully before assembling or using the product. Please check the contents of the boxes before attempting to assemble this product. The instructions will have a checklist of parts and fittings.
- Page 2 These tools are not necessary, but may help to assemble the product. Do NOT use any power tools as this may damage the frame. (Not metal) This product or some parts of this product will be heavy. Please use an assistant when lifting. Never drag or push the pieces across a hard or stone floor as this will cause damage to the joints.
-
Page 3: Safety Advice
SAFETY ADVICE Please take the time to carefully read through the whole of these instructions before you commence. Keep these instructions for future reference. Unpack, inspect and check of all of the contents. Please dispose of all packing safely. Small components parts could choke a child is swallowed. We strongly recommend that you keep children well away from the work area. - Page 4 BS EN 747-1:2012+A1:2015 SAFETY WARNINGS AND GENERAL NOTES: IMPORTANT - READ CAREFULLY - RETAIN FOR FUTURE REFERENCE WARNING - High beds and the upper bed of bunk beds are not suitable for children under six years due to the risk of injury from falls.
-
Page 5: Part List
PART LIST Model : Oliver Bunk Bed Carton 1 of 4 Part Name HEADBOARD POST (FRONT LEFT) HEADBOARD POST (FRONT RIGHT) HEADBOARD POST (REAR LEFT) HEADBOARD POST (REAR RIGHT) ® HEADBOARD PANEL (TOP) HEADBOARD PANEL (BOTTOM) Carton 2 of 4 STOPPER ®... - Page 6 Parts ALL PARTS ARE LABELLED WITH NUMBER ACCORDINGLY...
- Page 7 Hardware ® © JCBC BOLT (M6 x 25MM) JCBC BOLT (M6 x 55MM) PLASTIC DOWEL (M8 x 30MM) 146 PCS 2 PCS 38 PCS ® ® ® JRN NUT (M6x 13MM) JCBC W SCREW (M7 x 32MM) JCN NUT (M6 x 12MM) 38 PCS 20 PCS 2 PCS...
- Page 8 STEP 1 Insert ( A ) into 08MM holes on Headboard Panel (Top),Headboard Panel � - A � -� - - � _ 1 _ 4 6 � (Bottom),Side Rail (Front), Slat Support, Semi Guard Rail, Full Guard Rail, Top Shelf, Bottom Shelf, Divider,Back Panel and Ladder Slat.
- Page 9 STEP 2 DO NOT use any power tools as this may damage the bed frame and will invalidate any claim. Insert (G) into 01OMM holes on Headboard Post (Rear Left),Headboard Post (Rear Right),Top Shelf and Bottom Shelf,tighten it up by using crosshead screw driver.
- Page 10 WHEN FITTING CAMS ENSURE STARTING POSITION IS CORRECT BEFORE YOU INSERT CONNECTING BOLT TURN CLOCKWISE UNTIL SECURE. CORRECT WRONG STEP 3 DO NOT use any power tools as this may damage the bed frame and will invalidate any claim. Attach and secure Divider onto Top Shelf and Bollom Shelf and insert (H),tighten it up by using a Crosshead Screw Driver.Follow it up by attaching (N) into screw holes.
- Page 11 �� N � T use any power tools as this may damage the b ed frame and will invalidate any claim. Insert (G) into 010MM Holes on Bottom Shelf, tighten it up by using crosshead screw driver. WHEN FITTING CAMS ENSURE STARTING POSITION IS CORRECT BEFORE YOU INSERT CONNECTING BOLT TURN CLOCKWISE UNTIL SECURE.
-
Page 12: Back View
WHEN FITTING CAMS ENSURE STARTING POSITION IS CORRECT � BEFORE YOU INSERT CONNECTING BOLT � TURN CLOCKWISE UNTIL SECURE. CORRECT WRONG � STEP 7 DO NOT use any power tools as this may damage the bed frame and will invalidate any claim. Attach and secure Full Guard Rail,Top Shelf, Bottom Shelf and Back �... - Page 13 WHEN FITTING CAMS ENSURE STARTING POSITION IS CORRECT BEFORE YOU INSERT CONNECTING BOLT TURN CLOCKWISE UNTIL SECURE. CORRECT WRONG STEP 8 DO NOT use any power tools as this may damage the bed frame and will invalidate any claim. Insert (H) onto Top Shelf,tighten it up by using crosshead screw driver.
- Page 14 STEP 9 DO NOT use any power tools as this may damage the bed frame and will invalidate any claim. Insert (G) into 01OMM holes on Headboard Post (Front Left),Headboard Post (Front Right), Headboard Post (Rear Left) and Headboard Post (Rear Right),tighten it up by using crosshead screw driver.
- Page 15 WHEN FITTING CAMS ENSURE STARTING POSITION IS CORRECT BEFORE YOU INSERT CONNECTING BOLT TURN CLOCKWISE UNTIL SECURE. CORRECT WRONG STEP 10 DO NOT use any power tools as this may damage the bed frame and will invalidate any claim. Attach and secure Headboard Panel (Top) and Headboard Panel (Bollom) onto Headboard Post (Front Left), Headboard Post (Front Right),Headboard Post (Rear Left) and Headboard Post (Rear Right) and insert (H),tighten it up by using a Crosshead Screw Driver.Follow it up by attaching (N) into screw holes.
- Page 16 STEP 11 DO NOT use any power tools as this may damage the bed frame and will invalidate any claim. � Attach and secure Side Rail (Front) onto Headboard (L/R) by using (C) and (D),tighten it up by using (P).Follow it up by attaching (N) into screw holes.
- Page 17 STEP 12 DO NOT use any power tools as this may damage the bed frame and will invalidate any claim. Attach and secure Slat Support onto Side Rail (Front) and Full Guard Rail using (F), tighten it up using (P).Follow it up attaching (N) into screw holes.
- Page 18 STEP 13 DO NOT use any power tools as this may damage the bed frame and will invalidate any claim. Attach and secure Stopper onto Headboard (L/R) by using (K),tighten it up by using Crosshead Screw Driver.
- Page 19 STEP 14 DO NOT use any power tools as this may damage the bed frame and will invalidate any claim. � Attach and secure Ladder Side (Left) and Ladder Side (Right) onto Ladder Slat by using (C) and (D) ,tighten it up by using (P).Follow it up by attaching (N) into screw holes.
- Page 20 OPTION 1 : LEFT SIDE LADDER STEP 15 � DO NOT use any power tools as this may damage the bed frame and will invalidate any claim. Attach and secure Ladder onto Side Rail (Front) by using (C) and (D), �...
- Page 21 STEP 16 DO NOT use any power tools as this may damage the bed frame and � will invalidate any claim. � Attach and secure Ladder onto Headboard (L) by using (B) and (E), tighten it up by using (P).Follow it up by attaching (N) into screw holes. �...
- Page 22 STEP 17 DO NOT use any power tools as this may damage the bed frame and will invalidate any claim. � Attach and secure Semi Guard Rail onto Headboard (R) and Ladder by using (C) and (D),tighten it up by using (P).Follow it up by attaching (N) into screw holes.
- Page 23 STEP 18 DO NOT use any power tools as this may damage the bed frame and will invalidate any claim. Attach and secure Wooden Slat onto bed Slat Support by using (J), tighten it up by using a Crosshead Screw Driver. *Align both Side Rail (Front) tightening the Full Guard Rail...
- Page 24 STEP 19 Attaching (N) into 09MM holes on Side Rail (Front).
- Page 25 OPTION 2 : RIGHT SIDE LADDER STEP 15 � DO NOT use any power tools as this may damage the bed frame and will invalidate any claim. Attach and secure Ladder onto Side Rail (Front) by using (C) and (D), �...
- Page 26 STEP 16 DO NOT use any power tools as this may damage the bed frame and will invalidate any claim. Attach and secure Ladder onto Headboard (L) by using (B) and (E), tighten it up by using (P).Follow it up by attaching (N) into screw holes. �...
- Page 27 STEP 17 DO NOT use any power tools as this may damage the bed frame and will invalidate any claim. � Attach and secure Semi Guard Rail onto Headboard (R) and Ladder using (C) and (D),tighten it up using (P).Follow it up attaching (N) into screw holes.
- Page 28 STEP 18 DO NOT use any power tools as this may damage the bed frame and will invalidate any claim. Attach and secure Wooden Slat onto bed Slat Support by using (J), tighten it up by using a Crosshead Screw Driver. *Align both Side Rail (Front) tightening the Full Guard Rail...
- Page 29 STEP 19 Attaching (N) into 09MM holes on Side Rail (Front).
-
Page 30: General Care And Maintenance
Please dispose of all packaging safely. General Care & Maintenance Wipe clean with a slightly damp cloth. Avoid the use of all household cleaners and abrasives. Periodically check all screw & fixings to ensure they are secure. When moving your product, carefully lift into place. Never drag or push the product across the floor as this will cause damage to the joints.
Need help?
Do you have a question about the Oliver and is the answer not in the manual?
Questions and answers