Stihl BGA 300.0 Instruction Manual
Hide thumbs
Also See for BGA 300.0:
- Instruction manual (216 pages) ,
- Instruction manual (80 pages) ,
- Instruction manual (216 pages)
Table of Contents
Advertisement
Available languages
Available languages
Quick Links
Advertisement
Chapters
Table of Contents

Subscribe to Our Youtube Channel
Related Manuals for Stihl BGA 300.0


Summary of Contents for Stihl BGA 300.0
- Page 1 STIHL BGA 300.0 Instruction Manual Notice d’emploi...
- Page 2 G Instruction Manual 1 - 29 F Notice d’emploi 30 - 60...
-
Page 3: Table Of Contents
2.2 Symbols in Text ........3 13.1 STIHL AR Backpack Battery ..... . . 18 Main Parts . -
Page 4: Introduction
1 Introduction 24.1 STIHL BGA 300.0 ........28 1 Introduction 24.2 Symbols on the Blower. -
Page 5: Symbols In Text
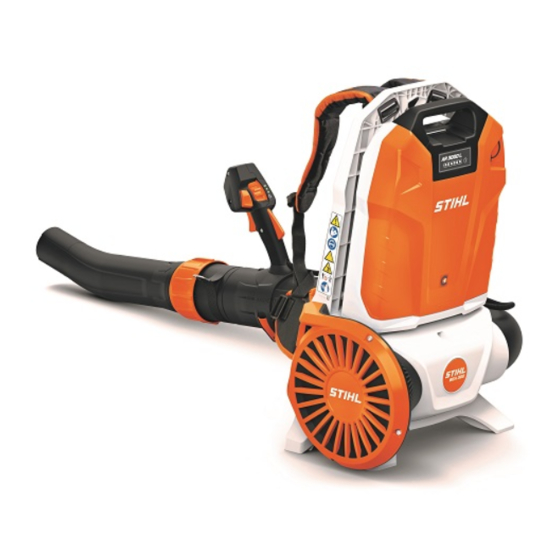
English 3 Main Parts 3 Main Parts WARNING Indicates a hazardous situation that, if not avoided, could result in death or serious injury. Blower NOTICE Indicates a risk of property damage, including damage to the machine or its individual components. Symbols in Text The following symbol is included to assist you with the use of the manual:... -
Page 6: Safety Symbols On The Products
English 4 Safety Symbols on the Products 6 Retaining Latch To reduce the risk of injury, follow the specified For switching the blower on and selecting the power safety precautions. level. 7 LEDs Indicate the unit's power level. Read and follow all safety precautions in the instruction manual. -
Page 7: Important Safety Instructions
– Be sure to read and follow the warnings and instructions for your battery and charger before 5 IMPORTANT SAFETY charging or starting work ■ This power tool may be powered by a STIHL AR L series INSTRUCTIONS backpack battery. Batteries, chargers and other accessories are sold Introduction separately. -
Page 8: Operator
– Do not permit minors to use the blower. protective glasses with adequate side protection that are impact-rated and ■ According to STIHL's current knowledge, the electric marked as complying with CSA Z94. motor of this blower should not interfere with a pacemaker. -
Page 9: Blower
STIHL or expressly approved by ■ Genuine STIHL replacement parts are specifically STIHL for use with this specific model are recommended. designed to match your blower and meet safety and – Use only attachments supplied or expressly performance requirements. -
Page 10: Using The Blower
– Never attempt to modify or override the controls or safety devices in any way. – If your blower or any part is damaged or does not function properly, take it to your authorized STIHL servicing dealer. Do not use the blower until the problem has been corrected. - Page 11 English 5 IMPORTANT SAFETY INSTRUCTIONS WARNING 5.6.3 Working Conditions WARNING ■ To maintain a firm grip and properly control your blower: – Keep the handle clean and dry at all times. Keep it ■ Operate your blower only under good visibility during free of moisture, pitch, oil, grease and resin.
- Page 12 English 5 IMPORTANT SAFETY INSTRUCTIONS ■ Use of this blower can generate dust and other 5.6.4 Operating Instructions substances containing chemicals known to cause WARNING respiratory problems, cancer, birth defects and other reproductive harm. ■ In the event of an emergency: –...
-
Page 13: Maintenance, Repair And Storage
■ Inserting any foreign object into the air intake or nozzle ■ Use of parts that are not authorized or approved by STIHL may result in property damage, including damage to the may cause serious or fatal injury or property damage. - Page 14 ■ Use of STIHL AR L series batteries for any purpose other ■ To reduce the risk of personal injury and property damage than powering STIHL products could be extremely in the event the battery emits smoke, an unusual smell or dangerous.
-
Page 15: General Warnings And Instructions
■ A battery fire can be dangerous. To reduce the risk of ■ Recharge only with the charger specified by STIHL. A severe personal injury and property damage in the event charger that is suitable for one type of battery may create of fire: a risk of fire when used with another battery. -
Page 16: Before Starting Work
Never operate your blower without a properly mounted blower tube and nozzle, @ 5.6.4. Use only attachments supplied or expressly approved by STIHL, @ 5.5. ► Push the blower tube clamp (6) onto the blower tube (7). ► Push the blower tube into the pleated hose (3) with the control handle (10) facing up. -
Page 17: Mounting And Removing The Nozzle
WARNING Never operate your blower without a properly mounted blower tube and nozzle, @ 5.6.4. Use only attachments supplied or expressly approved by STIHL, @ 5.5. To mount the nozzle: ► Open the clamping lever (1). ► Move the control handle (2) to the most comfortable position. -
Page 18: Adjusting The Blower Tube
WARNING A typical household electric circuit is between 15 and 20 amps. A single STIHL AL 500 charger draws approximately 4.8 amps. A single AL 300 charger draws approximately 4.4 amps. To reduce the risk of fire from overloading an electrical circuit: ►... -
Page 19: Charging
A battery is not fully charged when it ships from the factory. STIHL recommends that you fully charge the backpack 12.2 Charging battery before using it the first time. WARNING Operate the charger indoors in a dry room. -
Page 20: Led Diagnostics And Acoustic Signals
The acoustic signal works as it should. the power tool has an electrical malfunction. Do not operate 2 Three short beeps the power tool. Have it checked by an authorized STIHL The Bluetooth® signal is switched on or off. servicing dealer before use or storage. -
Page 21: Inserting And Removing The Battery
English 14 Inserting and Removing the Battery To determine the battery's state of charge: To insert the battery: 100 % ► Press the button (1) on the backpack battery. ► Position the battery (1) on the backplate (2) so that the A single short beep will be emitted. -
Page 22: Removing The Battery
Since a new battery is not fully charged, STIHL recommends clothing and protective apparel, including proper eye that you fully charge the battery before using it the first time, protection, when operating your blower, @ 5.4. -
Page 23: Switching Off
In the locked position, activation of the trigger switch is an authorized STIHL servicing dealer to be repaired blocked by the trigger switch lockout. Activation of the before use. -
Page 24: During Operation
The blower should switch on. If it does not, take the blower Generally, battery life will be shorter when operating to an authorized STIHL servicing dealer to be repaired continuously at the higher power levels. before use. -
Page 25: Using The Blower
English 18 After Finishing Work To activate the boost function: ► Hold the unit firmly with your hand, keeping the handle cradled between your thumb and fingers. ► Override the trigger switch's (1) end position and hold it ► Direct the air flow at the edges of the pile of material to be there. -
Page 26: Transporting
English 19 Transporting 19 Transporting WARNING To reduce the risk of unintended activation, never store the blower with the battery inserted. Always remove the battery 19.1 Blower before storing. When storing the blower: When transporting the blower: ► Clean the blower, @ 21. ►... -
Page 27: Inspection And Maintenance
@ 8. Carry out only the maintenance operations described in this manual. There are no user-authorized repairs. STIHL recommends that repair work be performed by authorized STIHL servicing dealers. To properly maintain the blower: ► Inspect the intake screen of the blower and replace if damaged. -
Page 28: Troubleshooting Guide
English 23 Troubleshooting Guide 23 Troubleshooting Guide 23.1 Blower Always remove the battery before carrying out any inspection, cleaning or maintenance. Condition LEDs on Cause Remedy Battery Blower does not start No electrical contact ► Remove the battery, @ 14.2. when switched on. - Page 29 20 °C). Run-time is too short. Battery not fully ► Charge the battery as described in its instruction manual. charged. Useful life of battery ► Have the battery checked by an authorized STIHL servicing has been reached or dealer. exceeded. 0458-724-8201-A...
-
Page 30: Specifications
If the operating characteristics or the and availability. appearance of your machine differs from those described in this manual, please contact your STIHL dealer or the STIHL 24.2 Symbols on the Blower distributor in your area for assistance. - Page 31 STIHL servicing dealer for recycling free of charge. 26.1 Disposal of the Power Tool STIHL products must not be thrown in household trash or disposed of except as outlined in this manual. ► Take the power tool, accessories and packaging to an approved disposal site for environmentally friendly recycling.
- Page 32 2.2 Symboles employés dans le texte ....32 13.1 Batterie en sac à dos STIHL AR ....48 Principales pièces .
-
Page 33: Préface
Spécifications ........59 24.1 STIHL BGA 300,0 ........59 Nous vous remercions pour votre achat. -
Page 34: Symboles Employés Dans Le Texte
français 3 Principales pièces 3 Principales pièces DANGER Indique une situation dangereuse qui, si elle n’est pas évitée, entraînera la mort ou des blessures graves. Souffleur AVERTISSEMENT Indique une situation dangereuse qui, si elle n’est pas évitée, pourrait entraîner la mort ou des blessures graves. AVIS Indique un risque de dommages matériels, y compris les dommages à... -
Page 35: Symboles De Sécurité Sur Les Produits
français 4 Symboles de sécurité sur les produits 6 Verrou de retenue Pour réduire le risque de blessure, respectez les Pour mettre en marche le souffleur et sélectionner le consignes de sécurité spécifiées. niveau de puissance. 7 DEL Indique le niveau de puissance de l’appareil. Lisez et observez toutes les consignes de sécurité... -
Page 36: Consignes De Sécurité Importantes
■ Pour réduire les risques d’incendie, d’explosion, sécurité dans le présent manuel de la batterie et d’électrocution ou d’autres lésions corporelles, lisez dans le manuel de l’outil électrique STIHL alimenté par cette batterie. Une utilisation attentivement les consignes de sécurité importantes dans ce chapitre. -
Page 37: Utilisateur
– N’autorisez pas les mineurs à utiliser le souffleur. – Évitez les vestes amples, les foulards, les cravates, les pantalons évasés ou à ■ D’après les connaissances actuelles de STIHL, le moteur revers, les bijoux et tout autre vêtement électrique de ce souffleur ne devrait pas provoquer qui pourrait être aspiré... -
Page 38: Souffleur
Ne portez pas de sandales, de tongs, de dangereuse. Seuls sont recommandés les accessoires chaussures à bout ouvert ou similaire. fournis par STIHL ou expressément autorisés par STIHL pour une utilisation avec ce modèle spécifique. ■ Pour aider à réduire le risque de blessures corporelles causées par la perte de contrôle pendant le... -
Page 39: Utilisation Du Souffleur
L’utilisation de avant d’avoir corrigé le problème. pièces qui ne sont pas autorisées ou homologuées par STIHL peut causer des blessures graves ou la mort ou ■ Avant d’insérer la batterie : des dommages matériels. - Page 40 français 5 CONSIGNES DE SÉCURITÉ IMPORTANTES AVERTISSEMENT – Lisez et suivez les instructions pour mettre en marche le souffleur, @ 15.1. ■ Pour garder une prise ferme et pour contrôler ■ Pour contribuer à réduire les risques de blessure grave correctement votre souffleur : résultant d’un démarrage involontaire : –...
- Page 41 français 5 CONSIGNES DE SÉCURITÉ IMPORTANTES – Ne vous penchez pas trop. Gardez une bonne tenue souffleur. Cette électricité statique peut se décharger sur pieds et un bon équilibre à tout moment. soudainement avec une étincelle. Pour réduire les risques de blessure résultant d’une décharge statique : ■...
- Page 42 français 5 CONSIGNES DE SÉCURITÉ IMPORTANTES contaminants aérosols, notamment ceux ayant une taille – Maintenez les cheveux, les vêtements amples, les de particules plus petites, peut causer des maladies doigts et toutes les parties du corps à l'écart des respiratoires ou autres. ouvertures et des pièces mobiles du souffleur.
-
Page 43: Maintenance, Réparation Et Rangement
AVERTISSEMENT – STIHL recommande de faire effectuer toutes les ■ Lisez et observez les consignes de sécurité sur la batterie opérations de réparation par un distributeur agréé ainsi que les avertissements et les instructions qui STIHL. - Page 44 également réduire la durée de vie et authentiques avec cet outil électrique. les performances de la batterie. ■ L’utilisation de batteries STIHL séries AR L à des fins – Utilisez et stockez la batterie uniquement autres que l’alimentation des produits STIHL pourrait être dans une plage de températures...
-
Page 45: Avertissements Généraux Et Instructions
■ Rechargez uniquement avec le chargeur spécifié par – Évacuez la zone. Le feu peut se propager STIHL. Un chargeur qui convient à un type de batterie rapidement. Tenez-vous à l’écart des vapeurs peut donner lieu à un risque d’incendie lorsqu’il est utilisé... -
Page 46: Avant D'entreprendre Le Travail
Une charge inadaptée ou hors de la plage uniquement les accessoires livrés ou expressément spécifiée peut endommager la batterie et augmenter le autorisés par STIHL, @ 5.5. risque d’incendie. Pour monter le tube du souffleur : ■ Faites faire les réparations par un réparateur qualifié qui utilise uniquement des pièces de rechange identiques. -
Page 47: Montage Et Démontage De La Buse
► Fixez le collier de serrage du coude avec la vis (4). autorisés par STIHL, @ 5.5. Pour monter la buse : ► Poussez le collier de serrage du tube du souffleur (6) sur le tube de la soufflante (7). -
Page 48: Réglage Du Tube Du Souffleur
français 11 Réglage du souffleur 11.3 Enfiler le harnais Pour ajuster la position de la poignée de commande : ► Mise à l’arrêt du souffleur, @ 15.2. AVERTISSEMENT L'opérateur doit être capable d'enlever le souffleur rapidement en cas d'urgence. En cas d'urgence, ouvrez et retirez rapidement la sangle de poitrine avant de laisser tomber le souffleur au sol. -
Page 49: Recharge De La Batterie
Habituellement, le circuit électrique d'une maison est de 15 Le chargeur effectue un autotest immédiatement après avoir à 20 ampères. Un seul chargeur STIHL AL 500 consomme été branché. La DEL de chargeur (1) s'allume en vert environ 4,8 ampères. Un seul chargeur STIHL AL 300 pendant environ 1 seconde, puis elle s'allume brièvement en... -
Page 50: Del De Diagnostic Et Signaux Sonores
Pour une liste complète des temps de charge approximatifs, voir www.stihl.com/charging-times. 13 DEL de diagnostic et signaux sonores 13.1 Batterie en sac à dos STIHL AR 13.1.1 État de la batterie ► Enfoncez la fiche du cordon de raccordement (1) dans la L’état de la batterie est indiqué... -
Page 51: Insertion Et Retrait De La Batterie
N’utilisez pas l’outil électrique. Faites-la vérifier par un ambiantes de 14 °F à 122 °F (- 10 °C à 50 °C), @ 7. distributeur agréé STIHL avant de l’utiliser ou de l’entreposer. AVERTISSEMENT Pour les informations de dépannage, @ 23. -
Page 52: Retrait De La Batterie
Assurez-vous que la batterie est bien fixée à la plaque arrière avant de commencer à travailler. Comme une batterie neuve n’est pas entièrement chargée, STIHL recommande de charger complètement la batterie avant de l’utiliser pour la première fois, @ 12.2. 14.2 Retrait de la batterie AVERTISSEMENT Pour réduire tout risque de blessure grave résultant d’une... -
Page 53: Mise En Marche Et Arrêt Du Souffleur
français 15 Mise en marche et arrêt du souffleur ► Appuyez et maintenez le bouton de blocage de la AVIS gâchette (1). Évitez d’exposer la batterie à une chaleur excessive ou les ► Tout en maintenant le bouton de blocage de la gâchette, périodes prolongées d’exposition directe au soleil. -
Page 54: 16 Vérification Des Commandes
Le souffleur doit s'arrêter. Si le souffleur ne s'éteint pas après que vous avez relâché la gâchette, retirez la batterie et apportez le souffleur à un distributeur agréé STIHL pour le faire réparer avant de l'utiliser. 17 Pendant l’utilisation 17.1 Sélection du niveau de puissance L’appareil peut fonctionner à... -
Page 55: Utilisation Du Bouton De Maintien De
français 17 Pendant l’utilisation ► Appuyez et maintenez le bouton de blocage de la ► Tout en maintenant l'interrupteur à gâchette, appuyez sur gâchette (1). le bouton de maintien de l'alimentation (2). L'interrupteur à gâchette peut être relâché et le souffleur ►... -
Page 56: Utilisation Du Souffleur
français 18 Après avoir terminé le travail 17.4 Utilisation du souffleur 18 Après avoir terminé le travail AVERTISSEMENT Portez toujours des vêtements adéquats et une 18.1 Préparation pour le transport ou l’entreposage combinaison de protection ainsi qu’une protection oculaire appropriée, @ 5.4. Ne dirigez jamais le flux d'air vers les AVERTISSEMENT passants. -
Page 57: Rangement
français 20 Rangement ► Lors du transport du souffleur dans un véhicule, fixez le Pour nettoyer le souffleur et la batterie : tube du souffleur à l'aide de la boucle de fixation (1) sur le ► Nettoyer soigneusement un tamis d'entrée sale avec une crochet (2) et positionnez le souffleur de manière à... -
Page 58: Inspection Et Maintenance
@ 8. Effectuez uniquement les opérations de maintenance décrites dans le présent manuel. Aucune réparation ne peut être effectuée par l’utilisateur. STIHL recommande de faire effectuer les opérations de réparation par un distributeur agréé STIHL. -
Page 59: Guide De Dépannage
français 23 Guide de dépannage 23 Guide de dépannage 23.1 Souffleur Retirez toujours la batterie avant d’effectuer une quelconque opération d’inspection, de nettoyage ou de maintenance. Situation DEL sur la Cause Solution batterie Le souffleur ne Absence de contact ► Retirez la batterie, @ 14.2. démarre pas à... - Page 60 ► Chargez la batterie de la manière décrite dans le manuel fonctionnement est entièrement d’utilisation. trop court. chargée. La durée de vie utile ► Faites vérifier la batterie par un distributeur agréé STIHL. de la batterie est atteinte ou dépassée. 0458-724-8201-A...
- Page 61 24.1 STIHL BGA 300,0 Indique le bouton de maintien de l'alimentation. – Types de batterie homologuée : STIHL série AR L – Vitesse maximale de l'air : 192 mph (86 m/s) Les produits STIHL ne doivent pas être jetés avec les –...
- Page 62 26.1 Mise au rebut de l’outil électrique Le scellé de la RBRC indique que le recyclage de la batterie a été prépayé par STIHL. Le RBRC dispose d’un numéro Les produits STIHL ne doivent pas être jetés avec les d’appel gratuit (1-800-822-8837) qui vous permet d’obtenir ordures ménagères ou mis au rebut différemment des...
- Page 64 0458-724-8201-A www.stihl.com *04587248201A* 0458-724-8201-A...
Need help?
Do you have a question about the BGA 300.0 and is the answer not in the manual?
Questions and answers