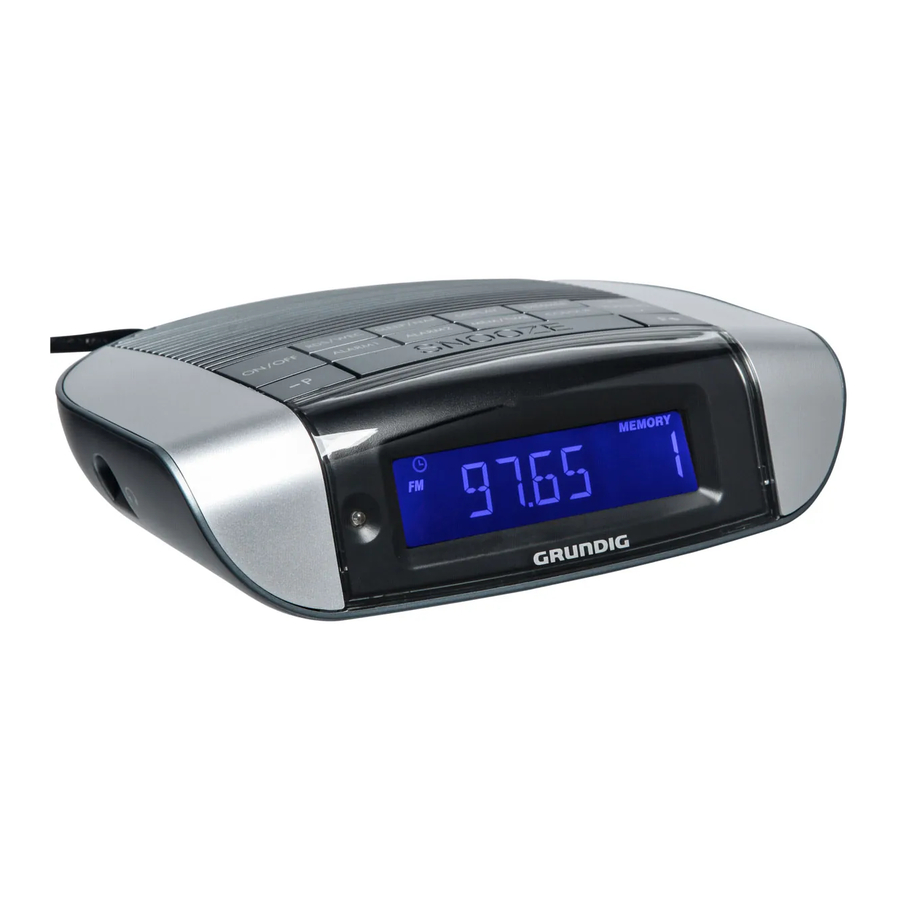
Grundig Sonoclock 660 PLL Clock Radio Manual
- User manual (19 pages) ,
- Manual (166 pages)
Advertisement
- 1 SET-UP AND SAFETY
- 2 OVERVIEW
- 3 POWER SUPPLY
- 4 SETTINGS
- 5 RADIO MODE
-
6
ALARM MODE
- 6.1 Viewing the alarm times
- 6.2 Alarm with radio station
- 6.3 Alarm with signal tone
- 6.4 Interrupting the alarm
- 6.5 Cancelling the alarm for the day
- 6.6 Deactivating and activating alarm standby
- 6.7 »ALARM 1« or »ALARM 2«
- 6.8 Deactivating/activating the alarm function for the weekend
- 6.9 Sleep timer
- 6.10 Reminder timer
- 6.11 Activating the reminder timer
- 7 INFORMATION
- 8 Documents / Resources
SET-UP AND SAFETY
- This device is designed for the playback of audio signals. Any other use is expressly prohibited.
- The only way to completely disconnect the device from the mains is to pull out the mains plug. Pull out the plug of the mains cable if you know that the device will not be used for a long period of time.
- Make sure the device is protected from dripping or splashing water. Do not place any vessels such as vases on the device. These may be knocked over and spill fluid on the electrical components, thus presenting a safety risk.
- Do not place any naked flames such as candles on the device.
- Only use the device in a moderate climate.
- Ensure that the device is adequately ventilated by placing it at least 10 cm from any other object. Do not cover the device with newspapers, table cloths, curtains, etc.
- If malfunctions occur due to brief mains overloads or static electricity charges, reset the device. To do this, pull out the power plug and connect it again after a few seconds.
- When deciding where to place the device, please note that furniture surfaces are covered by various types of varnish and plastic, most of which contain chemical additives. These additives may cause corrosion to the feet of the unit and leave stains on the surface of the furniture which could be difficult or impossible to remove.
- Do not use any cleaning agents as they may damage the housing. Clean the device with a clean, dry cloth.
- Never open the device casing. No warranty claims are accepted for damage caused by incorrect handling.
- The type plate is located on the bottom of the device.
![]()
Note, prolonged listening at loud volumes with the earphones can damage your hearing.

OVERVIEW

ON/OFF
Switches the radio to and from standby mode.
ALARM1
Activates the setting for alarm time 1.
RDS/WEC
Switches between different RDS station information bulletins in radio mode. Switches the alarm standby off for the weekend and on again.
ALARM2
Activates the setting for alarm time 2.
SLEEP/NAP
Activates the setting for the sleep timer,
activates the setting of the reminder timer.
MEM/TIME
Saves FM stations to presets;
activates the time setting.
DISPLAY
Switches the display between frequency or station name and time with week day.
COLOUR
Switches between eight different colours for the display backlight.
DIMMER
Adjusts the brightness of the display to one of three levels, switches off the backlight for the display.
 Control dial for volume control.
 TUNING
For setting FM stations manually;
starts the automatic station search.
 Selects the next preset up.
Battery
Compartment for inserting two back-up batteries compartment (2 x 1.5 V LR 03/AM 4/AAA).
RESET
Resets the device.
 Power cord.
ANTENNA
Wire antenna for FM reception.
SNOOZE
Interrupts the alarm function.
DISPLAY
Displays the current time, date, the alarm times and FM station information.
 Selects the next preset down.
AUTO DIMMER
Automatically adjusts the brightness of the display to the brightness of the surroundings.
 Headphone jack for connecting headphones or an earphone set with a jack plug (ø 3.5 mm).
The speaker on the unit is switched off.
POWER SUPPLY
Mains operation
Check that the mains voltage on the type plate (on the bottom of the device) corresponds to your local mains supply. If this is not the case, contact your specialist dealer.
- Plug the mains cable into the sockket (230 V~, 50/60 Hz).
![]()
- The device is connected to the mains with the power cord. Pull out the power cord when you want to completely disconnect the device from the mains.
- Unplug the mains plug to disconnect the device from the mains. Make sure the power plug is easily accessible during operation and not hindered by other objects.

Inserting back-up batteries
During mains operation, the back-up batteries ensure that stored settings are not lost in the case of a power failure or when the device is briefly disconnected from the mains.
- To open the battery compartment cover on the back of the device, press on the marked area, push the cover forward and lift it up.
- Observe the polarity marked on the base of the battery compartment when inserting the batteries (2 x 1.5 V LR 03/AM 4/AAA).
- Insert the lid again and push it to the right until it latches in place.
![warning]() Notes:
Notes: - Do not expose the batteries to extreme heat, caused for example by direct sunlight, heaters or fire.
- Take out the back-up batteries when you know that the device will not be used for a long period of time. The manufacturer accepts no liability for damage caused by leaking batteries.
 Environmental note:
- Batteries, including those which contain no heavy metal, should not be disposed of with household waste. Please dispose of used batteries in an environmentally sound manner. Find out about the legal regulations which apply in your area.
SETTINGS
First installation
When the device is connected to the mains for the first, time, an automatic station search starts. Stations are automatically saved to the presets. At the end of the search a demo program starts. To end the demo program, press »ON/OFF«. The station saved on preset position 1 can be heard.
If the device receives a station that transmits an RDS time signal, the time and the week day are set automatically, (RDS time synchronisation). This process may last a few minutes.
If the device could not execute the automatic station search as well as the automatic time/week day setting due to poor reception conditions, for example, you have to make the settings manually or select a different station.
Tuning and storing stations
A maximum of 20 stations can be stored on the presets.
Automatic station search
- Press »ON/OFF« to switch on the device from standby mode.
- Display: the frequency band and frequency, or station name.
- Activate the station search by pressing »
![]() TUNING
TUNING ![]() « until the frequency display changes to rapid run-through forwards or backwards.
« until the frequency display changes to rapid run-through forwards or backwards. - The search stops when a channel is found.
 TUNING
  « until the frequency display changes to rapid run-through forwards or backwards.
 Manual station search
- Press »
![]() TUNING
TUNING ![]() « briefly several times to move the frequency up in steps.
« briefly several times to move the frequency up in steps. - The frequency changes up or down in 50 kHz steps.
Storing stations as presets
- Press »
![]() TUNING
TUNING ![]() « to select the station you want to store.
« to select the station you want to store. - Press »MEM/TIME« to activate the memory function.
- Display: the preset displays »00« and »MEMORY« flash.
- Press »P –« or »P +« to select the desired preset.
![warning]() Note:
Note: - If stations are already stored on the presets, they are overwritten when new stations are stored.
- To store the station press »MEM/TIME« again.
- Display: »MEMORY« and, for example, »2«.
- To store more stations, repeat steps 1 to 4.
Note:
- If the device is disconnected from the mains, all saved stations will be deleted unless you have inserted back-up batteries.
Time settings
Setting the clock time
- Switch the device to standby with »ON/OFF«.
- Press and hold »MEM/TIME« until the hours flash in the display.
- Press »
![]() TUNING
TUNING ![]() « to set the hours and press »MEM/TIME« to confirm.
« to set the hours and press »MEM/TIME« to confirm. - Display: the minutes flash.
- Press »
![]() TUNING
TUNING ![]() « to set the minutes and press »MEM/TIME« to confirm.
« to set the minutes and press »MEM/TIME« to confirm. - Display: the current time.
Setting the week day
- Switch the device to standby mode with »ON/OFF«.
- Press »SNOOZE« and hold it down.
- Set the day of the week with »
![]() TUNING
TUNING ![]() « and press »SNOOZE« to confirm.
« and press »SNOOZE« to confirm. - Display: the current day.
Deactivating and activating RDS time synchronisation
- Press »ON/OFF« to switch the device to standby.
- Deactivate RDS time synchronisation by pressing »MEM/TIME« briefly.
- Display: »CT OFF«.
- Activate RDS time synchronisation by pressing »MEM/TIME« briefly.
- Display: »CT ON«.
- If an RDS time signal can be received, the time and the day of the week are updated after switching on the device.
Setting the alarm times
You can select two different alarm times. You can choose whether you want to be woken by the radio or by an alarm tone.
- Activate the setting by pressing »ALARM 1« or »ALARM 2« and holding down.
- Display: the last alarm time set, the hours flash.
- Set the hours with »
![]() TUNING
TUNING ![]() « and confirm with »ALARM 1« or »ALARM 2«.
« and confirm with »ALARM 1« or »ALARM 2«. - Display: the minutes flash.
- Set the minutes with »
![]() TUNING
TUNING ![]() « and confirm with »ALARM 1« or »ALARM 2«.
« and confirm with »ALARM 1« or »ALARM 2«.
Setting the brightness of the backlight display
- Repeatedly press »DIMMER« to change the brightness of the display (3 levels) or switch of the backlight.
![warning]() Note:
Note: - In addition to this function, the "AUTO DIMMER" ensures that the brightness of the display is adjusted to suit the brightness of the surroundings.
Setting the colour of the display backlight
- Select the backlight colour (8 colours) by repeatedly pressing »COLOUR«.
Resetting the device
If malfunctions occur due to brief mains overloads or static electricity charges, reset the device. Any stored settings are retained.
- When the device is switched on, press »RESET« on the base of the device, for example, using a paper clip.
![warning]() Note:
Note: - If you wish to delete the stored settings, pull out the mains plug and remove the back-up batteries. If you connect the mains cable again after a short time, all stored setting will have been deleted.
RADIO MODE
General information
Switching on and off
- Switch on the device from standby mode with »ON/OFF«.
- Switch on the device to standby mode with »ON/OFF«.
Adjusting the volume
- Set the desired volume with »
![]() « (right side of the device)
« (right side of the device)
 « (right side of the device)
Listening with headphones or earphones
- Insert the headphone or earphone plug (ø 3.5 mm, stereo) into the »
![]() « jack on the left of the device.
« jack on the left of the device. - The loudspeaker of the device is switched off.
![]()
- Excessive sound pressure from the earphones or headphones can cause hearing loss.
- The loudspeaker of the device is switched off.
 « jack on the left of the device.
 Radio mode
For the best FM (UHF) reception it is sufficient to align the wire antenna accordingly.
Switching on
- Switch on the device from standby mode with »ON/OFF«.
Selecting preset radio stations
- Select the radio station with »P –« or »P +«.
Switching the display
- In radio mode, switch the display between the time/day and frequency or station name with »DISPLAY«.
RDS information
RDS (Radio Data System) is an information system which is transmitted additionally by most FM stations.
If the device receives an RDS station, the station name appears briefly in the display, for example »FANTASY«, and » « is displayed constantly.
Note:
It may take some time before all the RDS information is available.
Searching for RDS stations
- Search for the desired RDS station by pressing »P –« or »P +« repeatedly until »
![]() « appears in the display and an RDS station is received.
« appears in the display and an RDS station is received.
RDS time synchronisation
Some RDS stations transmit an RDS time signal. If the reception is good, this time information will update the time (display: » « flashes), as long as the time synchronisation is activated. After successful time synchronisation, »« remains constantly in the display.
Time synchronisation can take several minutes, and even with good reception the accuracy depends on the time signal being transmitted. The automatic setting is always activated if the device is switched on from standby to radio mode and a suitable RDS station can be received.
Radio text
The radio text is RDS information.
- To call up radio text, press »RDS/WEC«.
- The radio text (TEXT) appears in the display as ticker text.
- If no radio text is available, »NO TEXT« appears in the display.
Displaying the current programme type
- To display the current programme type, press »RDS/WEC« twice.
- The programme type appears in the display.
- If no programme type identification is available, »NO PTY« appears.
Searching for programme types (PTY)
This RDS function enables you to search radio stations according to programme type. A total of 31 programme types have been defined.
- Select the desired programme type by pressing »RDS/WEC« repeatedly until the desired programme type is displayed.
- To start the search in the desired direction press »
![]() TUNING
TUNING ![]() «.
«. - Display: »PTY« flashes.
- If the desired programme type has been found, the corresponding programme can be heard.
- If the programme type could not be found, »NO MATCH« appears briefly in the display. The device returns to the previous station.
![warning]() Note:
Note:
 TUNING
  «.
«. - The search can be interrupted with »
![]() TUNING
TUNING ![]() «.
«.
ALARM MODE
The device has a dynamic alarm sound, that starts with a low volume and reaches maximum volume within a short time.
Viewing the alarm times
- In standby press »DISPLAY« repeatedly.
- Display: in sequence: alarm time 1, alarm time 2 and the the time and the day.
Alarm with radio station
- Press »ON/OFF« to switch on the device from standby mode.
- Set the radio station with »P –« or »P +«.
- Set the desired wake-up volume with »
![]() «.
«. - Activate the radio station as the alarm sound (»
![]() «) by pressing »ALARM 1« or »ALARM 2« repeatedly until the display shows: »
«) by pressing »ALARM 1« or »ALARM 2« repeatedly until the display shows: »![]() 1« or »
1« or »![]() 2«.
2«. - Press »ON/OFF« to switch the device to standby.
- The device wakes you up at the set time with the radio station (alarm duration is 90 minutes).
 «.
«.Alarm with signal tone
- Press »ON/OFF« to switch the device to standby.
- Activate the alarm signal as the alarm sound (»
![]() «) by pressing »ALARM 1« or »ALARM 2« repeatedly until »
«) by pressing »ALARM 1« or »ALARM 2« repeatedly until »![]() 1« or »
1« or »![]() 2« appears in the display.
2« appears in the display. - The device wakes you up at the set time with the signal tone (alarm duration is 90 minutes).
Interrupting the alarm
- Press »SNOOZE« while the alarm is going off.
- The alarm signal (radio station or signal tone) stops.
- The alarm goes off again at five-minute intervals (overall alarm duration is 90 minutes).
Cancelling the alarm for the day
- Press »ON/OFF« while the alarm is going off.
- The alarm (radio station or alarm tone) stops, but it retains the set time for the next day.
Deactivating and activating alarm standby
- To deactivate the alarm function press »ALARM 1« or »ALARM 2« repeatedly until »
![]() 1« or »
1« or »![]() 2« respectively »
2« respectively »![]() 1« or »
1« or »![]() 2« disappear from the display. – The set alarm time is saved.
2« disappear from the display. – The set alarm time is saved. - To activate the alarm function press
»ALARM 1« or »ALARM 2«
repeatedly until » 1« or » 2« respectively »
 1« or » 2« appear in the display.
Deactivating/activating the alarm function for the weekend
- In standby press »RDS/WEC«.
- Display: »WEC«.
- The alarm function is deactivated for the weekend.
- Press »RDS/WEC« again.
- Display: »WEC« disappears.
- The alarm function is activated for the weekend.
Sleep timer
The device has a sleep timer, which switches it off in radio mode at a preset time. The switch off time can be set in a range between 90 and 10 minutes.
Activating the sleep timer
- Set the desired switch-off time progressively by pressing and holding down »SLEEP/NAP« or in steps by pressing the button repeatedly.
- Display: »
![]() «.
«. - After the selected switch-off time has elapsed, the device switches off automatically.
- Display: »
- Display the remaining time until switch-off by pressing »SLEEP/NAP«.
 «.
«.Deactivating the sleep timer
- To switch off the sleep timer early, press »ON/OFF«;
or
set the switch-off time to »SLEEP 00« by pressing »SLEEP/NAP«.- Display: »
![]() « disappears.
« disappears.
- Display: »
Reminder timer
The reminder timer reminds you after a certain time (between 10 and 120 minutes) with a signal tone.
Activating the reminder timer
- Press »ON/OFF« to switch the device to standby.
- Set the desired reminder time progressively by pressing and holding down »SLEEP/NAP« or in steps by pressing the button repeatedly.
- Display: »NAP«.
- The device emits a signal tone to remind you after a set time.
- End the signal tone by pressing »ON/OFF«.
Notes:
- The remaining reminder time can be displayed with »SLEEP/NAP«.
- The function can be interrupted by pressing »SNOOZE«.
INFORMATION
Environmental note

This product has been made from high-quality parts and materials which can be re-used and recycled.
Therefore, do not throw the product away with normal household waste at the end of its life. Take it to a collection point for recycling electrical and electronic devices. This is indicated by this symbol on the product, in the operating manual and on the packaging.
Please find out about collection points operated by your local authority.
Help protect the environment by recycling used products.
Technical data

This device is noisesuppressed according to the applicable EU directives. This product fulfils the European directives 2004/108/EC, 2006/95/ EC and 2009/125 EC.
Power supply: 230 V, 50/60 Hz
Max. power consumption: < 3,2 W (operation) < 1 W (standby)
Output: DIN 45324, 10% THD 500 mW
Waveband: FM 87.5... 108.0 MHz
Dimensions and weight: B x H x T 178 x 51 x 144 mm
Weight approx. 0.57 kg
Technical and design modifications reserved.

Documents / ResourcesDownload manual
Here you can download full pdf version of manual, it may contain additional safety instructions, warranty information, FCC rules, etc.
Advertisement


Need help?
Do you have a question about the Sonoclock 660 PLL and is the answer not in the manual?
Questions and answers