Table of Contents
Advertisement
Advertisement
Table of Contents

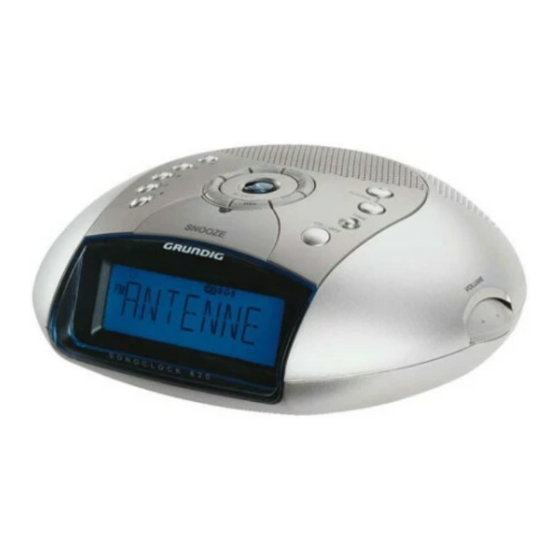
Summary of Contents for Grundig SONOCLOCK 620
- Page 1 ELECTRONIC CLOCK RADIO SONOCLOCK 620...
- Page 2 ___________________________________________________________________ Sicherheit/Informationen Radio-Betrieb DEUTSCH Auf einen Blick Weck-Betrieb Stromversorgung Timer-Betrieb Installation Service Safety/Information Radio mode ENGLISH Overview Alarm mode Current supply Timer mode Installation Service Sécurité/Informations Fonction radio FRANÇAIS Vue d’ensemble Fonction réveil Alimentation en courant Fonction horloge Installation Service après-vente Sicurezza/Informazioni Funzionamento radio ITALIANO...
-
Page 3: Safety Information
SAFETY, INFORMATION _____________________ ENGLISH Safety To ensure that this device provides you with long-term satisfaction and ent- ertainment, please observe the following instructions: This device is designed for the playback of audio signals. Any other use is expressly prohibited. Protect the device from moisture. Please note when setting up the device, that furniture surfaces are covered by various types of lacquer and plastic, most of which contain chemical additives. - Page 4 OVERVIEW ___________________________________________ ALARM 1 ALARM 2 + TUNING – 1... 5 6 ...10 TIME VOLUME DISPLAY Display ON/OFF Light indicator SNOOZE TRAFFIC/ SLEEP 1... 5 and Channel positions, press once for channel position 6 ...10 1 ... 5, press twice for channel position 6 ... 10. Display Displays various information such as station names, time, day, alarm setting.
- Page 5 OVERVIEW ____________________________________________ Pressing once activates the reminder timer; Each repeated pressing increases the activation time of the reminder timer by 10 minutes (max. 120 minu- tes). TRAFFIC/ Device activated: activates traffic information standby mode. Device switched off: blocks the alarm function during the weekend.
-
Page 6: Current Supply
CURRENT SUPPLY ________________________________ Connecting the mains cable Note: Check if the mains voltage on the identification plate (at the bottom of the device) corresponds to the local mains voltage. If this is not the case, contact your dealer. Insert the mains cable in the socket (230 V~, 50/60 Hz). Caution: The only way to isolate the device from the mains supply is to pull the plug. -
Page 7: Important Notes For Users In The U.k
CURRENT SUPPLY ____________________________________ Important notes for users in the U.K. Mains plug This apparatus is fitted with an approved moulded 13 Amp plug. To change a fuse in this type of plug proceed as follows: Remove fuse cover and fuse. Fix new fuse which should be a BS1362 5 Amp, A.S.T.A. -
Page 8: Installation
INSTALLATION _____________________________________ Automatic settings Note: To cancel the automatic settings, press the »MEM« key. After you have connected your Sonoclock to the mains, the following message appears in the display »SEARCHING FM PLEASE WAIT«. se aRC H I N – Your device automatically searches the frequency band for stations. –... -
Page 9: Setting The Time
INSTALLATION ________________________________________ To set further radio stations, repeat this procedure starting at pt. 2. Note: If no channel position is selected within 8 seconds, the device interrupts the setting procedure. Start again at pt. 3. Setting the time Note: If the time is not automatically set, select another channel position with an RDS station by pressing »1 ... -
Page 10: Radio Mode
RADIO MODE _______________________________________ Note: Each time a button is pressed, the display of your device is illuminated for 10 seconds. Radio reception When the device is switched off, the current time and day are shown in the display. Switch on the device with »ON/OFF«. BAYER N 3 –... - Page 11 RADIO MODE _________________________________________ Radiotext Some RDS stations transmit “radiotext” information. This is additional infor- mation about the station and its programme. Select a channel position with an RDS station by pressing »1 ... 10 «. BAYER N 3 – » «...
-
Page 12: Alarm Mode
ALARM MODE ______________________________________ Setting alarm time and type You can enter two different alarm times and select between two different alarm types. Setting the alarm time Enter the first alarm time by pressing and holding down the »ALARM 1« button. 6: 00 a i –... - Page 13 ALARM MODE ________________________________________ Checking the alarm time You can check the two alarm times without blocking the alarm function. Switch off device with »ON/OFF«. Press »DISPLAY« once. 6: 3 0 a i – Display: Alarm type, alarm time 1 and »A 1«. Press »DISPLAY«...
-
Page 14: Timer Mode
TIMER MODE ________________________________________ Sleep timer (falling asleep to music) sl e e p 9 0 Activate the function by pressing »SLEEP«. – Display: »SLEEP 90« (maximum set time) and the symbol » «. Enter the switch-off time (in 10 minute intervals from 90 to 10 minutes) sl e e p 3 0 with »SLEEP«. -
Page 15: Grundig Kundenberatungszentrum
Unser Kundenberatungszentrum steht Ihnen werktags stets von 8.00 – 19.00 Uhr zur Verfügung. Montags bis Freitags Haben Sie Fragen zur Umweltverträglichkeit unserer von 8.00 bis 19.00 Uhr Geräte, wenden Sie sich an die GRUNDIG Deutschland: 0180 / 530 21 22* Öko-Technologie, Fax: 0911/703-9213. Österreich: 0800 / 700 600* *gebührenpflichtig... - Page 16 Grundig AG • Kurgartenstraße 37 • D-90762 Fürth • http://www.grundig.de • http://www.grundig.com 72010-761.4000...


Need help?
Do you have a question about the SONOCLOCK 620 and is the answer not in the manual?
Questions and answers