Table of Contents
Advertisement
Advertisement
Table of Contents

Related Manuals for dynarex Bari+Max DB300


Summary of Contents for dynarex Bari+Max DB300
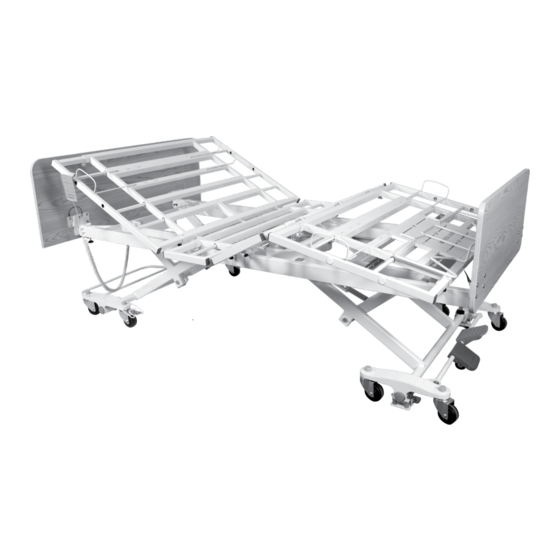
- Page 1 Reorder No. 12013 Bariatric HD Long-Term Care Bed DB300 • 5 Function Low Bed Expands to 48" User Manual 122°F IPX4 50°C 14°F -10°C Manufactured for: Dynarex Corporation 10 Glenshaw Street | Orangeburg, NY 10962 USA • www.dynarex.com | Made in China...
- Page 2 • DO NOT use accessories that are not designed or ap- result in damage. Consult your dealer or manufacturer for proved for use with the bed. Use only Dynarex approved further information. parts and accessories. DO NOT make modifications to the bed without authorization from the manufacturer.
- Page 3 DECLARATION – ELECTROMAGNETIC EMISSIONS Radio Frequency Interference (RFI) influences most electronic immediately. Leave it off while the transmission is in progress. equipment. Caution should be exercised regarding the use of Interference to electronic equipment may occur portable communications equipment in the area around such in the vicinity of devices marked with this symbol: equipment.
- Page 4 DECLARATION – ELECTROMAGNETIC EMISSIONS (Continued) Information about Non Life Support Devices Electromagnetic Interference Immunity Guidance and Manufacturer’s Declarations - Non-Life-Support-Devices Electromagnetic Interference Immunity The care bed is intended for use in the electromagnetic environment specified below. The customer or user of the care bed should ensure that it is used in such an environment.
- Page 5 DECLARATION – ELECTROMAGNETIC EMISSIONS (Continued) Working Clearances Recommended working clearances between portable and mobile RF communications equipment and the care bed The care bed is intended for use in the electromagnetic environment in which radiated RF disturbances are controlled. The customer or user of the care bed can help to prevent electromagnetic interference by maintaining a minimum dis- tance between portable and mobile RF communications equipment (transmitters) and the care bed as recommended below, according to the maximum output power of the communication device.
-
Page 6: Technical Specifications
TECHNICAL SPECIFICATIONS Bed Height 9.6"-26" Back Rest Angle 0°-65° Knee Break Angle 0°-35° Additional Manual Leg Lift Yes, various positions Trendelenburg/Reverse Trendelenburg Auto Contour Weight Capacity 770 lb. Safe Working Load (SWL) 750 lb. Sleeping Surface Dimension (Width × Length – Extension) 36"-42"-48"... - Page 7 ASSEMBLY INSTRUCTIONS UNPACKING THE BED 3. Upon unpacking your bed, the package should contain all the components shown below. 1. Unpack the components from the shipping 4. Inspect the bed components for damage. If the cartons. bed is damaged, do not use the bed and contact the manufacturer.
- Page 8 ASSEMBLY INSTRUCTIONS (Continued) 2.1 ASSEMBLING THE HEADBOARD 2.3 ASSEMBLING THE HEADBOARDS/ BRACKETS TO THE BED FOOTBOARDS ONTO THE BED 1. With the bed raised to its highest position, step 1. With the mounting plates on the headboard on the locking levers to lock the casters on the facing the bed, slide the mounting plate groove foot end of the bed.
- Page 9 ASSEMBLY INSTRUCTIONS (Continued) 2.4 INSTALLING THE WIDTH 2.5 INSTALLING THE BED-END MATTRESS RETAINERS MATTRESS RETAINER 1. Locate the mounting holes for the mattress retain- 1. Locate the mounting holes for the bed-end ers in the bed deck. Align and insert the mattress mattress retainer in the foot side of the bed deck.
- Page 10 ASSEMBLY INSTRUCTIONS (Continued) 2.7 INSTALLING THE RAILS OR 5. Re-insert the metal pins from the outside edge of the bed through the mounting holes and secure ASSIST BARS with the snap rings on the inside edge of the bed. Make sure the snap rings are positioned in the 1.
- Page 11 ASSEMBLY INSTRUCTIONS (Continued) 2.9 INSTALLING THE FOOTBOARD 4. Plug the cord from the staff control footboard into the port adjacent to the hand pendant. Use WITH STAFF CONTROL the included zip ties to secure the cord to the bed frame. Ensure the cord does not interfere with the 1.
- Page 12 ASSEMBLY INSTRUCTIONS (Continued) 2.10 INSTALLING THE BATTERY 3. Open the control box locking lid by pressing in the sides and lift it up, to expose the connection BACKUP parts. 1. Unplug the bed when installing the backup bat- tery. 2. Affix the battery backup with nuts and bolts to the side of the control box, on the same holding plate.
- Page 13 ASSEMBLY INSTRUCTIONS (Continued) 2.11 INSTALLING THE COMPOSITE HEADBOARD & FOOTBOARD 1. Raise the bed to its highest position and lock the bed in place. 2. Turn and loosen the two black turn knobs on the underside of the Bed Assembly insertion slots. 3.
-
Page 14: Equipment Operation
EQUIPMENT OPERATION POSITIONING THE BED EXTENDING THE LENGTH OF THE BED FROM 80" TO 84" OR 88" 1. To lock the bed, step on the red lever at the rear of the bed. 1. Loosen the two black knobs located on the un- derside of the bed frame securing the footboard frame. - Page 15 EQUIPMENT OPERATION (Continued) 4.1 RESETTING THE BED 4. To extend the headboard, lift up and flip the ex- tension piece on the back of headboard. Reinsert the steel plates into the mounting brackets on the Where a connection fault is identified and rectified, main headboard.
- Page 16 EQUIPMENT OPERATION (Continued) OPERATING THE BED RAILS ROTATING ASSIST BAR (REORDER NUMBER 12952) METAL SWING RAIL Parallel Assist Bar Alignment: Lift up and rotate (REORDER NUMBER 12950) the bar until it is parallel to the bed edge. Lower the bar and ensure it is securely locked in place. Raise Bed Rail: Pull the bed rail upwards until the rail is securely locked in place.
- Page 17 SYMPTOMS POSSIBLE FAULTS POSSIBLE SOLUTIONS Bed idle when hand pendant Adjustment may be at the maximum Check if other buttons are working. buttons are pressed. or minimum position. Power cord not connected or Ensure the power cable is properly damaged. connected to the electrical socket and the bed.
-
Page 18: Troubleshooting Guide
• Problems arising from failure to adhere to the product the terms contained herein. instructions If you have a question about your Dynarex device or this • Problems arising from misuse, negligence, accident or warranty, please contact an authorized Dynarex dealer. -
Page 19: Service Record
SERVICE RECORD DATE PERFORMED BY CONDITION REPORT Bariatric Heavy Duty Long-Term Care Bed • DB300 • 5 Function Low Bed • Expands to 48" (Reorder No. 12013) - Page 20 SERVICE RECORD DATE PERFORMED BY CONDITION REPORT Bariatric Heavy Duty Long-Term Care Bed • DB300 • 5 Function Low Bed • Expands to 48" (Reorder No. 12013)
Need help?
Do you have a question about the Bari+Max DB300 and is the answer not in the manual?
Questions and answers
My remote seems to have gone out and I can't adjust bed
To troubleshoot the Dynarex Bari+Max DB300 remote control that is not adjusting the bed:
1. Ensure all cables are fully inserted.
2. Make sure the bed is plugged into the appropriate outlet.
3. Unplug the bed for 60 seconds, then plug it back in.
4. If a thermal shutdown occurred, wait at least 20 minutes before using the functions again.
5. The bed is intended for 2 minutes of use every 20 minutes; avoid overuse.
This answer is automatically generated
My remote is blinking and not functioning as it should.