Table of Contents
Advertisement
Advertisement
Table of Contents

Related Manuals for Lowrance HDS PRO


Summary of Contents for Lowrance HDS PRO
- Page 1 ® Basic Operation Guide ENGLISH Scan here www.lowrance.com to save a copy...
-
Page 2: Table Of Contents
CONTENTS 4 About 4 Interface 4 Turn unit on/off 5 Physical control keys 6 Card reader 6 System controls dialog 7 Home screen 7 Launch an application 8 Adjust panel size 8 Favorite pages 8 Add a favorite page 9 Edit/delete a favorite page 9 Menus 9 Panel menu 10 Settings 11 Chart 11 Waypoints 12 Routes 12 Navigation 13 Traditional/CHIRP Sonar 14 Imaging sonar 14 SideScan... - Page 3 This product’s warranty is supplied as a separate document. Product features Features described and illustrated in this guide may vary from your display unit due to continuous development of the software. More information Document version: 001 For the latest version of this document in supported languages, visit: www.lowrance.com/downloads/hdspro.
-
Page 4: About
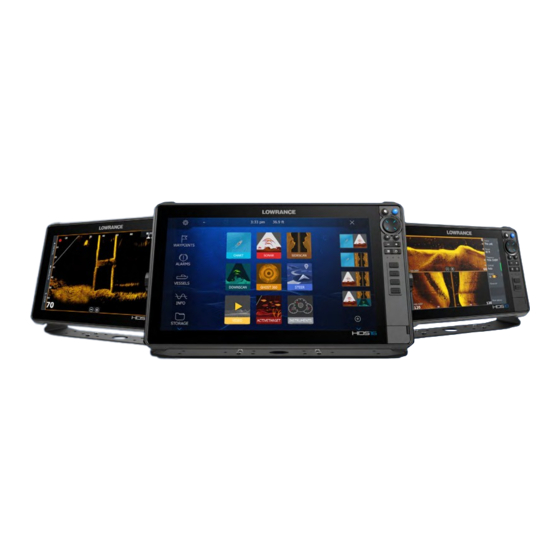
ABOUT This document describes the basic operation of the HDS Pro multi-function display (MFD) unit. For the latest version of this document and other user guides, we recommend you download the Lowrance mobile app or visit: www.lowrance.com/downloads/hdspro. INTERFACE You can interact with your display unit via the touchscreen or by pressing the physical buttons on the bezel. -
Page 5: Physical Control Keys
PHYSICAL CONTROL KEYS Pages Zoom in/out • Press to activate the home screen • Press to zoom the image • Repeat short presses to cycle through your • Press both buttons at once to save a Man Overboard (MOB) waypoint at the current favorites •... -
Page 6: Card Reader
Card reader Carefully slide a microSD card into the card reader slot until it clicks into place. To remove the microSD ® ® card, gently push in the card until it ejects out of the slot. SYSTEM CONTROLS DIALOG Press the power key once to view the System Controls dialog quickly. ¼... -
Page 7: Home Screen
HOME SCREEN Press the pages key to view the home screen. Settings Applications Close Favorites bar Toolbar LAUNCH AN APPLICATION There are three ways to launch an application: Select the application icon (full page panel) Select and hold an application icon to select a predefined split page Select the favorites icon All applications have three distinct interface areas. -
Page 8: Adjust Panel Size
ADJUST PANEL SIZE To adjust the panel sizes in a split page or favorite pages: Select Adjust splits on the System Controls dialog to show the resize icon. Drag the resize icon to set the preferred panel size. Save the changes by pressing the enter key, or select Save. FAVORITE PAGES Add a favorite page To add a favorite page, select and drag one or more application icons onto the center of the page editor. -
Page 9: Edit/Delete A Favorite Page
Edit/delete a favorite page To edit a favorite page, select and hold the favorite page you want to edit, then select or select Edit on the favorites bar, then select on the favorites page. To delete a favorite page, select next to the favorite page. -
Page 10: Settings
Settings There are three ways to view the Settings screen: Press the menu key twice. Select Settings on the System controls dialog. Select Settings on the home screen. -
Page 11: Chart
CHART Use the Chart application to navigate to a waypoint, create a route or track your current course. To navigate the chart: • Use pinch/spread gestures to zoom the chart image. You can also zoom by using the zoom controls (A), or the + or - keys. •... -
Page 12: Routes
Routes To create a route: Activate the cursor on the chart panel. Select New route on the menu. Select a position on the chart to mark your first route point. Continue to select your next position(s) to add additional route points. Selecting Save on the menu when done. -
Page 13: Traditional/Chirp Sonar
TRADITIONAL/CHIRP SONAR The Sonar application displays an image of the water and sea floor beneath your vessel, allowing you to detect fish and examine the structure of the sea floor. It detects objects under water by sending and receiving sound pulses from a compatible transducer. Adjust the sonar image by selecting the zoom buttons (A), or the + or - keys. -
Page 14: Imaging Sonar
IMAGING SONAR SideScan and DownScan are perfect for pinpointing fish-holding areas like rock piles, standing timber, weed beds, ditches, and drop-offs. ¼ Note: Only one structure source can be displayed on the MFD at a time. SideScan SideScan provides views to each side of the boat, allowing you to cover more water in a shorter period of time, and view areas too shallow for your boat –... -
Page 15: Fishreveal
FishReveal™ Select FishReveal™ to display fish arches in the SideScan or DownScan image. ¼ Note: SideScan FishReveal™ requires an S3100 sonar hub and compatible ActiveImaging™ HD FishReveal™ transducers to be connected to the unit. -
Page 16: Activetarget Sonar
ACTIVETARGET SONAR When an ActiveTarget transducer and its sonar module are connected to the Ethernet network, the ActiveTarget button shows on the home screen. The ActiveTarget transducer can be used in the following modes: Forward Use this mode to see fish and structure directly in front of the transducer. It provides a 18° side-to-side and 135°... - Page 17 Scout Use this mode to scan large areas for fish and structure and to identify the direction of your next cast. This mode provides a 135° side-to-side and 18° top-to-bottom view of the water column. A ActiveTarget icon, indicating beam direction B Fish C Range grid lines can be turned off/on, and set to straight or arc from the More menu.
-
Page 18: Activetarget 2 Wide Sonar
ACTIVETARGET 2 WIDE SONAR If you have two paired ActiveTarget 2 systems (two ActiveTarget 2 sonar modules and two ActiveTarget 2 transducers) on your vessel, you can view wide sonar images on your multi-function display. When the transducers are paired, you can launch the AT WIDE application from the home screen. You can install the transducers on the same trolling motor to achieve the following dual views: •... -
Page 19: Ping Synchronization
For this feature to work, the ping synchronization wires need to be connected between sonar modules and/or MFDs. For example, a connection must be made between HDS Pro and S3100 or HDS Pro and ActiveTarget 2 sonar module. -
Page 20: Trolling Motor
TROLLING MOTOR ⚠ WARNING: An autopilot is a useful navigational aid, but DOES NOT replace a human navigator. Ensure the autopilot has been installed correctly, commissioned and calibrated before use. If both an autopilot computer and a trolling motor are configured for MFD control, only one of them can be active at a time. -
Page 21: Trolling Motor Autopilot Modes
Trolling motor autopilot modes There are three trolling motor autopilot modes available: • Anchor: The trolling motor maintains the vessel position at a selected location. • Heading lock: The trolling motor steers the vessel on the set heading. ¼ Note: When activated, the trolling motor autopilot selects the current compass heading as the set heading. -
Page 22: Radar
RADAR Use the radar to navigate safely, track targets, and detect flocks of birds from a distance. ¼ Note: A compatible radar must be installed and commissioned for the Radar application to work. • Turn the radar transmitting on/off from the menu or press the power key once to see the menu. •... - Page 24 ®Reg. U.S. Pat. & Tm. Off, and ™ common law marks. Visit www.navico.com/intellectual-property to review the global trademark rights and accreditations for www.lowrance.com Navico Holding AS and other entities.
Need help?
Do you have a question about the HDS PRO and is the answer not in the manual?
Questions and answers