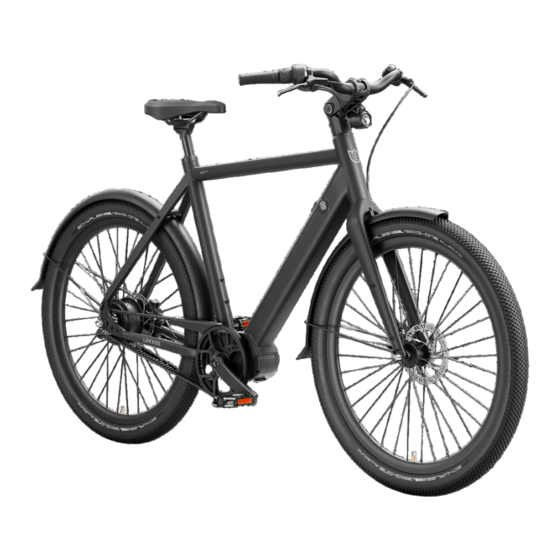
Lekker Amsterdam+ Assembly & Maintenance Manual
Hide thumbs
Also See for Amsterdam+:
- Installation manual (9 pages) ,
- Assembly & maintenance manual (16 pages) ,
- Assembly & maintenance manual (18 pages)
Table of Contents
Advertisement
Quick Links
Advertisement
Table of Contents

Subscribe to Our Youtube Channel
Related Manuals for Lekker Amsterdam+


Summary of Contents for Lekker Amsterdam+
- Page 1 Amsterdam+...
- Page 2 Assembly & Maintenance Guide Amsterdam+...
- Page 3 MANUAL LEKKER BIKES / Amsterdam GT combination, tricks and available components. For this reason, our manual is only applicable bicycle, we recommend you to your new LEKKER bicycle and its assembly, alongside any important notes, warnings and maintenance guides. seek the assistance of a skilled bicycle mechanic.
- Page 4 Index Getting started Fitting the handlebars and adjusting the controls Fitting the pedals Aligning the brakes Battery set-up Display settings Finishing touches Battery Health Safety and Warranty Assembly & Maintenance Guide...
-
Page 5: Getting Started
So, without further ado, unbox your LEKKER bike and feast your eyes on your newest sidekick. Once you’- ve removed the packaging, make sure you have your trustly toolkit to hand, as shown in the illustration on the next page. - Page 6 Assembly & Maintenance Guide Amsterdam+...
- Page 7 02. Fitting the handlebar Step 2: Where necessary, loosen the stem bolts and and adjusting the controls rotate the handlebars in the straight and forward position then align the handlebars so that they are straight and perpendicular to the frame. Then, tighten the handlebar stem to the front fork, Handlebars.
- Page 8 Step 3: Now, using a 4mm allen key, tighten the handlebars and stem, making sure all 4 bolts are centered and tightened properly. Step 4: Now you can adjust the position of your brake levers, display screen and bell. You will have the correct allen key or screwdriver in your tools.
-
Page 9: Fitting The Pedals
03. Fitting the pedals To assemble the pedals, you will need a 15mm open- RIGHT pedal: this pedal has no indented lines and is ended spanner. Insert the pedal into the crank and smooth in between the pedal and thread. ensure the pedals are properly tightened. -
Page 10: Aligning The Brakes
04. Aligning the brakes Lift the wheel off the ground and give it a spin. It should spin freely and without any noise. If you hear a metallic rubbing sound, then the brakes will need adjusting. To do this, you’ll need to use the 5mm allen key. With the bike upside down, adjust the caliper. -
Page 11: Battery Set-Up
05. Battery set-up Make sure that the battery is properly inserted into Note: All batteries and frames are water-resistant, the frame. When you feel a click, you’ll know it’s been but if you are storing the bike outside overnight, or locked into place. -
Page 12: Display Settings
06. Display Settings Once on, you can scroll through the 5 levels of motor We recommend that you sit on your bike before you assist using the + and - buttons on the front of the turn it on. This means you’ll have full control over the control module / display. -
Page 13: Finishing Touches
07. Finishing Touches Saddle. Using a 5mm allen key, loosen the seat post clamp bolt and adjust the seat post height. Ensure it’s at the correct height for you, and tighten the bolt. Tip: Your knee should slightly bend when the pedal is at its lowest position while sitting on the saddle. -
Page 14: Battery Health
100% is fine, but avoid storing it at 100% for an extended period (i.e. longer than a month). If possible, 5. Your LEKKER bike comes with the Bafang C11 dis- also remove your battery from your bike during play, which gives you an indication of your battery’s... -
Page 15: Safety And Warranty
As a rule, you will of a LEKKER product. If you want to use the warran- shorten the service life of the system, risk damaging ty, please ensure you have your receipt and go to the the Drive Unit (motor and also the e-bike itself. - Page 16 Assembly & Amsterdam + Maintenance Guide 6. What factors will affect my battery’s range? lekkerbikes.com - Rider weight & load (Racks, pannier bags, Child seat). - Environmental factors such as terrain, gradient, am- bient temperature & wind. Lower outside temperatu- res will negatively impact your bike’s range.
Need help?
Do you have a question about the Amsterdam+ and is the answer not in the manual?
Questions and answers