Leica GR10 User Manual
Hide thumbs
Also See for GR10:
- Operational manual (460 pages) ,
- User manual (96 pages) ,
- Operational manual (317 pages)
Table of Contents
Advertisement
Quick Links
Advertisement
Table of Contents

Related Manuals for Leica GR10


Summary of Contents for Leica GR10
- Page 1 Leica GR10 User Manual Version 1.0 English...
- Page 2 The type and serial number of your product are indicated on the type plate. tion Enter the type and serial number in your manual and always refer to this infor- mation when you need to contact your agency or Leica Geosystems authorised service workshop. Type: _______________ Serial No.:...
- Page 3 GNSS Networks and Detailed list of equipment available for GNSS Reference Stations reference stations including hardware and Equipment List software. Refer to the following resources for all GR10 documentation/software: • the Leica GR10 DVD • https://myworld.leica-geosystems.com myWorld@Leica Geosystems (https://myworld.leica-geosystems.com) offers a wide range of services, information and training material.
-
Page 4: Table Of Contents
Table of Contents In this manual Chapter Page Description of the System GR10 General Information GNSS Reference Station Components Unpacking the GR10 instrument Instrument Components GR10 Operation GR10 Software Power Supply Installation Before Installation Installation Options User Interface LED Indicators on GR10... - Page 5 GFU19 (US), GFU25 (CAN) CDMA MultiTech MTMMC-C 7.3.4 SLG1-2, Telit 3G GSM/GPRS/UMTS 7.3.5 SLR1-2, SATEL SATELLINE-TA11 International Limited Warranty, Software Licence Agreement Appendix A Directory Structure of the Memory Device Appendix B GR10 Pin Assignments and Sockets Index GR10, Table of Contents...
-
Page 6: Description Of The System
Once the first operational Galileo satellites are available, a software update will be required. The GR10 instrument is designed to support Compass. The Compass signal defi- nition is not fully finalised, although, test signals have been tracked in a test environment. As changes may still occur, Leica Geosystems cannot guarantee full Compass compatibility. -
Page 7: Gnss Reference Station Components
GNSS Reference Station Components Component over- The following diagram shows a typical reference station setup and the most view common accessories that can be used with a GR10. GR10_004 a) Radio/GSM antenna m) Antenna cable b) Antenna bracket n) Optional lightning protection... - Page 8 GNSS Antenna d) Computer running Web interface or Leica GNSS Spider e) Ethernet or USB cable GR10 g) Power supply The GR10 can be operated without the SD card but only data streaming will be possible. Main components Component Description...
-
Page 9: Unpacking The Gr10 Instrument
GR10 when ordered. For an overview of a typical reference station installation and the accessories that can be used with the GR10 go to "Component overview". For further information on accessories, please refer to the "GR10 Operational Manual (Online Help)". -
Page 10: Gr10 Operation
LB2 documentation. The GR10 instrument is delivered with default settings which cover the needs of the typical user. Use the Web interface or Leica GNSS Spider to adjust the GR10 settings. Operation by Web The Web interface is the main component used to configure and operate the interface GR10. - Page 11 Some configuration settings are available both in the Web interface and in Leica GNSS Spider. If such settings are configured in the Web inter- face, and then an Upload Settings or Start is done from Leica GNSS Spider, the settings are overwritten. In this case use the Web interface exclusively for settings that are not available in Leica GNSS Spider.
-
Page 12: Gr10 Software
• direct FTP access to the SD card. After uploading, the firmware must be transferred from the SD card to the System RAM via the GR10 Web interface. Refer to the "GR10 Operational Manual (Online Help)" for further information. Leica GNSS Spider can also be used to install the firmware. -
Page 13: Power Supply
Power Supply General Use the Leica Geosystems power supplies, batteries, chargers and accessories or accessories recommended by Leica Geosystems to ensure the correct func- tionality of the instrument. Power options Power for the instrument can be supplied either by power supply or batteries. -
Page 14: Installation
Please consider that a well-planned and thoroughly carried out electric installa- tion not only protects the cables against damage, but also looks professional. For detailed installation information, refer to the "GNSS Reference Station and Networks - An Introductory Guide". GR10, Installation... -
Page 15: Installation Options
GR10_016 If space in the rack is limited, then the rubber bumpers on the GR10 can be removed. The total height of the rack kit and instrument is then 2U. If the bumpers are removed, please remove the small feet from the mounting brackets. - Page 16 Rubber bumper GR10_017 If space in the cabinet is limited, then the rubber bumpers on the GR10 can be removed. If the bumpers are removed, please remove the small feet from the mounting brackets. The radio/GSM antenna must be installed on the outside of the rack if a slot-in or serial device is used.
- Page 17 Tripod The GR10 has a built-in Tripod mount to allow attachment to all Leica Geosys- tems Tripods. a) AS10 b) GNSS antenna carrier with 5/8 inch screw c) Tribrach d) Tripod e) Antenna cable GR10 GR10_019 When using the GR10 on a tripod, the rubber bumpers must be on.
-
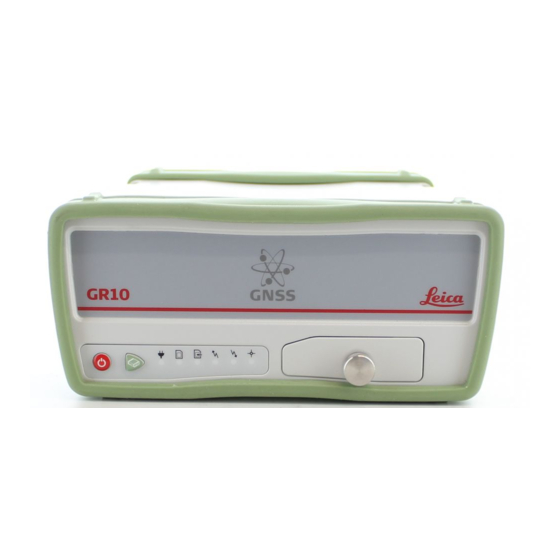
Page 18: User Interface
User Interface LED Indicators on GR10 LED indicators Description The GR10 has Light Emitting Diode indicators. They indicate the basic instru- ment status. Diagram a) Power LED b) SD card LED c) Raw data logging LED d) RT out data stream LED... - Page 19 Position LED The instrument is switched off. flashing The instrument is tracking satellites but no posi- green tion is available. green A navigated position is available. No satellites are tracked and no navigated posi- tion is available. GR10, User Interface...
-
Page 20: Keyboard
Button Function ON/OFF If GR10 already off: Turns on GR10 when held for 2 s. If GR10 already on: Turns off GR10 when held for 2 s. Hold the ON/OFF button for 10 s, to force the instrument to turn off.
Need help?
Do you have a question about the GR10 and is the answer not in the manual?
Questions and answers