Table of Contents
Advertisement
Advertisement
Table of Contents

Related Manuals for Leica GRX1200 series


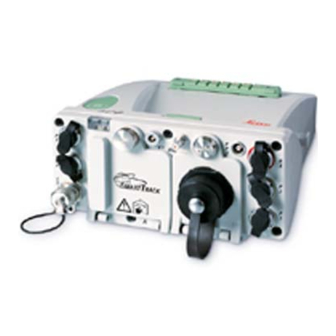
Summary of Contents for Leica GRX1200 series
-
Page 1: Getting Started
GRX1200 Series Getting Started Version 3.0 English... - Page 2 The type and the serial number of your product are indicated on the type plate. Enter the type and serial number in your manual and always refer to this information when you need to contact your agency or Leica Geosystems authorized service workshop. Type: _________________________ Serial No.:...
-
Page 3: Table Of Contents
Overview 3.1.2 Default settings 3.1.3 Startup Configurator Access the Receiver via FTP connection Access the Receiver with LEICA GPS Spider Configuring and Monitoring a GRX1200 Series Reference Station with Web Interface 3.4.1 Overview 3.4.2 Activating the Web Interface 3.4.3 Web Interface Connection 3.4.4... -
Page 4: How To Use This Manual
115200 Button: Index The index is at the back of the manual. Validity of this manual This manual applies to all GRX1200 Series instruments. Differences between the various models are marked and described. Available Name of documentation Description documentation GPS1200 User Manual Provides an overview of the system together with technical data and safety directions. - Page 5 Name of documentation Description Equipment List For GPS Describes items and setup of permanent GPS reference Networks and Reference stations. Stations GPS Reference Stations Explains priciples of GPS reference stations. and Networks - An intro- ductory guide Format of the documen- The GPS1200 CD contains the entire documentation in electronic format.
-
Page 6: Overview
Overview Description The GRX1200 Series Installation Guide • explains the configuration steps necessary to bring a GRX1200 Series receiver into service. • explains the different configuration and operation options of GRX1200 Series receivers as requirements may vary from installation to installation. - Page 7 Web Interface, and then an Upload Settings or Start is done from LEICA GPS Spider, these will be overwritten. In this case use the Web Interface exclusively for settings that are not available in LEICA GPS Spider, eg.
- Page 8 Overview GPS1200 Terminology Term Description Web browser For example Internet Explorer. Refer to the diagram below. Interface The procedures, codes and protocols that enable two entities to interact for an exchange of data. Web Interface Kind of an entry form to define receiver relevant settings. Runs in a web browser.
- Page 9 a) Web browser b) Web Interface Overview GPS1200...
- Page 10 Overview GPS1200 Requirements • When using the web browser, firmware v2.1 or higher must be loaded on the GRX1200 Series receiver. • The receiver must be connected to a power supply. • For a complete configuration into service, the reference station antenna must be set up and connected.
- Page 11 Overview GPS1200...
-
Page 12: Configuration
Configuration Configure Receiver Communication Settings 3.1.1 Overview Configuration methods The basic port and address settings of a receiver for connecting with web browser or LEICA GPS Spider • are pre-configured with default settings. • can be configured using the Startup Configurator. -
Page 13: Default Settings
3.1.2 Default settings Serial ports Type Setting Baud rate 115200 Parity None Data bits Stop bit Flow control None PPP on port RX Ethernet These settings are applicable to GRX1200 Pro/GRX1200 GG Pro. Type Setting IP address 192.168.0.3 Network mask 255.255.255.0 Gateway 1.1.1.1... - Page 14 Configuration GPS1200 These settings are valid for all GRX1200 Series receivers. Type Setting IP address for PPP 192.168.1.3, fixed Interfaces Type Setting Serial ports Remote interface NET ports Remote Interface Web Interface Type Setting User name Admin Password 12345678 Super Administrator...
-
Page 15: Startup Configurator
3.1.3 Startup Configurator Description The Startup Configurator is an ASCII file-based • configuration • extraction of the basic port and address settings of a GRX1200 Series receiver. Type Configuration Extraction To set settings. To query current settings. File name StartupConfig.ini GetConfig.ini... - Page 16 Configuration GPS1200 Type Configuration Extraction Explanation of Refer to paragraph "File contents for Refer to paragraph "File contents for file contents StartupConfig.ini/ GetConfig.ini". StartupConfig.ini/ GetConfig.ini". Configure port and Step Description address settings step- Copy the StartupConfig.ini file from a GPS1200 CD to a PC. by-step Modify the read only property of the file so the sensor can write to the file.
- Page 17 Step Description Remove the CompactFlash card from the PC. Make sure the receiver is switched off. Insert the CompactFlash card into the CompactFlash card compartment of the receiver. Turn the receiver on. The receiver reads the file contents and applies the settings. Once the settings have been applied successfully, the StartupConfig.ini file is deleted.
- Page 18 Configuration GPS1200 Query port and address Step Description settings step-by-step Copy the GetConfig.ini file from a GPS1200 CD to a PC. Create an empty ASCII file called GetConfig.ini on a PC. The content of the file does not matter, but the filename has to be exactly GetConfig.ini. When using the GetConfig.ini file from the CD, the read only property of the file need to be modified so the sensor can write to this file.
- Page 19 The format of all lines in the StartupConfig.ini file has to be exactly as shown, except for comment lines starting with #. All settings are case sensitive. ######################## Header # Author: Leica Geosystems AG • Standard header when querying settings ########################## using GetConfig.ini.
- Page 20 Configuration GPS1200 Example from file Explanation # MAC-Address MAC address ########################### • Media Access Control address. MAC-Address:00:c0:1b:05:3f:73 • Applicable for the GRX1200 Pro/GRX1200 GG Pro. • A hardware address that uniquely identifies each receiver's network adaptor. • The MAC address is often required by net- work administrators when assigning a static IP address to a receiver within a network.
- Page 21 Example from file Explanation # Ethernet Ethernet ########################### • This setting is applicable for GRX1200 Pro/ Ethernet:10.60.36.32,255.255.254.0,10. GRX1200 GG Pro. 60.36.5 • The receiver’s IP address, subnet mask and gateway settings • Defining the address, the size of the subnet and the gateway to contact for connections outside the subnet.
- Page 22 Configuration GPS1200 Example from file Explanation # EthernetPort EthernetPort ########################### This setting is applicable for GRX1200 Pro/ EthernetPort:NET1,5001,Server, GRX1200 GG Pro. 1.1.1.1,254.254.254.254, Features of the Ethernet connection of GRX1200 1.1.1.1,254.254.254.254, Pro/GRX1200 GG Pro: 1.1.1.1,254.254.254.254,1 • three logical IP (=NET) ports, which can be EthernetPort:NET2,5002,Server, used for receiver control over the remote inter- 10.60.36.33,10.60.36.33,...
- Page 23 Explanation • Server/client mode Server: The port is waiting for clients to connect. Clients can be for example LEICA GPS Spider on the remote interface, or RTK rovers on the real-time interface. Client: Receiver is establishing connections itself, for example to a NTRIPCaster.
- Page 24 Configuration GPS1200 Example from file Explanation # Webserver Webserver ############################ • Web Interface configuration options are for Webserver:80,0,443 controling the access to the Web Interface configuration panels and to enable SSL for Web Interface access. • Define Webserver: http port number, SSL off (0) or on (1), https port number # DynDNS DynDNS...
- Page 25 • The format of all lines in the StartupConfig.ini file has to be exactly as shown, except for comment lines starting with #. • In case an invalid entry is found in a StartupConfig.ini file, the receiver will create an error log file StartupConfig.err.
-
Page 26: Access The Receiver Via Ftp Connection
Configuration GPS1200 Access the Receiver via FTP connection Description The receiver’s CF card can be accessed via FTP connection from e.g. an internet browser or Windows Explorer. Data can then be downloaded manually from the sensor. Also firmware files, Web Interface files or start up configuration files can be loaded onto the CF card using this FTP connection. -
Page 27: Access The Receiver With Leica Gps Spider
Leica OWI standard. • has, per default, all serial and NET ports on a GRX1200 Series receiver assigned to it. • is the communication interface between LEICA GPS Spider and the receiver. - Page 28 Configuration No further configuration is required. Next step Refer to paragraph "Connect from LEICA GPS Spider" for infor- mation on how to establish a connection from within LEICA GPS Spider. Startup Configurator • To configure special port settings different to default settings.
- Page 29 Refer to "3.1.3 Startup Configurator" for information on how to use the Startup Configurator. Next step After the configuration has been done, the connection from within LEICA GPS Spider can be established. Refer to para- graph "Connect from LEICA GPS Spider" for information. Configuration GPS1200...
- Page 30 LEICA GPS Spider to establish communication. GPS Spider LEICA GPS Spider will indicate the successful connection with a progess bar and a watch- view message. Refer to the corresponding topic of the LEICA GPS Spider Online Help for information on...
-
Page 31: Configuring And Monitoring A Grx1200 Series Reference Station With Web Interface
Configuring and Monitoring a GRX1200 Series Reference Station with Web Interface 3.4.1 Overview Requirements • The reference station hardware is prepared. Refer to the GPS1200 User Manual and the Equipment List For GPS Networks and Reference Stations for information on how to set up reference station hardware. - Page 32 Configuration GPS1200 Procedure GRX1200 Classic / GRX1200 Pro / GRX1200 Lite: GRX1200 GG Pro: Serial cable LAN/WAN Step 1 Step 1 Web Interface over Ethernet Web Interface over serial connec- connection tion Refer to paragraph "Web Interface Refer to paragraph "Web Interface over Ethernet connection"...
-
Page 33: Activating The Web Interface
3.4.2 Activating the Web Interface Description If the sensor is to be configured via the Web Interface, the Web Interface first needs to be activated. This is done by loading a zip file containing all necessary data onto the receiver’s CF card. -
Page 34: Web Interface Connection
Configuration GPS1200 3.4.3 Web Interface Connection Next step Depending on the type of receiver, the configuration of the Web Interface connection varies. IF the receiver is a THEN GRX1200 Pro / refer to paragraph "Web Interface over Ethernet connection". GRX1200 GG Pro GRX1200 Classic / refer to paragraph "Web Interface over serial connection". - Page 35 Step Description Type in the IP address of the receiver into the address bar, for example http://10.60.36.39. Press ENTER. Configuration GPS1200...
- Page 36 Configuration GPS1200 Step Description After a few seconds, the start page of the Web Interface comes up: Continue with "5 Using the Web Interface".
- Page 37 Web Interface over Applicable for the GRX1200 Classic / GRX1200 Lite. A connection to the Web Interface is serial connection made using a serial cable and Point-to-Point Protocol. The procedure of connecting to the web consists of four parts: • Configure PPP on port RX of the receiver.
- Page 38 Configuration GPS1200 Step Description Select Control Panel/Phone and Modem Options/Modems to setup a new modem. This window comes up:...
- Page 39 Step Description Click Add…. This window comes up: Tick Don't detect my modem; I will select it from a list. Configuration GPS1200...
- Page 40 Configuration GPS1200 Step Description Click Next. This window comes up: Highlight Communication cable between two computers.
- Page 41 Step Description Click Next. This window comes up: Select the COM port on which the receiver is connected to. The COM port is the serial port. Click Next. Windows now takes a while to register the new modem. Configuration GPS1200...
- Page 42 Configuration GPS1200 Step Description Click Finish to finish the modem installation procedure. This window below comes up. The newly added modem is displayed in the list of installed modems. Select the newly added modem.
- Page 43 Step Description Click Properties. This window comes up: Select the General tab. Select 115200 as Maximum Port Speed. Click OK to return to the window Phone and Modem Options. Click OK to close the window Phone and Modem Options. Configuration GPS1200...
- Page 44 Configuration GPS1200 Step Description Close the window Printers and Other Hardware. The modem installation procedure is completed. Continue with the next part. Refer to "Define a PPP network connection step-by- step" below. Define a PPP network connection step-by-step Step Description Click on the desktop of the PC.
- Page 45 Step Description Select Control Panel/Network and Dial-up Connections/Make New Connec- tion to setup a new network connection. This window comes up: Configuration GPS1200...
- Page 46 Configuration GPS1200 Step Description Click Next. This window comes up: Tick Connect directly to another computer.
- Page 47 Step Description Click Next. This window comes up: Tick Guest. Configuration GPS1200...
- Page 48 Configuration GPS1200 Step Description Click Next. This window below comes up. The newly added communication cable is displayed in the list of devices. Select the newly created communication cable. Click Next.
- Page 49 Step Description Click Finish. This window comes up: Tick For all users. Configuration GPS1200...
- Page 50 Step Description Click Next. This window comes up: Type in the connection name PPP connection to Leica GRX1200 Series. Click Finish. The PPP network connection is now defined. A connect window Connect PPP connection to Leica GRX1200 Series is displayed.
- Page 51 Step Description Continue with the next part. Refer to "Establish a PPP connection step-by-step" below. Configuration GPS1200...
- Page 52 Configuration GPS1200 Establish a PPP connection step-by-step Step Description The connect window Connect PPP connection to Leica GRX1200 Series is displayed:...
- Page 53 Step Description Click Properties to set parameters. This window comes up: Select the General tab. Select Communications cable between two computers (COM...) as device. Configuration GPS1200...
- Page 54 Configuration GPS1200 Step Description Click Configure..This window comes up: Set the Maximum speed (bps) to 115200 or to the value configured for port RX in step 14. of "Define a serial line modem device on the PC step-by-step" above. Untick Enable hardware flow control.
- Page 55 Step Description Select the Networking tab. it looks like this: Tick Internet Protocol (TCP/IP). Configuration GPS1200...
- Page 56 Configuration GPS1200 Step Description Click Properties. This window comes up: Tick Use the following IP address. Type in 192.168.1.1 as IP Address.
- Page 57 Step Description This sets the PC IP address so that it can communicate with the GRX1200 Series receiver. This IP address will only be used as long as the connection to the GRX1200 Series receiver is established. Once the connection is closed, the standard IP address is automatically used again.
- Page 58 Configuration GPS1200 Step Description The start page of the web interace is displayed after a few seconds.
- Page 59 Step Description The PPP connection is now established. It is recommended to temporarily disable other network connections as long as the PPP connection to the receiver is established. Connections to the network may be influenced as long as PPP is active, because thed PC uses a different, fixed IP address during that time.
-
Page 60: Changing The Web Interface Language
Configuration GPS1200 3.4.4 Changing the Web Interface language Description To switch the Web Interface language, the Web Interface zip file has to be reloaded. The file can be found on the GPS1200 CD-ROM that was delivered with the receiver. Upload the specific Web Interface zip file for the desired language onto the receiver’s CF card. - Page 61 Configuration GPS1200...
-
Page 62: Firmware Upgrade
Step Description with LEICA GPS Spider If the new firmware is to be installed via LEICA GPS Spider, right click on the step-by-step sensor site and choose Firmware upgrade. The followign dialogue appears: Select the firmware file to be uploaded and press Upgrade. - Page 63 Step Description The LEICA GPS Spider software will automatically upload and install the new firmware. To use the Web Interface, a Web Interface upgrade has to be done every time a firmware upgrade is made. Upload the new Web Interface zip file as described in "3.2 Access the Receiver via FTP connection".
- Page 64 Firmware Upgrade GPS1200 Step Description Press YES (F6). Wait for the sensor to completely install the firmware file and reboot. The new firmware is now available on the sensor.
- Page 65 Firmware Upgrade GPS1200...
-
Page 66: Using The Web Interface
Using the Web Interface GPS1200 Using the Web Interface Introduction Requirements The Web Interface connection must be established. Refer to "3.4.3 Web Interface Connec- tion" for information of the configuration. Get started with Web Step Description Interface step-by-step Open the web browser. Type the sensors IP or hostname (when using DynDNS) in the browser window. - Page 67 Step Description The start page of the Web Interface comes up. The status header at the top of the window shows important status information. The navigation bar below the status header contains the links to the status and configuration pages, and to useful support links. Click accesses the Online Help.
- Page 68 Using the Web Interface GPS1200 Step Description Click from the navigation bar. This window comes up: Type in • User name: Admin • Password: 12345678...
- Page 69 Step Description Click OK. This window comes up: All configuration settings of a GRX1200 Series receiver can now be accessed.. Take some time to explore the different configuration screens. Continue with "5.2 Adjusting the Receiver Settings". Using the Web Interface...
-
Page 70: Adjusting The Receiver Settings
Adjusting the Receiver Settings Description GRX1200 Series receivers are delivered with a number of default settings to cover the needs of the majority of users, which keeps configuration time to a minimum. The settings can be adjusted according to all customer needs and applications. - Page 71 Step Description This step-by-step instruction starts with the last window of the previous chapter. Select Configuration/General. Type in any Instrument ID. Click Configuration/Submit always before leaving a screen. If you are interested in raw data logging, change to the Logging page. Configure the settings for Primary Logging.
- Page 72 Using the Web Interface GPS1200 Step Description Select the Antenna. Select Configuration/Antenna Height. Type in the Antenna Height. If you want to broadcast real-time corrections, set it up in the Configuration/Inter- faces. Select Configuration/Site Name & Coordinates. Type in Site Name and the coordinates of the site. Select Configuration/Access Management.
- Page 73 PUK code as password. For receivers delivered with firmware version 2.10 or higher, the PUK code comes with the receiver. For receivers delivered with firmware versions lower than v2.10, contact a Leica repre- sentative to obtain a PUK code. •...
-
Page 74: Option
Index Address settings Interface ................. 8 Configure ..............16 Interfaces, default settings ........... 14 Query ...............18 LEICA GPS Spider ............6 Buttons ................4 Manual Configure settings ............16 GPS1200 User Manual ..........4 How to use this ............4 Default settings .............12 Documentation ..............4... - Page 75 Remote interface ............27 Requirements ..............10 Serial ports, default settings ..........13 Startup Configurator ..........12, 15 StartupConfig.err ............25 StartupConfig.ini ............15, 19 Super Administrator ............72 Super Administrator, default settings ......14 Web browser ..............8 Web Interface ..............6, 8 Web interface, default settings ........14 Index GPS1200...
- Page 76 International Standards of Quality Management and Quality Systems (ISO standard 9001) and Environmental Management Systems (ISO standard 14001). Ask your local Leica Geosystems dealer for more information about our TQM program. Leica Geosystems AG Heinrich-Wild-Strasse...
Need help?
Do you have a question about the GRX1200 series and is the answer not in the manual?
Questions and answers