Precisa 520 PT Operating Instructions Manual
Hide thumbs
Also See for 520 PT:
- Operating instructions manual (84 pages) ,
- Quick start manual (9 pages)
Table of Contents
Advertisement
Quick Links
Advertisement
Table of Contents

Related Manuals for Precisa 520 PT


Summary of Contents for Precisa 520 PT
- Page 1 0 0 0 0 S W I S S M A D E 520 PT Operating Instructions 350-8182-000 a2...
- Page 2 520 PT Conformity Precisa Gravimetrics AG...
- Page 3 Refer to our website for information about local customer service centers and details of their addresses. www.precisa.com © Precisa Gravimetrics AG, 8953 Dietikon, Switzerland No reproduction in any form of this document, in whole or in part, may be made without written authorization from Precisa Gravimetrics AG.
-
Page 4: Table Of Contents
520 PT Table of contents Table of contents Your new balance .........................6 About this manual ....................6 1.1.1 Symbols and conventions ..................6 1.1.2 Illustrations and buttons ..................6 Unpacking ......................6 Transport and shipping ................... 7 Storage ........................ 7 Inspection and assembly .................. - Page 5 520 PT Table of contents System Settings ........................ 27 Weighing parameter....................27 6.1.1 Refresh rate ......................28 6.1.2 Environment ......................28 6.1.3 Filter profile ......................28 6.1.4 Value release .......................29 6.1.5 Auto zero ......................29 6.1.6 Quick tare ......................29 6.1.7 Zero range ......................29 Data exchange .....................30 6.2.1...
- Page 6 520 PT Table of contents Add-On: Identification ....................... 61 Setting up identifications ..................61 9.1.1 Identification, Mode ....................63 9.1.2 Example for Identifications ..................63 Add-On: Checkweigher ...................... 65 10.1 Setting up the Checkweigher ..................65 10.2 Customize the Checkweigher..................66 10.2.1 Example for protocol output ...................68 Add-On function Peak-Hold ....................
-
Page 7: Your New Balance
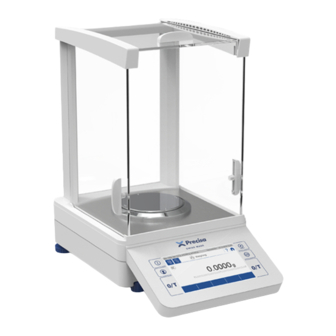
520 PT Your new balance Your new balance Thank you for purchasing a new Precisa balance from the 520 series. About this manual This manual has been written to help you working with your new balance. Read this manual thoroughly before use and keep it where all those who use the instrument will read it. -
Page 8: Transport And Shipping
520 PT Your new balance Transport and shipping • Your balance is a precision instrument. Treat it with care. • Avoid shaking, severe impacts and vibrations during transportation. • Ensure that there are no significant temperature fluctuations during transportation and that the balance does not become damp (condensation). -
Page 9: Inspection And Assembly
520 PT Your new balance Inspection and assembly Inspect delivery for complete supply immediately on unpacking all components. Components supplied, depending on balance type • Balance • Pan holder • Weighing pan • Protective ring for A • Centring ring for M balances •... -
Page 10: Basics
520 PT Basics Basics Choosing a suitable location The balance location must be chosen in such a way as to guarantee perfect operation of your balance, so that the allowable ambient conditions and prerequisites are met and maintained: • Place the balance on a solid, firm and vibration-proof, horizontal base. -
Page 11: Turning On The Balance
520 PT Basics Turning on the balance The following safety recommendations must be observed when connecting the balance to the mains: DANGER The balance may only be operated with the power adapter and power cable supplied. Before connecting the device to the mains, be sure that the operating voltage stated on the device and on the power adapter and power cable agrees with the local mains voltage. -
Page 12: Levelling
520 PT Basics Levelling To function properly, the balance must be precisely horizontal. Thatfor it is equipped with an electronic levelling device which makes appear a visual warning on the display if the balance is tilted outside the internally stored levelling tolerances. To readjust the levelling: •... -
Page 13: Adjusting The Balance
520 PT Basics Adjusting the balance Since the earth's gravity is not the same everywhere, each balance must - in accordance with the underlying physical weighing principle - be adjusted to compensate for the gravity at each location. This adjustment process must be carried out on initial installation and after each subsequent relocation. -
Page 14: Working With The Balance
520 PT Basics NOTE The balance must be adjusted on initial installation and after every relocation. If you work in accordance with Good Laboratory Practice (GLP), observe the prescribed intervals between calibrations (adjustments). For setting all different adjustment modes, •... -
Page 15: Verified Balances
520 PT Basics Verified balances Verified balances are provided with the EU/OIML certification or meet the local verification regulations. On verified balances, the balance range and certain weighing functions differ from standard. NOTE Your local dealer will be happy to assist you at any time if you have any questions about verifying your balance or working with verified balances. -
Page 16: Discover The Balance
520 PT Discover the balance Discover the balance The balance is equipped with a high-resolution touch screen panel and 6 fix integrated operation keys. The ease of operation is maintained by a highly intuitive user Interface. The touch panel is operable through standard laboratory rubber and silicon gloves as well as cotton gloves. -
Page 17: Navigation
520 PT Discover the balance Navigation There are 3 main screens: • Current application screen where you perform the weighings and measurements (Weighing, Counting, …) • Application screen to choose the application and the device settings. • User screen to select the user or to define new users Press the [Applications] key to enter the application screen •... -
Page 18: Current Application
520 PT Discover the balance Current application All work resp. Measurements that you carry out with the balance run on the current application screen; no matter whether it is a simple weighing, an adjustment or a complex application such as density determination. Due to the variety of applications, the appearance of the application screen can differ considerably. -
Page 19: User Screen
520 PT Discover the balance • At the Application Screen click on an [Applications icon] e.g. 'Weighing' to open the chosen application. User screen The user screen is used to access and define the different user profiles. In principle, the appearance always remains the same regardless of the newly defined users who join them •... - Page 20 520 PT Discover the balance Precisa Gravimetrics AG...
-
Page 21: The Basic Structure Of The Screen
520 PT The basic structure of the screen The basic structure of the screen Some components of the screen are always present and therefore fix positioned. Header The header shows scale-specific information such as the maximum weighing range 'Max', the minimum weight 'Min', the readability 'd', the veryfication scale interval 'e' and the user 'Administrator', date and time. -
Page 22: Current Application Screen
520 PT Current application screen Current application screen Depending on the application and its settings, various components are displayed on the screen. Context Menu, Add-Ons By tapping the context menu, the Add-On functions and other specific settings available for the current application are opened. -
Page 23: Customizer Tab
520 PT Current application screen NOTE Further information on add-ons settings can be found in the corresponding Chapters. Customizer Tab The Customizer Tab leads to an easy-to-handle screen layout and protocol editor. As per drag and drop features, additional buttons, info-lines or protocol stacks can be executed fast and intuitively. -
Page 24: Notes
520 PT Current application screen Notes At this point, notices are displayed, as e.g: • Level the balance, 2.4 Levelling • Adjust the balance, 2.5 Adjusting the balance Active Add-Ons and Functions, MSW At this point the activated Add-On will be shown with the corresponding icon. -
Page 25: Main Display
520 PT Current application screen • If you click on a module on the right, it appears red and is deleted by pressing the trash can. Main display The value that matches the application is shown in large format in the main display. Appropriate work instructions and notes are displayed during a workflow. -
Page 26: Define Soft Buttons
520 PT Current application screen When a soft button is pressed it performs the assigend function. In each application you may assign a choice of various functions to the soft button of the 'Action bar'. To ensure easy orientation, the functions are divided into groups: •... -
Page 27: Warnings, Status Reports
520 PT Current application screen • If a soft button from the 'Action bar' is selected, it appears red and is deleted by pressing the trash can icon. 5.12 Warnings, status reports Warnings are displayed at this point, such as that the minimum sample weight has not yet been reached or status messages about the printing process or that unloading with the ECS is currently active. -
Page 28: System Settings
520 PT System Settings System Settings The basic settings of the balance can be found on the application screen. • Enter the application screen and select 'Settings”. • Swiping up and down gives you access to all system settings. Weighing parameter To ensure proper operation of your balance, the balance location must be selected so that the permissible ambient conditions are met. -
Page 29: Refresh Rate
520 PT System Settings NOTE Further information on these settings can be found in the context help. 6.1.1 Refresh rate The value set defines the period after which each new measurement is displayed. For the definition of this period, the quality of the balance location is crucial. The stability control must also be set appropriately. -
Page 30: Value Release
520 PT System Settings • Dosing: Optimal for dosing with liquids or powder. Ultra fast response also to very small changes in weight 6.1.4 Value release The value release defines when the weighing result is recognized as stable and reliable. In addition, there are settings from very slow for highly reproducible results in which the speed is subordinate to very fast if a quick value release is necessary e.g. -
Page 31: Data Exchange
520 PT System Settings Data exchange There are several channels available for data exchange and for each channel with the mode 'Protocol' or 'Measurement transfer'. Die enables for example a parallel output of the protocol via the serial interface on a printer and as a text or CSV file on a mass storage/memory stick connected to the USB interface. - Page 32 520 PT System Settings 6.2.2.1 Mode 'Protocol' The mode 'Protocol' is the most used and simply outputs the protocol as define in the application via the chosen channel and the format depending on the channels capability. Depending on the type of channel different settings must be adjuted like e.g. simply choose the printout format with 24 or 40 characters per line or more setting as e.g.
-
Page 33: Rs232 Serial Port
520 PT System Settings Since the transfer requires a separate trigger, a corresponding message always appears when the 'Measured value transfer' mode is selected. If the trigger is set to 'Print button', the transfer is triggered with the [Print] button or synchronously with the protocol output and thus automatically depending on the settings of the active application. -
Page 34: Usb Device As Usb Serial Port
520 PT System Settings As with all channels, you must select the mode for data exchange. For the 'Measurement transfer', the trigger must be defined as well as the information to be transferred 'Time stamp', 'Device ID' and 'Net/Gross/Tare'. For the definition of the transmission format of the display value, see 6.4 Measurement transfer. -
Page 35: Mass Storage
520 PT System Settings 6.2.5.1 Mode 'Protocol' • Keyboard language: Select character set for the PC according to the English, German, French, Turkish or Spanish keyboard of your PC. • Format: Select output format in lines mode or in table mode which includes a tab stop for each column. -
Page 36: Network
520 PT System Settings protocol or the measured value output in the selected format is saved to a file on the mass storage device. If a corresponding file already exists, new dates are always appended. 6.2.6.1 Mode 'Protocol' Beside the file name, the file format text “txt” or comma separated values “.csv” can be selected. - Page 37 520 PT System Settings As for a channels you must choose the mode for the data exchange. For 'Measurement transfer', depending on the needs the trigger must be chosen as well as the items “Time stamp”, “Device ID” and “Net/Gross/Tare” to be transferred with a character for the separation.
- Page 38 It is important to know whether to assign to the balance a static IP address or an automatic IP address from a DHCP server. In addition, the network administrator knows the port of the remote terminal of the network connection; for Precisa printers or software, this is normally port 2101 or 4001.
- Page 39 520 PT System Settings 6.2.7.6 Setting Up in Server Communication Mode (mostly used) In this mode, a device connects to the balance. In addition to the IP address of the balance, the device must also know the local port of the balance. If this is not explicitly given, use port 2101.
- Page 40 520 PT System Settings Connection status of the balance as a Server with LAN and DHCP set in the mode 'Protocol”. Connection status of the balance as a Server with LAN and DHCP set in the mode 'Measurement transfer”. 6.2.7.7 Setting Up in Client Communication Mode In this mode, the balance connects to a device, or often to a printer.
-
Page 41: Protocol, Glp Header, Glp Footer
520 PT System Settings • Mode of data output as 'Protocol' or 'Measurement transfer' • Remote host address or network name of the device to which the balance is to connect • Remote host port or the local port to which the scale is to connect onto the device Connection status of the balance as a Server with LAN and DHCP set in the mode 'Protocol”. -
Page 42: Glp Header
520 PT System Settings NOTE Further information on these settings can be found in the context help. NOTE Further information on these settings can be found in the context help. For example, a protocoll might look like this: Company Street 123... -
Page 43: Glp Footer
520 PT System Settings To ensure easy orientation, the building blocks are divided into groups: • General contains blocks such as Date, time, user, the 3 text sections 1..3, line rewriting, etc. • Application contains blocks for the application. •... -
Page 44: Measurement Transfer
520 PT System Settings Measurement transfer Here you can set the format of the measured value for 'Data exchange' with 'Measurement transfer'. • Symbol indicates whether the symbols for net, gross, tare, etc. are transferred. • Symbol width is the number of characters or placeholders for the symbols •... -
Page 45: Device Settings
520 PT System Settings NOTE If a channel is not physically available, the transfer may take a long time, because the scale only stops the transfer after a certain timeout. NOTE Further information on these settings can be found in the context help. -
Page 46: Display Backlight
520 PT System Settings 6.5.4 Display Backlight Adjusts the level (1-7) of display backlight for adaption to different ambient light situations • 1 Low for low light emission environment • 7 High best suited for working place with high light emission 6.5.5 Auto standby Off / On... - Page 47 520 PT System Settings - 12 hrs: Time representation based on the 12 hrs model (e.g. 09:02 am, 02:10 pm etc)) • Set Date / Set Time: Setting the date/time Note: The internal clock is equipped with a backup battery, which guarantees perfect functioning for several years.
-
Page 48: Minimal Sample Weight And Quality Management, Msw
520 PT System Settings Minimal Sample Weight and Quality Management, MSW Only very small quantities are used in many applications and, thus, only a small part of the balance's weighing capacity is used. However the lower the weight the greater the relative measuring uncertainty. -
Page 49: Determination Of The Minimal Sample Weight
520 PT System Settings The balance's weighing parameters settings (refresh rate, environment etc.) are also fixed in such a way as to guarantee compliance with tolerances in future measurements and can only be changed by a user with Administrator or Quality Manager access rights. -
Page 50: Usp Chapter 41, Determinatin, Calculation
10 comparable weighed values. Additionally, the accuracy of the balance must be determined. To determine the standard deviation according USP 41 the following steps are required: 1. Determined the repeatability (Precisa recommend 10 measurements at 50% of the capacity) 2. Calculate the smallest possible weighing sample: - If the standard deviation <... -
Page 51: About Device
520 PT System Settings Device type Define the type of foot switch what is attached Function left / right Define the function of the switches: • Off for no functrion of the switch • Print starts a printout, just like the [Print] key •... -
Page 52: Adjustment
520 PT System Settings In the device information you find the overview with the product name, the serial number, the current software version, the installed accessories and the installed applications. In the terminal and sensor updates you can see the history of installed updates. -
Page 53: Adjustment Mode Off
520 PT System Settings Common settings: • Protocol: After the adjustment, a protocol is output via the corresponding interface. If the balance is integrated in an EDP system, this can lead to problems, which is why the output can be suppressed with the Protocol setting. -
Page 54: Adjustment Mode Internal
520 PT System Settings 6.11.4 Adjustment mode Internal The adjustment is triggered manualy and executed by the internal weight SCS. 6.11.5 Adjustment mode Automatic Thebalance can be set so that it automatically adjusts with the built-in weight or at least indicates that an adjustment is necessary. -
Page 55: Levelling
520 PT System Settings NOTE Indipendend of these adjustment modes, the balance can always be adjusted explicitly in the Adjustment application, see 2.5 Adjusting the balance. 6.12 Levelling The balance must be set up exactly horizontally in order to function properly. The balance is therefore equipped with an electronic level indicator for level control and two rotating feet, which can be used to compensate for small differences in height or unevenness in the balance area. - Page 56 520 PT System Settings NOTE Further information on these settings can be found in the context help. NOTE Indipendend of this monitoring, the balance can always be adjusted explicitly in the LEvelling application. Precisa Gravimetrics AG...
-
Page 57: Add-On: Units / Free Conversion
520 PT Add-On: Units / Free Conversion Add-On: Units / Free Conversion Unit With the aid of the Add-On function 'Units' you can display and print out the measuring result in different units. The activity of the Add-On function is indicated in current application screen by a small icon. - Page 58 520 PT Add-On: Units / Free Conversion By using one of the basically named as 'Unit1' until 'Unit4' a free unit with the following settings can be made. • Display unit name: Name of the units displayed in the units list •...
-
Page 59: Add-On: Statistics
520 PT Add-On: Statistics Add-On: Statistics The Add-On function 'Statistics' can log all measuring data in order to provide you with a wide range of statistical information for a series of measurements. All data can be displayed and printed out upon your requirements. -
Page 60: Statistics Mode
520 PT Add-On: Statistics Load-change-Mode absolute: In this mode the load change must exceed a certain limit to be recognized as such. Enter the minimum load change between measurements in g. This setting is not possible for automatic value acquisition with time interval. - Page 61 520 PT Add-On: Statistics • Add Up: Serves for different components which in total exceed the weighing capacity and are mixed or weighed in a separate container. - The automatic tare is switched off. - Only the total and the number of samples or components are displayed as the result.
-
Page 62: Add-On: Identification
520 PT Add-On: Identification Add-On: Identification With the Add-On function 'Identification' you can insert free identifications, labels, batch numbers or sample counters for measured values and much more into your protocol. The same information can also be shown on the display, see 5.3 Info section. - Page 63 520 PT Add-On: Identification Once an identification has been selected the menu as below appears to set it according to the requirement. • Name: Is the name of the identification which is shown on the display and the printout, e.g.
-
Page 64: Identification, Mode
520 PT Add-On: Identification • Mode: see 9.1.1 Identification, Mode Describes how the identification behaves, see below. • Text: Enter the default text • Auto entry: (not available for mode fixed text): - On: Before printing, the text field is automatically opened for editing - Off: Identification to be processed must be opened using a soft button. - Page 65 520 PT Add-On: Identification The report for 4 subsequent weighings could look like this: Article: Screws Check: Ok Class: A No: 1 + 20.407 g Article: Screws Check: Ok Class: B No: 2 + 20.405 g Article: Screws Check: No...
-
Page 66: Add-On: Checkweigher
520 PT Add-On: Checkweigher 10 Add-On: Checkweigher With the Add-On function 'Checkweigher' you check the measured values of an application for its agreement with a defined reference (nominal weight, nominal pieces or nomila percentage) plus/minus an allowable tolerance limit (upper limit, lower limit). -
Page 67: Customize The Checkweigher
520 PT Add-On: Checkweigher • Mode: Switch on/off the check weigher • Nominal [g, pcs, %]: Manually set a value as the target value • Tolerance [Weight, Percent, PCS]: Choose to set the limits/ tolerances as a weight, in % or as pcs •... - Page 68 520 PT Add-On: Checkweigher Add in the 'Info section' the necessary checkweigher information to be showed. Precisa Gravimetrics AG...
-
Page 69: Example For Protocol Output
520 PT Add-On: Checkweigher 10.2.1 Example for protocol output Values in the lower or upper range are marked on the protocol output with '<' or '>'. For a protocol with current measurement: < + 143.513 g 144.530 g > + 167.605 g... -
Page 70: Add-On Function Peak-Hold
520 PT Add-On function Peak-Hold 11 Add-On function Peak-Hold With the aid of the Add-On function Peak-Hold you can determine/hold the maximum value of a weighing or a series of weighings. 11.1 Application examples To explain the function, the possible applications are shown here by means of examples. - Page 71 520 PT Add-On function Peak-Hold 11.1.1.1 Hold value Manual / Stable Press [Start Peak-Hold] Place the weight on the weighing pan. The maximum measured stable weight value is displayed and held until [Stop Peak-Hold] is pressed. Each newly captured maximum will be attended by a short beep tone.
-
Page 72: Mode Automatic
520 PT Add-On function Peak-Hold Place the weight on the weighing pan. The maximum measured unstable or stable weight value is displayed and held until [Stop Peak-Hold] is pressed. 11.1.2 Mode Automatic 11.1.2.1 Hold value Automatic / Stable Example: The item to be weighed covers the display. The value can only be read after the goods to be weighed have been removed. - Page 73 520 PT Add-On function Peak-Hold Place your item on the weighing pan. As soon as the threshold value of 15g has been exceeded the Peak-Hold will capture the next stable (peak) value. As soon as the weight on the pan is stable, Peak-Hold indicates it by a short beep tone and displays the stable weight value for 10 seconds (hold time).
- Page 74 520 PT Add-On function Peak-Hold 11.1.2.2 Hold value Automatic / Each Example: For measuring rudimentary material properties, e.g. force required for a certain degree of deformation or for rudimentary testing of a release force. Load the balance with the weight force you want to examine. As soon as the threshold value of 150 g has been exceeded the Peak-Hold will constantly show the peak of the measured values.
-
Page 75: Indication In Protocols
520 PT Add-On function Peak-Hold To end the examination press [Stop Peak-Hold]. 11.1.3 Indication in protocols The displayed peak value is represented with the protocol item "Current measurement". Precisa Gravimetrics AG... -
Page 76: Add-On: Protocol
520 PT Add-On: Protocol 12 Add-On: Protocol A protocol consists of the 3 blocks 'Header', 'Measurement' with the corresponding outputs and the 'Footer'. These blocks must needs to be defined separately for each application. The following description is for all blocks 'Header', 'Measurement' and 'Footer ' very much identical. -
Page 77: Protocol Measurement
520 PT Add-On: Protocol • Header button: The header is printed out immediately after pressing the soft button for printing the header. Therefore you need to place this soft button onto the 'Action bar' what can be found in the group 'Device', see 5.11 Action bar and soft button customizing. - Page 78 520 PT Add-On: Protocol • [Print] each value: After pressing the [Print] key once, immediate printout, even if the scale has not yet released the weight value as stable and thus valid. • [Print] stable value: After pressing the [Print] key, one-time printout as soon as the weight value has been approved by the scale as stable and valid.
-
Page 79: Protocol Footer
520 PT Add-On: Protocol 12.3 Protocol Footer The footer is usually printed out at the end with information about the user, signature, information about the status of the device as e.g. Adjusted on ..., etc. The trigger for the printout must be defined. -
Page 80: Protocol Items
520 PT Add-On: Protocol 12.5 Protocol items Most protocol items are self-explanatory or have a description of where they are defined. To ensure easy orientation, the building blocks are divided into groups: • General contains date, time, user, GLP header resp. GLP footer, paragraphs, line breaks, etc. -
Page 81: Move Items
520 PT Add-On: Protocol 12.5.2 Move items The items can be moved by drag & drop functionality, but it has been hold for approx. 2S until it appears in green. 12.5.3 Deletes items By selecting an item this turns to red. Pressing the waste bin symbol deletes it. -
Page 82: Workign With Users
520 PT Workign with Users 13 Workign with Users The user menu provides access to different password protected user profiles and settings. Please note, that the user menu cannot be switched if no user profile is enabled. The balance can be adapted to the individual requirements of the application and the personal preferences. -
Page 83: Create User (For Administrators Only)
520 PT Workign with Users The menu offers the following options: • Create user (for administrators only): Finally creates the user as defined here. • Delete user (for administrators only): Delete an existing user. • Edit user settings (for administrators only): Edit the setting of an existing user means like define the specific settings in functions and applications, what is is mainly used for restricted user. - Page 84 520 PT Workign with Users • Based On: Defines from which already existing user a copy is taken. If you create a user the very first time, the copy template is the administrator profile. • Name: Sets the user name as an alphanumeric data entry. This can be accomplished by the virtual keyboard or the by an external HID device (e.g.
-
Page 85: Deleting A User (For Administrators Only)
520 PT Workign with Users • User Create: Finally create the user as defined here. 13.2.2 Deleting a user (for administrators only) By pressing the delete item a list with the existing users is popping up. After selecting the user a message box appears, asking for confirmation. -
Page 86: Edit The User Settings (For Administrators Only)
520 PT Workign with Users 13.2.3 Edit the user Settings (for administrators only) Depending on the access authorization, the user is not allowed to make the settings himself. Here, as an administrator, you can set the settings for each user as you would be the user himtself. -
Page 87: Customized User (For Administrators Only)
520 PT Workign with Users 13.2.4 Customized user (for administrators only) “Customized” user type serves to predefine a user access level template with special settings compared to the already available access levels templates “Standard”, “Restricted” and “Quality Manager”. Qualitiy management Predefine the access rights what are in relation of quality management matters: •... - Page 88 520 PT Workign with Users • Weighing settings: Access to change settings of the balance weighing system and parameters User Predefine the access rights what are in relation with the user: • Name/Password setting: Access to change the name and password of the user...
- Page 89 520 PT Workign with Users Predefine the access rights what are in relation to the applications: • Statistics settings: Access to change settings of the Add-On 'Statistics' • Identification settings: Access to change settings of the Add-On 'Identification' • Protocol settings: Access to change settings of the Add-On 'Protocol' •...
-
Page 90: Data Transfer, Data Exchange
520 PT Data transfer, data exchange 14 Data transfer, data exchange 14.1 Hardware connections The data can be transfered through different connections from tha balance to a peripheral device. At the back of housing: Ethernet, wired USB, HOST RS232, DB9f... - Page 91 520 PT Data transfer, data exchange Print out date and time Start printing (corresponds press «PRINT» key) Individually print each value (unstable) Individually print each value (stable) P2 lll Print after change of load (llll = min. load change necessary in g or in percent) E.g.:...
-
Page 92: Audit Trail
520 PT Audit Trail 15 Audit Trail The audit trail is a function embedded in the terminal software which automatically records and displays information about data generated, changed or deleted by the user or the system. The audit trail is stored on the SD card in the terminal. There is no write access to the LOG files on the terminal. - Page 93 520 PT Audit Trail • Calibration number update • Delete user • Create user • Change application • Change Action bar • Change Info section • Levelling • Adjust spirit level • Adjust • • Linearization • Manuel entry, Administrator and Service user only...
Need help?
Do you have a question about the 520 PT and is the answer not in the manual?
Questions and answers