Table of Contents
Advertisement
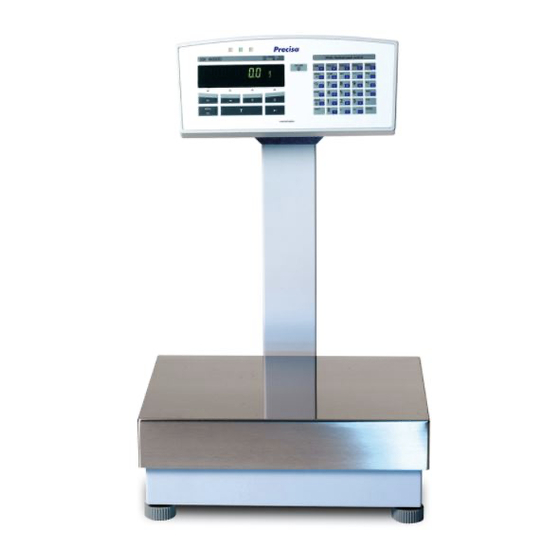
Series 490
SERIES 490
Order no.
350-8108
Index c2
350-7903
Index c2
Technische Änderungen vorbehalten
Subject to technical modification
Copyright
These service instructions are protected by copyright. All rights reserved. No part of the service instructions may be reproduced,
processed, duplicated or published in any form by photocopying, microfilming, reprinting or other process, in particular electronic
means, without the written agreement of Precisa Gravimetrics AG.
Diese Service-Anleitung ist urheberrechtlich geschützt. Alle Rechte vorbehalten. Kein Teil der Serviceanleitung darf ohne schrift-
liche Genehmigung der Precisa Gravimetrics AG in irgendeiner Form durch Fotokopien, Mikrofilm, Nachdruck oder andere Ver-
fahren, insbesondere auch elektronischer Art, reproduziert, verarbeitet, vervielfältigt oder verbreitet werden.
© Precisa Gravimetrics AG, 8953 Dietikon, Switzerland, 2006.
Precisa Gravimetrics AG
SERVICE
MANUAL
Service manual cpl.
Service-Anleitung kpl.
Content only
nur Inhalt
Moosmattstrasse 32
Service manual
Service-Anleitung
Box 352
CH-8953 Dietikon
Advertisement
Table of Contents

Subscribe to Our Youtube Channel
Related Manuals for Precisa 490 Series


Summary of Contents for Precisa 490 Series
- Page 1 Diese Service-Anleitung ist urheberrechtlich geschützt. Alle Rechte vorbehalten. Kein Teil der Serviceanleitung darf ohne schrift- liche Genehmigung der Precisa Gravimetrics AG in irgendeiner Form durch Fotokopien, Mikrofilm, Nachdruck oder andere Ver- fahren, insbesondere auch elektronischer Art, reproduziert, verarbeitet, vervielfältigt oder verbreitet werden.
-
Page 2: Table Of Contents
Parts list / Stückliste 350-7244-010................A61 10. Signal lamp / Signallampe 350-8510 ..............A62 10.1 Schematic Board / Schema Print 350-7249-010............A64 10.2 Assembly Board / Bestückung Print 350-7249-010 ............A69 10.3 Parts list / Stückliste 350-7249-010................A70 Precisa Gravimetrics AG Index c2... - Page 3 Bill of material / Stückliste 490-7203-010............... C23 Main board load cell / Hauptprint Wägezelle 490-7204-010 ......C24 Schematic / Schema 490-7204-010................C24 Assembly / Bestückung 490-7204-010 ................C32 Bill of material / Stückliste 490-7204-010............... C33 Precisa Gravimetrics AG Index c2...
- Page 4 Linearisation of a balance ....................D17 Final check of the adjustment ..................D17 7.10 S-correction of a balance ....................D18 7.11 Adjustment of the internal calibration weight (only SCS) ..........D19 Final control ....................... D20 Error message ....................D21 Precisa Gravimetrics AG Index c2...
- Page 5 Endmontage der Waage ....................E17 Kontrolle der Eckenlast ....................E17 Linearisierung der Waage ....................E17 Endkontrolle der Justierung ................... E17 7.10 S-Korrektur der Waage ....................E18 7.11 Abgleichen des internen Kalibriergewichtes (nur SCS) ..........E19 Endkontrolle......................E20 Precisa Gravimetrics AG Index c2...
- Page 6 Bedienungsfehler (Fehler verschwindet bei korrekter Bedienung resp.Anwendung) ... E21 Fatale Fehler (Waage bleibt stehen, im Service-Mode behebbar)........ E21 Hardware Fehler (Waage bleibt stehen) ............... E21 10. Rücksprache mit Hersteller ................E22 11. Index of catchwords / Stichwortverzeichnis............E23 Precisa Gravimetrics AG Index c2...
-
Page 7: Section A: Accessories / Kapitel A: Zubehör
Series 490 Section A: Accessories / Kapitel A: Zubehör Precisa Gravimetrics AG Index c2... -
Page 8: Bracket Mounted On Balance / Halter Für Terminal An Waage 350-8655
350-8655 Series 490 1. Bracket mounted on balance / Halter für Terminal an Waage 350-8655 Key-No. Part-No. Description Bezeichnung PN 1100-256 Screw M5x16 Kombischraube M5x16 PN 1100-148 Screw M4x20 ZS-Schraube M4x20 490-7049 Levelling unit Stellfuss Precisa Gravimetrics AG Index c2... -
Page 9: Wall Bracket / Wandhalter 350-8654
350-8654 Series 490 2. Wall bracket / Wandhalter 350-8654 Key-No. Part-No. Description Bezeichnung PN 1100-256 Screw M5x16 Kombischraube M5x16 Precisa Gravimetrics AG Index c2... -
Page 10: Remote Display Freestanding / Zweitanzeige Freistehend 350-8504
PN 1500-076 Lock washer M4 Sicherungsscheibe M4 PN 3502-121 Cable 1,5 m Kabel 1,5 m PN 1100-192 Screw M3x18 LK-Schraube M3x18 350-5054 Clamping piece Klemmstück PN 1300-037 Nut M3 Gewinde-Einsatz M3 PN 1049-004 Socket Durchführungstülle Precisa Gravimetrics AG Index c2... -
Page 11: Schematic Board / Schema Print 350-7242-010
350-8504 Series 490 3.1 Schematic Board / Schema Print 350-7242-010 Precisa Gravimetrics AG Index c2... - Page 12 350-8504 Series 490 Precisa Gravimetrics AG Index c2...
- Page 13 350-8504 Series 490 Precisa Gravimetrics AG Index c2...
- Page 14 350-8504 Series 490 Precisa Gravimetrics AG Index c2...
- Page 15 350-8504 Series 490 IO[0..7] Precisa Gravimetrics AG Index c2...
-
Page 16: Assembly Board / Bestückung Print 350-7242-010
350-8504 Series 490 3.2 Assembly Board / Bestückung Print 350-7242-010 Precisa Gravimetrics AG Index c2... - Page 17 350-8504 Series 490 Precisa Gravimetrics AG Index c2...
- Page 18 PN 3306-047 R10,R15,R19,R21 PN 3306-222 330R PN 3306-133 R18,R16 PN 3306-347 PN 3306-947 PN 3306-312 R23,R24 PN 3306-210 PN 3306-010 SW DIP-4 PN 3605-004 14C89 PN 3023-002 14C88 PN 3023-001 LM2575 PN 3051-001 LM3524 PN 3031-001 Precisa Gravimetrics AG Index c2...
- Page 19 Reference Type Part 4069S PN 3023-004 78L12 PN 3050-022 79L12 PN 3050-023 U9,U8 5818EPF PN 3022-051 27C512 PN 3022-038 U13,U11 74HC132 PN 3023-007 74HC373 PN 3023-011 80C32_PLCC PN 3022-054 32K/8 PN 3023-005 24C08 PN 3022-053 Precisa Gravimetrics AG Index c2...
-
Page 20: Remote Display Wall Mounted / Zweitanzeige Wandmontage 350-8516
350-8516 Series 490 4. Remote display wall mounted / Zweitanzeige Wandmontage 350-8516 Precisa Gravimetrics AG Index c2... - Page 21 PN 1500-076 Lock washer M4 Sicherungsscheibe M4 PN 3502-122 Cable 3 m Kabel 3 m PN 1100-192 Screw M3x18 LK-Schraube M3x18 350-5054 Clamping piece Klemmstück PN 1300-037 Nut M3 Gewinde-Einsatz M3 PN 1049-004 Socket Durchführungstülle Precisa Gravimetrics AG Index c2...
-
Page 22: Interface Rs232 / Schnittstelle Rs232 350-8506
Deckel Interface 2-fach 350-7175 Cover SUB-DB25 Deckel SUB-DB25 350-7241-010 RS232 board Print RS232 PN 1048-019 Distance bolt Distanzbolzen PN 1053-004 Puffer Gummipuffer PN 1100-210 Screw M4x8 ZK-Schraube M4x8 PN1500-072 Serrated lock washer M3 Fächerscheibe M3 Precisa Gravimetrics AG Index c2... -
Page 23: Schematic Board / Schema Print 350-7241-010
350-8506 Series 490 5.1 Schematic Board / Schema Print 350-7241-010 Precisa Gravimetrics AG Index c2... - Page 24 350-8506 Series 490 Precisa Gravimetrics AG Index c2...
- Page 25 350-8506 Series 490 Precisa Gravimetrics AG Index c2...
- Page 26 350-8506 Series 490 Precisa Gravimetrics AG Index c2...
- Page 27 350-8506 Series 490 Precisa Gravimetrics AG Index c2...
-
Page 28: Assembly Board / Bestückung Print 350-7241-010
350-8506 Series 490 5.2 Assembly Board / Bestückung Print 350-7241-010 Precisa Gravimetrics AG Index c2... - Page 29 Q1,Q2 BC337 PN 3100-004 PN 3304-282 100k PN 3304-410 R4,R13 PN 3304-310 R5,R6,R7,R8,R9,R10,R11,R12 PN 3304-047 PN 3304-222 SW DIP-4 PN 3605-001 SW DIP-8 PN 3605-004 U1,U4 MAX202 PN 3022-057 LM7805 PN 3050-007 80C52 PN 3022-059 Precisa Gravimetrics AG Index c2...
-
Page 30: Interface 20 Ma Current Loop / 20 Ma Stromschleife 350-8526
Deckel SUB-D15 350-7245-010 20 mA current loop board Print 20mA current loop PN 1048-019 Distance bolt Distanzbolzen PN 1053-004 Puffer Gummipuffer PN 1100-210 Screw M4x8 ZK-Schraube M4x8 PN 1500-072 Serrated lock washer M3 Fächerscheibe M3 Precisa Gravimetrics AG Index c2... -
Page 31: Schematic Board / Schema Print 350-7245-010
350-8526 Series 490 6.1 Schematic Board / Schema Print 350-7245-010 Precisa Gravimetrics AG Index c2... - Page 32 350-8526 Series 490 Precisa Gravimetrics AG Index c2...
- Page 33 350-8526 Series 490 Precisa Gravimetrics AG Index c2...
- Page 34 350-8526 Series 490 Precisa Gravimetrics AG Index c2...
- Page 35 350-8526 Series 490 Precisa Gravimetrics AG Index c2...
-
Page 36: Assembly Board / Bestückung Print 350-7245-010
350-8526 Series 490 6.2 Assembly Board / Bestückung Print 350-7245-010 Precisa Gravimetrics AG Index c2... - Page 37 PN 3304-133 R6,R11 220R PN 3304-222 470R PN 3304-147 PN 3304-310 R17,R18,R19 100k PN 3304-410 SW DIP-4 PN 3605-004 SW DIP-8 PN 3605-001 80C52 PN 3022-059 U5,U2 4N35 PN 3270-003 LM7805 PN 3050-007 MAX202 PN 3022-057 Precisa Gravimetrics AG Index c2...
-
Page 38: Ethernet-Box 350-8573
ZK-Schraube M4x8 Distance bolt Distanzbolzen PN 1048-023 PN 1100-060 Screw M3x4 ZK-Schraube M3x4 350-4118 Label Ethernet Bez.Schild Ethernet 350-4118-NET Label Ethernet-NET Bez.Schild Ethernet NET 350-4118-BUS Label Ethernet BUS Bez.Schild Ethernet BUS PN 1053-004 Bumpon Gummipuffer Precisa Gravimetrics AG Index c2... -
Page 39: Schematic Board / Schema Print 350-7255-010
350-8573 Series 490 7.1 Schematic Board / Schema Print 350-7255-010 Precisa Gravimetrics AG Index c2... - Page 40 350-8573 Series 490 Precisa Gravimetrics AG Index c2...
- Page 41 350-8573 Series 490 Precisa Gravimetrics AG Index c2...
- Page 42 350-8573 Series 490 Precisa Gravimetrics AG Index c2...
- Page 43 350-8573 Series 490 Precisa Gravimetrics AG Index c2...
-
Page 44: Assembly Board / Bestückung Print 350-7255-010
350-8573 Series 490 7.2 Assembly Board / Bestückung Print 350-7255-010 Precisa Gravimetrics AG Index c2... - Page 45 PN 3361-110 PN 3306-215 PN 3306222 R4,R10,R12 PN 3306-310 100k PN 3306-410 SW DIP-4 PN 3605-004 PLCC44 PN 3500-802 MAX202CSE PN 3023-015 LM1117-3.3 PN 3031-009 LM2674 PN 3051-002 VARISTOR 6V PN 3680-015 14POL PN 3502-002 Precisa Gravimetrics AG Index c2...
-
Page 46: Schematic Board / Schema Print 350-7256-010
350-8573 Series 490 7.4 Schematic Board / Schema Print 350-7256-010 Precisa Gravimetrics AG Index c2... -
Page 47: Assambly Board / Bestückung Print 350-7256-010
350-8573 Series 490 7.5 Assambly Board / Bestückung Print 350-7256-010 Precisa Gravimetrics AG Index c2... - Page 48 Z-Diode 10V PN 3244-010 R65,R85 PN 3306-000 R79,R63,R91 PN 3306-010 R1,R2,R76 PN 3306-047 R6,R66,R68,R72,R77,R78,R11,R87,R89 100R PN 3306-110 R3,R7,R9 220R PN 3306-122 330R PN 3306-133 R8,R22,R39 PN 3306-210 PN 3306-220 PN 3306-224 R15,R18,R36,R52,R58,R60,R61,R62, PN 3306-247 R67,R73,R84 Precisa Gravimetrics AG Index c2...
- Page 49 PN 3607-001 47uH PN 3680-010 CR16XX PN 3860-001 32.768kHz PN 3881-009 22.1184MHz PN 3881-015 HEADER 2 PN 3503-552 HEADER 6X2 PN 3502-026 weighing cell PN3503-709 HEADER 2 PN 3503-502 LC1,LC2,LC3,LC4,LC5,LC6,LC7,LC8, NFE31 PN 3680-012 LC9,LC10,LC11,LC12,LC13,LC14,LC15, LC16 Precisa Gravimetrics AG Index c2...
- Page 50 350-8573 Series 490 L1,L2,L3,L4,L7 BLM21 PN 3680-013 47uH PN 3680-014 L8,L9,L10,L12,L13,L14 L_1206 PN 3680-016 SH-202 PN 3680-011 RV1,RV2 VDR_B72520_6V/ PN 3680-015 1206 HEADER 10 PN 3504-371 Precisa Gravimetrics AG Index c2...
- Page 51 Deckel Interface 2-fach 350-7176 Cover SUB-D15 Deckel SUB-D15 350-7243-010 Analog output board Print Analogausgang PN 1048-019 Distance bolt Distanzbolzen PN 1053-004 Puffer Gummipuffer PN 1100-210 Screw M4x8 ZK-Schraube M4x8 PN 1500-072 Serrated lock washer M3 Fächerscheibe M3 Precisa Gravimetrics AG Index c2...
-
Page 52: Schematic Board / Schema Print 350-7243-010
350-8508 Series 490 8.1 Schematic Board / Schema Print 350-7243-010 Precisa Gravimetrics AG Index c2... - Page 53 350-8508 Series 490 Precisa Gravimetrics AG Index c2...
- Page 54 350-8508 Series 490 Precisa Gravimetrics AG Index c2...
- Page 55 350-8508 Series 490 IO[0..7] Precisa Gravimetrics AG Index c2...
- Page 56 350-8508 Series 490 Precisa Gravimetrics AG Index c2...
-
Page 57: Assembly Board / Bestückung Print 350-7243-010
350-8508 Series 490 8.2 Assembly Board / Bestückung Print 350-7243-010 Precisa Gravimetrics AG Index c2... - Page 58 PN 3304-047 PN 3330-008 120k PN 3304-412 PN 3304-315 PN 3304-247 240R PN 3304-124 PN 3304-010 SW1,SW2 SW DIP-4 PN 3605-004 24C08 PN 3022-053 89C52 PN 3022-059 LM7915 PN 3050-019 LM7815 PN 3050-001 LM7805 PN 3050-007 Precisa Gravimetrics AG Index c2...
- Page 59 350-8508 Series 490 Item Quantity Reference Type Part 14C89 PN 3022-049 14C88 PN 3022-048 LM1458 PN 3030-020 LM3524 PN 3030-034 DAC210 PN 3030-030 Precisa Gravimetrics AG Index c2...
-
Page 60: Input/Output Module / Eingang/Ausgang Modul 350-8509
Cover SUB-D25/15 Deckel SUB-D25/15 350-7244-010 Input / output board Eingang / Ausgang Print PN 1048-019 Distance bolt Distanzbolzen PN 1053-004 Puffer Gummipuffer PN 1100-210 Screw M4x8 ZK-Schraube M4x8 PN 1500-072 Serrated lock washer M3 Fächerscheibe M3 Precisa Gravimetrics AG Index c2... -
Page 61: Schematic Board / Schema Print 350-7244-010
Series 490 9.1 Schematic Board / Schema Print 350-7244-010 Precisa Gravimetrics AG Index c2... - Page 62 Series 490 IO[0..7] Precisa Gravimetrics AG Index c2...
- Page 63 Series 490 Precisa Gravimetrics AG Index c2...
- Page 64 Series 490 Precisa Gravimetrics AG Index c2...
- Page 65 Series 490 Precisa Gravimetrics AG Index c2...
-
Page 66: Assembly Board / Bestückung Print 350-7244-010
Series 490 9.2 Assembly Board / Bestückung Print 350-7244-010 Precisa Gravimetrics AG Index c2... - Page 67 PN 3304-222 PN 3304-010 R11,R12 PN 3304-210 R13,R17,R20 PN 3304-310 R14,R15,R16,R19 PN 3304-047 100k PN 3304-410 SW DIP-4 PN 3605-004 80C52 PN 3022-059 U3,U2 ULN2803 PN 3019-206 24C08 PN 3022-053 LM7805 PN 3050-007 MAX202 PN 3022-057 Precisa Gravimetrics AG Index c2...
-
Page 68: Signal Lamp / Signallampe 350-8510
Series 490 10. Signal lamp / Signallampe 350-8510 Precisa Gravimetrics AG Index c2... - Page 69 U-Scheibe M3 PN 3510-113 Clip angle Befestigungswinkel PN 3630-001 Base module Basismodul PN 3630-002 Module yellow Dauerlichtmodul gelb PN 3630-003 Module red Dauerlichtmodul rot PN 3630-004 Module green Dauerlichtmodul grün PN 3630-005 Filament lamp Glühlampe Precisa Gravimetrics AG Index c2...
-
Page 70: Schematic Board / Schema Print 350-7249-010
Series 490 10.1 Schematic Board / Schema Print 350-7249-010 Precisa Gravimetrics AG Index c2... - Page 71 Series 490 Precisa Gravimetrics AG Index c2...
- Page 72 Series 490 Precisa Gravimetrics AG Index c2...
- Page 73 Series 490 Precisa Gravimetrics AG Index c2...
- Page 74 Series 490 Precisa Gravimetrics AG Index c2...
-
Page 75: Assembly Board / Bestückung Print 350-7249-010
Series 490 10.2 Assembly Board / Bestückung Print 350-7249-010 Precisa Gravimetrics AG Index c2... - Page 76 PN 3360-005 PN 3304-282 PN 3304-222 R13,R17,R20 PN 3304-310 R14,R15,R16,R19 PN 3304-047 100k PN 3304-410 PN 3504-341 PWRJACK SW PN 3512-012 PN 3504-310 80C52 PN 3022-059 ULN2803 PN 3019-206 LM7805 PN 3050-007 MAX202 PN 3022-057 Precisa Gravimetrics AG Index c2...
-
Page 77: Horn For Signal Lamp / Horn Zu Signallampe 350-8533
Slow whoop 500Hz - 1200Hz 1200Hz Sägezahn 1200Hz / 500Hz Sawtooth 1200Hz / 500Hz Wechselton 544Hz / 440Hz Alternating 544Hz / 440Hz Dauerton 1000Hz Continuous 1000Hz Simulierte Glocke Simulated bell sound Wobbelton 800Hz / 1000Hz Sweeping 800Hz / 1000Hz Precisa Gravimetrics AG Index c2... - Page 78 PN 1053-004 Puffer Gummipuffer PN 1100-024 Screw M3x8 ZK-Schraube M3x8 PN 1100-210 Screw M4x8 ZK-Schraube M4x8 PN 1300-003 Nut M3 Mutter M3 PN 1500-009 Serrated lock washer M3 Fächerscheibe M3 PN 3510-114 Clip angle Befestigungswinkel Precisa Gravimetrics AG Index c2...
-
Page 79: Schematic Board / Schema Print 350-7252-010
Series 490 12.1 Schematic Board / Schema Print 350-7252-010 Precisa Gravimetrics AG Index c2... - Page 80 Series 490 Precisa Gravimetrics AG Index c2...
- Page 81 Series 490 Precisa Gravimetrics AG Index c2...
- Page 82 Series 490 Precisa Gravimetrics AG Index c2...
- Page 83 Series 490 Precisa Gravimetrics AG Index c2...
-
Page 84: Assembly Board / Bestückung Print 350-7252-010
Series 490 12.2 Assembly Board / Bestückung Print 350-7252-010 Precisa Gravimetrics AG Index c2... - Page 85 PN 3022-029 HM62256 PN 3022-044 U6,U5 74HC132 PN 3019-409 24C08 PN 3022-053 U10,U11 74HC151 PN 3019-418 U13,U12 74HC138 PN 3019-403 LM7805 PN 3050-007 U16,U18,U20,U22 14C89 PN 3022-049 U17,U19,U21,U23 14C88 PN 3022-048 U24,U25,U26,U27 7660 PN 3030-035 Precisa Gravimetrics AG Index c2...
-
Page 86: Below The Balance Weighing Feature Unterflur-Wägevorrichtung 350-8630
Stop screw Anschlagschraube 350-3033 Locking screw 40kg Stellschraube 40kg 350-3034 Guide Büchse 350-7086 Suspension 40kg Aufhängung 40kg 350-7087 Eye bolt Ringschraube F2-156 Spring Druckfeder PN 1700-013 Split 3.2x12mm Splint 3.2x12mm PN 1054-001 Spring snap Karabinerhaken Precisa Gravimetrics AG Index c2... -
Page 87: Mounting / Dismantling Below The Balance Weighing Feature Montage / Demontage Der Unterflurwägung
350-8630 Series 490 13.1 Mounting / Dismantling below the balance weighing feature Montage / Demontage der Unterflurwägung Precisa Gravimetrics AG Index c2... - Page 88 7. Mount the eye bolt ( 5 ) 8. All four leveling screws should be unscrewed a bit in order to incraese the distance between the eye bolt and the surface 9. Assemble the housing‘s top and the weighing pan Precisa Gravimetrics AG Index c2...
- Page 89 6. Die Anschlagschraube ( 1 ) montieren 7. Die Ringschraube ( 5 ) montieren 8. Alle vier Waagenfüsse sollten ein wenig herausgeschraubt werden, um die Distanz zwischen der Ringschraube und der Unterfläche zu vergrössern 9. Das Gehäuseoberteil und die Waagschale montieren Precisa Gravimetrics AG Index c2...
-
Page 90: Below The Balance Weighing Feature Ip 65 / Unterflur-Wägevorrichtung Ip 65 350-8635
Scheibe 350-3046 Locking screw Stellschraube 350-5031 Eye bolt Ringschraube 350-7093 Cover Abdeckung 350-7094 Suspension Aufhängung F2-156 Spring Druckfeder PN 1100-291 Screw M3x6 ZK-Schraube M3x6 PN 1700-013 Splint 3.2x12mm Splint 3.2x12mm PN 1054-001 Spring snap Karabinerhaken Precisa Gravimetrics AG Index c2... -
Page 91: Dust Cover Terminal / Staubschutz Terminal 490-4002
490-4002 Series 490 15. Dust cover terminal / Staubschutz Terminal 490-4002 Precisa Gravimetrics AG Index c2... -
Page 92: Ups - Power Supply / Usv - Stromversorgung 350-7420
350-7420 Series 490 16. UPS - power supply / USV - Stromversorgung 350-7420 Key-No. Part-No. Description Bezeichnung 350-7423 NiMH Akku NiMH Akku kpl. 490-2032 Akkucrank Akkuklammer PN 1100-208 Screw KA 30x6 ZK-Schraube KA30x6 Precisa Gravimetrics AG Index c2... -
Page 93: Section B: Mechanics / Kapitel B: Mechanik
Series 490 Section B: Mechanics / Kapitel B: Mechanik Precisa Gravimetrics AG Index c2... -
Page 94: Balance Complete / Waage Komplett
Protective ring Schutzring PN 1100-065 Screw M4x8 ZK-Schraube M4x8 PN 1100-260 Screw M4x8 SK-Schraube M4x8 PN 1100-063 Screw M4x10 ZK-Schraube M4x10 Terminal → page B6 Terminal → Seite B6 PN 1100-263 Screw KA40x10 ZK-Schraube KA40x10 Precisa Gravimetrics AG Index c2... -
Page 95: Balance Ip65 Complete / Waage Ip65 Komplett
Nut M3 Mutter M3 PN 1500-023 Washer M6 U-Scheibe M6 PN 1100-263 Screw KA40x10 ZK-Schraube KA40x10 PN 1500-029 Lock washer M6 Spannscheibe M6 Terminal → page B6 Terminal → Seite B6 490-4027 Label IP65 Kleber IP65 Precisa Gravimetrics AG Index c2... -
Page 96: Base Bottom / Boden Unterteil
Base bottom / Boden Unterteil Series 490 3. Base bottom / Boden Unterteil Precisa Gravimetrics AG Index c2... - Page 97 Mutter M5 490-7034-001 Measuring resistor up to 34kg Messwiderstand kpl. bis 34kg 490-7034-002 Measuring resistor 40...60kg Messwiderstand kpl. 40...60kg PN 3510-117 Cable fixing Befestigungsschelle 490-7021 Cable balance board Kabel LS-Waagenprint PN 3650-013 Cable support Kabelhalter Precisa Gravimetrics AG Index c2...
-
Page 98: Terminal / Terminal
Terminal / Terminal Series 490 4. Terminal / Terminal Precisa Gravimetrics AG Index c2... - Page 99 PN 1100-062 Screw M3x8 ZK-Schraube M3x8 PN 1100-185 Screw KA35x10 ZK-Schraube KA35x10 PN 1100-208 Screw KA30x6 ZK-Schraube KA30x6 PN 1100-258 Screw KA30x14 ZK-Schraube KA30x14 PN1100-290 Screw KA30x8 SK-Schraube KA30x8 PN 1500-078 Starlock D3 Starlock D3 Precisa Gravimetrics AG Index c2...
-
Page 100: Label Series 490 490-Xxxx
ITK 34000D-DR 490-7029-013 ITK 34000D-FR 490-7030-001 ISK 12000D 490-7030-002 ISK 18000D 490-7030-003 ISK 24000D 490-7030-006 ISK 20000G 490-7030-007 ISK 30000G 490-7030-008 ISK 40000G 490-7030-009 ISK 60000G 490-7030-011 ISK 34000D 490-7030-012 ISK 34000D-DR 490-7030-013 ISK 34000D-FR Precisa Gravimetrics AG Index c2... -
Page 101: Terminal Ip65 / Terminal Ip65
Terminal IP65 / Terminal IP65 Series 490 5. Terminal IP65 / Terminal IP65 Precisa Gravimetrics AG Index c2... - Page 102 Klebband doppelseitig PN 1053-005 Blind plug Blindstopfen PM 1053-009 Bumpon Gummipuffer PN 1100-053 Screw KA30x12 ZK-Schraube KA30x12 PN 1100-054 Screw KA30x8 ZK-Schraube M3x8 PN 1100-059 Screw M3x12 ZK-Schraube M3x12 PN 1100-062 Screw M3x8 ZK-Schraube M3x8 Precisa Gravimetrics AG Index c2...
- Page 103 Screw KA35x10 ZK-Schraube KA35x10 PN 1100-280 Screw KA25x6 SK-Schraube KA25x6 PN 1100-292 Screw KA30x10 ZK-Schraube KA30x10 PN 1300-041 Nut squer M3 Vierkantmutter M3 PN 1300-058 Thread insert M3 Gew.Einsatz M3 PN 1500-078 Starlock D3 Starlock D3 Precisa Gravimetrics AG Index c2...
-
Page 104: Weighing Cell Till 30Kg / Wägezelle Bis 30Kg
Weighing cell till 30kg / Wägezelle Series 490 bis 30kg 6. Weighing cell till 30kg / Wägezelle bis 30kg Precisa Gravimetrics AG Index c2... - Page 105 Spring washer M4 Tellerfeder M4 PN 1500-040 Washer M4 U-Scheibe M4 PN 1500-068 Washer M4 U-Scheibe M4 350-8644 Flexure sheet-set ( 20pcs.) Biegelager-Set ( 20 Stk.) 350-8643 Flexure sheet-set vertical ( 10 pcs.) Stehlager-Set ( 10 Stk.) Precisa Gravimetrics AG Index c2...
-
Page 106: Weighing Cell 60Kg/ Wägezelle 60Kg
Weighing cell 60kg/ Wägezelle Series 490 60kg 7. Weighing cell 60kg/ Wägezelle 60kg Precisa Gravimetrics AG Index c2... - Page 107 U-Scheibe M4 PN 1500-073 Spring washer M5 Tellerfeder M5 PN 1500-074 Washer M5 U-Scheibe M5 350-8644 Flexure sheet-set ( 20 pcs.) Biegelager-Set ( 20 Stk.) 350-8643 Flexure sheet-set vertical ( 10pcs.) Stehlager-Set ( 10 Stk.) Precisa Gravimetrics AG Index c2...
-
Page 108: Cross Holder Complete / Quersteg Komplett
Series 490 komplett 8. Cross holder complete / Quersteg komplett Key-No. Part-No. Description Bezeichnung 490-8010 Cross holder compl.12000..34000g Quersteg kpl.12000...34000g 490-8013 Cross holder compl.40000..60000g Quersteg kpl.40000...60000g 490-3011 Centring bolt Zentrierbolzen PN 1100-058 Screw M3x10 ZK-Schraube M3x10 Precisa Gravimetrics AG Index c2... -
Page 109: Calibration / Kalibrierung 490-8500
Calibration weight Kalibriergewicht 490-7014 Servomotor Servomotor kpl. PN 1024-006 Locking washer D6 Sicherungsscheibe D6 PN 1046-007 O-Ring O-Ring PN 1100-153 Screw M3x6 EK-Schraube M3x6 PN 1100-211 Screw M4x6 EK-Schraube M4x6 PN 1500-031 Washer M6 U-Scheibe M6 Precisa Gravimetrics AG Index c2... -
Page 110: Section C: Electronics / Kapitel C: Elektronik
Series 490 Section C: Electronics / Kapitel C: Elektronik Precisa Gravimetrics AG Index c2... -
Page 111: Main Board / Hauptprint 490-7200-020
Main board / Hauptprint Series 490 490-7200-020 1. Main board / Hauptprint 490-7200-020 1.1 Schematic / Schema 490-7200-020 Precisa Gravimetrics AG Index c2... - Page 112 Main board / Hauptprint Series 490 490-7200-020 Precisa Gravimetrics AG Index c2...
- Page 113 Main board / Hauptprint Series 490 490-7200-020 Precisa Gravimetrics AG Index c2...
- Page 114 Main board / Hauptprint Series 490 490-7200-020 Precisa Gravimetrics AG Index c2...
- Page 115 Main board / Hauptprint Series 490 490-7200-020 Precisa Gravimetrics AG Index c2...
- Page 116 Main board / Hauptprint Series 490 490-7200-020 Precisa Gravimetrics AG Index c2...
- Page 117 Main board / Hauptprint Series 490 490-7200-020 Precisa Gravimetrics AG Index c2...
-
Page 118: Assembly / Bestückung 490-7200-014
Main board / Hauptprint Series 490 490-7200-020 1.2 Assembly / Bestückung 490-7200-014 Upper side / Oberseite Precisa Gravimetrics AG Index c2... - Page 119 Main board / Hauptprint Series 490 490-7200-020 Lower side / Unterseite Precisa Gravimetrics AG Index c2...
- Page 120 Z-Diode 10V PN 3244-010 R65,R85 PN 3306-000 R79,R63,R91 PN 3306-010 R1,R2,R76 PN 3306-047 R6,R66,R68,R72,R77,R78,R11,R87,R89 100R PN 3306-110 R3,R7,R9 220R PN 3306-122 330R PN 3306-133 R8,R22,R39 PN 3306-210 PN 3306-220 PN 3306-224 R15,R18,R36,R52,R58,R60,R61,R62, PN 3306-247 R67,R73,R84 Precisa Gravimetrics AG Index c2...
- Page 121 PN 3607-001 47uH PN 3680-010 CR16XX PN 3860-001 32.768kHz PN 3881-009 22.1184MHz PN 3881-015 HEADER 2 PN 3503-552 HEADER 6X2 PN 3502-026 weighing cell PN3503-709 HEADER 2 PN 3503-502 LC1,LC2,LC3,LC4,LC5,LC6,LC7,LC8, NFE31 PN 3680-012 LC9,LC10,LC11,LC12,LC13,LC14,LC15, LC16 Precisa Gravimetrics AG Index c2...
- Page 122 Main board / Hauptprint Series 490 490-7200-020 L1,L2,L3,L4,L7 BLM21 PN 3680-013 47uH PN 3680-014 L8,L9,L10,L12,L13,L14 L_1206 PN 3680-016 SH-202 PN 3680-011 RV1,RV2 VDR_B72520_6V/ PN 3680-015 1206 HEADER 10 PN 3504-371 Precisa Gravimetrics AG Index c2...
-
Page 123: Smartbox Board / Smartbox Print 490-7201-010
Smartbox board / Smartbox Print Series 490 490-7201-010 2. Smartbox board / Smartbox Print 490-7201-010 2.1 Schematic / Schema 490-7201-010 Precisa Gravimetrics AG Index c2... - Page 124 Smartbox board / Smartbox Print Series 490 490-7201-010 Precisa Gravimetrics AG Index c2...
- Page 125 Smartbox board / Smartbox Print Series 490 490-7201-010 Precisa Gravimetrics AG Index c2...
- Page 126 Smartbox board / Smartbox Print Series 490 490-7201-010 Precisa Gravimetrics AG Index c2...
- Page 127 Smartbox board / Smartbox Print Series 490 490-7201-010 Precisa Gravimetrics AG Index c2...
-
Page 128: Assembly / Bestückung 490-7201-010
Smartbox board / Smartbox Print Series 490 490-7201-010 2.2 Assembly / Bestückung 490-7201-010 Upper side / Oberseite Lower side / Unterseite Precisa Gravimetrics AG Index c2... - Page 129 PN 3440-310 14,C16,C23,C24,C30,C31 C15,C18,C19,C20,C21,C22,C25,C26,C2 100nF PN 3440-410 7,C28,C29,C32,C33,C34,C35,C36 HEADER 6X2 PN 3502-006 JP2,JP3,JP5 RJ45 neu PN 3502-100 HEADER 11 PN 3504-363 Calibration Lock PN 3602-011 LC1,LC2,LC3,LC9,LC10,LC11,LC12,LC1 NFE31PT471 PN 3680-012 3,LC14,LC15,LC16,LC17,LC19,LC20,LC 21,LC22,LC23,LC24,LC25,LC26,LC27,L C28,LC29 11.0592 MHz PN 3881-012 Precisa Gravimetrics AG Index c2...
-
Page 130: Connector Board / Steckerprint 490-7203-010
Connector board / Steckerprint Series 490 490-7203-010 3. Connector board / Steckerprint 490-7203-010 3.1 Schematic / Schema 490-7203-010 Precisa Gravimetrics AG Index c2... -
Page 131: Assembly / Bestückung 490-7203-010
Connector board / Steckerprint Series 490 490-7203-010 3.2 Assembly / Bestückung 490-7203-010 Upper side / Oberseite Lower side / Unterseite Precisa Gravimetrics AG Index c2... - Page 132 Connector board / Steckerprint Series 490 490-7203-010 3.3 Bill of material / Stückliste 490-7203-010 Item Quantity Reference Type Part RJ45 GESCH PN 3502-100 SW TASTER160 PN 3602-012 HEADER 6X2 PN 3502-006 RJ45 UNGESCH PN 3501-108 Precisa Gravimetrics AG Index c2...
- Page 133 Main board load cell / Hauptprint Series 490 Wägezelle 490-7204-010 4. Main board load cell / Hauptprint Wägezelle 490-7204-010 4.1 Schematic / Schema 490-7204-010 Precisa Gravimetrics AG Index c2...
-
Page 134: Main Board Load Cell / Hauptprint Wägezelle 490-7204-010
Main board load cell / Hauptprint Series 490 Wägezelle 490-7204-010 Precisa Gravimetrics AG Index c2... - Page 135 Main board load cell / Hauptprint Series 490 Wägezelle 490-7204-010 Precisa Gravimetrics AG Index c2...
- Page 136 Main board load cell / Hauptprint Series 490 Wägezelle 490-7204-010 Precisa Gravimetrics AG Index c2...
- Page 137 Main board load cell / Hauptprint Series 490 Wägezelle 490-7204-010 Precisa Gravimetrics AG Index c2...
- Page 138 Main board load cell / Hauptprint Series 490 Wägezelle 490-7204-010 Precisa Gravimetrics AG Index c2...
- Page 139 Main board load cell / Hauptprint Series 490 Wägezelle 490-7204-010 Precisa Gravimetrics AG Index c2...
- Page 140 Main board load cell / Hauptprint Series 490 Wägezelle 490-7204-010 Precisa Gravimetrics AG Index c2...
-
Page 141: Assembly / Bestückung 490-7204-010
Main board load cell / Hauptprint Series 490 Wägezelle 490-7204-010 4.2 Assembly / Bestückung 490-7204-010 Precisa Gravimetrics AG Index c2... - Page 142 LM399 PN 3220-101 D11,D10 BZX84C4V7 PN 3244-947 ZMM12V PN 3245-012 PN 3304-910 R3,R22,R68,R86,R87 PN 3306-000 PN 3306-010 R47,R82,R83,R84,R85 100R PN 3306-110 330R PN 3306-133 220R PN 3306-122 R9,R10,R20,R21,R49 PN 3306-210 R58,R60,R62 PN 3306-220 PN 3306-224 Precisa Gravimetrics AG Index c2...
- Page 143 PN 3502-006 PRINTKLEMME/ PN 3503-709 9_2R PN 3504-302 Calibration Lock PN 3602-011 SPEAKER PN 3607-001 PLT08CN1R53 PN 3680-011 LC1,LC2,LC3,LC4,LC5 NFE31PT471 PN 3680-012 BLM21AG102SN1 PN 3680-013 L1,L2 47uH PN 3680-014 VDR_B72520_6V/ PN 3680-015 1206 14.7456MHz PN 3881-013 Precisa Gravimetrics AG Index c2...
- Page 144 Main board load cell / Hauptprint Series 490 Wägezelle 490-7204-010 PRINTKLEMME/ PN 3503-709 9_2R PTC1 FUSE_PTC_RXE1 PN 3350-302 Precisa Gravimetrics AG Index c2...
-
Page 145: Display Board Vfd / Displayprint Vfd 320-7204-010
Display board VFD / Displayprint Series 490 VFD 320-7204-010 5. Display board VFD / Displayprint VFD 320-7204-010 5.1 Schematic / Schema 320-7204-010 Precisa Gravimetrics AG Index c2... -
Page 146: Assembly Board / Bestückung Print 320-7204-010
Display board VFD / Displayprint Series 490 VFD 320-7204-010 5.2 Assembly board / Bestückung print 320-7204-010 Precisa Gravimetrics AG Index c2... -
Page 147: Parts List / Stückliste 320-7204-010
5.3 Parts list / Stückliste 320-7204-010 Item Quantity Reference Type Part PN 3440-233 DISPLAY1 10-LT-55GK PN 3260-019 BAW56 PN 3145-001 Q3,Q1 BCP55 PN 3140-001 Q4,Q2 BCP52 PN 3140-002 PN 3306-310 CD4069 PN 3023-004 U2,U3 5818EPF PN 3022-051 74HC132 PN 3023-007 Precisa Gravimetrics AG Index c2... -
Page 148: Section D: Repairs
Series 490 Section D: Repairs Precisa Gravimetrics AG Index c2... -
Page 149: Service Tools And Equipment
Service tools and equipment Series 490 1. Service tools and equipment 1.1 Tool set series 490 (350-8572) Precisa Gravimetrics AG Index c2... - Page 150 • Voltmeter 1.2.2 Standard tools • Box spanner Nos. 4, 5.5 und 7 • Flat-bladed screwdriver Nos. 1, 2, 3 und 4 • Philips screwdriver Nos. 0 und 2 • Socket wrench Nos. 3 und 4 Precisa Gravimetrics AG Index c2...
-
Page 151: Opening Up A Balance
2. Bring the balance in normal working position 3. Remove the weighing pan 4. Disassemble 4 membranes → see Illustration 1. 5. Unscrew 6 screws and remove the cover (don‘t spoil the seal). Illu. 1 Precisa Gravimetrics AG Index c2... -
Page 152: Dismantling The Weighing Cell
1. Pull up the weighing cell so that the longitudinal support are in vertical position, weighing cell bottom has to be lock up 2. Plug in 2 parallel pins [13] and insert the fit-up aid‘s [14] + [15] between chassis and cross holder → see illustration 2. Precisa Gravimetrics AG Index c2... -
Page 153: Removing The Balance Arm
3.5 Removing the balance arm 1. Fixing the balance arm with alignment jig [3] on the chassis and 4 Line head screws [11] (at first 2x on the caassis, then 2x on the balance arm) → see Illustration 3. Precisa Gravimetrics AG Index c2... -
Page 154: Removing The Coil
3. Remove 4 Line head screws from the magnetic plate and take off the magnetic plate. ATTENTION: magnetic → danger to clamp. 4. Unsolder the connecting wires by connection-board. 5. Extend coil over axis [16] and remove axis [16]. Precisa Gravimetrics AG Index c2... -
Page 155: Replacement The Flexure Strap And Flexure Sheet
3. Balance op to 40kg, place the flexure holders No.1 and No.3 (12//B14) on the mounting plate [1] in accordance with illustration 5 • Place the new flexure sheets and tighten with Line head screws.Position of marks see Precisa Gravimetrics AG Index c2... -
Page 156: Replacement The Flexure Sheet On Balance Arm
3. Mount new flexure sheets with 2 Line head srews and washers by means of alignment jig [4] on the balance arm. Position of marks see illustration 6. 4. Remove alignment jig [4] and mount against alignment jig [3] with 2 Line head screws. Illu. 6 Precisa Gravimetrics AG Index c2... -
Page 157: Cleaning
BEWARE: Do not clean the coil with adhesive tape; risk of injury. 1. Using a lint-free cloth, remove any contamination from the coil. 5.3 Final check of cleaning Visually inspect the annular gap and the coil for any contamination and clean if necessary. Precisa Gravimetrics AG Index c2... -
Page 158: Assembling The Weighing Cell
5. With 2 bolts and the fixing bracket [7] press the cross holder smoothly on the alignment jig [14] + [15] 6. Insert 2 cylindrical pins into the chassis upper-side. 7. Introduce flexure holder bottom side with screws outwards over the parallel pins [13] and install with Line-head screws. Precisa Gravimetrics AG Index c2... -
Page 159: Assembling The Weighing - Cell In The Housins's Bottom
7. Fasten loosely from the top the retaining plate with 4 cross-head screws and washers ( Centre-incision against the top ) 8. Set the balance in the service mode ( see “Set the balance to the service-mode” on page D14) Precisa Gravimetrics AG Index c2... -
Page 160: Assembling The Selfcalibration System
7. let down the SCS-Selfcalibration-System with funtion key F4, centre the retaining plate and fasten it with 4 cross-head screw‘s. 8. Lift up the SCS-Selfcalibration-System withfunction key F3 and connect it on the main board.(Pos. S2). Precisa Gravimetrics AG Index c2... -
Page 161: Adjustment
(once positive, once negative) 5. If the difference is too great, the position of the balance arm can be adjusted with the symmetry screw. 6. Detach connecting cable and voltmeter from the balance. Precisa Gravimetrics AG Index c2... -
Page 162: Checking The Pre-Load
7. Place a test weight ( see chart final control to select right corner load weight ) at point C of the weig- hing pan. Tare the balance using the T-key. 8. Move the weight to point A Precisa Gravimetrics AG Index c2... -
Page 163: Checking The Hysteresis And Unstability
„ TESTPROG 2 „ release now the key. 8. Press the function key F2 ( UNR ) and wait till “END“ appears in the display. 9. The final value should stop below 100 digits. Precisa Gravimetrics AG Index c2... -
Page 164: Final Assembly Of The Balance
2. Check the corner load → see “Adjusting of the corner load” on page D15 3. Check the linearity with half and full weight. 4. Carry out any S-corrections →.see “S-correction of a balance” on page D18 Precisa Gravimetrics AG Index c2... -
Page 165: S-Correction Of A Balance
3. Using the function key F3 „UP“ and F4 „DOWN“ the chosen correction factor is entered and set with the funktion key F1 „SET“ . 4. Submit the balance of a repeated final inspection → see “Final control” on page D20 Precisa Gravimetrics AG Index c2... -
Page 166: Adjustment Of The Internal Calibration Weight (Only Scs)
8. The balance terminates the external calibration and „INTERNAL CALIBRATION “ will again appear on the Info-Display and the process will automatically terminate. 9. The balance is switched off and again and service mode is abandoned. Precisa Gravimetrics AG Index c2... -
Page 167: Final Control
0.5 g 20000 G 20100 g 2 x 10000 10000 30000 G 30100 g 2 x 15000 10000 40000 G 40100g 2 x 15000 15000 60000 G 62000 g 2 x 30000 20000 Weight deposit point Precisa Gravimetrics AG Index c2... - Page 168 ERROR 95 / 1 No response from the weighing cell unit check connection terminal to weighing cell unit ERROR 95 / 2 ID, software from weighing cell unit not rec call service Precisa Gravimetrics AG Index c2...
-
Page 169: Discussion With The Manufacturer
• Series number e.g. 2400-100 (Label on the rear of the balance) • Program number e.g. X00-0000.P00(appears on the display when switching on the balance) • As precise a description of the defect as possible • Weighing results PRECISA GRAVIMETRICS AG Moosmattstrasse 32 Po-Box 352 CH-8953 Dietikon Tel. -
Page 170: Kapitel E: Reparaturen
Series 490 Kapitel E: Reparaturen Precisa Gravimetrics AG Index c2... -
Page 171: Service-Werkzeuge Und Ausrüstung
Service-Werkzeuge und Series 490 Ausrüstung 1. Service-Werkzeuge und Ausrüstung 1.1 Werkzeug-Set der Serie 490 (350-8572) Precisa Gravimetrics AG Index c2... - Page 172 • Pinzette • Lupe • Voltmeter 1.2.2 Standardwerkzeuge • Steckschlüssel Nr. 4, 5.5 und 7 • Schlitz-Schraubenzieher Nr. 1, 2, 3 und 4 • Kreuzschlitz-Schraubenzieher Nr. 0 und 2 • Inbus-Schlüssel Nr. 3 und 4 Precisa Gravimetrics AG Index c2...
-
Page 173: Öffnen Einer Waage
1. Die Waage vom Netz trennen (Netzkabel ziehen). 2. Waage in Arbeitsstellung bringen. 3. Waagschale entfernen. 4. 4 Membranen demontieren → siehe Abbildung 1. 5. 6 Schrauben lösen und Deckel entfernen (Dichtung nicht beschädigen). Abb. 1 Precisa Gravimetrics AG Index c2... -
Page 174: Demontieren Der Wägezelle
3.4 Demontage des Winkelträgers 1. Die Wägezelle an den beiden Längsträgern senkrecht aufstellen, Wägezellenboden gegen sich 2. 2 Zylinderstifte [13] stecken und Montagehilfen [14] + [15] zwischen Chassis und Quersteg einschie- ben → siehe Abbildung 2. Precisa Gravimetrics AG Index c2... -
Page 175: Demontage Des Waagbalkens
10.Winkelträger vorsichtig nach oben ausfahren und danach Zylinderstifte [13] und Montagehilfen [14] + [15] entfernen. 3.5 Demontage des Waagbalkens 1. Mit Ausrichtlehre [3] den Waagbalken am Chassis mittels 4 Line-Head-Schrauben [11] fixieren (zuerst 2x chassisseitig, dann 2x waagbalkenseitig) → siehe Abbildung 3. Precisa Gravimetrics AG Index c2... -
Page 176: Demontage Der Spule
2. 2 Einstellschrauben der Eckenlast ganz lösen und mit einer halben Umdrehung wieder anziehen. 3. 4 Line-Head-Schrauben des Magnetdeckels entfernen und Magnetdeckel abheben. ACHTUNG: magnetisch → Klemmgefahr. 4. Broncebänder der Tauchspule am Chassis-Verbindungsprint ablöten. 5. Tauchspule über die Achse [16] ausfahren und Achse [16] entfernen. Precisa Gravimetrics AG Index c2... -
Page 177: Auswechseln Des Zugbandes, Der Biege- Und Hängelager
2. Waagen bis 34kg, Lenker Nr.2 und Nr.3 (12+19/B12) gemäss Abb.5 auf die Montageplatte [1] legen 3. Waagen ab 40kg, Lenker Nr.1 und Nr.3 (13+14//B14) gemäss Abb. 5 auf die Montageplatte [1]legen. 4. Neue Biegelager einlegen und mit Line-Head-Schrauben anziehen. Position der Markierungen siehe Abbildung 5. Precisa Gravimetrics AG Index c2... -
Page 178: Auswechseln Der Hängelager
2. Neue Hängelager mit 2 Zylinderschrauben und Beilagen mittels Ausrichtlehre [4] auf den Waagbal- ken montieren. Position der Markierungen siehe Abbildung 6. 3. Ausrichtlehre [4] entfernen und wieder Ausrichtlehre [3] mit 2 Line-Head-Schrauben montieren. Abb. 6 Precisa Gravimetrics AG Index c2... -
Page 179: Reinigung
VORSICHT: Spule nicht mit Klebeband reinigen, Verletzungsgefahr der Spule. 1. Mit einem faserfreien Tuch die Spule von allfälligem Schmutz befreien. 5.3 Schlusskontrolle der Reinigung Den Ringspalt und die Spule visuell auf allfällige Verschmutzungen prüfen und gegebenfalls reinigen. Precisa Gravimetrics AG Index c2... -
Page 180: Montage Der Wägezelle
5. Mit 2 Bolzen [9] und dem Haltewinkel [7] den Quersteg leicht auf Montagehilfen [14] + [15] drücken. 6. 2 Zylinderstifte [13] in Chassis-Unterseite stecken. 7. Den unteren Lenker mit Schraubenköpfen nach aussen über die Zylinderstifte [13] einfahren und mitLine-Head-Schrauben montieren. Precisa Gravimetrics AG Index c2... -
Page 181: Montage Der Wägezelle In Gehäuse-Unterteil
4. Waage umdrehen und auf die Füsse stellen. 5. Hauptprint mit Lichtschrankenkabel verbinden, einfügen und mit 4 Schrauben befestigen. 6. Lichtschrankenkabel auf Lichtschranke einstecken. Hinweis: Die drei nachfolgenden Arbeitsschritte müssen nur bei montierter SCS-Kalibrierung ausge- führt werden. Precisa Gravimetrics AG Index c2... -
Page 182: Montage Der Kalibrierung
7. Mit den beiden Funktions-Tasten F3 (AUF) und F4 ( AB ) wird das Kalibriergewicht betätigt. 8. Kalibriergewicht mittels Funktionstaste F4 absenken, Trägerblech damit zentrieren und die 4 Kreuz- schlitz-Schrauben anziehen. 9. Kalibriergewicht mittels Funktionstaste F3 wieder anheben. Precisa Gravimetrics AG Index c2... -
Page 183: Justieranleitung
(einmal positiv, einmal negativ). 4. Falls die Differenz zu gross ist (grösser ±0.1 V), kann die Lage des Waagbalkens mit der Symme- trieschraube verstellt werden. 5. Das Voltmeter und das Verbindungskabel [2] von der Waage entfernen. Precisa Gravimetrics AG Index c2... -
Page 184: Kontrolle Der Vorlast
Prüfen B - D Diagonale, einstellen mit Schraube 2 ( Abb.1) 6. Die Diagonale A-C hat die grössere Differenz. 7. Ein Prüfgewicht ( siehe Tabelle Endkontrolle zur Wahl des Prüfgewichtes ) auf den Punkt C der Waagschale stellen, Waage mittels TARA-Taste tarieren. Precisa Gravimetrics AG Index c2... -
Page 185: Prüfen Der Hysterese Und Der Unruhe
Info-Display „ TESTPROG 2 „ erscheint, dann Taste loslassen. 8. Die Funktionstaste F2 ( UNR ) drücken und warten bis in der Anzeige END erscheint. 9. Endwert sollte weniger als 100 Digits betragen. Precisa Gravimetrics AG Index c2... -
Page 186: Endmontage Der Waage
1. Die Waage mittels der TARA-Taste kalibrieren. 2. Kontrolle der Eckenlast →.siehe “Einstellung der Eckenlast” auf Seite E15 3. Kontrolle der Linearität mit Halblast und Volllast. 4. Eventuell S-Korrektur durchführen →.siehe “S-Korrektur der Waage” auf Seite E18 Precisa Gravimetrics AG Index c2... -
Page 187: S-Korrektur Der Waage
3. Mittels der Funktions-Tasten F3 „UP“ und F4 „DOWN“ wird der gewählte Korrektur-Faktor eingege- ben und mittels der Funktions-Taste F1 „SET“ gesetzt. 4. Die Waage einer nochmaligen Endkontrolle unterziehen → siehe “Endkontrolle” auf Seite E20. Precisa Gravimetrics AG Index c2... -
Page 188: Abgleichen Des Internen Kalibriergewichtes (Nur Scs)
8. Die Waage schliesst die externe Kalibrierung ab und im Info-Display erscheint wieder „CALIBRA- TION INTERN“ und der Vorgang wird automatisch abgeschlossen. 9. Die Waage schaltet sich ab und wieder an, der Service-Mode ist verlassen. Precisa Gravimetrics AG Index c2... -
Page 189: Endkontrolle
0.5 g 20000 G 20100 g 2 x 10000 10000 30000 G 30100 g 2 x 15000 10000 40000 G 40100g 2 x 15000 15000 60000 G 62000 g 2 x 30000 20000 Position des Prüfgewichtes Precisa Gravimetrics AG Index c2... - Page 190 Codezahl falsch Codezahl neu programmieren ERROR 20 Temperaturmessung defekt Service anrufen ERROR 95 / 1 Keine Antwort von der Wägezelle Verbindung Waage - Terminal überprüfen ERROR 95 / 2 ID, Software Version nicht erhalten Service anrufen Precisa Gravimetrics AG Index c2...
- Page 191 • Serie-Nummer z.B. 2400-100 (Etikette auf Rückseite der Waage) • Programm-Nummer z.B. X00-0000.P00 (erscheint beim Einschalten der Waage in der Anzeige) • eine möglichst genaue Fehlerbeschreibung • Wägeergebnisse PRECISA GRAVIMETRICS AG Moosmattstrasse 32 Po-Box 352 CH-8953 Dietikon Tel. +41 44 744 28 28 Fax.
- Page 192 Balance IP65 complete B3 Bedienungsfehler D21, E21 Öffnen einer Waage E4 Boden Unterteil B4 Opening up a balance D4 Calibration B17 PRECISA GRAVIMETRICS AG D22, E22 Cleaning D10 corner load D17 Reinigung E10 Remote display freestanding A4 Demontieren der Wägezelle E5...
- Page 193 UPS - power supply A86 USV - Stromversorgung A86 Waage IP65 komplett B3 Waage komplett B2 Wägezelle B12, B14 Wall bracket A3 Wandhalter A3 Weighing cell B12, B14 Zubehör A1 Zweitanzeige freistehend A4 Zweitanzeige Wandmontage A14 Index c2 Precisa Gravimetrics AG...
Need help?
Do you have a question about the 490 Series and is the answer not in the manual?
Questions and answers