Table of Contents
Advertisement
Quick Links
Advertisement
Table of Contents

Subscribe to Our Youtube Channel
Related Manuals for GEZE GC 339


Summary of Contents for GEZE GC 339
- Page 1 GC 339 151316-03 42.8440 v3 - 04.2021...
-
Page 2: Table Of Contents
Intended use........................4 Safety notices ........................4 Safety-conscious working ....................5 Environmentally conscious working ................5 Description ....................6 Supplied by GEZE ......................8 Work to be done before installation ..........9 Installing the drive ......................9 Safety sensor system ..................... 10 Installation ....................11 Installation without accessories .................11 Installation with ceiling installation kit .............. -
Page 3: Symbols And Illustrations
GC 339 Fault messages and troubleshooting ..........27 Technical data ..................29 Accessories / spare parts ..............30 Symbols and illustrations Warning notices In these instructions, warning notices are used to warn against material damage and injuries. Always read and observe these warning notices. -
Page 4: Product Liability
à Make sure that the cover of the drive is fitted correctly and earthed. à If unauthorised changes are made to the system, GEZE cannot be held liable in any way whatsoever for any resulting damage, and the approval for use on escape and rescue routes ceases. -
Page 5: Safety-Conscious Working
GC 339 Safety à DIN EN 16005 “Power operated pedestrian doorsets – Safety in use – Requirements and test methods” à Accident-prevention regulations, especially BGV A1 “General regula- tions” and BGV A2 “Electrical installations and equipment”. à The risk assessment and installation of the sensor and the door system in compliance with national and international regulations and door safety standards are the responsibility of the door manufacturer. -
Page 6: Description
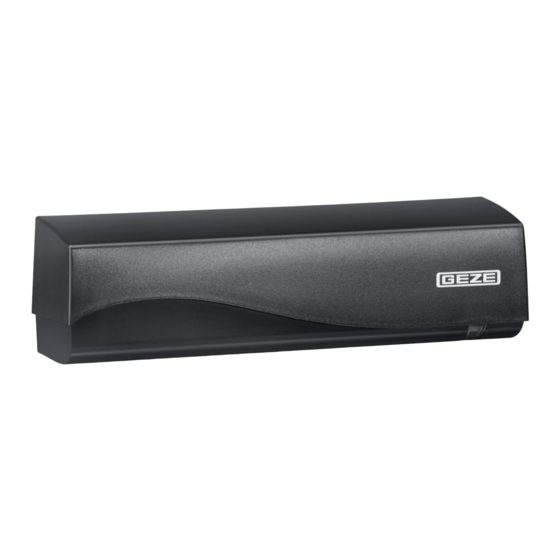
Description GC 339 Description The safety sensor GC 339 has an infrared field for protection. The mutual influence of several sensor systems with hazardous effect is not possible. Unintentional stop signals are possible where detectors are mounted next to one another, since their infrared measuring ranges overlap and each sensor could activate the other. - Page 7 GC 339 Description Cover AIR lens (interface) Setting button (grey) Width adjustment of the AIR Button for setting the angle curtain of the AIR curtain (red) AIR lens (transmitter) Main connector...
-
Page 8: Supplied By Geze
Description GC 339 2. 1 Supplied by GEZE... -
Page 9: Work To Be Done Before Installation
GC 339 Work to be done before installation Work to be done before installation 3. 1 Installing the drive Make sure that the cover of the drive is fitted correctly and earthed. -
Page 10: Safety Sensor System
GC 339 Safety sensor system One combined detector per passage direction is installed on automatic slid- ing doors. The safety sensor GC 339 may be required in addition for larger opening widths. For escape and rescue routes: à Use protective door leaf if necessary. Heed standards. -
Page 11: Installation
GC 339 Installation Installation 4. 1 Installation without accessories Avoid extreme vibrations. Do not cover the sensor. Keep away from fluorescent lamps. Keep away from moving objects. Avoid highly reflective objects in the infrared range. Keep a distance of at least 150 mm away from lights, signs or hot air curtains. -
Page 12: Installation With Ceiling Installation Kit
Installation GC 339 Installation with ceiling installation kit... - Page 13 GC 339 Installation click click click...
-
Page 14: Installation With Mounting Bracket
Installation GC 339 Installation with mounting bracket DIN 7981 8 × ½“... -
Page 15: Installation With Weather Hood
GC 339 Installation Installation with weather hood... -
Page 16: Cabling
24Vsw AIR curtain Test When activated, the output of the GC 339 is opened (GND applied to the SIO input). Set the type of contact for SIO 1 and SIS 2 to “normally closed contact”. Test the sensor with GND. -
Page 17: Commissioning
GC 339 Commissioning Commissioning 5. 1 Protection area The position of the IR curtain in relation to the door can be checked using a spot finder. Activate 4 visible Adapt the angle of the AIR Yellow LED is flashing spots.* curtain. - Page 18 Commissioning GC 339 à Test the width of the required area using a piece of paper (DIN A4), since the spot finder detects over the whole emission area. Testing the emission area. à The “Air: Width” parameter must be set identically (see chapter 7).
-
Page 19: Settings
GC 339 Configuration possibilities Settings Configure the sensor using LCD or remote control (see chapters 6 and 7). Teach-in Before starting teach-in, move out of the infrared field. Before leaving the installation, test the correct sensor installation. Teach-in 2 sec. -
Page 20: Changing Zip Code
Configuration possibilities GC 339 6.1.3 Changing ZIP code Back 6.1.4 Changing and storing values AIR:Filter AIR:Filter AIR:Filter >2.8m 4 <2.8m 2 >2.8m 4 6.1.5 Checking values using the remote control... -
Page 21: Settings
GC 339 Settings Settings 7. 1 Default settings Choose the following default settings or configure the settings yourself (chapter 6 on page 19). STANDARD: Pre-setting. Standard Standard inside and outside installations Pre-setting. DIFFICULT ENVIRONMENTS: Critical cond. Difficult installations due to environment or weather Pre-setting. - Page 22 Settings GC 339...
- Page 23 GC 339 Settings...
-
Page 24: Last Installation Steps
Last installation steps GC 339 Last installation steps Before leaving the installation, check the sensor for correct function. -
Page 25: Further Installation Situations
1900 2500 / 3000 3500 2150 2500 / 3000 When only one GC 339 detector is used. If necessary, a GC 339 with a different frequency is required for further protection. Distance Installation height Protection; 2 m height accord- ing to DIN 18650 / EN 16005... -
Page 26: Lintel Installation
Maintenance GC 339 Lintel installation According to DIN 18650/EN 16005, the distance between the inner light curtains must not exceed 200 mm. In the case of other dimensions, please contact the sales department first. Installation height a Max. reveal depth b... - Page 27 GC 339 Fault messages and troubleshooting Fault messages and troubleshooting Effect Cause Elimination display The ORANGE LED The sensor has Switch the power supply flashes 1 x detected an internal off and on. error. Replace the sensor if the ORANGE LED continues to flash.
- Page 28 Fault messages and troubleshooting GC 339 Effect Cause Elimination display – The RED LED The sensor is vibrating. Check whether the lights up sensor has been fixed in sporadically place correctly. Check the position of cable and cover. The sensor senses Start teach-in with door the door.
- Page 29 GC 339 Technical data Technical data Power supply: 12 V to 24 V, AC ±10 %; 12 V to 30 V, DC ±10 % Power < 2.5 W consumption: Installation 2 m to 3.5 m height: Temperature –25 °C to +55 °C, 0 to 95 % relative air humidity, non-condensing range: Protection rating:...
- Page 30 Accessories / spare parts GC 339 Accessories / spare parts Material no. Ceiling bracket 153568 151253 (black) Ceiling installation kit 151254 (white) Weather hood 158250 Curved adapter 151540 Remote control 100061 Spot finder 112321...
- Page 31 GC 339...
- Page 32 Germany China Romania GEZE GmbH GEZE Industries (Tianjin) Co., Ltd. GEZE Romania S.R.L. Niederlassung Süd-West E-Mail: chinasales@geze.com.cn E-Mail: office-romania@geze.com Tel. +49 (0) 7152 203 594 www.geze.com.cn www.geze.ro E-Mail: leonberg.de@geze.com Russia GEZE Industries (Tianjin) Co., Ltd. GEZE GmbH Branch Office Shanghai OOO GEZE RUS Niederlassung Süd-Ost...
Need help?
Do you have a question about the GC 339 and is the answer not in the manual?
Questions and answers