Table of Contents
Advertisement
Quick Links
Advertisement
Table of Contents

Related Manuals for Bartscher 380


Summary of Contents for Bartscher 380
- Page 1 700841...
- Page 2 Bartscher GmbH Phone: +49 5258 971-0 Franz-Kleine-Str. 28 Fax: +49 5258 971-120 Technical Support Hotline: +49 5258 971-197 D-33154 Salzkotten Germany www.bartscher.com Version: 1.0 Date of preparation: 2023-03-17...
-
Page 3: Table Of Contents
Original instruction manual Safety ......................2 Explanation of Signal Words ..............2 Safety instructions..................3 Intended Use ................... 7 Unintended Use ..................7 General information ..................8 Liability and Warranty ................8 Copyright Protection ................8 Declaration of Conformity ................ 8 Transport, Packaging and Storage .............. -
Page 4: Safety
Safety Diese Bedi enungsanlei tung besc hrei bt di e Installation, Bedi enung und Wartung des Geräts und gilt als wic htige Infor mationsquelle un d N achschl agewer k. Di e Kenntnis aller enthaltenen Sic herheits hinweis e und H andlungs anweisungen schafft die Vorauss etz ung für das sichere und s ac hger echte Ar beiten mit dem Gerät. D arüber hi naus müs sen die für den Ei ns atz ber eic h des Geräts geltenden ör tlichen Unfall verhütungs vorsc hriften und allgemeinen Sicherheits besti mmungen eing ehalten wer den. Dies e Bedi enungs anleitung is t Bes tandteil des Produkts und muss i n unmi ttelbarer N ähe des Ger äts für das In¬s tall ations-, Bedi enungs-, Wartungs- und R einigungspers onal jederzeit z ugänglich auf¬bewahrt werden. Wenn das Ger ät an eine dritte Pers on weiterg egeben wird, muss die Bedi enungsanlei tung mit ausgehändigt wer den. -
Page 5: Safety Instructions
Safety WARNING! The signal word WARNING warns against hazards that may lead to moderate or severe injuries or death if the hazards are not avoided. CAUTION! The signal word CAUTION warns against hazards that may lead to light or moderate injuries if the hazards are not avoided. , di e IMPORTANT! The signal word IMPORTANT indicates possible property damages,... - Page 6 Safety • Always completely unwind the power cord. • Never place the appliance or other objects on the power cord. • Always take hold of the plug to disconnect the appliance from the power supply. • Check the power cord regularly for damage. Do not use the appliance if the power cord is damaged.
- Page 7 Safety For this reason, ensure impeccable hygiene when handling the appliance and meat, and obtain comprehensive information on dry-ageing from a trustworthy butcher/expert. • A noticeable sour smell may indicate the appearance of a wild mould. • Once ageing is complete, dark and dry areas should be removed by cutting them out wide and in excess.
- Page 8 Safety • This appliance is not a refrigerator. Do not store any food products in the appliance other than those specified in 'Intended use' section. • Do not use the appliance for smoking. • The appliance actively regulates the required air humidity. Do not place any salt blocks in the appliance to regulate the air humidity.
-
Page 9: Intended Use
Safety Intended Use As described below, every use of the appliance for a purpose differing and/or diverging from its intended standard use, is prohibited and considered to be an unintended use. The following is an intended use: – Storage and ageing of meat (beef, pork, game, etc.). Unintended Use An unintended use may lead to personal injuries or property damages caused by hazardous voltage, fire or high temperature. -
Page 10: General Information
General information General information Liability and Warranty All information and instructions in this instruction manual account for legal regulations in force, current level of technical engineering knowledge as well as our expertise and experience, developed over the years. If special models or additional options are ordered, or state-of-the-art technical solutions were implemented, the actual scope of delivery of the appliance may, in some circumstances, differ from descriptions and numerous drawings in this instruction manual. -
Page 11: Transport, Packaging And Storage
Transport, Packaging and Storage Transport, Packaging and Storage Delivery Check Immediately upon reception, check the delivery for completeness and possible shipping damage. In the case of visible transport damage refuse to accept the appliance or accept it conditionally. Mark and note the scope of damage in shipping documents/consignment list of the shipping company and lodge a complaint. -
Page 12: Technical Data
Technical Data Technical Data Technical Specifications Name: Dry Age cabinet 380 700841 Art. No.: Material: steel plate, tinted glass Inner material: stainless steel Volume, in l: Inner chamber dimensions (W x D x H), in 495 x 532 x 1600 Temperature range, min.–max., in °C:... - Page 13 Technical Data Version / Characteristics • Cooling: circulating air • Temperature control: electronic • Control: electronic • Thermostat • Automatic defrost function • Evaporation of condensed water • Type of shelves: racks • Height-adjustable shelves • Digital display • Internal lighting: LED •...
-
Page 14: List Of Components Of The Appliance
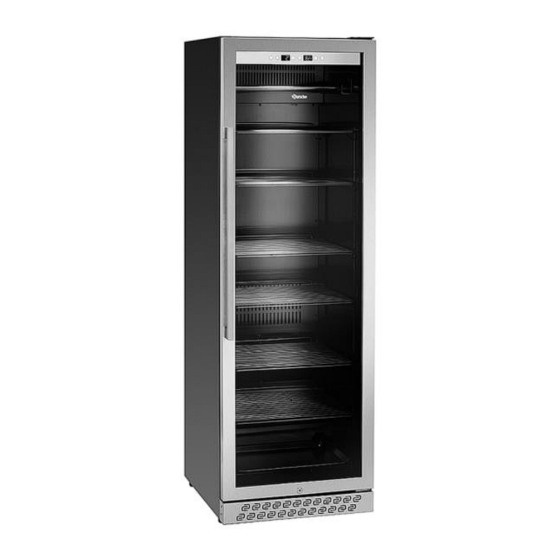
Technical Data List of Components of the Appliance Fig. 1 12 / 28 700841... -
Page 15: Functions Of The Appliance
Technical Data Description for Fig. 1 1. Control panel 2. LED lighting 3. Appliance door 4. Door handle 5. Activated carbon filter (2 pcs) 6. Drip tray 7. Cold air outlet ventilation openings 8. Lock 9. Feat (3 fixed feet + 1 height- 10. -
Page 16: Installation And Operation
Installation and operation Installation and operation Installation ATTENTION! Due to high weight of the appliance it should be transported, unpacked, and installed by two persons. • Do not plac e the applianc e in hot environment or in the vici nity of fl ammable materials . •... - Page 17 Installation and operation – even, with sufficient load-bearing capacity, resistant to water, dry and resistant to high temperatures; – sufficiently large, and thus enabling usage of the appliance with no problems; – easily accessible; – well ventilated. • The el ectric soc ket s hould be easil y accessibl e s o it is pos sibl e to quic kl y disconnect the power c ord when nec ess ar y. The el ectric soc ket s hould be easil y accessibl e s o it is pos sibl e to quic kl y disconnect the power c ord when nec ess ar y.
- Page 18 Installation and operation Fixing of Door Handle 1. Before the first use, fix the supplied stainless steel handle to the appliance door. 2. Move the rubber seal on the door internal side left or right to uncover the fixing holes. 3.
-
Page 19: Operation
Installation and operation Operation Before First Use 1. Before the first use, clean the appliance inside and outside, as well as accessories, using luke-warm water and a soft cloth. Follow the instructions in section 6 'Cleaning'. 2. To end with, dry the appliance and accessories thoroughly. 3. - Page 20 Installation and operation Appliance Start-Up 1. Plug the appliance into a suitable single socket. 2. To switch the appliance on, press the ON/OFF switch on the control panel. 3. Then, switch the UV light for at least 2 hours to disinfect the internal chamber. To this end, press the key.
- Page 21 Installation and operation NOTE! Place/hang meat in the appliance only when the required temperature is reached in the inner chamber. To obtain optimum ageing results, we recommend the following setting: Temperature: 3°C / Air humidity: 75% By pressing the keys simultaneously for 3 seconds it is possible to switch between displaying temperature in °C and °F.
-
Page 22: Cleaning And Maintenance
Cleaning and Maintenance Indications for User on Dry-Ageing • Dry-ageing of beef and pork, as well as game, is a complex process that requires time and ideal conditions. • High-quality meat should be placed on stainless steel racks or hung on meat hooks on hanging rods. -
Page 23: Cleaning
Cleaning and Maintenance Cleaning 1. Clean the appliance thoroughly after each ageing process. 2. Take the meat out. Use food-grade gloves. 3. Observe the following instruction on cleaning individual accessories and components. Stainless Steel Racks, Hanging Rack and Drip Tray 1. - Page 24 Cleaning and Maintenance Replace the water tank after use very 3 months. Inner Chamber 1. Clean the inner chamber and inner surface of the appliance door with a luke- warm water, a mild, food-grade washing agent and a soft cloth. 2.
-
Page 25: Maintenance
Cleaning and Maintenance Maintenance Condensate Tank ( If there were major temperature fluctuations or if the appliance is to be switched off for a longer time, we recommend checking the condensate tank / drip tray. Temperature fluctuations may occur, for example, due to power outage, extended/frequent appliance door opening, when the appliance is operating, or appliance faults. - Page 26 Cleaning and Maintenance Water vapour will melt the ice within approx. an hour. Water generated in the process of melting will collect in the inner chamber and may be also collected in the drip tray (K). – Take the pot and the cloth out of the appliance. –...
- Page 27 Cleaning and Maintenance UV Lamp Replacement 1. Loosen the UV lamp fixture screws carefully. 2. Remove the UV lamp fixture. 3. Hold the UV lamp and rotate it by 45˚. 4. Remove the UV lamp and replace it with a new UV lamp. 5.
-
Page 28: Possible Malfunctions
Possible Malfunctions Possible Malfunctions Mögliche The table below contains descriptions of possible causes and solutions to malfunctions or errors during operation of the appliance. When malfunction cannot be removed, contact the technical service. Error Possible Cause Solution Appliance does not Incorrectly connected plug Pull the plug out and insert it work properly in a socket... - Page 29 Possible Malfunctions Error Possible Cause Solution Appliance is The appliance is not Place the appliance on even vibrating placed on even surface surface Appliance operates Loose elements (e.g. Check all screws and nuts, too loudly nuts/screws) tighten them if necessary The appliance is not Place the appliance on even placed on even surface...
-
Page 30: Disposal
Disposal Error Code Messages Error Codes Problem Solution Door has been open for too Close the door long Door contact switch issue Contact the service company H2, H5 Sensor error Contact the service company Cooling issue Contact the service company Air humidity issue Contact the service company Defrosting process issue...
Need help?
Do you have a question about the 380 and is the answer not in the manual?
Questions and answers