Table of Contents
Advertisement
ASSEMBLY & OPERATING INSTRUCTIONS
WARNING:
Read this Owner's manual carefully and be sure
your gas grill is properly assembled, installed
and maintained. Failure to follow these
instructions could result in serious injury and/or
property damage. This gas grill is intended for
outdoor use only and is not intended to be
installed in or on recreational vehicles or boats.
Note to Installer
Leave this Owner's Manual with the customer
after delivery and/or installation.
Liquid Propane Gas Grill
Note to Consumer
Leave this Owner's Manual in a convenient
place for future reference.
Customer Service Helpline:
For parts ordering, call:
1-888-980-4933
MFG No.:D425
UPC No.: 856597007867
Please make sure the cylinder valve connection
device shall properly and safely mate with the
connection device attached to the inlet of the
pressure regulator.
1
425
• Parts
• Assembly
• Safety Rules
• Use and Care
• Troubleshooting
C045246-A0
Advertisement
Table of Contents

Related Manuals for Monument Grills Denali 425


Summary of Contents for Monument Grills Denali 425
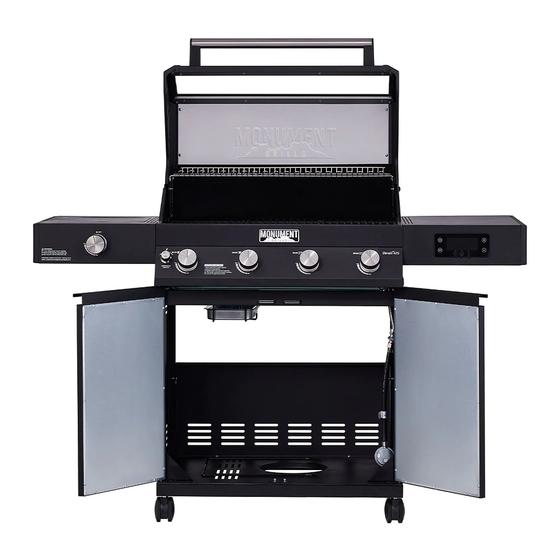
- Page 1 ASSEMBLY & OPERATING INSTRUCTIONS Liquid Propane Gas Grill • Parts • Assembly • Safety Rules • Use and Care • Troubleshooting Note to Consumer WARNING: Read this Owner’s manual carefully and be sure Leave this Owner’s Manual in a convenient your gas grill is properly assembled, installed place for future reference.
-
Page 2: Table Of Contents
Amazon or other marketplace internet handling code, B149.2, or the standard for Recreational retailer from any entity other than Monument Grills is not vehicles, ANSI A 119.2, and CSA Z240 RV series an original purchase and will not qualify for a warranty recreational vehicle code, as applicable. -
Page 3: Safety Precautions
Safety Precautions A tank of approximately 12 inches in diameter by 18- 1/2 inches high is the maximum size LP gas tank to • Have your LP gas tank filled by a reputable use. You must use an OPD gas tank which offers propane gas dealer and visually inspected and an Overfill Prevention Device. - Page 4 WARNING Burner Flame Check A strong gas smell, or the hissing sound of gas indicates a serious problem with your gas grill or the LP gas tank. Failure to immediately follow the steps listed below could result in a fire or explosion that could cause serious bodily injury, death, or property damage.
-
Page 5: Hardware List
Contents for Hardware Pack The following table illustrates a breakdown of the hardware pack. It highlights what components are used in the various stages of assembly. Tools required for assembly Philips Head Screwdriver (not included). Note: The left and right sides of the grill are on your left and right as you face the front of the grill. Philips Head Screwdriver... -
Page 6: Assembly Diagram
Model Denali 425 Assembly Diagram... -
Page 7: Assembly List
Model Denali 425 Assembly List... -
Page 8: Assembly Instructions
Assembly Instructions Figure 1 Please insert Locking Caster(No.21) into the bottom plate(No.10). Half screw out the screws in the bottom plate, then put Locking Caster(No.7)and Locking Caster(No.11)onto Figure 2 the relevant screw holes and screw tightly. - Page 9 4 × A Install Back Panel, Bottom(No.9) onto Figure 3 the relevant place with four B screws. Half screw out the screws in the bottom and side plates, then put Triangle Bracket(No.25) Figure 4 onto the relevant screw holes and screw tightly.
- Page 10 4 × F Install Cart Frame, Front(No.8) onto the relevant place with four A screws. Attention: magnet downward. Figure 5 Figure 6...
- Page 11 4 × A Figure 7 Screw the grill body and the cart tightly with four B screws. 12 × E Install Side Shelf End Cap(No.12) onto the Side Burner Cooking Grid(No.14) Figure 8 & Side Shelf,Lift(No.15) and tighten it with twelve E screws.
- Page 12 2 × A 2 × D 1.Half screw out the three big screws on the grill body, then put Side Shelf,Right(No.16)onto the relevant screw holes and screw tightly. 2.Screw Side Shelf,Right(No.16)tightly with B screw and D spacer Figure 9 inside the grill body. 2 ×...
- Page 13 2 × A 2 × D 1.Half screw out the three big screws outside the grill body, then put Side Shelf,Lift(No.15) onto the relevant screw holes and screw tightly. Figure 11 2.Screw Side Shelf,Lift(No.15) tightly with B screw and D spacer inside the grill body. 2 ×...
- Page 14 Half screw out the screw in Side Burner Nozzel Seat(No.33), then Figure 13 put it into the hole of Side Shelf,Lift(No.15) and screw tightly. 1 × F Figure 14 Fixed Valve Converter Bracket(No.32) onto the right plate with one A screw.
- Page 15 2 × C 1.Put the C part into the relevant hole in the bottom plate. 2.Put Cabinet Door(No.6) into the C part. Figure 15 3.Then put the door into by pressing the flexible axis upward. 2 × F Figure 16 Install Temperature Sensor Cover(No.27) onto Fire Box(No.2) with two A screws.
- Page 16 2 × F 1.Install Grease Box Bracket(No.20) onto Grease Tray(No.5) with two A screws. 2.Put Foil Tray(No.18) and Grease Box(No.19) into Grease Box Bracket(No.20). Figure 17 3.Put the grease tray into the grill body. Put Cooking Grid With Hole(No.3), Warming Rack(No.4) ,Side Burner Figure 18 Cooking Grid(No.14) and Flame Tamer(No.22) into the relevant place.
- Page 17 Figure 19 Install Gas-jar Fixing Line(No. 13) onto the bottom plate.
- Page 18 Connecting LP Gas Tank to LP Grill 1. Place foot ring of 20 lb tank into the hole in bottom panel. Make sure the tank valve is in OFF Regulator Connection position.(Fig.26). 2. Check the tank valve to ensure it has proper external mating threads to fit the hose and regulator assembly provided.
-
Page 19: Lighting Instructions
Checking for LP gas leaks Never test for leaks with a flame. Prior to first use, at the beginning of each season, or every time your LP gas tank is changed, you must check for gas leaks. 1. Make a 50/50 (soap/water) mild soap solution. 2. - Page 20 WARNING If Grill Still Fails To Light 1. Check gas supply and connections for leaks. Check Never lean over the grill cooking area while that all wire connections are secure. lighting your gas grill. Keep your face and body a safe distance (at least 18 inches) from the 2.
-
Page 21: Digitemp Display&App Instructions
Monument Digitem Display Instructions ③ ④ ⑤ ② ① Display Icons Power Button ① Short Press power button to turn on and turn off Firebox Temperature Display the Digitemp Display. This area displays real-time firebox temperature . Setup Button ② •... - Page 22 Digitemp Display while Display is on. 6. Bluetooth and App Connection • Search "Monument Grills" in iOS store or Play store to download the APP. • After download the APP, initiate Bluetooth function of your phone, meanwhile turn on the Digitemp Display on the grill.
- Page 23 Monument App Instructions Battery capacity indicator Firebox Real- time Temperature Indicator Meat Probe Real-time Meat Probe Timer Temperature Indicator Meat Probe Target Temperature Indicator Turn off or Turn on the Digitemp Display 1. Firebox Temperature Indicator You can monitor the real-time fire box temperature in Firebox Temperature Indicator. This temperature data is not adjustable by the APP or Digitemp Display.
-
Page 24: Cleaning And Maintenance
Cleaning and Maintenance Cleaning Exterior Stainless Steel Surfaces To ensure a proper working unit the following proper care and maintenance is suggested. •Weathering and extreme heat can cause exterior stainless steel surfaces to turn tan in color. Cleaning Cooking Grids Machine oils used in manufacturing process of We suggest you wash your cooking grids in a mild soap stainless steel can also cause this tanning color. -
Page 25: Troubleshooting
3. Inspect each burner for damage (cracks or holes) Regardless of which burner cleaning procedure you and if such damage is found, order and install a new use, we recommend you also complete the following burner. After installation check to ensure that gas steps to help prolong burner life. -
Page 26: Part Diagram
Model Denali 425 Parts Diagram... -
Page 27: Part List
Model Denali 425 Parts List For assembly questions, call: 1-888-980-4933 Important: Use only parts listed above. When ordering parts, providing the following information: To make sure you obtain the correct replacement parts for your gas grill, please refer to the part 1. -
Page 28: Cooking Instruction
Cooking Instructions Indirect Cooking WARNING To cook indirectly, the food should be placed on the Do not leave the grill unattended. left or right side of your grill with the burner lit on the Your grill will get very hot. opposite side. -
Page 29: Cooking Chart
Grill Cooking Chart WARNING: To ensure that it is safe to eat,food must be cooked to the minimun internal temperatures listed in the table below. *United States Department of Agriculture... - Page 30 WWW.MONUMENTGRILLS.COM Product Registration Card It is simple! Complete and mail your Product Registration Card with the Copy of the Receipt today! Last name: ______________ First Name: _______________ Address: _________________________________________ City: ______________________ State: ________________ Zip: ____________ Phone: ___________________ Email: ______________________________________ Place of purchase: ___________ Model Number: ___________...
Need help?
Do you have a question about the Denali 425 and is the answer not in the manual?
Questions and answers