Advertisement
Quick Links
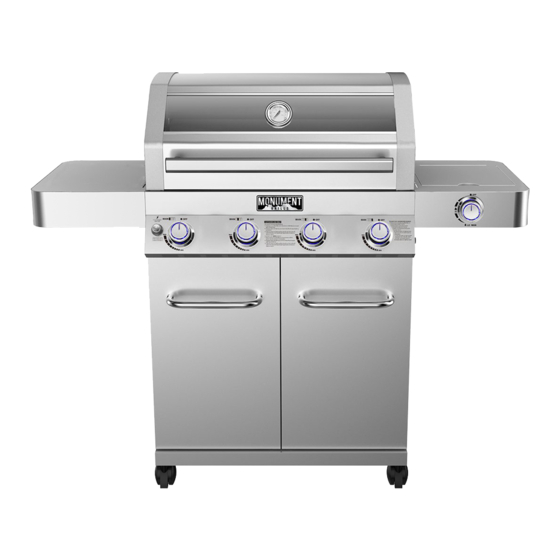
ASSEMBLY & OPERATING INSTRUCTIONS
Liquid Propane Gas Grill
WARNING:
Read this Owner's manual carefully to ensure
your gas grill is properly assembled, installed
and maintained. Failure to follow these
instructions could result in serious injury and/or
property damage. This gas grill is intended for
OUTDOOR use only and is not intended to be
installed in or on recreational vehicles or boats.
Note to Installer
Leave this Owner's Manual with the customer
after delivery and/or installation.
Note to Consumer
Leave the Owner's Manual in a convenient place
for future reference.
Customer Service Helpline: Warranty & Parts
1-888-980-4933
Monday – Friday 9am – 6pm CST
MFG No.: 41847NG
UPC No.:856597007386
Make sure the cylinder valve connection device fits
properly and safely with the connection device
attached to the inlet of the pressure regulator.
• Parts
• Assembly
• Safety Rules
• Use and Care
• Troubleshooting
C043481-A0
Advertisement

Related Manuals for Monument Grills 41847NG


Summary of Contents for Monument Grills 41847NG
- Page 1 1-888-980-4933 OUTDOOR use only and is not intended to be Monday – Friday 9am – 6pm CST installed in or on recreational vehicles or boats. MFG No.: 41847NG Note to Installer UPC No.:856597007386 Leave this Owner’s Manual with the customer Make sure the cylinder valve connection device fits after delivery and/or installation.
-
Page 2: Table Of Contents
Amazon or other marketplace internet retailer storage and handling code, B149.2, or the standard for from any entity other than Monument Grills is not an Recreational vehicles, ANSI A 119.2, and CSA Z240 original purchase and will not qualify for a warranty RV series recreational vehicle code, as applicable. -
Page 3: Safety Precautions
Safety Precautions • Have your LP gas tank filled by a reputable A tank of approximately 12 inches in diameter by propane gas dealer and visually inspected and re- 18-1/2 inches high is the maximum size LP gas qualified at each filling. tank to use. - Page 4 WARNING Burner Flame Check A strong gas smell or hissing sound of gas indicates a serious problem with your gas grill or the LP gas tank. Failure to immediately follow the steps listed below could result in a fire or explosion that could cause serious bodily injury, death, or property damage.
- Page 5 Contents for Hardware Pack The following table illustrates a breakdown of the hardware pack. It highlights what components are used in the various stages of assembly. 5/32"x12mm 11 pcs 1/4"x15mm 13 pcs 2 pcs 1/4'' 4 pcs Tools required for assembly Philips Head Screwdriver (not included).
-
Page 6: Parts Diagram
Model 41847NG Parts Diagram... - Page 7 Model 41847NG Parts List seq. appellation Material code seq. appellation Material code Main Lid D010012906 Battery Box A0212663 Temperature Gauge A0212824 Spindle Below Door Panel A0212557 Temperature Gauge Seat A0212967 Spacing Screw Below Door Panel A02120079 Cart Bottom Panel Front...
-
Page 8: Assembly Instructions
Assembly Instructions Insert Part No.47 into the bottom plate. Figure 1 Half screw out the screws in the bottom plate, attach Part No.35 and Part No.40 onto the relevant screw holes and screw tightly. Figure 2... - Page 9 Install Part No.38 onto the relevant place with four B screws. Figure 3 Half screw out the screws in the bottom and side plates, attach Part No.45 onto the relevant screw holes and screw tightly. Figure 4...
- Page 10 Install Part No.37 onto the relevant place with four A screws shown in Figure 5. Attention: magnet downward. Figure 5 Figure 6...
- Page 11 Screw the grill body and the cart tightly with four B screws. (Figure 7.1) Figure 7.1 Figure 7.2 2 x B 2 x D 1.Half screw out the three big screws outside the grill body, attach Part No.25 onto the relevant screw holes and screw tightly. 2.Screw Part No.25 tightly with B screw and D spacer inside the grill body.
- Page 12 1. Insert the wire of Part No.23. 2. Put Part No.2, Part No.3 onto the Main Lid. Figure 9 1. Insert Part No.30, Part No.32 and Part No.33 as the figure shows. 2. Insert the wire as the figure shows. Figure 10...
- Page 13 1.Half screw out the screw in Part No.27, insert into the hole of Part No.22 and screw tightly. Figure 11 2 x B 2 x D 1.Half screw out the three big screws on the grill body, attach Part No.69 onto the relevant screw holes and screw tightly. 2.Screw Part No.69 tightly with B screw and D spacer inside the grill body.
- Page 14 Fixed Part No.58 onto the right plate with one A screw. Figure 13.1 Figure 13.2 1. Install Part No. 50 onto Part No.51 with A screws. (Figure 14.1) 2. Put the C part into the relevant hole in the bottom plate. (Figure 14.2) 3.
- Page 15 1. Install Part No.14 onto Part No.16 with two A screws. (Figure15.1) 2. Put Part No.15 into Part No.14. (Figure15.1) 3. Put the grease tray into the grill body. (Figure15.2) Figure 15.1 Figure 15.2 Put Part No. 7, Part No. 8 , Part No. 9 into the relevant place. Figure 16...
- Page 16 Connect Part No.54 to Part No.41. Figure 17 1.Install Part No. 48 onto the bottom plate. 2.Install Part No. 26 onto the side plate. Figure 18...
- Page 17 Connecting LP Gas Tank to LP Grill 1. Place foot ring of 20 lb. tank into the hole in bottom panel. Make sure the tank valve is in OFF Regulator Connection position.(Fig.20). 2. Check the tank valve to ensure it has proper external mating threads to fit the hose and regulator assembly provided.
-
Page 18: Lighting Instructions
Checking for LP gas leaks Never test for leaks with a flame. Prior to first use, at the beginning of each season, or every time your LP gas tank is changed, you must check for gas leaks. 1. Make a 50/50 (soap/water) mild soap solution. 2. - Page 19 If Grill Still Fails To Light WARNING 1. Check gas supply and connections for leaks. Check Never lean over the grill cooking area while that all wire connections are secure. lighting your gas grill. Keep your face and body a safe distance (at least 18 inches) from the 2.
-
Page 20: Cleaning And Maintenance
Cleaning and Maintenance Cleaning Exterior Stainless Steel Surfaces To ensure a proper working unit the following proper care and maintenance is suggested. Weathering and extreme heat can cause exterior stainless-steel surfaces to turn tan in color. Machine Cleaning Cooking Grids oils used in manufacturing process of stainless steel We suggest you wash your cooking grids in a mild soap can also cause this tanning color. -
Page 21: Troubleshooting
3. Inspect each burner for damage (cracks or holes) Regardless of which burner cleaning procedure you and if such damage is found, order and install a new use, we recommend you also complete the following burner. After installation check to ensure that gas steps to help prolong burner life. -
Page 22: Cooking Instructions
Cooking Instructions Indirect Cooking WARNING Do not leave the grill unattended. To cook indirectly, the food should be placed on Your grill will get very hot. Never lean over the left or right side of your grill with the burner lit the cooking area while using your grill. - Page 23 Grill Cooking Chart FOOD Weight or thickness Temperature Time Special instructions and tips Slice or chop vegetables and dot with butter or Vegetables Medium 8 to 20 minutes margarine. Wrap tightly in heavy duty foil. Grill turning occassionally. Wrap individually in heavy duty foil. Cook Potatoes Whole Medium...
- Page 24 QUALIFIED GAS TECHNICIAN. Model NO.41847NG Orifice Size Liquid propane(LP) Natural Gas(NG) Components Orifice Size...
- Page 25 GAS CONVERSIONS 1. Turn off the main gas supply valve. 2. Disconnect LP gas fuel tank (if present). 3. Turn off all burner control valves. 4. Remove the LP gas fuel tank (if present) from the grill cart. 5. Use an adjustable wrench to remove the LP regulator from the manifold. Label position 6.Use an adjustable wrench to install the Natural gas regulator hose to the manifold and secure.
- Page 26 Make Gas Connection 1.Pass the NG hose to grill cart through the back panel 2.Connect the brass connector on one end of the 10 ft (3.0m) PVC flexible gas supply hose to the Natural gas pressure regulator 3.Connect the quick connector on the other end of the 10 ft.
- Page 27 Change Grill Main Burner Valve Orifices 1. Remove the grates and flame tamers. 2. Push back the Clamp Spring which hold the burner in place,the clamp spring will drop off to grease tray or grill cart 3.Remove the burner from the grill by lifting the burner out 4:Use a 6 mm socket and wrench or 6 mm nut driver to remove the brass orifice from the end of gas valve.
- Page 28 Change the Side Burner Orifice 1:Remove the LP Side Burner Orifice,and install the NG Side Burner Orifice Adjust High/Low Flame Setting Screw 1:Remove all the control knobs 2:Use a flat-blade screwdriver to turn the high flame setscrew clockwise approximate 90º 3:Check that burner operates at the new high flame setting.
- Page 29 soap 50 % 50 %...
- Page 30 WWW.MONUMENTGRILLS.COM Product Registration Card It is simple! Complete and mail your Product Registration Card with the Copy of the Receipt today! Last name: ______________ First Name: _______________ Address: _________________ City: _________ State: __________ Zip: ____________ Phone: __________ Email: ______________ Place of purchase: _______________ Model Number: ______________ Serial Number: _____ Date of Purchase: ______________ Please ...
- Page 31 WWW.MONUMENTGRILLS.COM Carte d’enregistrement du produit C’est facite!Remplissez et postez carte d’enregistrement du prodduit des aujourd’hui avec une copie du ticket de caisse! Nom de famille: _______________ Prenom: _______________ Adresse:___________Ville:______________ Province: ______________ Code postal: _____________Telephoner: _____________ Adresse courriel: ______________ Lieu d’achat: ______________ Numero de modele: ___________ Numero de serie: ____________ Date d’achat: ______________ Por favor,devuelva su tarjeta de registro de product hoy para validar el servicio de garantia 31 ...
- Page 32 WWW.MONUMENTGRILLS.COM Tarjeta de registro del product Es simple!Liene y envie su Tarjeta de inscripcion del prodcto hoy con la copia del comprobante de recibot Apellido: ______________ Primer nombre: ______________ Dereccion: _________Ciudad: ___________Estado: _____________ Codigo postal: ______________ Liame(Opcinal): ______________ Lugar de compra: ______________ Numero del modelo: ___________Numero de serie: La fecha de Compra: ______________ Envie su tarjeta de inscripcion del product hoy mismo pour valider la garantie 32 ...
Need help?
Do you have a question about the 41847NG and is the answer not in the manual?
Questions and answers