Eloma Genius T 6-11 Operation Manual
Combi-steamer
Hide thumbs
Also See for Genius T 6-11:
- Brochure (16 pages) ,
- Installation and technical connections (24 pages) ,
- Installation and operation manual (46 pages)
Table of Contents
Advertisement
Advertisement
Table of Contents

Related Manuals for Eloma Genius T 6-11


Summary of Contents for Eloma Genius T 6-11
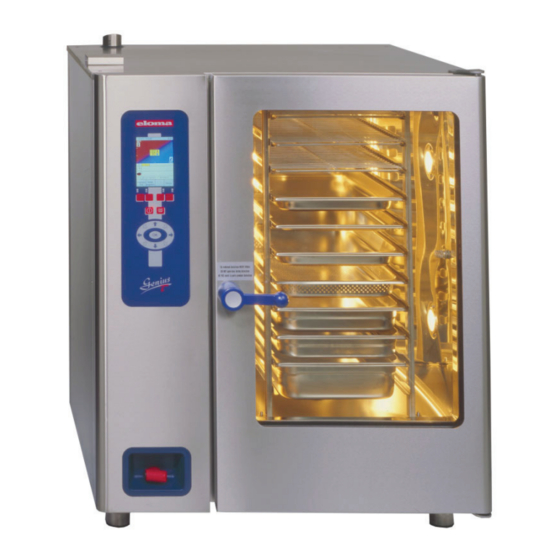
- Page 1 Combi-Steamer Genius T Operation Manual...
- Page 3 You have chosen an Eloma combi-steamer Thank you for your confidence. These operation manual apply to Eloma’s combi-steamer Genius T electrical and gas appliances. Please read the installation and operating instructions in full before starting up the appliance and make sure to pay particular attention to the safety information.
-
Page 4: Table Of Contents
Operation Manual Electro and Gas Heated Combi-Steamer Genius T 6-11, 10-11, 20-11, 12-21, 20-21 Table of contents: 1. Safety information ............. 4 SPS - SPS Steam Protection System ....30 Control panel and functional description ....7 ... - Page 5 Pictograms/symbols used Warning Attention! Danger! Immediate dangerous situation, Possibly dangerous situation, Possibly dangerous situation, that can endanger severe injury that possibly can endanger severe that can endanger minor injury. or death. or death. Caustic substances Risk of explosion Caution: Risk of burns Caution: Hot steam Caution: Hot liquid Risk of fire...
-
Page 6: Safety Information
The appliance shall only be used for its intended purpose, namely the professional preparation of food. Eloma combi steamers are designed for use in commercial environments. Method of operation The combi-steamer Genius T offers every possibility to experience modern professional cooking technology. - Page 7 The door must not be opened whilst Autoclean is running (risk of chemical burns). Only use Eloma Multi-Clean special cleaning agents and Eloma Multi-Clean rinse agents. Eloma GmbH accepts no liability for damage caused by using non-Eloma cleaning agents or rinse agents; use of such agents will also invalidate any warranty claims.
- Page 8 Remove the sensor from the food before taking the batch out. Condensation hood (option) An optional condensation hood is available for Eloma combi steamers. The condensation hood is controlled fully automatically via the combi steamer. During the cooking process, steam is condensed as it passes over air-cooled plate condensers.
-
Page 9: Control Panel And Functional Description
Control panel and functional description Control panel Genius T Actual time Operation system Climatic Cursor Program step Climatic Monitor Time Core temperature Info line Menu selection Sensor keys LED START Master key ON/OFF Touch key START/STOP LED STOP OK to confirm Genius Scout Genius direction arrows bed_791318_gt_2v4_en... -
Page 10: Genius Operation With Genius Scout
Press OK to confirm every input or setting. Manual operation As soon as the unit is connected to the mains, the Eloma standby screen appears. Touch master key to switch on, the start-up screen appears. The red part of the screen represents dry heat, the blue one moist heat. -
Page 11: Start-Up In Manual Operation
Start-up in manual operation Prior to start : Open water tap. Press key ON/OFF, a start-up screen appears. The appliance is ready for work. LED is lit. Eloma Standby-screen Start-up screen Program Menu Cooking Special list group process program ... -
Page 12: Manual Operation - Input Of One Step
After selection of a cooking procedure and OK, you must set – time – or core temperature. 1. Input time 2. Input core temperature 3.Input lines Menu Next Preheat Menu Next Prehea Menu Next Preheat Save Save Save back Step back Step... -
Page 13: Manual Operation - Input Of Two Steps
Manual operation – Input of two steps ( Steptronic ® ) Example 1 step Input 190°C, 50%, Time 10 minutes step Input 220°C, 20%, Time 15 minutes Input 1 step Input 2 step Manual operation Remaining time Total time Step 1+2 Menu Next... -
Page 14: Manual Operation - Input Of Several Steps)
Manual operation – Input of several steps ( Steptronic ® ) (Steptronic ® allows to combine several steps, also time and core temperature combined.) Input of the first cooking step as described in Sec. 3.1. To proceed to a second step, press touch key Next step and repeat input as described before. ... -
Page 15: Display Of Actual Values
Display of actual values ( Steptronic ®) While a program is running down, touch one of the direction arrows and the actual values for temperature and humidity are displayed for 5 seconds. Then the display returns to the desired set values. ... -
Page 16: Additional Functions
Additional functions Go to Additional functions to select further functions. Enter manually temperature/humidity and time or core temperature, confirm with OK. Go to “Additional“, using arrow and proceed as described. Manual input Additional functions Additional function active Manual Input Info line Menu... -
Page 17: Cooking Procedures In Semi-Automatic Operation
Cooking procedures in semi-automatic operation For a shortcut to the temperature/moisture parameters necessary for the desired cooking procedure, you can use the screen "Selection cooking procedures". To select preset temperature/humidity parameters press cooking process. Once in the cooking process, press the Joker Scout arrow keys to select the desired cooking procedure. Once you selected and entered your choice, the interface for the cooking procedure definition opens. -
Page 18: Program Storage "Infothek
Program Storage “Infothek“ Program number Program name Input field name Confirm Program name / No. Input field number Symbol Favourite << Cursor to the left >> Cursor to the right Field : Delete characters to the left Letters, numbers, characters ... - Page 19 Select and edit a program name out of the name proposals Menu Next Preheat A -> a Save A -> a Menu Menü back Step Help Save Hilfe Speichern back a -> A zurück a -> A Use Genius direction arrows to bring up the first letter, confirm with OK. ...
- Page 20 Select a program to be a Favourite Symbol Favourite A -> a A -> a Menu Menu Help Save Help Save back a -> A back a -> A We recommend to mark programs that are frequently used to be Favourites. It is then possible to create the list of favourites, facilitating a quick search.
-
Page 21: Delete A Program
Delete a Program Bring up the program from the program list and confirm with OK . Manual Menu- Preheat Menu Delete Preheat Favourites Menu Delete Preheat Input group back program back program Set the time or the core temperature to ”0” “ and press sensor key Delete program. ... -
Page 22: Select And Start A Program From The Program List
Select and start a Program from the Program List Touch sensor key Program List to bring up all saved programs, maximum 300. Display 1 step Select a program Manual Change Next Steam Step Step Program indication Manual Menu- Preheat Favourites Input group... -
Page 23: Delayed Start In Program Operation
Delayed start in program operation The start of a program can be delayed for up to 24 hours. Select a program from any list and confirm with OK. Press sensor key Start time. Use the Genius Scout arrows to set the start time and start pressing key. -
Page 24: Menu Groups In Fully Automatic Operation
Menu groups in fully automatic operation Select and start a program via menu group With the sensor keys Program List, Menu group you can open the display Menu groups. Use the arrow keys to select the desired menu group, the middle is selected with the OK key. ... -
Page 25: Special Programs
Special Programs Touch sensor key Special Program to bring up further special programs and functions. Banquet Program Menu Cooking Special Manual Menu Next Preheat Menu Next Preheat Autoclean HACCP Special Save Save List group process program Input back Step back Step ... -
Page 26: Cooking (Low Temperature)
7.2. LT-Cooking (Low temperature) Menu Next Preheat Manual Save Menu Next Preheat Autoclean HACCP Special back Step Save Input back Step Touch sensor key Special program, use Genius arrow to select LT cooking and confirm with OK. The Climatic monitor indicates below the striped field the LT cooking range for temperature/humidity. -
Page 27: Cook & Hold
Cook & Hold Manual Menu Next Preheat Menu Next Preheat Autoclean HACCP Special Save Save Input back Step back Step Touch sensor key Special program , use Genius arrow to select Cook & Hold and confirm with OK. ... -
Page 28: Delta-T- Cooking
Delta-T- Cooking Menu Next Preheat Manual Autoclean HACCP Special Save Input back Step Touch sensor key Special program, use Scout arrow to select T-Cooking and confirm with OK. The Climatic monitor indicates the T-Cooking range for temperature/humidity. Standard setting for T-Cooking is 40°C and 40% humidity. - Page 29 Example: Input T = 50°C, core temperature 65 °C. The T – program is started, the actual core temperature is displayed, e. g. 20°C. T = 50°C is added to the actual core temperature to determine the cooking chamber temperature - at this moment CT 20°C + T 50°C = 70°C ...
-
Page 30: Baking
Baking Menu Next Preheat Manual Menu Next Preheat Save Autoclean HACCP Special Save back Step Input back Step Touch sensor key Special program. Use the Scout arrow to select “Baking” and confirm with OK. With the Climatic Cursor the temperature/steam quantity can be set. ... -
Page 31: Combi Cooking
Combi cooking Combi cooking can be selected manually or while running a program. Different cooking programs can be started at different times. The sensor key Combi Cooking is available: 1. during cooking 2. if you have pressed Preheating, after the Active Temp procedure. 3. -
Page 32: Preheat - Cool Down Active Temp
Preheat – Cool Down Active Temp The combi steamer should always be preheated, respectively cooled down. When selecting the function “Active temp“ the temperature in the oven cavity is brought to a pre-set nominal temperature. Consequently this function offers two procedures. In case the cooking chamber temperature is below this nominal value, the cavity is heated up. -
Page 33: Haccp
11. HACCP An annular memory can save up to 200 programs. All processing data is recorded continuously and automatically. Once a cooking program is terminated with “Start/Stop” or through automatic switch off at program end, its protocol is stored. The cleaning program Autoclean is also stored. 11.1 Serial Interface –... -
Page 34: Selection And Printing Of Recorded Cooking Processes
11.2 Selection and printing of recorded cooking processes The connecting cable shall only be plugged or unplugged if both, the steamer and the printer, are switched off, otherwise the control unit or the printer may be damaged. The appliance must be switched on with no program in progress. Any exact HACCP recording presupposes the correct setting of the real time. -
Page 35: Special
12. Special 12.1 Weekly program Use the function weekly program for stored programs that are supposed to be started at a certain day and time of the week. Manual Menu Menu Autoclean HACCP Special Help Input back back Touch sensor key Special Program, Special and confirm “Week program”... -
Page 36: Start Sreen
12.2.2 Start Sreen You can select 5 different start-up displays. Menu Menu Help Help back back Select or deselect with "" by pressing OK. Screen Manual input , see Sec. 3., is not displayed. 12.2.3 Language Menu Menu Help Help back... -
Page 37: Preparation For Cleaning
13. Preparation for cleaning Prior to starting a cleaning program make sure that there is sufficient cleaner and rinse agent in the respective canisters. Visual control. Exchange of canisters In case there is not sufficient cleaner or rinse agent left, the canisters must be exchanged or refilled. Please ensure that correct connections are made. -
Page 38: Delay Start Of Autoclean
Autoclean programs: According to the degree of dirt inside the cooking chamber, different programs can be chosen. Display Duration Program steps Step 1 50 minutes Soak - 1 x Clean - Rinse – Dry Step 2 1 hour 20 min. Soak –... -
Page 39: Manual Cleaning
14.4 Manual Cleaning Manual Menu Start Program Autoclean HACCP Special Help Input back Time Info Select Autoclean with sensor button. Select manual cleaning using Scout and start it with Caution: manual cleaning begins only at a maximum temperature of max. 60°C/140°F display indicates ... -
Page 40: Hints On Operational Safety
Other cleaning products may lead to irreparable rust damage within the cooking chamber, as well as damaging internal pumps and seals. Eloma GmbH will not assume liability for any damages resulting from the use of alternative products. This will void the Eloma warranty. -
Page 41: Error
17. Error 17.1 Error indicator display Press sensor key Help to get valuable information regarding failures. The displayed symbols explain possible failure causes and offer remedies. If your Genius does not work correctly, take the following list and try to help yourself. If you do not succeed, switch off and disconnect the unit from the mains.Call the after-sales service ... -
Page 42: Error Message
17.2 Error Message Error Description Reaction, error remedy Probe cooking chamber 1 Operation stop! no signal Customer service call! Probe cooking chamber 2 Operation stop! no signal Customer service call! Warning! Meat probe Customer service call! no signal sensor 1 Meat probe operation is possible!. -
Page 43: Trouble Shooting
17.3 Trouble Shooting If your Genius isn’t working properly, review the following list first. If you do not succeed, switch off, disconnect from mains, close water tap. Call the after-sales service Failure Possible Cause Remedy No required heating Mains switched off or fuse Check the mains system and switch capacity, fan does not start blown. -
Page 44: Cleaning And Maintenance
− Grease and cleaner residue often collect on the outer side of the door seal. If these are not removed, the integrity of the seal will be compromised. − Only use original Eloma cleaning products when cleaning. Cleaning of glass panel: −... - Page 45 Cleaning of drip gutter and tray : ( models 6-11 and 10-11 only) Drip gutter under the appliance: Clean it regularly, including the drain opening. Drip tray on the door: Remove it to the front for regular cleaning by pressing the two clips underneath down.
- Page 48 Notes: bed_791318_gt_2v4_en...
- Page 49 Notes: bed_791318_gt_2v4_en...
- Page 50 Notes: bed_791318_gt_2v4_en...
- Page 52 Englisch Art. Nr.: bed_791318_gt_2v4_en...
Need help?
Do you have a question about the Genius T 6-11 and is the answer not in the manual?
Questions and answers