Primes Cube L1 Original Instructions Manual
Hide thumbs
Also See for Cube L1:
- Operating manual (48 pages) ,
- Original instructions manual (56 pages)

Related Manuals for Primes Cube L1


Summary of Contents for Primes Cube L1
- Page 1 Original Instructions Cube L1 LaserDiagnosticsSoftware LDS Cube App Revision 04 EN - 03/2023...
- Page 3 Cube L1 IMPORTANT! READ CAREFULLY BEFORE USE. KEEP FOR FUTURE USE. Revision 04 EN - 03/2023...
-
Page 4: Table Of Contents
Cube L1 Table of contents Basic safety notes Icons and conventions About this operating manual Device description Functional description ................13 Measuring principle ................13 Functions of the On/Off button ............. 14 Optical display ..................14 4.4.1 Status messages ..............14 4.4.2... - Page 5 Mount the device..............23 Removal from the laser system ............25 Connections Overview of connections ..............26 Micro-USB port ..................26 8.2.1 PRIMES USB driver ..............26 8.2.2 Install the USB driver manually ..........27 Bluetooth ..................28 ® 8.3.1...
- Page 6 Cube L1 10.3.1 Connect/disconnect the device with the LDS ......41 10.3.2 Open toolbench Cube Measurement ........43 10.3.3 Settings in the device control ..........44 10.3.4 Start measurement ..............47 10.3.5 Measuring results display ............48 10.3.6 Delete measurements from the memory of the Cube L1 ..53 10.4...
- Page 7 Cube L1 PRIMES - the company PRIMES is a manufacturer of measuring devices which are used to analyze laser beams. These devices are employed for the diagnostics of high-power lasers rang- ing from CO -, fiber- and solid-state lasers to diode lasers. A wavelength range from...
-
Page 8: Basic Safety Notes
Every person who is responsible for the installation, start-up or operation of the device must have read and understood the operating manual and, in particular, the safety instructions. If you still have questions after reading this operating manual, please contact PRIMES or your supplier for your own safety. Observing applicable safety regulations... - Page 9 Cube L1 Protect yourself from direct and reflected laser radiation while working with the device by taking the following measures: • Never leave the device unattended when taking measurements. • Wear safety goggles adapted to the power, power density, laser wavelength and operating mode of the laser beam source in use.
-
Page 10: Icons And Conventions
Cube L1 Icons and conventions Warning messages The following icons and signal words indicate possible residual risks in the form of warn- ings: DANGER Means that death or serious physical injuries will occur if necessary safety precautions are not taken. - Page 11 Cube L1 Further icons and conventions in this operating manual Here you will find useful information and helpful tips. Indicates a single instruction. If several of these instructions appear one below the other, the order in which they are executed is irrelevant or they represent alternative courses of action.
-
Page 12: About This Operating Manual
For measurement operation with a PC, the optional LaserDiagnosticsSoftware LDS must be installed on the PC. PRIMES will be happy to provide you with a current down- load link. For this purpose, contact your sales partner or send an e-mail to: support@primes.de... -
Page 13: Device Description
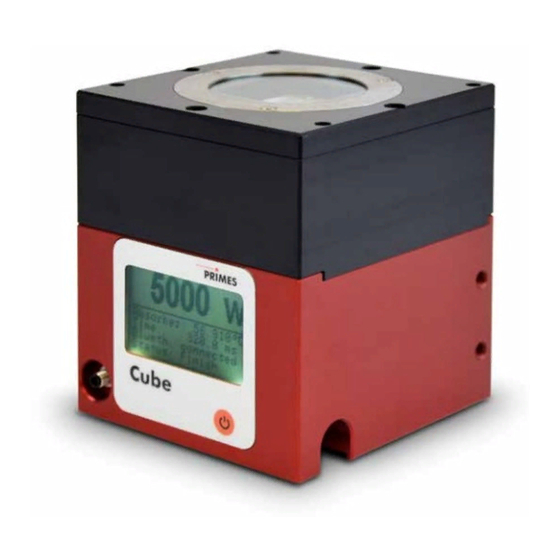
Cube L1 Device description Functional description The device is used to measure laser power. The laser beam passes through the protec- tive window and hits the absorber and a photodiode. The absorber and the photodiode are protected from contamination by the protective window. The display shows the measured laser power and further information on the status of the device. -
Page 14: Functions Of The On/Off Button
Cube L1 Functions of the On/Off button The On/Off button has several functions: Keystroke Function Short press Switch on 5 seconds Switch off 2 seconds Show measuring values Press again for 2 seconds Switch to next window Tab. 4.1: Functions of the On/Off button... -
Page 15: Warning Message
Cube L1 4.4.2 Warning message Warning message Reason Safety interlock open The absorber temperature has exceeded 100 °C. In order to protect the device, the safety interlock was triggered. Tab. 4.3: Warning message This warning message does not imply an error. The message is automatically reset as soon as the absorber temperature is below 100 °C again. -
Page 16: Charging The Lithium-Ion Battery
Cube L1 4.6.1 Charging the lithium-ion battery Charge the battery completely before using the device for the first time. The first com- plete charge on the PC requires approx. 3 hours. Only use the supplied USB cable to charge the battery. Recharge the battery when the charge level reaches 20 %. Do not charge the rechargeable battery unattended, e.g. -
Page 17: Transport And Storage
Cube L1 Transport and storage Warning messages NOTICE Damaging/Destruction of the device Hard impacts can damage the absorber within the device. Handle the device carefully when transporting or installing it. To avoid contamination, cover the inlet aperture with the alignment tool pro- vided. -
Page 18: Install Laserdiagnosticssoftware Lds
Install LaserDiagnosticsSoftware LDS For measurement operation with a PC, the optional LaserDiagnosticsSoftware LDS must be installed on the PC. PRIMES will be happy to provide you with a link to download the current version. Please contact your sales partner or contact us by e-mail: support@primes.de... -
Page 19: Mounting
Cube L1 Mounting Conditions at the installation site • The device must not be operated in a condensing atmosphere. • The ambient air must be free of gases and aerosols that interfere with the laser radiation (e.g. organic solvents, cigarette smoke, sulfur hexafluoride). - Page 20 Cube L1 Use of the device with the focal plane on the bottom edge of the device The focal plane of the laser beam should be on the bottom edge of the device. The laser beam should be convergent (see Fig. 7.1 on page 20).
- Page 21 Cube L1 Focal plane Laser beam Beam diameter 1 – 7 mm Focal plane Illustration with divergent Illustration with convergent beam incidence beam incidence Fig. 7.2: Alignment to the laser beam with the focal plane above the bottom edge of the device Revision 04 EN - 03/2023...
-
Page 22: Align The Device Centrally Using The Alignment Tool
Cube L1 7.2.4 Align the device centrally using the alignment tool The alignment tool is within the scope of delivery. It can be reordered under order num- ber 410-011-046. Using the alignment tool and a pilot laser beam, you can position the device with the necessary accuracy (see Fig. -
Page 23: Mount The Device
Cube L1 7.2.5 Mount the device DANGER Serious eye or skin injury due to laser radiation If the device is moved from its aligned position, increased scattered or directed reflection of the laser beam can occur during measuring operation (laser class 4). - Page 24 Cube L1 Bottom view Side view right Side view left Rear view Fig. 7.4: Mounting threads in the housing (dimensions in mm) Revision 04 EN - 03/2023...
-
Page 25: Removal From The Laser System
Cube L1 Removal from the laser system Switch off the laser beam. Ensure that moving parts, e.g. robot arms, etc. are at a standstill and that they cannot be set in motion unintentionally. Unscrew the mounting screws (see Fig. 7.4 on page 24). -
Page 26: Connections
EMC-compliant. Therefore, in industrial environments with strong sources of interference, connection interruptions and data transmission distur- bances may occur. 8.2.1 PRIMES USB driver You will find the PRIMES USB driver for all USB-capable devices on the PRIMES web- site at: https://www.primes.de/en/support/downloads/software.html Revision 04 EN - 03/2023... -
Page 27: Install The Usb Driver Manually
8.2.2 Install the USB driver manually The driver installation requires administrator rights. Download the USB driver from the PRIMES website. Save the driver to a data carrier. Connect the data carrier to a PC. Double-click to start the driver installation software. -
Page 28: Bluetooth
Cube L1 Bluetooth ® A class 1 Bluetooth interface is integrated in the device. This enables a wireless con- ® nection with the PC, tablet or smartphone. When connected to a PC with a class 1 Bluetooth dongle, the range under free space conditions is approx. 100 m. -
Page 29: Safety Interlock
Cube L1 Safety interlock NOTICE Damaging/Destruction of the device If the safety interlock is not connected, the device can be damaged or de- stroyed due to overheating. Connect the safety interlock to the device. The use of the safety interlock protects the device from damage in many situations. - Page 30 Cube L1 Safety interlock connection (view connection on device) Function Common pin Connected with pin 2, when ready for operation Connected with pin 2, when in safety interlock mode (absorber too hot) Tab. 8.1: Pin assignment of safety interlock connection Revision 04 EN - 03/2023...
-
Page 31: Laser Parameter Setting
Cube L1 Laser parameter setting For correct measurements and to protect the device from damage, the following param- eters must be observed and adhered to. Setting the laser rise time The applicable irradiation time is between 0.1 s and 2.0 s, which has to be transferred to the laser controller as pulse duration/burst duration. -
Page 32: Maximum Permissible Power Density
Cube L1 Maximum permissible power density To avoid damage, the maximum permissible power density of 250 kW/cm² must not be exceeded at the optics. The power density in kW/cm² is calculated according to the formula: Formula 1: Calculation of the power density To determine the maximum laser power, the result is weighted with a safety factor of 2. -
Page 33: Minimum And Maximum Energy Input Per Measurement
Cube L1 Minimum and maximum energy input per measurement The measured temperature rise in the absorber is decisive for an accurate and re- producible measurement. Regardless of the starting temperature, we recommend an energy input of approx. 500 J per measurement. -
Page 34: Waiting Times Until The Next Measurement In Serial Measurements
Cube L1 Absorber temperature in °C Min. energy input in J Max. energy input in J 4 000 4 000 4 000 4 000 4 000 4 000 4 000 4 000 4 000 1 000 3 700 1 500 3 200 Tab. 9.1: Absorber temperature with the recommended minimum and permissible maximum energy input (ambient temperature 20 °C) -
Page 35: Measurement With Pulsed Lasers
Cube L1 Measurement with pulsed lasers When using pulsed laser radiation a correct exposure time measurement is possible up to a pulse frequency of 10 kHz and a duty cycle of 50 %. In case of ontimes/offtimes shorter than 50 μs a correct exposure time measurement is not possible. -
Page 36: Measure
Cube L1 Measure 10.1 Warning messages DANGER Serious eye or skin injury due to laser radiation If the device is moved from its aligned position, increased scattered or directed reflection of the laser beam can occur during measuring operation (laser class 4). - Page 37 Cube L1 NOTICE Damaging/Destruction of the device Contamination and fingerprints on the protective window can cause damage or cracking respectively splintering of the protective window during measuring operation. Do not touch the protective window with bare hands. Regularly check the condition of the protective window. The protective win- dow can be cleaned or replaced in case of heavy, non-removable contamina- tion (see chapter 12 „Maintenance and service“...
-
Page 38: Measuring With The Cube L1
Cube L1 10.2 Measuring with the Cube L1 Please read chapter 9 „Laser parameter setting“ on page 31 first. 10.2.1 Start measurement Measurements with the Cube L1 are to be performed exclusively with a stationary laser beam. Observe the warning messages in chapter 10.1 on page 36. - Page 39 Cube L1 The screen displays the following measurement values: • Laser power in W 1) • Absorber temperature in °C • Pulse duration/burst duration in ms For cw lasers, the measured power of the laser is displayed in W (Power) and the pulse dura- tion in ms (Time).
-
Page 40: Display Of Measurement Results
W (Power) over the burst duration (corrected) in ms (Time). You can read out the last 30 measurements with the optional Android™ PRIMES Cube App for mobile devices or the optional LDS. Revision 04 EN - 03/2023... -
Page 41: Measuring With The Optional Laserdiagnosticssoftware Lds
Cube L1 10.3 Measuring with the optional LaserDiagnosticsSoftware LDS Please read chapter 9 „Laser parameter setting“ on page 31 first. This chapter describes measurements with the LDS. For a detailed description of the soft- ware installation, file management and evaluation of the measured data, please refer to the separate operating manual “LDS”. - Page 42 Cube L1 The Connections window is displayed. Click on the desired device. Click the Connect to device button. If the device does not appear: Install the USB driver according to chapter 8.2.2 on page 27. Check according to chapter 8.3.2 ...
-
Page 43: Open Toolbench Cube Measurement
Cube L1 10.3.2 Open toolbench Cube Measurement The Cube L1 is established as a connected device. Click on the connected device. The corresponding Device control opens. The toolbench Cube Measure- ment is opened. If the Cube Measurement toolbench was previously closed, the Open measurement toolbench button is displayed. -
Page 44: Settings In The Device Control
Cube L1 10.3.3 Settings in the device control Edit the options according to the explanations in the following table. Option Explanation If the Cube Measurement toolbench was previously closed, the Open Open measurement toolbench measurement toolbench button is displayed. ... - Page 45 Cube L1 Option Explanation Trigger level Setting the trigger level enables the sensitivity of the built-in photodi- (Laser power) ode to be adjusted: • The Trigger level Low setting is recommended for measuring low laser powers and pulsed laser beams.
- Page 46 Cube L1 Option Explanation Autom. ready for The option automatically puts the device back into ready for measure- ment after each measurement. If the check mark has been removed, measurement the device must be set to ready for measurement again after each measurement by briefly pressing the On/Off button.
-
Page 47: Start Measurement
Cube L1 10.3.4 Start measurement Measurements with the Cube L1 are to be performed exclusively with a stationary laser beam. The measurement in the Cube L1 starts automatically when the laser is switched on. The Start display field is therefore not active. -
Page 48: Measuring Results Display
Cube L1 10.3.5 Measuring results display Display the current measurement in the toolbench Cube Measurement After the measurement is finished, the measurement results are displayed in the open toolbench Cube measurement (see below). For all tools, the displayed parameters can be adjusted by clicking the gear symbol... - Page 49 Cube L1 Display of the measurements stored in the Cube L1 Press the Load measurements button The last 30 measurements stored in the device are read out of the memory of the Cube L1. Switch to the Projects tab. The uploaded measurements are displayed in the project tree.
- Page 50 Cube L1 Display of the measurements performed with the LDS Switch to the Projects tab. The measurements are dis- played in the project tree. Date, time and order of the dis- played measurements: Move the mouse pointer over the measurement.
- Page 51 Cube L1 Evaluate measured values with the LDS tools Click the Power measurement selection in the drop-down list. The Graph, Results table and Measurement value display tools are displayed. The Power measurement tool is not relevant for the Cube L1. Open the desired tool and drag...
- Page 52 Cube L1 For all tools, the displayed parameters can be adjusted by clicking the gear symbol For example, the rows/columns in the Results table can be swapped. For uploaded measurements from the Cube L1, the numbering is descending (last/most recent measurement is referred „measurement 0“).
-
Page 53: Delete Measurements From The Memory Of The Cube L1
In the Cube App you can make additional settings for power saving functions and the automatic ready for measurement. Please find detailed information on the operation of the Cube App in the separate oper- ating manual Cube App. These can be found on the PRIMES website at: https://www.primes.de/en/support/downloads/operating-manuals.html Revision 04 EN - 03/2023... -
Page 54: Troubleshooting
Cube L1 Troubleshooting 11.1 Messages in the LaserDiagnosticsSoftware LDS during measurement If problems occur during a measurement, the LDS displays them in different categories and different colors. Notes Notes provide assistance in interpreting the measurement results and are displayed in a blue window. - Page 55 Cube L1 Device errors Device errors that can result in damage of the device are displayed in an orange window. In this case, proceed as follows: Fix the problem. Click the Confirm button to remove the message. The message disappears. If the problem is not fixed, then the message appears again shortly afterwards.
-
Page 56: Connection Failure With The Lds
Cube L1 11.2 Connection failure with the LDS Error Possible cause Solution The Bluetooth con- No Bluetooth con- Connect the device to the PC according ® ® nection between the nection is estab- to chapter 8.3.3 on page 28. device and the LDS lished. - Page 57 Cube L1 Error Possible cause Solution A pulsed laser beam Not enough energy is When using pulsed laser radiation a correct cannot be measured. put into the absorber. exposure time measurement is possible up to a pulse frequency of 10 kHz and a duty cycle of 50 %.
- Page 58 Set the shortest possible laser rise time. The set laser power When properly aligned and used, the cali- does not correspond brated PRIMES measuring device provides to the actual emitted reliable measured values. laser power. Increase the set power on the laser.
-
Page 59: Maintenance And Service
For further cleaning, use a mixture of distilled water and isopropanol in a ratio of approx. 5:1. Use lint-free cleaning cloths that do not cause scratches. If these steps are not sufficient, please contact PRIMES or your PRIMES distribu- tor. 12.2.2 Cleaning the protective window After a measurement let the device cool down for an adequate period of time. -
Page 60: Exchanging The Protective Window On The Device
The protective window in the beam entrance is a wearing part and can be replaced if necessary. The protective window is coated with an anti-reflective coating and has low reflectance values of less than 1 %. To avoid increased reflection, use only original PRIMES protective windows. Protective window diameter 55 mm Glass thickness 1.5 mm Order number 410-070-021 (1 piece);... -
Page 61: Warning Messages
Cube L1 12.3.1 Warning messages DANGER Serious eye or skin injury due to laser radiation If the protective window is not correctly positioned, reflections can cause directional laser radiation. Ensure that the protective window is positioned evenly in the indentation on the O-ring. -
Page 62: Exchanging The Protective Window
Cube L1 12.3.2 Exchanging the protective window Observe the warning messages in 12.3.1 on page 61. Let the device cool down for an adequate period of time. Put on suitable gloves. Unscrew the 3 Torx screws M3 x 6 mm on the protective window mount. -
Page 63: Measures For The Product Disposal
Max-Planck-Str. 2 64319 Pfungstadt Germany If you are located outside the EU, please contact your local PRIMES distributor to dis- cuss the disposal procedure for your PRIMES measuring device. PRIMES is registered at the german „joint body“ for producers „Stiftung Elektro-Alt- geräte Register“... -
Page 64: Declaration Of Conformity
Cube L1 Declaration of conformity Revision 04 EN - 03/2023... - Page 65 Cube L1 Revision 04 EN - 03/2023...
-
Page 66: Technical Data
Cube L1 Technical data Measurement parameters Power range 200 – 16 000 W Wavelength range (see identification plate) 900 – 1 100 nm Beam diameter on the protective window 1 – 7 mm Max. power density on the protective window 250 kW/cm² Irradiation time 0.1 – 2.0 s (depending on laser power) Min. - Page 67 Cube L1 Supply Data Power supply Built-in lithium-ion battery Maximum charging current 1.3 A Voltage 3.7 V Capacity 1 000 mAh Energy 3.7 Wh Weight of the battery 20 g Shipment classification Lithium ion batteries contained in equipment Temperature range for charging the lithium-ion 0 – 45 °C...
-
Page 68: Dimensions
Cube L1 Dimensions Bottom view Side view right Front view Top view Dimensions in mm Revision 04 EN - 03/2023... - Page 69 Cube L1 Side view left Rear view Dimensions in mm Revision 04 EN - 03/2023...
-
Page 70: Appendix
Cube L1 Appendix GNU GPL license notice The software of this product contains software code that is licensed subject to the GNU General Public License (GPL) Version 2 or later. The license terms of the GNU GPL Ver- sion 2 or later are available on the following websites: •... - Page 71 Cube L1 Revision 04 EN - 03/2023...
- Page 72 PRIMES GmbH Max-Planck-Str. 2 64319 Pfungstadt Germany Tel +49 6157 9878-0 info@primes.de www.primes.de...
Need help?
Do you have a question about the Cube L1 and is the answer not in the manual?
Questions and answers