Primes Cube L1 Operating Manual
Hide thumbs
Also See for Cube L1:
- Original instructions manual (56 pages) ,
- Original instructions manual (72 pages)

Related Manuals for Primes Cube L1


Summary of Contents for Primes Cube L1
- Page 1 Operating Manual Translation of the original instructions Cube L1 LaserDiagnosticsSoftware LDS Cube App Revision 01/2019 EN...
- Page 3 Cube L1 IMPORTANT! READ CAREFULLY BEFORE USE. KEEP FOR FUTURE USE. Revision 01/2019 EN...
-
Page 4: Table Of Contents
Transportation Installation/Removal Prepare installation ................14 Mounting position ................15 8.2.1 Align the Cube L1 with the alignment tool ....... 16 Install the Cube L1 ................17 Remove the Cube L1 ................18 Connections Safety interlock ..................19 Micro-USB socket ................20 Bluetooth ..................... - Page 5 13.2 Measuring results display ..............30 Measuring with the optional LaserDiagnosticsSoftware LDS 14.1 Connect the Cube L1 with the LaserDiagnosticsSoftware LDS .... 31 14.2 Select measurement mode CW Operation or Pulse Operation ..... 32 14.3 Make settings for power saving functions and automatic measurement readiness ...............
- Page 6 Cube L1 Maintenance and service 16.1 Exchanging the protective window on the device ......... 39 16.1.1 Safety instructions ..............39 16.1.2 Exchanging the protective window ......... 41 Measures for the product disposal Declaration of conformity Technical data Dimensions Appendix 21.1 System control (option) ................
- Page 7 • Beam quality factor M² PRIMES is responsible for both the development, production, and calibration of the measuring devices. This guarantees optimum quality, excellent service, and a short re- action time, providing the basis for us to meet all of our customers’ requirements quickly and reliably.
-
Page 8: Basic Safety Instructions
Basic safety instructions Intended use The Cube L1 is used to measure power in the beam path of lasers. Please observe and adhere to the specifications and limit values given in chapter 19, „Technical data“, on page 44. Other forms of usage are improper. The information contained in this oper- ating manual must be strictly observed to ensure proper use of the device. - Page 9 Cube L1 • Connect the laser control’s safety interlock to the device. Check that the safety interlock will switch off the laser properly in case of error. • Please wear safety goggles adapted to the power, power density, laser wave length and operating mode of the laser beam source in use.
-
Page 10: Symbol Explanation
Cube L1 Symbol explanation The following symbols and signal words indicate possible residual risks: DANGER means that death or serious physical injuries will occur if necessary safety precautions are not taken. WARNING means that death or serious physical injuries can occur if necessary safety precautions are not taken. -
Page 11: About This Operating Manual
Call for observing (visual feedback from the device or the software). X Call for action About this operating manual This documentation describes the installation and operation of the Cube L1 and per- forming measurements with the Cube L1, the Cube App or the optional LaserDiagnos- ticsSoftware LDS. -
Page 12: Important Information For Devices With Rechargeable Lithium-Ion Battery
Please send the device to PRIMES as described in chapter 17, „Measures for the product disposal“, on page 42. If you are located outside of the EU, please contact your PRIMES distribution partner for matters concerning device disposal. Revision 01/2019 EN... -
Page 13: System Description
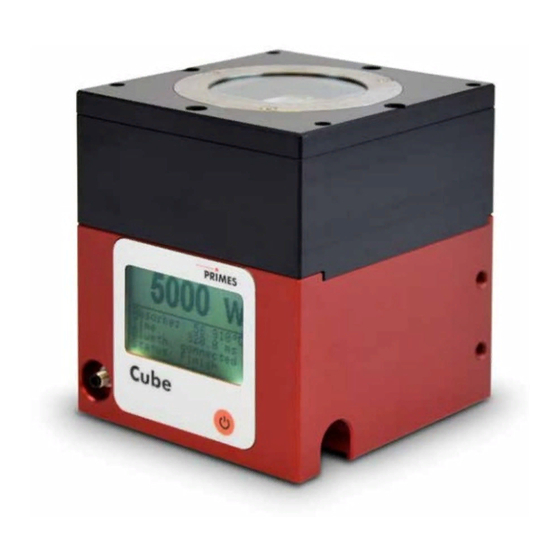
On/Off button Micro-USB socket Fig. 6.1: System description of the Cube L1 Measuring principles The absorber of the calorimetric measurement system is irradiated by a laser for a short period of time. The temperature difference of the absorber between start and finish of the laser pulse is measured. -
Page 14: Installation/Removal
Cube L1 Installation/Removal Prepare installation Turn off the laser source. Ensure that moving parts, e.g. robot arms, etc. are at a standstill and that they cannot be set in motion unintentionally. DANGER Serious eye or skin injury due to laser radiation... -
Page 15: Mounting Position
The focal position of the laser beam must be located on the lower edge of the device. To align the Cube L1 under the laser, a alignment tool is included (see chapter 8.2.1 on page 16). 5°... -
Page 16: Align The Cube L1 With The Alignment Tool
Damaging/Destruction of the device The exposure with laser radiation will destroy the alignment tool and the underlying protective window. X Remove the alignment tool before measurement. Marking Alignment tool Fig. 8.2: Alignment of the Cube L1 using the alignment tool Revision 01/2019 EN... -
Page 17: Install The Cube L1
• The device must not be able to move. Connect the safety interlock connection cable. Remove the alignment tool from the protective window of the device. View X Fig. 8.3: Mounting threads in the Cube L1 housing Revision 01/2019 EN... -
Page 18: Remove The Cube L1
Cube L1 Remove the Cube L1 Turn off the laser source. Ensure that moving parts, e.g. robot arms, etc. are at a standstill and that they cannot be set in motion unintentionally. Unscrew the mounting screws from the mounting threads (see Fig. 8.3 on page 17). -
Page 19: Connections
Cube L1 Connections Safety interlock connection Micro-USB socket Fig. 9.1: Connections Safety interlock At temperatures over 200 °C, the safety interlock is triggered in order to protect the absorber from overheating. If the absorber is hotter than 200 °C, Pin 3 and Pin 4 will connect. -
Page 20: Micro-Usb Socket
When using the optional LaserDiagnosticsSoftware LDS (not included in delivery), the device communicates with the LDS via the micro-USB socket or bluetooth. You will find the PRIMES USB-driver for all USB-capable devices on the PRIMES web- site at: https://www.primes.de/en/support/downloads/software.html. Bluetooth A class 1 Bluetooth interface is integrated in the device. -
Page 21: Control Elements
Press again for 2 seconds Turn over measuring value display Tab. 10.1: On/Off button Display on the Cube L1 Laser power in Watt Battery capacity Absorber temperature Bluetooth connection Status message active/inactive Fig. 11.1: Display on the Cube L1 Revision 01/2019 EN... -
Page 22: Status Messages
Cube L1 11.1 Status messages Status message Meaning Waiting for laser beam The device is ready for operation, the laser can be turned on. Check temp. The temperature gradient (change in the absorber temperature/time) is checked. Please wait until the message disappears. Thereafter, the device is ready to measure again. -
Page 23: Important Information For Measuring With The Cube L1
Cube L1 Important information for measuring with the Cube L1 12.1 Safety instructions DANGER Severe eye or skin injury due to laser radiation During the measurement the laser beam is guided on the device, which causes scattered or directed reflection of the laser beam (laser class 4). -
Page 24: Laser Parameter Setting
Cube L1 12.2 Laser parameter setting 12.2.1 Setting the laser rise time The applicable measurement time is between 0.1 s and 2.0 s, which has to be trans- ferred to the laser controller as pulse length. The maximum laser rise time for measuring the power cannot exceed 100 µs. -
Page 25: 12.2.2 Minimum Energy Per Single Measurement
Cube L1 12.2.2 Minimum energy per single measurement The energy used for the measurement must achieve a sufficiently high temperature in the absorber to be recorded with high precision. Typically, an energy of approx. 500 J is recommended, as long as the measuring duration is < 2 s. -
Page 26: Series Measurement
Cube L1 12.3 Series measurement Always start a measurement series with the smallest power and increase it gradually. Small amounts of energy should be measured with absorber temperatures that are close to the ambient temperature. In general: The minimum amount of irradiated energy should amount to approximately twenty times the difference of the absorber temperature minus room temperature, so at least 200 J. -
Page 27: Measurement With Pulsed Lasers
Cube L1 12.4 Measurement with pulsed lasers When it comes to pulsed laser radiation a correct exposure time measurement up to a pulse frequency of 10 kHz and a duty cycle of 50 % is possible. In case of on/off times shorter than 50 μs a correct exposure time measurement is not possible. -
Page 28: Measuring With The Cube L1
Please read chapter 12, „Important information for measuring with the Cube L1“, on page 23 first. 13.1 Start measurement Measurements with the Cube L1 should be performed exclusively with a static (unmov- ing) laser beam. Observe the safety instructions in chapter 12.1 on page 23. Press the on/off button. - Page 29 Cube L1 To access the following windows, press the on/off button for approx. 2 seconds. The window displays the following mea- surement values: • Laser power in W • Absorber temperature in °C • Corrected burst duration in ms (Time) With a cw laser, the max. power of the laser is displayed in W (Pk Pow).
-
Page 30: Measuring Results Display
13.2 Measuring results display The last 14 measuring values can be read off from the display of The Cube L1. You can read off the last 30 measuring values with the optional Android™ PRIMES Cube App for mobile devices or optional LaserDiagnosticsSoftware LDS. -
Page 31: Measuring With The Optional Laserdiagnosticssoftware Lds
Cube L1 Measuring with the optional LaserDiagnosticsSoftware LDS This chapter aims to provide some basic information as you get to know the Cube L1, discussing the example of a measurement with the LaserDiagnosticsSoftware LDS. For a detailed description of the software installation, file management and evaluation of the mea- sured data, please refer to the separate operating manual LaserDiagnosticsSoftware LDS. -
Page 32: Select Measurement Mode Cw Operation Or Pulse Operation
Cube L1 14.2 Select measurement mode CW Operation or Pulse Operation The Cube L1 is established as a connected device. Click on the connected device. Click on the CW Operation/Pul- se Operation button or on the drop-down list CW Operation/Pulse Opera- tion. -
Page 33: Make Settings For Power Saving Functions And Automatic Measurement Readiness
Cube L1 14.3 Make settings for power saving functions and automatic measure- ment readiness In the LaserDiagnosticsSoftware LDS you can make additional settings for power saving functions and the auto- matic measurement readiness. Enter the desired settings in the Device control. -
Page 34: Start Measurement
Cube L1 14.4 Start measurement Measurements with the Cube L1 should be performed exclusively with a static (unmov- ing) laser beam. The measurement in the Cube L1 starts when the laser is switched on. The display field Start is therefore not active. -
Page 35: Measuring Results Display
Cube L1 14.5 Measuring results display 14.5.1 Displays in the toolbench CW Measurement or Pulse Measurement The measuring results are displayed in the opened toolbenchs once the measurement has been completed (see below). By clicking on the gear symbol you can adjust the displayed parameters. -
Page 36: 14.5.2 Displays In The Toolbench Cube Series
Press the Load measurements button in the device control. The last 30 measurements are readout from the Cube L1 and the measuring values are displayed in the left table. Click on the arrow in the column Use to transfer the measuring values to the analysis table. -
Page 37: Load And Delete Measuring Values
Cube L1 14.6 Load and delete measuring values The Cube L1 stores the measured values in an internal memory. The measuring values can be displayed and deleted in the LaserDiag- nosticsSoftware LDS. Click on the Load measure- ments button. •... -
Page 38: Measuring With The Optional Cube App
Switch off the device after an entered time Tab. 15.1: Functions and settings Please find detailed information on the operation of the Cube App in the separate op- erating instructions Cube App. These can be found on the PRIMES website at: https:// www.primes.de/en/support/downloads/operating-manuals.html. Revision 01/2019 EN... - Page 39 The operator is responsible for determining the maintenance intervals for the measuring device. PRIMES recommends a maintenance interval of 12 months for inspection and validation or calibration. If the device is used only sporadically, the maintenance interval can also be extended up to 24 months.
- Page 40 Cube L1 CAUTION Burns due to hot components After a measurement the optics below the protective window is hot! Unintentional contact during the protective window exchange could lead to burns. X Do not replace the protective window directly after a measurement.
- Page 41 Check for secure fit of the protective window holder: • The protective window holder must lie flat against the device. Torx screws M3 x 6 mm Protective win- dow holder Protective window O-ring Optics Fig. 16.1: Exchanging the protective window on the Cube L1 Revision 01/2019 EN...
- Page 42 PRIMES is a registered manufacturer in the German “Used Appliances Register“ (Elektro-Altgeräte-Register “EAR“) with the number WEEE-reg.-no. DE65549202. Provided that you are located in the EU, you are welcome to send your PRIMES devices to the following address, where they will be disposed free of charge (this service does...
- Page 43 Cube L1 Declaration of conformity Revision 01/2019 EN...
- Page 44 Cube L1 Technical data Measurement parameters Power range 200 – 16 000 W Wavelength range 1 030 – 1 090 nm Beam diameter on the protective window 1 – 7 mm Max. power density on the protective window 250 kW/cm² Irradiation time 0,1 – 2,0 s (depending on laser power) Min.
- Page 45 Cube L1 Supply Data Power supply Integrated lithium-ion battery, which can be charged via a micro-USB port Temperature range for charging the lithium- 0 – 45 °C Ion battery Communication Interfaces USB/Bluetooth Dimensions and Weight Dimensions (L x W x H) 92 x 97 x 110 mm...
- Page 46 Cube L1 Dimensions Ø 50 35,5 View X All dimensions in mm (general tolerance ISO 2768-v) Revision 01/2019 EN...
- Page 47 Cube L1 Appendix 21.1 System control (option) An optional connection to the system control is available. Please contact your PRIMES sales partner with any questions. An overview of the PRIMES sales contacts can be found under www.primes.de/en/contact.html or www.primes.de/en/worldwide.html. Revision 01/2019 EN...
- Page 48 PRIMES GmbH Max-Planck-Str. 2 64319 Pfungstadt Germany Tel +49 6157 9878-0 info@primes.de www.primes.de...
Need help?
Do you have a question about the Cube L1 and is the answer not in the manual?
Questions and answers