CoverCraft CARVER Bimini Top Installing
Hide thumbs
Also See for CARVER Bimini Top:
- Installing (2 pages) ,
- Assembly and installation (4 pages)
Advertisement
Quick Links
BETTER COVERS. BETTER SERVICE.
How To Prolong The Life
Of Your Bimini Top
• Avoid letting water or snow
stand on the top.
• Always travel with top in the
stored position.
• Allow Bimini Top to dry
thoroughly before folding
for storage.
Please enclose a note describing the
defect and be sure to include your full
name and address inside the package.
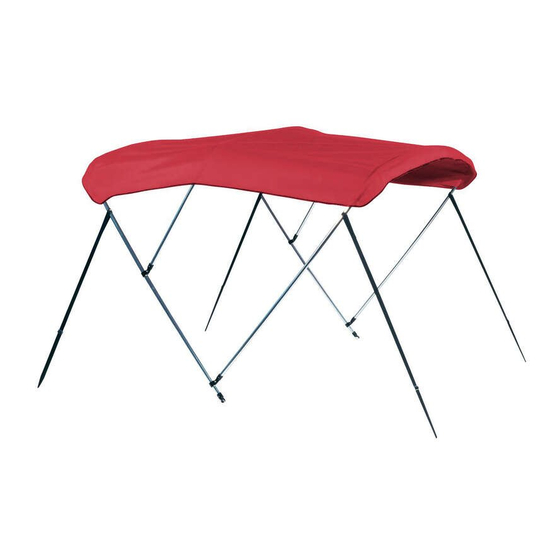
Installing A Carver Bimini Top
Carver Bimini Tops are a classy way to protect yourself and your boat from the
elements. They also add style and color to your boat. These instructions make
assembly and installation easy. Please read them carefully before beginning.
Important: Make sure all parts are included in your Bimini Top package. The quantities listed below are the
quantities of parts needed based on the size of the top that was ordered. You may receive additional parts
that are not needed for your particular size of bimini top.
TUBe PONTOON TOPS, PLeASe ReFeR TO THe SUPPLeMeNTAL INSTRUCTIONS ON PAge 5 WHICH
eXPLAIN ALTeRNATe PARTS NOT LISTed BeLOW.
PArTS LiST:
item
No. 8 screws, 1/2" length
No. 10 screws, 1" length
Finish Washers
Long, metal side bow sections
Medium, metal side bow sections
Short, metal side bow sections
Center metal cross bow sections (equal length)
Black, 1" polypropylene hold-down straps
Black, 1" polypropylene adjuster straps
(packaged with canvas)
Bimini Top Canvas
Deck Hinges
Eye Straps
Optional Storage Boot
Brace Kit (pair)
Minimum tools needed:
Drill with 9/64" bit, a Phillips head and a flat head screwdriver, pencil.
Also helpful: Tape measure or other measuring device.
Polypropylene
Hold-Down Straps
Polypropylene
Adjuster Straps
2 Bow Tops
12
12
4
2
0
2
2
4
0
1
2
4
1
0
Universal
Deck Hinges
Short, Medium, and Long Metal Side Bow Sections
Eye Straps
No. 8, No. 10 Screws,
and Finish Washers
!
Please take extra care when
unpacking and assembling your
bimini top. Should you need to
return the bimini top, it MUST
be in its original, new condition.
The bimini top canvas must
be clean and dry, and free of
debris (including pet hair).
Frame components must not be
scratched.
!
FOR STAINLeSS STeeL TOPS ANd SqUARe
Quantities for:
3 Bow Tops 4 Bow Tops
16
20
12
12
4
4
2
2
2
2
2
4
3
4
4
4
2
4
1
1
2
2
4
4
1
1
0
0
Center Metal Cross Bow Section
4-Bow Square
Tube Tops
20
12
2
2
2
4
4
2
4
1
2
2
1
1
1
Advertisement

Related Manuals for CoverCraft CARVER Bimini Top


Summary of Contents for CoverCraft CARVER Bimini Top
- Page 1 Installing A Carver Bimini Top Carver Bimini Tops are a classy way to protect yourself and your boat from the elements. They also add style and color to your boat. These instructions make BETTER COVERS. BETTER SERVICE. assembly and installation easy. Please read them carefully before beginning.
- Page 2 INSTRUCTIONS FOR CARVeR 2 BOW BIMINI TOP These instructions show how to assemble the top, with its frame and straps, starting upside down and inverting to an upright position when attaching to your boat. Step 1 identify the hook shaped, long and short metal side bow sections.
- Page 3 INSTRUCTIONS FOR CARVeR 3 BOW BIMINI TOP FOR STAINLeSS STeeL TOPS, PLeASe ReFeR These instructions show how to assemble the top, with its frame and straps, starting upside down TO THe SUPPLeMeNTAL and inverting to an upright position when attaching to your boat. INSTRUCTIONS ON PAge 5 Step 1 identify the hook shaped, long, medium, and short metal side bow sections.
- Page 4 INSTRUCTIONS FOR CARVeR 4 BOW BIMINI TOP FOR STAINLeSS STeeL TOPS, PLeASe ReFeR These instructions show how to assemble the top, with its frame and straps, starting upside down TO THe SUPPLeMeNTAL and inverting to an upright position when attaching to your boat. INSTRUCTIONS ON PAge 5 Step 1 identify the hook shaped, long, medium, and short metal side bow sections.
- Page 5 Square Tube Pontoon Bimini Top Follow Instructions for 4-Bow Top with these exceptions: Step 7. The long bow has a jaw slide installed to mount the brace kit, instead of the pre-drilled hole Additional Instructions for Buggy-Style for the hold-down strap. (See photo on label.) Pontoon Top with Tails: 1.
- Page 6 Additional Instructions for Adjusting Height of a standard 35” Super Sport or standard 46” 3-Bow Bimini Top. if you wish to shorten the height of the above style bimini tops, you may do so by carefully drilling out the rivets using a 3/16”...
- Page 7 INSTALLINg THe BIMINI Please Note: The process of assembling the Step 5. Mark the position of the eye TOP ON THe BOAT straps on the gunwale of the boat, bimini frame may cause the width of the measuring to make sure they are exactly frame to expand or retract at the mounting opposite each other on the sides of the points.
- Page 8 Installing a Carver Slide Track Kit Carver Slide Track Kits are available in 18” , 24”, 36”, 48” and 60” lengths to accommodate virtually any boat and bimini top. All Slide Track Kit packages contain: Standard Mount Fittings 2 - Aluminum Slide Tracks 2 - Sliding Deck Hinges with combined Slide Locks 2 - Side-Mount Sliding Deck Hinges 2 - Slide Locks (for use with side-mount hinges)
- Page 9 Carver Square Tube Bimini Top with Zippered Sleeves Assembly and Installation Instructions Carver Bimini Tops are a classy way to protect yourself and your boat from the elements. They also add style and color to your boat. These instructions make assembly and installation easy.
- Page 10 These instructio s show how to assemble the top, with its frame and straps, starting upside down and inverting to an upright posi on when a aching A-Bow to your boat. Step 1. Identi y the hook shaped, long A-bow, medium B-bow, and short C- bow frame parts (as shown in gure 1).
- Page 11 Installing the Bimini Top on the boat Please Note: The process of assembling the bimini frame may cause the width of the frame to expand or retract at the mounting points. If the frame appears too wide or too narrow when you are ready to mount the top on the boat, simply mount one side and, with minimal force, push or pull the opposite side to fit the mounting point on the opposite side.
- Page 12 Square Tube Dual Pontoon Top Assembly & Installation Please take extra care when unpacking and assembling your bimini top. Should you need to return the bimini top, it MUST be in its original, new condition. The bimini top canvas must be clean and free of debris (including pet hair).
- Page 13 Step 5. Pass the looped end of each hold-down strap over each end of the medium (front) bow. ⑥ Use a ½” No. 8 screw to fasten strap to bow frame at each pre-drilled hole position as shown. Position strap over hole and insert screw, with finish washer, through center of strap and into pre- drilled hole.
- Page 14 Universal Tower Bimini Top Parts List (UPS-Able) Quantity Quantity with Quantity with Item Per Top Single Brace Option Double Brace Option No. 8 screws, 1/2" length No. 10 screws, 1" length Finish washers Long, metal side bow sections Medium, metal side bow sections Short, metal side bow sections Center metal cross bow sections Black polypropylene hold-down straps...
- Page 15 Universal Tower Bimini Top Assembly Instructions These instructions show how to assemble the top, with its frame and straps, starting upside down and inverting to an upright position when attaching to your boat. Step 1. Spread the Bimini Top metal out on a flat, clean surface. All bow’s are color coordinated with stickers.
- Page 16 Universal Tower Bimini Top Installation Instructions 1. Place the folded bimini top in the storage boot. 2. Using the straps on the boot, secure the bimini to the top of the tower adjusting the straps to the desired storage height (typically beneath the speakers, if applicable).
- Page 17 Universal Tower Bimini Top Parts List (Pre-Assembled) Quantity Quantity with Quantity with Item Per Top Single Brace Option Double Brace Option No. 10 screws, 1" length Black polypropylene hold-down straps Bimini Top Canvas Bimini Top Storage Boot Tower Clamps Rubber Gaskets Thumb Screws ¼”...
- Page 18 Universal Tower Bimini Top Installation Instructions 1. Using the straps on the boot, secure the bimini to the top of the tower adjusting the straps to the desired storage height (typically beneath the speakers, if applicable). 2. Prepare to install the tower clamps. Clamps are standard 2-3/8” inside diameter.
Need help?
Do you have a question about the CARVER Bimini Top and is the answer not in the manual?
Questions and answers