Advertisement
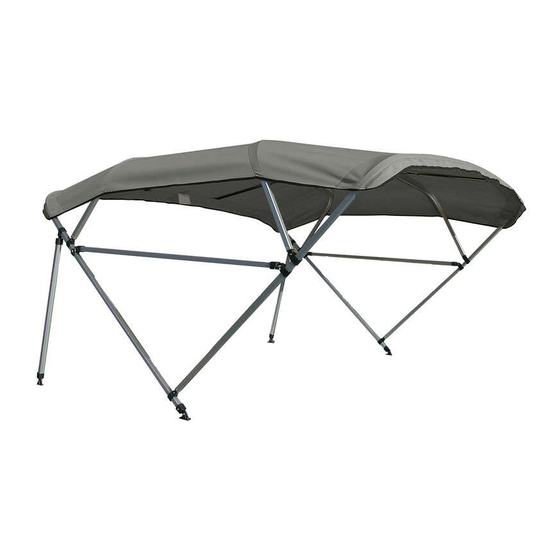
These instructions show how to assemble the top, with its frame and straps, starting upside down and inverting to an
upright position when attaching to your boat.
1.
Identify the hook shaped, long, medium, and short metal side
bow sections. Using the long side bow sections and one of the
center cross bow sections, assemble the side bow and center
bow parts as shown, aligning the pre-drilled holes. Use the
1/2", No. 8 screws to connect the bow parts securely. Repeat
this procedure for both the medium and short bows, aligning
the pre-drilled holes and securing them with 1/2" No. 8 screws.
Caution: If screw heads become burred, cover heads with duct tape
or file down screw heads to avoid damage to canvas.
2.
Spread the Bimini Top canvas out on a flat, clean area with the
bottom side up. Sewn-in label indicates the bottom, or inside,
and the back of the top.
3.
With the bows assembled, insert the medium bow
assembly through the sleeve at the front of top. (This is the
sleeve opposite the end with the sewn-in tag.) Note the
position of the single pre-drilled holes on the bow frame.
(Holes should be facing toward the middle of the canvas.)
Insert the short bow assemblies through the small sleeves in
the center of the top and the long bow assembly through the
sleeve at the back of the top (nearest the sewn-in tag). Again,
note the position of the single pre-drilled holes on the long
bow frame. (Holes should be facing toward the middle of the
canvas.)
4.
Pass the buckled end of the adjuster strap through opening
in the fabric and around the long bow. Thread looped end
through buckle. Attention should be paid to the orientation
of the strap and buckle so that the finished piece resembles
photo A. Pass the looped end of the strap over the end of
the short bow and slide down into position directly across
from opening in fabric where buckled end is attached. (See
illustration). Leave at maximum length. Repeat this step for
the second strap then assemble the straps for the front bow.
See enlargement.
5.
Connect short frame ends to jaw slides on each side of long
bow frame. Frame ends can be rotated to align with jaw slides.
Repeat for medium frame ends as shown. Jaw slides should
allow bows to pivot, but be tight enough to hold securely.
6.
The long bow has a pre-installed jaw slide to mount the rear
brace kit. The recommended mounting location of the braces
is 47" aft of the main deck hinge.
7.
To install the front horizontal brace, slide the pre-installed jaw
slides up to rest against the short bows. Do not tighten. Insert
the braces into the jaw slides and slide the jaw slides down
approximately 2 1/2" until firmly set, then tighten set screws.
Carver by Covercraft Industries, LLC
More Information at CarverCovers.com
or call (888) 48-COVER.
Instructions for Free Standing Pontoon Bimini Top
1
2
3
4
A
(Adjuster straps will be
used to achieve desired
crown on Bimini Top after
installation on boat. See
enlargement on pg. 6).
Scan code to watch our
online assembly video.
212 N. Lyles Ave., Landrum, SC 29356
The Best Covers Under the Sun™
Advertisement
Table of Contents

Related Manuals for CoverCraft Carver Free Standing Pontoon Bimini Top


Summary of Contents for CoverCraft Carver Free Standing Pontoon Bimini Top
- Page 1 Scan code to watch our online assembly video. approximately 2 1/2” until firmly set, then tighten set screws. Carver by Covercraft Industries, LLC 212 N. Lyles Ave., Landrum, SC 29356 More Information at CarverCovers.com The Best Covers Under the Sun™...
- Page 2 CAUTION: If mounting your Bimini Top to a windshield, you may need shorter screws to prevent cracking the windshield. Please call us at (888) 48-COVER for shorter screws. Parts List for Carver Free Standing Pontoon Bimini Top Item QTY Included No.
Need help?
Do you have a question about the Carver Free Standing Pontoon Bimini Top and is the answer not in the manual?
Questions and answers