Table of Contents
Advertisement
Quick Links
3
1
Quick Start Guide
EN
คู ่ ม ื อ เริ ่ ม ต้ น อย่ ำ งย่ อ
TH
6
Hướng dẫn sử dụng nhanh
VI
7
快速使用指南
简
快速使用指南
繁
MiVue
730 Series
™
1
2
2
1
4
1
2
3
3
3
5
2
8
6
6
4
7
7
1
3
5
7
8
8
9
9
6
10
7
2
A
B
Menu
3
A
1
2
B
C
4
Revision: R01
(12/2018)
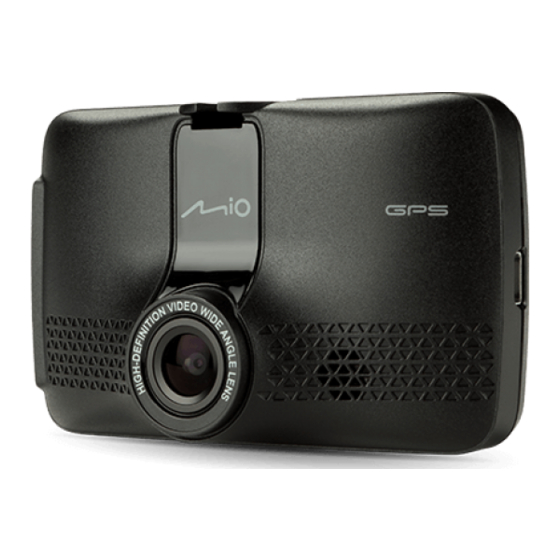
Getting to know your dash cam
4
1
Device mount socket
2
Mini-USB connector
3
LCD screen
3
4
System indicator
5
Microphone
5
Function keys
The device provides 4 function keys to control the corresponding
icons displayed on the LCD screen. The keys' functions may vary
on different screens.
A. Recording screen
1
Opens the Menu screen.
2
Enters the Parking mode.
6
3
Adds a custom safety
(speed) camera.
7
4
Manually starts an event
recording.
Using your dash cam in a vehicle
Caution: Do not operate the device while driving. Using this product does
not change the requirement for a driver to take full responsibility for his or her
behavior. This responsibility includes observing all traffic rules and regulations
in order to avoid accidents, personal injury or property damage.
A. Make sure that your car is parked on level ground. Follow the
instructions to securely mount your dash cam in a vehicle.
B. When adjusting the angle of mounting, make sure that the
camera's view is parallel with the level ground and the ground/
sky ratio is close to 6/4.
C. Route the cable through the top ceiling and the A-pillar so
that it does not interfere with driving. Make sure that the cable
installation does not interfere with the vehicle's airbags or
other safety features.
Note: The installation illustrations are for your reference only. If you encounter
any problems during installation, please contact a skilled installer (for
example, the service personnel of the vehicle) for assistance.
Using a memory card
Note: MiTAC does not guarantee the product's compatibility with memory
cards from all manufacturers.
The dash cam supports the Class 10 memory cards with 8 GB –
128 GB capacity.
Hold the card (MicroSD) by the edges and gently insert it into the
slot as shown in the illustration.
To remove a card, gently push the top edge of the card inwards
to release it and pull it out of the slot.
Formatting a card
To format a memory card (all data will be erased), press
Format.
Setting the date and time
To make sure that the date and time of your recordings are
correct, check the settings before you begin recording.
1. Press
2. Do one of the following:
•
Select Use GPS time, and then select the time zone of
your location. The system will set date and time according
4
4
to the GPS location.
10
6
10
Note: This feature is not available on all models.
5
5
•
Select Manual, and the system will display the date and
time setting screen. Use
9
8
9
the selected field; press
fields have been changed. When done, press
10
4
Continuous recording
10
The dash cam automatically turns on once the vehicle engine is
started. The system will automatically start continuous recording
5
shortly after start-up. The recording may be divided into several
video clips; recording will not stop between video clips.
8
9
Event recording
By default, if an event happens such as sudden impact, high-
speed driving, an aggressive turn or an accidental crash during
continuous recording, the G sensor will prompt the dash cam to
start an event recording. The event recording can last up to 1
minute if the sensor is triggered repeatedly during the recording.
Parking mode
Note: This feature is not available on all models.
To enable the function, press
1
> On.
2
When the Parking mode detection is enabled, the system will
enter Parking mode when the car stops moving for about 5
3
minutes. In the Parking mode, parking recordings could be
4
triggered only when movements or vibrations are detected. The
parking recording can last up to 1 minute if the sensor is triggered
repeatedly during the recording.
Camera mode
1
The dash cam allows you to take a photo:
2
Playback mode
3
1. Press
4
2. Select the desired type.
3. Select the desired file from the list and then press
start playback.
System settings
Note: Not all setting items and options are available for all models.
To customise the system settings, press
MiVue app
The MiVue app allows you to view, share and back up the videos
recorded on a MiVue dash cam via WIFI. Search for "MiVue" in
Apple App Store or in Google Play Store to download the app
for free.
Note: MiTAC does not guarantee the product's compatibility with smartphones
3
from all manufacturers.
Setting up a WIFI connection
1. Enable WIFI by selecting
2. On your smartphone, open the MiVue app and follow the on-
screen instructions to set up the connection.
Note: The WIFI connection between your Mio and smartphone is not
Internet-enabled.
MiVue Manager
MiVue Manager™ is a tool for you to view the videos recorded
on a MiVue™ dash cam. Download MiVue Manager from the
Support page of Mio™ website (www.mio.com/support) and
follow the on-screen prompts to install it.
Playing the recording files
1. Remove the memory card from the dash cam and access the
card on the computer via a card reader. You are advised to copy
the recording files to your computer for backup and playback.
2. Start MiVue Manager on the computer.
3. Double-click the desired file on the file list to start playback.
For more information
For the detailed information on using the dash cam, download
the User Manual from Mio website: www.mio.com
About GPS
Note: This feature is not available on all models.
GPS is operated by the United States government, which is
solely responsible for the performance of GPS. Any change to
the GPS system can affect the accuracy of all GPS equipment.
GPS satellite signals cannot pass through solid materials
(except glass). When you are inside a tunnel or building,
GPS positioning is not available. Signal reception can be
affected by situations such as bad weather or dense overhead
obstacles (such as trees, tunnels, viaducts and tall buildings).
The GPS positioning data is for reference only.
Declaration of conformity
For regulatory identification purposes, MiVue 730 Series is
assigned a model number of N583. Hereby, MiTAC declares that
this N583 is in compliance with the essential requirements and
other relevant provisions of Directive 2014/53/EU.
Visit Mio website (www.mio.com) for the full text of the declaration
for your device.
4
6
Power button (
) /
Function keys
7
Camera lens
8
Speaker
9
Memory card slot
10
5
Shutdown button
8
9
B. Menu screen
1
Acts as the BACK button.
2
Acts as the ENTER button.
3
Moves to the previous option.
4
Moves to the next option.
> Settings > Date/Time.
/
to adjust the value of
and repeat the step until all
.
> Parking Mode > Detection
> Camera >
> File Playback.
to
.
> WIFI > On.
EN
ท� ำ ควำมรู ้ จ ักกล้ อ งหน้ ำ รถของคุ ณ
10
1
ตั ว ยึ ด อุ ป กรณ์
2
ช่ อ งเสี ย บ Mini-USB
3
หน ้าจอ LCD
4
ไฟแสดงถสานะระบบสถานะ
5
ไมโครโฟน
คี ย ์ ฟ ั ง ก์ ช ั น
อุ ป กรณ์ ม ี ป ุ่ มฟั ง ก์ ช ั น 4 ปุ่ มเพื ่ อ ควบคุ ม ไอคอนที ่ แ สดงบนหน ้าจอ LCD
(ปุ่ มฟั ง ก์ ช ั น อาจแตกต่ า งกั น ไปตามหน ้าจอแต่ ล ะแบบ)
9
8
A. หน ้าจอบั น ทึ ก เหตุ ก ารณ์
1
เปิ ด หน้ า จอ "เมนู "
2
เข้ า สู ่ โ หมดการบั น ทึ ก ขณะจอด
3
เพิ ่ ม กล้ อ งความปลอดภั ย
(กล้ อ งตรวจจั บ ความเร็ ว )
แบบก� า หนดเอง
4
เริ ่ ม การบั น ทึ ก เหตุ ก ารณ์ ด ้ ว ยตนเอง
กำรใช ้ ก ล้ อ งหน้ ำ รถในยำนพำหนะ
ค� ำ เตื อ น: ห ้ามใช ้งานอุ ป กรณ์ ใ นขณะขั บ ขี ่ การใช ้ผลิ ต ภั ณ ฑ์ น ี ้ ไ ม่ ไ ด ้
เปลี ่ ย นแปลงข ้อก� า หนดที ่ ผ ู ้ขั บ ขี ่ ต ้องรั บ ผิ ด ชอบต่ อ พฤติ ก รรมการขั บ ขี ่
ของตนเองทั ้ ง หมด ความรั บ ผิ ด ชอบนี ้ ร วมไปถึ ง การปฏิ บ ั ต ิ ต ามข ้อบั ง คั บ
และกฎจราจรทั ้ ง หมด เพื ่ อ หลี ก เลี ่ ย งอุ บ ั ต ิ เ หตุ การบาดเจ็ บ ของบุ ค คล
หรื อ ความเสี ย หายต่ อ ทรั พ ย์ ส ิ น
A. ตรวจให ้แน่ ใ จว่ า รถของคุ ณ จอดหยุ ด นิ ่ ง และดั บ เครื ่ อ งยนต์ แ ล ้ว ท� า
ตามค� า แนะน� า เพื ่ อ ติ ด ตั ้ ง กล ้องหน ้ารถในยานพาหนะอย่ า งมั ่ น คง
B. เมื ่ อ ท� า การปรั บ ตั ว ยึ ด ให ้แน่ ใ จว่ า มุ ม มองของกล ้องขนานกั บ พื ้ น ที ่ ไ ด ้
ระดั บ และอั ต ราส่ ว นของพื ้ น ดิ น และท ้องฟ้ า อยู ่ ท ี ่ 6/4
C. เดิ น สายผ่ า นเพดานด ้านบนและเสา A เพื ่ อ ไม่ ใ ห ้สายเป็ นอุ ป สรรคต่ อ
การขั บ ขี ่ ตรวจให ้แน่ ใ จว่ า การติ ด ตั ้ ง สายไม่ ไ ปขั ด ขวางการท� า งานของ
ถุ ง ลมนิ ร ภั ย หรื อ คุ ณ สมบั ต ิ ด ้านความปลอดภั ย อื ่ น ๆ ของยานพาหนะ
หมำยเหตุ : ภาพประกอบส� า หรั บ การติ ด ตั ้ ง นี ้ ม ี ไ ว ้เพื ่ อ ให ้คุ ณ ใช ้อ ้างอิ ง
เท่ า นั ้ น หากคุ ณ พบปั ญ หาใดๆ ในระหว่ า งการติ ด ตั ้ ง โปรดติ ด ต่ อ เจ ้า
หน ้าที ่ ต ิ ด ตั ้ ง ที ่ เ ชี ่ ย วชาญ (เช่ น พนั ก งานบริ ก ารของยานพาหนะดั ง กล่ า ว)
เพื ่ อ ขอรั บ ความช่ ว ยเหลื อ
กำรใช ้ ก ำร์ ด หน่ ว ยควำมจ� ำ
หมำยเหตุ : MiTAC ไม่ ร ั บ ประกั น ว่ า ผลิ ต ภั ณ ฑ์ จ ะสามารถใช ้ร่ ว มกั บ การ์ ด
หน่ ว ยความจ� า ได ้จากผู ้ผลิ ต ทุ ก ราย
กล ้องหน ้ารถรองรั บ การ์ ด หน่ ว ยความจ� า Class 10 ที ่ ม ี ค วามจุ 8 GB –
128 GB
จั บ การ์ ด (MicroSD) ตรงขอบ แล ้วค่ อ ยๆ ใส่ ล งในช่ อ งตามที ่ แ สดงไว ้ใน
ภาพประกอบ
หากต ้องการถอดการ์ ด ออก ให ้ค่ อ ยๆ กดขอบด ้านบนของการ์ ด เข ้าไป
ข ้างในเพื ่ อ ปลดการ์ ด แล ้วดึ ง ออกจากช่ อ ง
กำรฟอร์ แ มตกำร์ ด
วิ ธ ี ก ารฟอร์ แ มตการ์ ด หน่ ว ยความจ� า (ข ้อมู ล ทั ้ ง หมดจะถู ก ลบออก) กด
>
> ฟอร์ แ มต
กำรต ั ้ งค่ ำ ว ันที ่ แ ละเวลำ
วิ ธ ี ต รวจสอบว่ า ข ้อมู ล และเวลาของคุ ณ ถู ก ต ้อง ให ้ตรวจสอบการตั ้ ง ค่ า ก่ อ น
เริ ่ ม บั น ทึ ก เหตุ ก ารณ์
1. กด
> ต ั ้ งค่ ำ > ว ัน/เวลำ
2. ท� า หนึ ่ ง ในรายการต่ อ ไปนี ้
เลื อ ก ใช ้ เ วลำ GPS จากนั ้ น เลื อ กเขตเวลาส� า หรั บ สถานที ่ ข อง
คุ ณ ระบบจะตั ้ ง ค่ า วั น ที ่ แ ละเวลาตามต� า แหน่ ง GPS
หมำยเหตุ : คุ ณ สมบั ต ิ น ี ้ ไ ม่ ส ามารถใช ้งานได ้ในบางรุ ่ น
เลื อ ก ตนเอง แล ้วระบบจะแสดงหน ้าจอตั ้ ง ค่ า วั น ที ่ แ ละเวลา ใช ้
/
เพื ่ อ ปรั บ ค่ า ของช่ อ งที ่ เ ลื อ ก กด
ตามขั ้ น ตอนซ� ้ า จนกว่ า ช่ อ งทั ้ ง หมดจะมี ก ารเปลี ่ ย นแปลง เมื ่ อ เสร็ จ
สิ ้ น กด
กำรบ ันทึ ก ต่ อ เนื ่ อ ง
กล ้องหน ้ารถจะเปิ ด โดยอั ต โนมั ต ิ เ มื ่ อ รถยนต์ ต ิ ด เครื ่ อ ง ระบบจะเริ ่ ม ท� า การ
บั น ทึ ก ต่ อ เนื ่ อ งโดยอั ต โนมั ต ิ ใ นไม่ ช ้าหลั ง จากล ้องเปิ ด การบั น ทึ ก จะได ้รั บ
การแบ่ ง ออกเป็ นวิ ด ี โ อหลายๆ คลิ ป ซึ ่ ง การบั น ทึ ก จะไม่ ห ยุ ด ในระหว่ า ง
คลิ ป วิ ด ี โ อแต่ ล ะครั ้ ง
กำรบ ันทึ ก เหตุ ก ำรณ์ ฉ ุ ก เฉิ น
ตามค่ า เริ ่ ม ต ้น หากมี เ หตุ ก ารณ์ เ กิ ด ขึ ้ น เช่ น การชนอย่ า งกะทั น หั น การขั บ
รถด ้วยความเร็ ว สู ง การหั ก เลี ้ ย วอย่ า งรุ น แรง หรื อ การชนที ่ เ ป็ นอุ บ ั ต ิ เ หตุ ใ น
ระหว่ า งการบั น ทึ ก ต่ อ เนื ่ อ ง เซ็ น เซอร์ G จะสั ่ ง ให ้กล ้องหน ้ารถเริ ่ ม ท� า การ
บั น ทึ ก เหตุ ก ารณ์ ฉ ุ ก เฉิ น การบั น ทึ ก เหตุ ก ารณ์ ฉ ุ ก เฉิ น จะอยู ่ ไ ด ้สู ง สุ ด ถึ ง 1
นาที หากเซ็ น เซอร์ ไ ด ้รั บ ค� า สั ่ ง ให ้ท� า งานอี ก ครั ้ ง ในระหว่ า งการบั น ทึ ก
โหมดกำรจอด
หมำยเหตุ : คุ ณ สมบั ต ิ น ี ้ ไ ม่ ส ามารถใช ้งานได ้ในบางรุ ่ น
หากต ้องการเปิ ด ใช ้ฟั ง ก์ ช ั น นี ้ กด
จ ับ > เปิ ด
หากเปิ ด ใช ้งานการตรวจจั บ โหมดการจอด ระบบจะเข ้าสู ่ โ หมดการจอด
เมื ่ อ รถหยุ ด การเคลื ่ อ นที ่ เ ป็ นเวลา 5 นาที ในโหมดการจอด การบั น ทึ ก
ขณะจอดจะท� า ได ้ก็ ต ่ อ เมื ่ อ ตรวจพบการเคลื ่ อ นที ่ ห รื อ การสั ่ น สะเทื อ น
เท่ า นั ้ น การบั น ทึ ก ขณะจอดจะอยู ่ ไ ด ้สู ง สุ ด ถึ ง 1 นาที หากเซ็ น เซอร์ ไ ด ้
รั บ ค� า สั ่ ง ให ้ท� า งานอี ก ครั ้ ง ในระหว่ า งการบั น ทึ ก
โหมดกล้ อ ง
กล ้องติ ด รถยนต์ ส ามารถถ่ า ยภาพได ้ กด
.
โหมดกำรเล่ น วี ด ี โ อย้ อ นหล ัง
> วิ ด ี โ อย้ อ นหล ัง
1. กด
2. เลื อ กประเภทที ่ ต ้องการ
3. เลื อ กไฟล์ ท ี ่ ต ้องการจากรายการ จากนั ้ น กด
กำรต ั ้ งค่ ำ ระบบ
หมำยเหตุ : ในบางรุ ่ น อาจไม่ ม ี ต ั ว เลื อ กและรายการตั ้ ง ค่ า บางรายการ
หากต ้องการปรั บ แต่ ง การตั ้ ง ค่ า ระบบ ให ้กด
แอป MiVue
แอป MiVue ช่ ว ยให ้คุ ณ สามารถดู แชร์ และส� า รองข ้อมู ล วิ ด ี โ อที ่ บ ั น ทึ ก
ไว ้ในกล ้องหน ้ารถ MiVue ผ่ า น WIFI ได ้ ค ้นหา "MiVue" ใน App
Store ของ Apple หรื อ Google Play Store เพื ่ อ ดาวน์ โ หลดแอปได ้ฟรี
หมำยเหตุ : MiTAC ไม่ ร ั บ ประกั น ว่ า ผลิ ต ภั ณ ฑ์ จ ะสามารถใช ้ร่ ว มกั บ สมา
ร์ ท โฟนได ้จากผู ้ผลิ ต ทุ ก ราย
กำรต ั ้ งค่ ำ กำรเช ื ่ อ มต่ อ WIFI
1. เปิ ด ใช ้ WIFI โดยเลื อ ก
2. บนสมาร์ ท โฟนของคุ ณ ให ้เปิ ด แอป MiVue แล ้วท� า ตามค� า แนะน� า บน
หน ้าจอเพื ่ อ ตั ้ ง ค่ า การเชื ่ อ มต่ อ
หมำยเหตุ : ระหว่ า งการเชื ่ อ มต่ อ ไวไฟระหว่ า งโทรศั พ ท์ ก ั บ Mio
สั ญ ญาณอิ น เตอร์ เ น็ ต ในโทรศั พ ท์ จ ะใช ้ไม่ ไ ด ้
MiVue Manager
MiVue Manager™ เป็ นเครื ่ อ งมื อ ที ่ ค ุ ณ สามารถใช ้เพื ่ อ ดู ว ิ ด ี โ อที ่ บ ั น ทึ ก
ไว ้ในกล ้องหน ้ารถ MiVue™ ได ้ ดาวน์ โ หลด MiVue Manager จากหน ้า
การสนั บ สนุ น ของเว็ บ ไซต์ Mio™ (www.mio.com/support) และท� า
ตามค� า แนะน� า บนหน ้าจอเพื ่ อ ท� า การติ ด ตั ้ ง
กำรเล่ น ไฟล์ ท ี ่ บ ันทึ ก ไว้
1. ถอดการ์ ด หน่ ว ยความจ� า ออกจากกล ้องหน ้ารถและเข ้าใช ้งานการ์ ด ใน
คอมพิ ว เตอร์ ผ ่ า นทางการ์ ด รี ด เดอร์ ขอแนะน� า ให ้คุ ณ คั ด ลอกไฟล์ ท ี ่
บั น ทึ ก ไว ้ลงในคอมพิ ว เตอร์ ข องคุ ณ เพื ่ อ ส� า รองข ้อมู ล และเล่ น ไฟล์
2. เปิ ด MiVue Manager ในคอมพิ ว เตอร์
3. คลิ ก สองครั ้ ง ที ่ ไ ฟล์ ท ี ่ ต ้องการในรายการไฟล์ เ พื ่ อ เล่ น ไฟล์
ข้ อ มู ล เพิ ่ ม เติ ม
หากต ้องการข ้อมู ล โดยละเอี ย ดเกี ่ ย วกั บ การใช ้กล ้องหน ้ารถ ให ้
ดาวน์ โ หลด คู ่ ม ื อ ผู ้ใช ้ จากเว็ บ ไซต์ Mio: www.mio.com
เกี ่ ย วก ับ GPS
หมำยเหตุ : คุ ณ สมบั ต ิ น ี ้ ไ ม่ ส ามารถใช ้งานได ้ในบางรุ ่ น
รั ฐ บาลสหรั ฐ อเมริ ก าเป็ นผู ้ให ้บริ ก าร GPS โดยถื อ เป็ นผู ้รั บ ผิ ด ชอบต่ อ
ประสิ ท ธิ ภ าพในการท� า งานของ GPS แต่ เ พี ย งผู ้เดี ย ว การเปลี ่ ย นแป
ลงใดๆ กั บ ระบบ GPS อาจส่ ง ผลต่ อ ความถู ก ต ้องแม่ น ย� า ของอุ ป กรณ์
GPS ทั ้ ง หมด
สั ญ ญาณดาวเที ย ม GPS ไม่ ส ามารถส่ ง ผ่ า นทะลุ ว ั ส ดุ ท ี ่ เ ป็ นของแข็ ง
(ยกเว ้นกระจก) ได ้ หากคุ ณ อยู ่ ใ นอุ โ มงค์ ห รื อ สิ ่ ง ปลู ก สร ้าง การหา
ต� า แหน่ ง GPS จะไม่ ส ามารถใช ้งานได ้ การรั บ สั ญ ญาณอาจได ้รั บ
ผลกระทบจากสถานการณ์ ต ่ า งๆ เช่ น สภาพอากาศที ่ เ ลวร ้ายหรื อ สิ ่ ง
ขี ด ขวางเหนื อ หั ว ที ่ ห นาแน่ น (เช่ น ต ้นไม ้ อุ โ มงค์ และตึ ก สู ง )
ข ้อมู ล การหาต� า แหน่ ง GPS มี ไ ว ้ส� า หรั บ อ ้างอิ ง เท่ า นั ้ น
ประกำศเรื ่ อ งควำมสอดคล้ อ ง
เพื ่ อ จุ ด ประสงค์ ด ้านการระบุ ต ามข ้อบั ง คั บ หมายเลขรุ ่ น ของ MiVue 730
Series คื อ N583 เป็ นไปตามข ้อก� า หนดที ่ จ � า เป็ นและบทบั ญ ญั ต ิ ท ี ่ เ กี ่ ย ว
ข ้องอื ่ น ๆ ของกฎระเบี ย บเลขที ่ 2014/53/EU
เยี ่ ย มชมเว็ บ ไซต์ Mio (www.mio.com) เพื ่ อ ดู ป ระกาศฉบั บ เต็ ม ส� า หรั บ
อุ ป กรณ์ ข องคุ ณ
TH
ปุ่ มเปิ ด -ปิ ด (
) /
6
10
ปุ่ มฟั ง ก์ ช ั ่ น
เลนส์ ก ล ้อง
7
ล� า โพง
8
ช่ อ งเสี ย บการ์ ด หน่ ว ยความจ� า
9
ปุ่ มปิ ด
10
B. หน ้าจอ "เมนู "
1
ท� า หน้ า ที ่ เ ป็ น ปุ ่ ม "BACK"
2
ท� า หน้ า ที ่ เ ป็ น ปุ ่ ม "ENTER"
3
กลั บ ไปที ่ ต ั ว เลื อ กก่ อ นหน้ า
4
ไปที ่ ต ั ว เลื อ กถั ด ไป
จากนั ้ น ท� า
> โหมดกำรจอด > กำรตรวจ
> กล้ อ ง >
เพื ่ อ เริ ่ ม การเล่ น
> WIFI > เปิ ด
Advertisement
Table of Contents

Related Manuals for Mio MiVue 730 Series


Summary of Contents for Mio MiVue 730 Series
- Page 1 ข ้องอื ่ น ๆ ของกฎระเบี ย บเลขที ่ 2014/53/EU Visit Mio website (www.mio.com) for the full text of the declaration เยี ่ ย มชมเว็ บ ไซต์ Mio (www.mio.com) เพื ่ อ ดู ป ระกาศฉบั บ เต็ ม ส� า หรั บ for your device.
- Page 2 2. Trên điện thoại thông minh, hãy mở ứng dụng MiVue và thực 建立无线网络联机 hiện theo các hướng dẫn trên màn hình để thiết lập kết nối. 建立無線網路連線 Lưu ý: Khi kết nối WIFI giữa Mio và điện thoại thông minh thì bạn không được 1. 从设置菜单中选择 [ WIFI ] > [ 开 ],打开本设备的无线网络功 1. 按 > [ WIFI ] > [ 開 ] 即可開啟本裝置的無線網路功能。...
Need help?
Do you have a question about the MiVue 730 Series and is the answer not in the manual?
Questions and answers