Advertisement
Quick Links
Advertisement

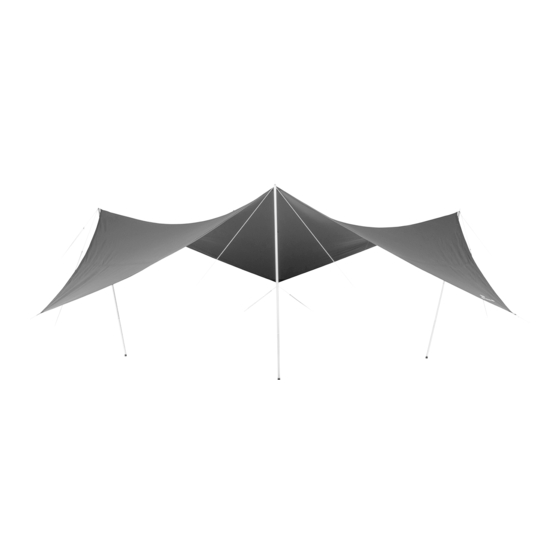
Related Manuals for Snow Peak TP-511


Summary of Contents for Snow Peak TP-511
- Page 1 取扱説明書 : Ver 2.00 TP-511 HDタープ シールド メーヴェ L...
- Page 2 この度は、 スノーピーク製品をお買い上げいただき、 誠にありがと う ございます。 本製品は、 キャ ンプ用のタープで す。 安全にご使用いただ く ためにも下記の取扱説明書をよ く読んでから ご使用く ださい。 また、 読み終わった後も 大切に保管して く だ さい。 説明内容で理解出来ない点及び製品に不具合が確認された際には直ちに使用を中 止しご購入いただき ま した販売店様も し く は弊社ユーザーサービスまでお問い合わせ く だ さい。 安全上の注意事項 ご使用の前によ く 読んで予測さ れる事故を回避 し安全にご使用く だ さ い。 危険...
- Page 3 セッ ト内容 セッ ト内容は一般的な条件下での設営を基本と したものです。 基本的な設営にはタープ用ポール×3本、 ペグ× 10本が別途必要です。 上記推奨サイ ズを ご参考の う え、 ご用意く だ さ い。 ま た、 ペグやロープ自在は消耗品です。 常 に予備を携行する こ と をお勧め し ま す。 自在付ロープ タープ本体 (二又用10m ×3、 二又用7m ×1、 3m ×2) キ ャ リ ーバッ グ×1 ポールケース...
- Page 4 初めてお使いになる前に ●品質には万全を期 してお り ますが、 お使いになる前に必ず試 し張り を行い、 付属品や設営道具を確認 して く だ さ い。 万一不具合や付属品の欠品があった場合は、 お買い求めになった販売店様または弊社ユーザーサービスまで お問い合わせ く だ さ い。 ●本製品にはポール ・ ペグ ・ ハンマー等は含ま れてお り ません。 □基本的な設営には別売り のウ イ ングポール×3本、 ペグ ×10本が別途必要です。 下記の推奨サイ ズを ご参考の上、 ご用意 く だ さ い。 □推奨ポール...
- Page 5 各ロープの固定、 ペグダウ ンの位置は下図のよ う に行っ て く だ さ い。 サブロープ(10m 二又) サブロープ(3m) サブポール 240cm メ イ ンロープ メ イ ンロープ 45° (10m 二又) (7m 二又) 45° 45° 中心線 サブポール 240cm メ イ ンポール 240cm サブロープ(3m) サブロープ(10m 二又) ※メ インポールとサブポールは、同じポールをご使用く ださい。 ※二又用ロープのロープ間の角度が上か...
- Page 6 設営の手順 より安全に設営するためにも必ず2人以上で設営してください。 設営 ・ 撤収は以下の説明に従い繰り返 し練習 し、 実際のキ ャ ンプに備えて く だ さ い。 また、 付属品が全て揃っている か前も ってご確認く だ さ い。 無理な設営 ・ 撤収は本体 ・ ポールの破損や事故の原因にな り ます。 本書を よ く お読みにな り ご使用 く だ さ い。 タープを地面に広げます。 ポールはあ らかじめ組み立てた状態で240cmのものを3本準備して く ださい。 タープ本体を平らな場所にロゴが上を向く...
- Page 7 メインポールを立ち上げます。 〔図 B〕 メ イ ンポール 〔図A❶〕 を立ち上げ、 〔図A〕 の❶ ❷を結ぶタープの中心線に対して 〔図B〕 のよ 二又ロープ (10m) うに外側に二又ロープを引き、 ロープの返し部 二又ロープ 分にペグダウン します。 〔図D〕 (7m) 45° 45° 45° 中心線 メ イ ンポール(240m) ※それぞれのロープ間の角度が90° 以上広い位 置でペグダウンする とポールにテンショ ンが伝 わらず、 正し く設営する事ができな く なるので注 ロープ 〔図...
- Page 8 タープの稜線を緩ませます。 〔図 F〕 ロープの自在の位置を調整し稜線部分を 2割く らい緩ませた状 緩み 態に します。 ※この緩みが完成時の美しい曲線を作り ます。 〔図F〕 各コーナーにロープを取り付けペグダウン 〔図 G〕 します。 〔図G〕 に示した位置にサブポール (3m) を取り サブロープ(3m) 付けて く ださい。 すでにペグダウン しているメ イ ン 用二又ロープ (10m二又) と並行になるよ うに 平行 サブロープ (3m) を引き、 ペグダウン します。 ※ロープの方向がずれると、 シワの原因になり、 正し...
- Page 9 LEDランタンループの仕様 タープの中央には、 指定のLED照明を吊るすためのラ ンタ ンループが付いています。 〔図 J〕 下記の対応機種を ご確認の う え、 ご使用 く だ さ い。 〔図J〕 ■対応機種 ES-070 : ほおずき / ES-090 : スポ ッ トほおずき / ES-041 : たねほおずき 危険 : 燃焼式のラ ンタ ン等の熱を発生さ せる照明は、 絶対に取り付けないで く だ さ い。 火災や思わぬ事故の原因 と な り ます。 注意...
- Page 10 ケースへの収納 最初にポールをゆっ く り倒 し、 先端金具と メ イ ンロープを外 します。 ペグを抜いて、 それぞれのロープを束ねた後、 キ ャ リ ーバッ グの長さに合わせてタープ本体を折り たたみ、 キ ャ リ ーバッ グの中に入れます。 ポールやペグはそれぞれ付属の専用ケースにポールの先端部が上になるよ う に入れ、 キ ャ リ ーバッ グに収納 して く だ さ い。 む き出 しの状態で収納する と本体生地を損傷する こ と があ り ます。 結露について...
- Page 11 メンテナンス ・ 保管 ●長期間ご使用 しなかっ た製品を再度お使いにな る際は、 弊社ユーザーサー ビス ま で点検を依頼 して く だ さ い。 ●本製品はポ リ エステル生地を組み合わせて使用 しています。 生地の特性を考慮 し、 出来る限り色移り し難い加工と 配色パタ ー ン を採用 していま すが、 保管状態な どによ り、 色移り が発生する場合があ り ま す。 ご了承 く だ さ い。 ま た、 濡 れた...
- Page 12 スペック 材質 : 本体/210Dポ リ エステルオ ッ クス ・ 遮光ピグ メ ン ○ 対応人数 6名 ○ トPUコーティ ング耐水圧3,000mmミ ニマム ・ テフロン 撥水加工 ・ UVカ ッ ト加工 セッ ト内 容: タープ 本 体 、 自在 付ロープ ( 二 又 用 ○ 10m×3、...
- Page 13 Product Manual : Ver 2.00 TP-511 HD Tarp Shield "Mawe"...
- Page 14 Thank you very much for purchasing a Snow Peak product. This product is a tarp for camping. To use this product safely and correctly, please carefully read these instructions. After reading these instruc- tions, keep this manual in a safe place for future reference. If you find anything in the instruction manual that is difficult to understand or find a defect with the product, stop using it immediately and contact the dealers where the product was purchased or Snow Peak Customer Service.
- Page 15 Set Contents The included contents are designed for set up in normal conditions. A basic setup requires three poles and ten pegs; all sold separately. Please refer to the recommended size listed. The pegs and the flexible ropes are replaceable items that will wear out over time, so it's best to carry a spare Rope with Rope Tensioner Tarp (Forked 10m(32.8') x 3, 7m (22.8')x 1, 3m(9.8’)x 2)
- Page 16 In the unlikely event that there is a problem or a missing accessory, please contact the dealer where you purchased the product or Snow Peak Customer Service. ●This product does not include pegs and hammers for ropes.
- Page 17 Fix the rope and peg down, as shown below. Sub-Rope 10m(32.8') Sub-Rope 3m(9.8') Sub Pole (240cm) Main Rope Main Rope 45° 10m(32.8') 7m (22.8') 45° 45° Center Line Sub Pole (240cm) Main Pole (240cm) Sub-Rope 3ma(9.8') Sub-Rope 10m(32.8') * The same kind of pole can be used for the main pole and sub pole. * Please note that if you peg down the Rope Grommet...
- Page 18 Setup Procedure: Make sure that two or more people take part in the setup. Follow the instructions below to set up and disassemble. Practice set up before camping and ensure all the accessories are functioning. Excessive assembly and tear down may damage the body or poles, potentially resulting in an accident.
- Page 19 Raise the Main Pole. [ Figure B ] Raise the main pole [ Figure A ❶ ], and pull the Forked Rope forked rope towards the outside from the center- 10m(32.8') line of the tarp, connecting ❶ and ❷ in [ Figure Forked Rope 7m (22.8') A ] as shown in [ Figure B ].
- Page 20 Loosen the Ridge of the Tarp. [ Figure F ] Adjust the position of the tensioner on the 10m rope, loosening Looseness it by about 20%. * This looseness creates a beautiful curve. [ Figure F ] Attach the Rope to Each Corner and [ Figure G ] Secure with a Peg.
- Page 21 Using the LED Lantern Loop At the center of the tarp, there is a lantern loop to hang the designated LED [ Figure J ] lighting. Check the following models before using them. [ Figure J ] ES-070 : HOZUKI LIGHT ■Compatible models ES-090 : SPOT HOZUKI ES-041 : MINI HOZUKI...
- Page 22 How to Store in the Carry Case First, tilt the pole slowly and remove the rope from the tip of the pole. After pulling out the pegs and bundling each rope, fold the tarp according to the carry bag's length and put it in the carry bag. Put the poles and pegs in the attached case with the pole's tip facing up, and store it in the carry bag.
- Page 23 Maintenance and Storage ● When using a product that has been in storage for a long time, please contact Snow Peak Customer Service. ● A polyester fabric blend is used for this product. Considering the material characteristics, we adopted processing and color patterns that will result in less color migration. However, depending on storage conditions, slight color migration may occur.
- Page 24 Specifications ●Material : Tarp / 210D Polyester Oxford, ●Capacity: 6 persons Light-Shielding Pigment PU coating Waterproof rating: 3,000mm minimum, Teflon water-repellent finish, UV protection treatment ● Carry Bag Size : W78 x 18D×H21cm (W30.7" xD7.1" x H8.3" ) ●Weight : 4.4 kg /9.7 lb 240cm (7.9’) Pole 400cm (13.1’)
Need help?
Do you have a question about the TP-511 and is the answer not in the manual?
Questions and answers