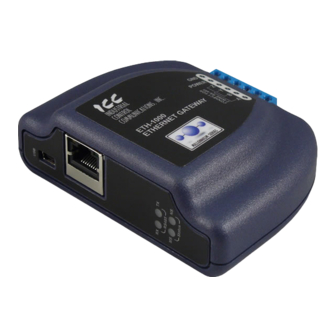
ICC ETH-1000 Quick Installation Manual
Hide thumbs
Also See for ETH-1000:
- Instruction manual (281 pages) ,
- Installation manual (54 pages) ,
- Quick start manual (10 pages)
Advertisement
ICC
1.
Install the latest ICC Configuration Studio software
http://www.iccdesigns.com/icc-configuration-studio.html
2.
Create a configuration project using the ICC Configuration Studio and download the
configuration to the ETH-1000 via the included USB cable
•
Online Tutorial Videos are available in the ICC Configuration Studio's Help Menu.
•
The ETH-1000 User's Manual and protocol driver manuals are available in the ICC
Configuration Studio's Help Menu. Additional ETH-1000 documentation, sample
configurations, and other resources can be found on the ETH-1000 product page:
3.
Secure the ETH-1000 using one of the following mounting options
•
Desktop – Apply the included four rubber feet and place on a level surface.
•
Panel/Wall – Drill two holes 25mm apart vertically. Set two screws into the holes
and mount the ETH-1000 onto the screws.
•
DIN rail – Clip the included DIN rail adapter onto a 35mm or G-type rail. Mount the
ETH-1000 onto the DIN rail adapter screws. Adjust the screw height if necessary.
Clip DIN rail adapter onto rail
ETH-1000 Quick Installation Guide
http://www.iccdesigns.com/eth-1000.html
Panel/Wall mount
DIN rail
adapter
Adjust
screws
Mount ETH-1000 onto DIN rail adapter
Page 1
PN11145-1022
Advertisement
Table of Contents

Summary of Contents for ICC ETH-1000
- Page 1 Online Tutorial Videos are available in the ICC Configuration Studio’s Help Menu. • The ETH-1000 User’s Manual and protocol driver manuals are available in the ICC Configuration Studio’s Help Menu. Additional ETH-1000 documentation, sample configurations, and other resources can be found on the ETH-1000 product page: http://www.iccdesigns.com/eth-1000.html...
- Page 2 ETH-1000 Quick Installation Guide Connect an Ethernet cable from an Ethernet switch to the ETH-1000 Ethernet port Connect the RS-485 wiring (for serial communication) Terminal Network Connection RS-485 Receive Positive (Non-Inverting) RXD+ Data Signal RS-485 Receive Negative (Inverting) RXD- Data Signal...


Need help?
Do you have a question about the ETH-1000 and is the answer not in the manual?
Questions and answers