Table of Contents
Advertisement
Quick Links
Advertisement
Table of Contents
Troubleshooting

Subscribe to Our Youtube Channel
Related Manuals for Roche Accu-Chek Solo


Summary of Contents for Roche Accu-Chek Solo
- Page 1 USER’S MANUAL ACCU-CHEK SOLO MICROPUMP SYSTEM...
- Page 5 If you have any questions, contact customer support. Also consult the instructions for use enclosed with the components of the Accu-Chek Solo micropump system. The screens shown in this User’s Manual may differ slightly from the screens shown on the display of the diabetes manager. The...
- Page 6 Text of the instruction/action step º The Accu-Chek Solo reservoir assembly Screen text/button text º The Accu-Chek Solo cannula assembly & pump holder Screens are shown in some of the º The Accu-Chek Guide test strips instructions. º The Accu-Chek Guide control solution To help you fully benefit from the º...
-
Page 7: Table Of Contents
CONTENTS Purpose of the Micropump System Intended Use Contraindications Risks and Benefits General Safety Information Components of the Micropump System Using the Micropump System in Daily Life Getting to Know the Micropump System Diabetes Manager Overview Status Screen Main Menu Information Screen Navigation and Operation Putting the Diabetes Manager into Operation... - Page 8 CONTENTS 10.6 System Events 10.7 Data Transfer 11 Changing Settings 11.1 Warning Limits 11.2 Time and Date 11.3 Bolus Settings 11.4 Tone and Vibration 11.5 Mute Warnings and Reminders 11.6 General Settings 11.7 Screen Lock 11.8 System Information 11.9 Travelling and Aeroplane Mode 12 Reminders 12.1 Overview of Reminders 12.2 Programming Reminders...
-
Page 9: Purpose Of The Micropump System
The Accu-Chek Solo micropump system is Intended Use intended for the subcutaneous continuous delivery of insulin via customizable hourly The Accu-Chek Solo pump base is part of rates, for the management of diabetes the micropump. It contains the mechanical mellitus in persons requiring insulin. The... -
Page 10: Contraindications
The Accu-Chek Guide Solo professional. diabetes manager is needed to fulfil the º People who do not understand what is intended purpose of the Accu-Chek Solo required for insulin pump therapy or who micropump. are not able to follow the instructions for use of the micropump system. -
Page 11: General Safety Information
PURPOSE Of THE MICROPUMP SYSTEM In case of improper use of the micropump General Safety system or non-compliance with your Information healthcare professional’s instructions, you risk experiencing, for example, hypoglycaemia, hyperglycaemia, w WARNING ketoacidosis or infections of the infusion º The micropump system may only be site. - Page 12 (test results) apps available in your country, and over-delivery or under-delivery of designated for use with your insulin. Accu-Chek Solo micropump system by Roche.
-
Page 13: Components Of The Micropump System
For signalizing system messages. Micropump System Lanyard eyelet For attaching a lanyard. The Accu-Chek Solo micropump system is a Power button system that primarily consists of a tubeless For turning the diabetes manager on micropump and a diabetes manager, which or off. - Page 14 º Close the cover of the headphone port source for the micropump. after use. Accu-Chek Solo micropump Reservoir The Accu-Chek Solo pump base contains the mechanical parts as well as the electronics to control and monitor the operation of the pump. Pump base...
- Page 15 PURPOSE Of THE MICROPUMP SYSTEM Accu-Chek Solo cannula assembly Accu-Chek Solo pump holder The Accu-Chek Solo cannula assembly The Accu-Chek Solo pump holder is an creates a connection between the adhesive pad that is adhered to the skin micropump and the body. The Accu-Chek to fix the cannula in place.
- Page 16 PURPOSE Of THE MICROPUMP SYSTEM w WARNING Accu-Chek Solo insertion device The Accu-Chek Solo insertion device is º Check all components for visible used to attach the infusion assembly damage before using them with the (pump holder and cannula) to the body micropump system.
-
Page 17: Using The Micropump System In Daily Life
PURPOSE Of THE MICROPUMP SYSTEM high-impact bodily contact, such as martial Using the Micropump arts, football or hockey. The micropump System in Daily Life could suffer damage by being hit or kicked or if it is hit by a ball. The micropump system is intended to be used continuously, every day in any Sleeping... - Page 18 PURPOSE Of THE MICROPUMP SYSTEM doubt, remove the micropump and change to an alternative therapy method. Do not use the micropump system at an air pressure below 70 kPa. This corresponds to an altitude of up to 3,000 metres above sea level.
-
Page 19: Getting To Know The Micropump System
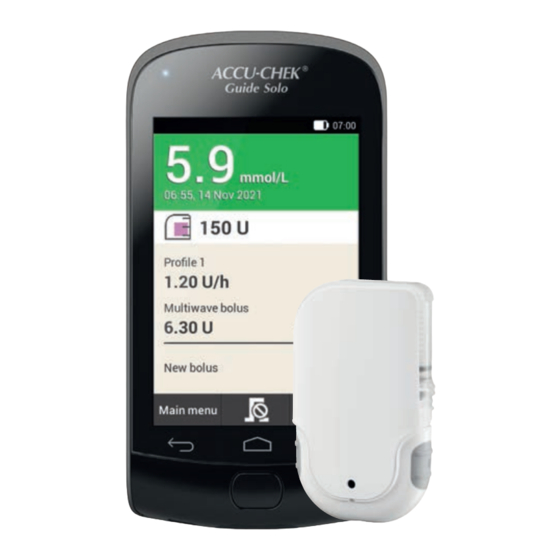
GETTING TO KNOW THE MICROPUMP SYSTEM Getting to Know the a glance. You can access other information and menus from the Status screen. Micropump System Depending on the situation (for example, whether you are using pump therapy or injection therapy), other content and Diabetes Manager symbols are displayed. -
Page 20: Main Menu
GETTING TO KNOW THE MICROPUMP SYSTEM Description Bolus Shows the active bolus type and the remaining insulin units. New bolus New bolus to program a new bolus. Main menu Tap this button to display the main Description menu. Reservoir level 1 Logbook entries menu Shows how many insulin units are in... - Page 21 GETTING TO KNOW THE MICROPUMP SYSTEM Symbols in the status bar Symbol Description Status of rechargeable battery Shows the current level of the rechargeable battery in the diabetes manager. No communication Is displayed when the communication between the diabetes manager and the micropump is not established Description or interrupted.
-
Page 22: Information Screen
GETTING TO KNOW THE MICROPUMP SYSTEM Menu Description icon Micropump is in STOP mode, Start micropump Stop micropump (cancel bolus and TBR and interrupt basal rate) Test blood glucose, enter glucose value, perform control test Replace system components (infusion assembly, reservoir, Description pump base) 1 Event data... -
Page 23: Navigation And Operation
GETTING TO KNOW THE MICROPUMP SYSTEM Button function Status screen Switch to the Status screen. Forward Go to the next screen within the process step. In many process steps, this button performs the same function as Next buttons. Insulin Button Slide your finger from the upper screen Press the insulin button to start a basal rate edge downwards. - Page 24 GETTING TO KNOW THE MICROPUMP SYSTEM Entering Numbers Minus/plus buttons You can either use a numeric keypad to enter numbers or use the minus/plus buttons to set them. Some numbers and values can only be set using the minus/plus buttons or only be entered by means of the numeric keypad.
- Page 25 GETTING TO KNOW THE MICROPUMP SYSTEM the settings in the menu Settings > Screen lock. Swipe across the screen with your finger, starting from , until the lock symbol is outside the circle shown, then remove your finger.
-
Page 26: Putting The Diabetes Manager Into Operation
It takes approx. 4 hours to charge º Use only the rechargeable battery from a fully drained battery using a charger that Roche. is connected to a wall socket. Do not remove the tab on the battery. The... - Page 27 PUTTING THE DIABETES MANAGER INTO OPERATION 3.1.2 Charging the Battery Using " a Computer Plug the smaller end (USB type micro-B) of the USB cable into the USB socket of the diabetes manager. " Place the rechargeable battery into the battery compartment of the diabetes manager.
-
Page 28: Setup Wizard
PUTTING THE DIABETES MANAGER INTO OPERATION If the LED does not light up after º Having the time and date set precisely 15 minutes, proceed as follows: is essential in order for your micropump system to function properly. Having the º Disconnect the charger from the wrong time set may result in the diabetes manager. - Page 29 PUTTING THE DIABETES MANAGER INTO OPERATION Setup mode: & If the diabetes manager is turned on, briefly press the power button to activate Manual setup. the energy-saving standby mode. Note: It is not currently possible to perform the setup on the PC. Start screen: "...
- Page 30 PUTTING THE DIABETES MANAGER INTO OPERATION Information - Selected carbohydrate unit: if the correct unit is displayed. If you want to change the unit, tap No. You then return to Step 11. Setting warning limits You can set warning limits for Once you have entered all settings for hyperglycaemia and hypoglycaemia that time and date, tap OK.
- Page 31 PUTTING THE DIABETES MANAGER INTO OPERATION Information - Set up bolus advice: If you want to set up bolus advice now, tap Yes. In section 7.1 Setting Up Bolus Advice, you will find the explanations and steps for setting up this feature. If you do not want to set up bolus advice now, tap No.
-
Page 32: Programming A Basal Rate Profile
PUTTING THE DIABETES MANAGER INTO OPERATION blocks. Tap the appropriate time blocks to Example: Basal rate profile change these settings. Insulin delivery Hourly basal rate 9 10 11 12 13 14 15 16 17 18 19 20 21 22 23 24 Time Setup wizard >... - Page 33 PUTTING THE DIABETES MANAGER INTO OPERATION Basal rate profile: § Define the end time for the first time block. To do so, tap the top entry field in the column. End time: Set the end time for the first time block. Tap OK.
-
Page 34: Putting The Micropump Into Operation
PUTTING THE MICROPUMP INTO OPERATION Putting the NOTE Micropump into º The pump holder must not be attached Operation to sites on the body with scars, birthmarks and moles, tattoos, injuries, bruises or rashes. This chapter explains all steps necessary to prepare the micropump before using it for º... - Page 35 PUTTING THE MICROPUMP INTO OPERATION Information - Prepare micropump: § Remove the pump holder from the packaging. After setting up the diabetes manager, the Prepare micropump screen appears. Tap OK. Prepare micropump: " Attach the hook on the pump holder to the underside of the insertion device.
- Page 36 PUTTING THE MICROPUMP INTO OPERATION & Insert the cannula assembly into the Remove both parts of the protective film insertion device. from the adhesive pad. Push the cannula assembly into the slot Do not touch the adhesive surface of the until you hear it click into place.
- Page 37 PUTTING THE MICROPUMP INTO OPERATION w WARNING Press the white detach button and detach the insertion device from the Risk of hyperglycaemia (high glucose infusion assembly. If possible, keep the level) adhesive pad in position with the other º If you trigger the insertion device hand.
- Page 38 PUTTING THE MICROPUMP INTO OPERATION 4.2.2 filling the Reservoir with " Remove the new reservoir assembly Insulin from the packaging. In addition to the reservoir assembly, you § Slowly and carefully pull out the need an insulin vial with U100 insulin and a battery’s protective film to activate the form of disinfectant, such as a sterile battery.
- Page 39 PUTTING THE MICROPUMP INTO OPERATION Place the insulin vial on a flat and solid surface (for example, a table top) and hold it firmly. Place the filling aid onto the vial. Push the filling aid downwards until you hear it click into place. &...
- Page 40 PUTTING THE MICROPUMP INTO OPERATION Remove the filling aid from the reservoir by pulling it off laterally. Dispose of the filling aid according to local regulations. w WARNING During disposal, ensure that no third party could injure themselves. Slowly push the handle upwards in the direction of the arrow 1 to remove air bubbles from the reservoir.
- Page 41 PUTTING THE MICROPUMP INTO OPERATION " NOTE º Do not exert too much force when connecting the pump base to the reservoir. º Make sure that the opening for ventilation of the micropump is always clear so that the battery is fully functional.
- Page 42 PUTTING THE MICROPUMP INTO OPERATION & NOTE Use the diabetes manager to set the insulin units. Each pump base can only be paired once Reservoir fill amount: with a diabetes manager. So if you are Set the number of insulin units (for using a different diabetes manager than example, 200 U) with which you filled the before, for example, a replacement...
- Page 43 PUTTING THE MICROPUMP INTO OPERATION Enter pump key: § & Enter here and enter the pump key using the keyboard. If pairing was successful, a sound is emitted. Tap Done. NOTE Failure to complete the process of Point the camera of the diabetes manager connecting the micropump and diabetes at the pairing code on the pump base.
- Page 44 PUTTING THE MICROPUMP INTO OPERATION 4.2.5 filling the Reservoir Needle If you can see a drop of insulin at the tip of the needle, the reservoir needle is w WARNING filled. Wait for insulin drop: § once you can see a drop of insulin on the reservoir needle.
- Page 45 PUTTING THE MICROPUMP INTO OPERATION Hook on the bottom of the pump base " w WARNING Check the micropump and the pump holder for damage before you attach the micropump to the pump holder. Deformations or cracks can cause the micropump system to become leaky.
-
Page 46: Stopping And Starting The Micropump
PUTTING THE MICROPUMP INTO OPERATION Attach micropump: " Tap Next. A small amount of insulin is delivered in order to fill the soft Teflon cannula. ® 4.2.7 Activating the Basal Rate Profile Setup wizard > Attaching the Micropump > Activating the Basal Rate Profile After having completed all preparatory steps The Status screen displays the activated for using the micropump for the first time,... - Page 47 PUTTING THE MICROPUMP INTO OPERATION Starting insulin delivery º The reservoir or infusion assembly is leaking. º The infusion assembly has come loose at the infusion site. Stopping insulin delivery Main menu: Stop Information - Stop insulin delivery?: " Tap Yes. While the micropump is in STOP mode, the micropump issues the Cancel sound once On the Status screen, tap...
-
Page 48: Testing Or Entering Your Glucose Level
TESTING OR ENTERING YOUR GLUCOSE LEVEL Testing or Entering º Read the test strip package insert. In Your Glucose Level the package insert, you will find further important information on storage, accuracy and precision of glucose Glucose values can be specified in two values, and possible causes of incorrect different units of measurement (mmol/L and glucose values. - Page 49 TESTING OR ENTERING YOUR GLUCOSE LEVEL § º When the diabetes manager prompts you to apply a drop, you have approximately 2 minutes to apply blood to the test strip. If you do not apply any blood during this time, the diabetes manager turns itself off.
- Page 50 TESTING OR ENTERING YOUR GLUCOSE LEVEL If the tone for blood glucose tests is turned on, a sound is emitted. Tap OK. NOTE º The glucose value can be used for bolus advice for a period of 15 minutes. Use your finger pricker to prick the side of º...
- Page 51 TESTING OR ENTERING YOUR GLUCOSE LEVEL If you want to complete the blood glucose w WARNING test without adding any information or Incorrect entries for carbohydrate delivering a bolus, tap Done. amounts or health events may lead to If you want to deliver a bolus, tap Bolus incorrect bolus advice.
- Page 52 TESTING OR ENTERING YOUR GLUCOSE LEVEL Setting health events Note: Health events provide information about Type a note to save with this entry. your current health or activities. Tap Done. If you have set up bolus advice and select a Entering basal insulin (injection mode) health event, bolus advice will be adjusted by the percentage you specified.
- Page 53 TESTING OR ENTERING YOUR GLUCOSE LEVEL w WARNING Colour of dot Glucose value is º If your glucose value is very high, test above the hyper warning for ketones. If the test returns a positive limit. It is strongly Blue, Hyper result and you are experiencing recommended that you symptoms of ketoacidosis (for example,...
- Page 54 TESTING OR ENTERING YOUR GLUCOSE LEVEL Blue with Hyper Yellow Glucose value - Blue dot with hyper: Glucose value - Yellow dot: The glucose value is below the target If the glucose value exceeds the hyper range for the current time block. warning limit, the diabetes manager will issue the W-75 - Warning limit exceeded The glucose value does not fall below the...
- Page 55 TESTING OR ENTERING YOUR GLUCOSE LEVEL Glucose value - HI: NOTE screen means that your glucose value might be very low. Being aware of the symptoms of low blood The glucose value is above the measuring glucose can help you to better understand range of the diabetes manager.
-
Page 56: Entering Your Glucose Value
TESTING OR ENTERING YOUR GLUCOSE LEVEL º Are the test strips still valid (see the label Main menu: on the test strip container next to the e In the Main menu, tap Test symbol)? Information - Test BG or enter glucose º... -
Page 57: Delivering A Bolus
DELIVERING A BOLUS Delivering a Bolus Bolus Input Screen A bolus represents the required insulin amount to be delivered in addition to the basal rate to cover the intake of food or correct an elevated glucose level. The bolus type and bolus amount are determined by your healthcare professional’s guidelines, your glucose level, your eating behaviour, your state of health as well as the type and... -
Page 58: Bolus Types
DELIVERING A BOLUS Active insulin Bolus Types If bolus advice is activated, the amount of active insulin that is to be You can choose the bolus types Standard considered is displayed. bolus, Extended bolus or Multiwave bolus on Bolus input screen. -
Page 59: Programming A Bolus
DELIVERING A BOLUS If you are planning to eat slowly digestible Proportion mealtime insulin: carbohydrates but have an elevated glucose Set the desired amount for the meal level before the meal, you can use this bolus. bolus type as well. In this case, you program Tap OK. - Page 60 DELIVERING A BOLUS You can add an extended bolus to an Deliver insulin - Deliver extended & ongoing standard bolus. bolus: Check the total amount and duration 6.4.2 Extended Bolus displayed. The duration of bolus delivery can be To confirm this step and deliver the bolus, programmed in 15-minute increments for a press period of up to 24 hours.
-
Page 61: Quick Bolus
DELIVERING A BOLUS immediate amount and the delayed amount Multiwave bolus: are 0.1 U respectively. Tap Bolus. Bolus input: Deliver insulin - Deliver multiwave Type on the Bolus input screen. bolus: Bolus type: " Check the displayed total amount, immediate amount, delayed amount and Multiwave bolus. - Page 62 DELIVERING A BOLUS A quick bolus allows a bolus to be discreetly delivered if the diabetes manager is not available or cannot communicate with the micropump. This is the case, for example, when aeroplane mode is turned on. The bolus amount can only be programmed in defined increments.
-
Page 63: Delivering A Bolus With A Pen Or Syringe
DELIVERING A BOLUS amounts delivered on the Bolus input NOTE screen. º If you do not confirm the acoustic The insulin amounts you documented will feedback in step 3 by pressing the be saved in the diabetes manager. The quick bolus buttons, no bolus will be entered insulin amounts are taken into delivered and the Cancel sound is account for future bolus advice calculations. -
Page 64: Cancelling A Bolus
DELIVERING A BOLUS can view the fully delivered bolus amount in the My data menu. 6.7.1 Cancelling a Single Bolus On the Status screen or in the Main menu, tap . Cancel bolus: " Inject the insulin units with a pen or Tap the bolus you want to cancel. -
Page 65: Setting The Delivery Lag Time
DELIVERING A BOLUS Status screen: Delivery lag time: § All boluses have been cancelled and Set the delivery lag time. The delivery lag deleted from the Status screen. time can be 0, 15, 30, 45 or 60 minutes. Tap OK. Standard bolus: Setting the Delivery Lag Time Tap Bolus. -
Page 66: Bolus Advice
BOLUS ADVICE Bolus Advice º No warning will be issued for entries that are incorrect yet still possible (for example, within acceptable ranges). The bolus advice feature aims to bring your glucose level back into the target range º Insulin that was not delivered via the defined for you, by delivering an insulin micropump system can only be taken amount that was calculated in advance. - Page 67 BOLUS ADVICE executing the setup wizard. If required, you End time: can change the time block settings. Set the end time for the first time block. You can set the minutes in 15-minute w WARNING increments. Discuss intended changes to your bolus Tap OK.
- Page 68 BOLUS ADVICE Carbohydrate ratio: § Set the carbohydrate amount for the carbohydrate ratio. Tap OK. Example Insulin sensitivity: The limit values currently set for the 1.00 U : 2.2 mmol/L target range are displayed. In this example, one insulin unit lowers Tap Next. the glucose value by 2.2 mmol/L. Insulin sensitivity: 7.1.2 Default Settings Set the insulin units for the insulin...
- Page 69 BOLUS ADVICE Information - Settings are being Target range: copied: Set the upper and lower limit values. The default settings for carbohydrate ratio Tap Next. and insulin sensitivity are copied to all time blocks. & You can change the settings for each time block separately.
- Page 70 BOLUS ADVICE The percentage for a health event must be & between -50 % and +50 %. You can change the percentage in increments of 5 %. Example You like running, so you create the customised health event Run with a percentage of -20 %, for example. When you select the Run health event during bolus calculation, the bolus amount is decreased by 20 %.
-
Page 71: Changing Bolus Advice And Time Blocks
BOLUS ADVICE Acting time: " Set the hours and minutes for the acting time (for example, 3 hours, 25 minutes). Tap OK. Offset time: Set the hours and minutes for the offset time (for example, 1 hour, 15 minutes). Tap the respective entries to set the Meal Tap OK. - Page 72 BOLUS ADVICE § Tap the time block to be deleted. In this example, the time block from The health events are displayed with the 11:30 to 15:30 is to be deleted. percentages that were set. Done after setting the health events. Set up time block: Decrease the end time until it equals the 7.2.3 Deleting a Single Time...
- Page 73 BOLUS ADVICE 7.2.4 Deleting Several Time Bolus advice options: & Blocks Set the carbohydrate ratio and insulin sensitivity for the merged time block. You can delete one or more time blocks by merging different time blocks. Tap Done. Main menu: Time blocks: In the Main menu, tap the Settings...
- Page 74 BOLUS ADVICE § Done when you have finished editing the time blocks. 7.2.6 Resetting All Time Blocks Time blocks: Tap Reset. Information - Reset time blocks?: " If you want to reset all time blocks, tap Yes. Tap the last time block. (for example, 22:00 - 05:30) First time block: §...
-
Page 75: Using Bolus Advice
BOLUS ADVICE advice. However, the total bolus amount Done when you have finished editing is considered as a correction bolus, and the time blocks. no meal rise is registered. If this bolus was used for food intake, you should edit the bolus in your logbook Using Bolus Advice to assign the bolus part that was used for the carbohydrates. - Page 76 BOLUS ADVICE Health events: " meal bolus is decreased accordingly. Once the meal bolus reaches “0”, the If you have selected multiple health correction bolus is decreased accordingly. events, enter the total percentage. Tap Save. Selecting the bolus type Glucose value in detail: §...
- Page 77 BOLUS ADVICE § Tap the field for manually entering the glucose value. Information - Test BG or enter glucose value?: if you want to enter the glucose value manually. The Status screen is displayed showing Glucose value: the current bolus information. Enter the glucose value using the numeric keypad and tap OK.
- Page 78 BOLUS ADVICE Bolus advice: Carbohydrates: Once all entries are correct, tap Bolus. Set the carbohydrate amount you want to eat. Alternatively, you can enter the carbohydrate amount using the numeric keypad. To do so, tap Save. Glucose value in detail: Tap Bolus.
-
Page 79: Turning Off Bolus Advice
BOLUS ADVICE saved by the micropump system is identical Turning Off Bolus to the amount you delivered. Advice Also consult the instructions for use for your This section describes how to turn off bolus insulin pen or syringe. advice. Bolus advice: Start bolus advice with or without testing NOTE your blood glucose. -
Page 80: Basal Rate Profiles And Temporary Basal Rates
BASAL RATE PROfILES AND TEMPORARY BASAL RATES Basal Rate Profiles Creating and Editing a and Temporary Basal Rate Profile Basal Rates A basal rate profile can be programmed, edited and deleted in different ways. Start In this chapter you will learn how you can by using one of the following two options: adapt your basal insulin supply to your life Status screen:... - Page 81 BASAL RATE PROfILES AND TEMPORARY BASAL RATES End time: º To add a new time block, set the end time of the last time block to the Set the end time for the time block. desired start time of the new time Tap OK.
- Page 82 BASAL RATE PROfILES AND TEMPORARY BASAL RATES your healthcare professional, check all the Deliver insulin: Activate basal rate time blocks and correct the entries. profile: To confirm this step and activate the basal rate profile, press 8.1.2 Activating a Basal Rate Profile Tapping cancels the activation of the...
-
Page 83: Temporary Basal Rates
BASAL RATE PROfILES AND TEMPORARY BASAL RATES Information - Delete entry?: § Tap an end time to change the end time for the time block. Tap a basal rate to to delete the basal rate profile. change the basal rate for the time block. Basal rate profiles: Basal rate profile: §... -
Page 84: Creating And Editing A Tbr
BASAL RATE PROfILES AND TEMPORARY BASAL RATES Standard TBR: " NOTE Percentage to enter the percentage of º A TBR cannot be programmed if the the temporary basal rate. micropump is in STOP mode. Percentage: § º Stopping the pump (STOP mode) stops TBR delivery as well as any bolus Set the percentage for adjusting the delivery. - Page 85 BASAL RATE PROfILES AND TEMPORARY BASAL RATES Customised TBR: " Enter the desired name for the customised TBR (for example, Run). The name may have up to 12 characters. Tap Done. Customised TBR: § Percentage to enter the percentage for the customised TBR. The diabetes manager shows the Status Percentage: screen with the current TBR information.
- Page 86 BASAL RATE PROfILES AND TEMPORARY BASAL RATES The newly programmed customised TBR The activated TBR is displayed on the is displayed. Status screen. NOTE 8.3.4 Cancelling a TBR A customised TBR less than 100 % is Temporary basal rate: indicated by .
-
Page 87: Replacing System Components
Always start as follows when * Important information for the Accu-Chek Solo products: for replacing the infusion assembly, reservoir the Reservoir and Infusion assembly products, the expiry date or pump base: indicated by E on the packaging reflects the date by which... -
Page 88: Replacing The Infusion Assembly
REPLACING SYSTEM COMPONENTS " Replacing the Infusion Assembly Have the following system components at hand for this process: Pump holder, Cannula, Insertion device, Diabetes manager, Disinfectant or sterile alcohol wipe. NOTE Press the flap to detach the micropump º Check the pulled out cannula to ensure and remove the pump from the infusion that it has been completely removed. -
Page 89: Replacing The Reservoir
REPLACING SYSTEM COMPONENTS The infusion assembly is now filled automatically. Deliver insulin - Activate basal rate profile: To confirm this step and then restart the micropump and return to the Status screen, press Handle for piston rod Protective film for battery Replacing the Reservoir Filling aid... -
Page 90: Replacing The Pump Base
REPLACING SYSTEM COMPONENTS Replacing the Pump Base The expected period of use must not be exceeded. Otherwise, the delivery accuracy may be impaired. You will be reminded regularly to replace the pump base before the deadline expires. For information on the remaining running time of the micropump, see the settings in the System information... - Page 91 REPLACING SYSTEM COMPONENTS Information - Replace pump base?: " Tap Yes, if you want to replace the pump base now. § Press the flap of the infusion assembly. Remove the used micropump from the infusion assembly. Dispose of system components: Dispose of the used reservoir and the used pump base according to local regulations.
-
Page 92: My Data
MY DATA My Data Date and time, glucose value, time of test, carbohydrate intake, health events, bolus amounts, bolus type and notes. Analysing your therapy data saved in the Note the following: diabetes manager helps you and your healthcare professional to determine how º... - Page 93 MY DATA º Before reviewing logbook entries on a Column for displaying PC, you first have to transfer the saved carbohydrate information logbook entries to a PC that has specific Symbol for carbohydrates and diabetes management software. carbohydrate amount Symbol for glucose value range information 10.1.1 Understanding the Symbol for bolus advice...
- Page 94 MY DATA Symbol description Symbol description Extended bolus Notes Bolus insulin from an extended bolus You entered a note. Multiwave bolus Bolus insulin from a multiwave bolus 10.1.2 Viewing and Adjusting Logbook Data Micropump Main menu: Bolus insulin from a quick bolus data.
-
Page 95: Trend Graph
MY DATA Time of test: Note: On the Logbook entries screen, tap Time On the Logbook entries screen, tap Note.* test. Tap a time of test (for example, Type a note to save with this entry. Before meal). Tap Done. Tap Save. - Page 96 MY DATA Hyper warning limit Light blue line: Hyper warning limit Selected time of test Displays logbook entries entered for this time of test. mmol/L Time scale Illustrated time period Events Displays health events or indicates mmol/L that the micropump was stopped. Basal rate Blue line: The distance from the top Basal insulin amount...
- Page 97 MY DATA Example Example For example, if the highest basal rate in For example, if the largest carbohydrate the selected time period is 3 U/h, the amount in the selected time period is scale will show the range from 0 to 5 U/h. 86 g, the scale will show the range from 0 to 120 g.
-
Page 98: Standard Week
MY DATA The standard deviation indicates how the 10.3 Standard Week glucose values are scattered around the blood glucose average. A high standard deviation means that the glucose values are Main menu > My data > Standard week scattered away from the blood glucose The standard week graph displays your average. -
Page 99: Target Range
MY DATA Highest glucose value of the day of 10.4 Target Range the standard week Blood glucose average of the day Main menu > My data > Target range of the standard week This screen displays a pie chart and a table Lowest glucose value of the day of illustrating your glucose values for the time the standard week... -
Page 100: Averages Table
MY DATA 10.4.1 Displaying the Target Glucose value ranges Range Data Coloured representation of the glucose value ranges Target range: to change the representation of to switch to the target range table. the target range. The target range table displays the target range data in table format. -
Page 101: System Events
MY DATA Time scale: " Tap the desired time period (for example, 30 days). Tap Save. 10.6 System Events Main menu > My data > System events The following system events can be accessed directly on the diabetes manager: The last 90 maintenance, Event data warning and error messages... - Page 102 MY DATA Start date, start time, immediate amount Example for the bolus (for quick, standard or multiwave bolus), delayed bolus amount (for extended or multiwave bolus), bolus duration (for extended or multiwave bolus) 10.6.3 TBR Data Example Each entry includes the following data: Type and number of the maintenance (warning or error message), title of the maintenance (warning or error message),...
-
Page 103: Data Transfer
MY DATA Example 10.7 Data Transfer You can display and evaluate the data on a PC using an Accu-Chek diabetes management software, such as the Accu-Chek Smart Pix software. For more information, see the User’s Manual for the software used. Install the software before you begin the data transfer. - Page 104 MY DATA Plug the larger end (USB-A plug) of the USB cable into a free USB port on your computer. Do not use the USB charging port (often indicated by ), as data is not transferred via this port. Establishing data connection to PC: Launch the Accu-Chek diabetes management software on your PC.
-
Page 105: Changing Settings
CHANGING SETTINGS Changing Settings " Main menu > Settings In the Settings menu, you can make changes to the factory settings or change the settings you made. This allows you to adjust the micropump system to your individual treatment requirements and your personal preferences. - Page 106 CHANGING SETTINGS Lower warning limit: Remaining insulin amount: § Set the lower warning limit (for example, Set the number of insulin units at which 3.3 mmol/L). you want to receive a warning (for example, 40.00 U). Tap OK. Tap Save. Warning limits: The automatic off function is a safety to return to the list of settings.
-
Page 107: Time And Date
CHANGING SETTINGS Duration: Time format: " Set the number of hours after which the Tap the desired time format, for example, insulin delivery will be interrupted 24 hours. (for example, 14 hours). Tap Save. Tap OK. Time: § Automatic off: Set the hours and minutes for the current Tap Done. - Page 108 CHANGING SETTINGS Bolus settings: Example Quick bolus buttons to activate or With a quick bolus increment of 0.5 U, deactivate the quick bolus buttons of the you have to press the quick bolus buttons micropump. 5 times to deliver an insulin amount of 2.5 U.
-
Page 109: Tone And Vibration
CHANGING SETTINGS Main menu > Settings > Tone and NOTE vibration º While programming a bolus, you can Settings: set a delivery lag time of 0, 15, 30, 45 Tone and vibration. or 60 minutes. º If a bolus contains correction insulin or Tone and vibration: "... -
Page 110: Mute Warnings And Reminders
CHANGING SETTINGS Tone and vibration: & º Warnings that occur during Mute warnings and reminders activation are Touchscreen feedback to set how the displayed once the diabetes manager is diabetes manager reacts when you make turned on or Mute warnings and a selection using the touchscreen. -
Page 111: General Settings
CHANGING SETTINGS Mute warnings and reminders: Language: " Frequency to set the repetition Tap the entry for the language in which interval (for example, Once) for Mute you want the menus and texts to appear warnings and reminders. on the screen. Tap Done. -
Page 112: System Information
CHANGING SETTINGS º If you want to change the PIN, you have NOTE to turn the screen lock off and on again. If you have forgotten the PIN you chose, º Choose a PIN that you can easily you can unlock the diabetes manager memorise and enter. -
Page 113: Travelling And Aeroplane Mode
CHANGING SETTINGS true for changing the clocks in summer and System information: " winter time. The list of system information is displayed. Example Scroll the screen upwards to see You change the time of the micropump additional system information. system from 10:00 to 13:00. After the System information: §... - Page 114 CHANGING SETTINGS Aeroplane mode: " The diabetes manager automatically reconnects to the micropump. Status to put the switch in the position. Status screen: Tap Done. Aeroplane mode is turned off. Information - Aeroplane mode on: § The aeroplane mode symbol is no longer displayed in the status bar.
-
Page 115: Reminders
REMINDERS Reminders 12.1 Overview of Reminders You can set reminders for specific Reminder appointments and events. This can be Replace infusion assembly useful when you have to make specific Reminds you to replace the infusion preparations, for example, for replacing the assembly after a specified number of infusion assembly. -
Page 116: Programming Reminders
REMINDERS 12.2 Programming Reminders Set the desired time and frequency for each reminder. If you choose Repeat, you will be reminded of the event at certain intervals, for example, daily. Some reminders only appear when certain conditions are met. You can add more reminders by tapping Once the maximum number of reminders Replace infusion assembly. - Page 117 REMINDERS Reminder: Test After Low BG Once you have made all settings, tap Done. This reminder reminds you to test your blood glucose again when the previous Reminder: Test Blood Glucose glucose value was too low. The BG threshold in this reminder can be set This reminder alerts you to test your blood individually and is independent of the hypo glucose at a time that was specified...
-
Page 118: Deleting Reminders
REMINDERS programmed time. You can program up to Visit healthcare professional: " 5 reminders of the Missed bolus type. Status to put the switch in the position. Tap Time, Date Tone to make Example the desired settings. The missed bolus reminder is Once you have made all settings, tap programmed for 14:00. - Page 119 REMINDERS When turned off, no reminders are issued. If an event occurs during that time, the reminder will be issued after the diabetes manager is turned on. Example to confirm the reminder. The reminder will no longer be displayed. Snooze if you want to be reminded again at a later point in time.
-
Page 120: Injection Therapy Mode
Injection Therapy º Store the micropump and consumables Mode according to the permitted ambient conditions. If you do not want to use your micropump for a while, you can switch to injection 13.1 Removing the therapy mode. This could be the case, for example, if you want to do without your Micropump insulin pump while on holiday. - Page 121 & Remove the used reservoir from the pump base. Keep the pump base in a safe place. & Dispose of the used infusion assembly and used reservoir according to local regulations. 13.1.1 Activating Injection Therapy Mode Main menu: The screen informs you that injection In the Main menu, tap the Settings menu.
-
Page 122: Injection Therapy Screens
13.2 Injection Therapy Screens Once you turn on injection therapy mode, some of the displays and menus on the diabetes manager change. The elements necessary for pump therapy are no longer available on the Status screen. In the Main menu, some of the menus are omitted from the menu selection. - Page 123 Glucose value in detail Reminders Reminders screen in Reminders screen in Glucose value in detail Glucose value in detail pump therapy mode. injection therapy mode. screen in pump therapy screen in injection mode. therapy mode. Instead of the Replace infusion assembly You will also see the reminder, the Inject basal...
- Page 124 My data Bolus settings Logbook entries screen Logbook entries screen Bolus settings screen in Bolus settings screen in in pump therapy mode. in injection therapy pump therapy mode. injection therapy mode. mode. Instead of the quick bolus You can enter or change elements, the elements the amount of basal for setting the insulin...
-
Page 125: Care And Maintenance
CARE AND MAINTENANCE Care and w WARNING Maintenance º The diabetes manager must be turned off for cleaning. Make sure the diabetes This chapter provides information on how to manager is turned off and not in care for and maintain the micropump standby mode. - Page 126 CARE AND MAINTENANCE " º Do not get any moisture in slots or openings. º Do not spray anything onto the 3 Min. micropump. º Do not immerse the micropump in liquid. Liquid can impair the functionality of the device electronics and lead to Remove any large contaminants with a malfunctions.
- Page 127 CARE AND MAINTENANCE " Failure to follow the cleaning instructions Wipe the surfaces of the pump base will damage the insertion device and stop using a fresh, dry, lint-free cloth. it from working properly. Check that the opening for ventilation is clean and not blocked.
-
Page 128: Control Test Of The Diabetes Manager
CARE AND MAINTENANCE 14.2 Control Test of the NOTE Diabetes Manager Use only the Accu-Chek Guide control solutions: Control 1 with low glucose You can check whether the diabetes concentration or Control 2 with high manager is delivering correct glucose glucose concentration. values by performing a control test. - Page 129 CARE AND MAINTENANCE º When a test strip is in the diabetes manager, the touchscreen and the buttons, including the power button, are deactivated. The buttons are activated again when you remove the test strip or the test is complete. º...
- Page 130 CARE AND MAINTENANCE Displaying the control result If the control result is outside the permitted concentration range, contact customer support. Tap OK. NOTE Outside the permitted concentration range, LO or HI means that the control result is outside the permitted range. Disposing of test strips The control result is displayed.
-
Page 131: Checking The System Functions
CARE AND MAINTENANCE º Did you apply control solution only after maintenance and error messages) to be the tone sounded and the Apply drop issued correctly. screen appeared? If you cannot feel or hear the vibrations and º Was the test strip kept still before and sounds of the diabetes manager or suspect during the test? that there might be other defects, you can... - Page 132 CARE AND MAINTENANCE Checking the screen: The screen shows NOTE different colours (red, green, blue and º If you are using injection therapy mode, white) in quick succession. In addition, Micropump signals entry will be the diabetes manager vibrates whenever deactivated and greyed out.
-
Page 133: Messages And Troubleshooting
MESSAGES AND TROUBLESHOOTING Messages and Error and maintenance messages are repeated every 5 seconds and cannot be Troubleshooting muted. The cause of the error or maintenance message must be confirmed The micropump system uses error and corrected. messages, maintenance messages, Warnings and reminders are repeated every warnings and information messages to 30 seconds and can be muted as often as inform you about the status of the... -
Page 134: Information
MESSAGES AND TROUBLESHOOTING º If the micropump issues the Error 15.2 Warnings sound and the diabetes manager does Warnings inform you about relevant not display any error messages even technical states of the micropump system or though the diabetes manager and about possible risks for your therapy or micropump are in communication health. - Page 135 MESSAGES AND TROUBLESHOOTING Information/possible Information/possible Code Title of warning cause solution Warnings triggered by the micropump. Ensure that you have a new pump base at hand as a Running time of the The period of use of the replacement. W-25 pump will end soon pump base will end soon.
- Page 136 MESSAGES AND TROUBLESHOOTING Information/possible Information/possible Code Title of warning cause solution The operating life of the Replace the reservoir as W-40 Replace reservoir reservoir will soon come to soon as possible. an end. The micropump has been in Start the micropump if you STOP mode for at least an W-41 Micropump stopped...
- Page 137 MESSAGES AND TROUBLESHOOTING Information/possible Information/possible Code Title of warning cause solution Eat or drink fast-acting carbohydrates. Then test Blood glucose has fallen your blood glucose. If W-80 Hypoglycaemia below the hypo warning hypoglycaemia persists, limit. consult your healthcare professional. Eat or drink fast-acting carbohydrates.
- Page 138 Information/possible Information/possible Code Title of warning cause solution When aeroplane mode is turned off and the diabetes The saved logbook entries manager and micropump W-88 Aeroplane mode on may not be up to date. are within communication range, the logbook entries will be synchronised.
-
Page 139: Maintenance Messages
MESSAGES AND TROUBLESHOOTING 15.3 Maintenance Messages Code of maintenance message Maintenance activity refers to the Maintenance messages inform you about a micropump temporary loss of certain features of the Maintenance activity refers to the micropump system. Maintenance messages diabetes manager require you to intervene in order to solve the problem. - Page 140 MESSAGES AND TROUBLESHOOTING Title of Possible cause/ Code maintenance further information consequences message Maintenance messages triggered by the micropump. The operating life of your Replace your pump base M-18 Replace micropump micropump has come to an and the reservoir now. end.
- Page 141 MESSAGES AND TROUBLESHOOTING Title of Possible cause/ Code maintenance further information consequences message Hold the diabetes manager close to the micropump to ensure that data is exchanged between the pump and the diabetes The micropump system manager. Resume setting M-27 No data connection setup was interrupted.
- Page 142 MESSAGES AND TROUBLESHOOTING Title of Possible cause/ Code maintenance further information consequences message The diabetes manager automatically deactivates communication via Bluetooth wireless The level of the technology to save power. M-59 Battery almost empty rechargeable battery is very As a result, communication low.
- Page 143 MESSAGES AND TROUBLESHOOTING Title of Possible cause/ Code maintenance further information consequences message Hold the diabetes manager close to the micropump. There is no connection to M-67 Bolus delivery failed You can deliver a quick the micropump. bolus straight from the micropump.
- Page 144 MESSAGES AND TROUBLESHOOTING Title of Possible cause/ Code maintenance further information consequences message The micropump and the Aeroplane mode diabetes manager are not Hold the diabetes manager M-88 turned off within communication close to the micropump. range. Hold the diabetes manager There is a communication close to the micropump and problem between the...
-
Page 145: Error Messages
MESSAGES AND TROUBLESHOOTING Examples of error messages: 15.4 Error Messages Error messages inform you about important malfunctions of the micropump system. The micropump switches to STOP mode and does not deliver any insulin. Once the cause of the error message has been eliminated, you can use all features of the micropump system again. - Page 146 MESSAGES AND TROUBLESHOOTING Possible cause/ Code Title of error Possible solutions consequences Select Replace and replace Communication between the the reservoir. Wait at least micropump and diabetes 30 seconds after removing manager is not possible. the used reservoir before Electronic error The micropump switches to connecting a new reservoir to STOP mode and does not...
-
Page 147: General Troubleshooting
MESSAGES AND TROUBLESHOOTING 15.5 General Troubleshooting This chapter deals with general error situations that do not necessarily result in a message on the micropump system. If the problem cannot be resolved using the suggested solutions, contact customer support. Problem Possible cause Possible solutions The level of the rechargeable battery is... - Page 148 MESSAGES AND TROUBLESHOOTING Problem Possible cause Possible solutions The Display is The display is Perform the system function test for the defective or the damaged or the diabetes manager screen. If the system colours are not diabetes manager is function test of the screen shows a represented correctly.
- Page 149 MESSAGES AND TROUBLESHOOTING Problem Possible cause Possible solutions The aeroplane mode is Turn off aeroplane mode on the diabetes turned on. manager. The micropump was Check the settings for the automatic off turned off by the feature. automatic off feature. Check whether the micropump is turned off.
- Page 150 MESSAGES AND TROUBLESHOOTING Problem Possible cause Possible solutions 1. Remove the reservoir from the pump base for at least 20 seconds. 2. Turn off the diabetes manager completely. Then turn the diabetes manager back on. 3. Check that the serial number of the micropump is entered in the System information screen.
- Page 151 MESSAGES AND TROUBLESHOOTING Problem Possible cause Possible solutions The set reservoir fill amount deviates from During bolus or basal the actually filled rate delivery, the amount. The set value displayed reservoir during reservoir replacement was too level on the Status high.
-
Page 152: Technical Data
TECHNICAL DATA Technical Data Technical data of the micropump system Communication between micropump 16.1 Micropump System and diabetes manager Bluetooth Low Energy (BLE) wireless Technical data of the micropump technology system Transmission frequency Permitted insulin types 2402–2480 MHz U100 insulins: Transmission power Humalog , NovoLog , NovoRapid... - Page 153 TECHNICAL DATA Technical data of the diabetes Technical data of the diabetes manager manager Weight Admissible humidity range 140 g Storage and transport, with packaging: 5 % to 85 % Signal reproduction During operation: 15 % to 90 % Graphical user interface, status LED, speakers, vibration alarm Atmospheric pressure Storage and transport, with packaging: Display...
-
Page 154: Micropump
TECHNICAL DATA Technical data of the diabetes 16.3 Micropump manager Battery voltage Technical data of the micropump 3.7 V Dimensions Battery capacity Approx. 63 × 39 × 14 mm 1,530 mAh / 1,590 mAh Weight Charging voltage via USB Micropump with filled reservoir < 29 g 5 V Pump casing Max. charging current Impact and scratch-resistant plastic 700 mA (polycarbonate) - Page 155 TECHNICAL DATA Technical data of the micropump Technical data of the micropump Admissible humidity range Basal rate, increments Storage and transport, with packaging 0.1 U/h up to under 5.0 U/h: increments (pump base): 5 % to 85 % of 0.01 U/h Storage and transport, with packaging 5.0 U/h up to under 25.0 U/h: increments (reservoir): 20 % to 80 % of 0.1 U/h...
-
Page 156: Infusion Assembly
TECHNICAL DATA Technical data of the micropump Technical data of the micropump Bolus amount, increments Maximum pressure 0.2 U up to under 2.0 U: increments of 150 kPa (1.5 bar) 0.05 U Reservoir fill amount 2.0 U up to under 5.0 U: increments of Maximum: 200 U 0.1 U Minimum: 80 U 5.0 U up to under 10.0 U: increments of... -
Page 157: Insertion Device
TECHNICAL DATA 16.6.1 Startup Chart 16.5 Insertion Device The startup chart shows changes in the delivery rate over the stabilization period. Technical data of the insertion device Dimensions 0.1 U/h, 6 mm cannula 82 × 53 × 49 mm 0.004 Actual flow Weight Target flow 85 g Period of use 0.002 4 years... -
Page 158: Electromagnetic Compatibility (Emc)
16.7 Electromagnetic and end-to-end cyclic redundancy checks. Compatibility (EMC) Wireless Quality of Service and Coexistence Essential Performance The Accu-Chek Solo micropump system is The Accu-Chek Solo micropump system ® designed to work safely and effectively in maintains during its expected lifetime: the presence of nearby wireless devices º... - Page 159 º The diabetes manager detects when the interferences of radar with your insulin data exchange with the micropump is pump, we recommend switching off the Bluetooth function on your Accu-Chek Solo not possible and notifies the user accordingly. micropump system during boarding,...
- Page 160 Electromagnetic Emissions Guidance and manufacturer’s declaration – electromagnetic emissions The Accu-Chek Solo micropump system is intended for use in the electromagnetic environment specified below. Always make sure that the system is used in such an environment. Requirements that are specified in IEC 60601-1-2 that are not applicable to the Accu-Chek Solo micropump system are not mentioned in the table below.
- Page 161 TECHNICAL DATA Electromagnetic Immunity test test level/conditions Compliance level environment standard - guidance Radiated RF 10 V/m 80 Mhz to 10 V/m 80 Mhz to IEC 61000-4-3 2.7 Ghz 2.7 Ghz Radiated RF 3 V/m 2.7 to 6 Ghz 3 V/m 2.7 to 6 Ghz IEC 61000-4-3 Power frequency (50/69 Hz) 3 A/m 3 A/m magnetic field...
- Page 162 Accu-Chek Solo micropump system is used exceeds the applicable RF compliance level above, the Accu-Chek Solo micropump system should be observed to verify normal operation. If abnormal performance is observed, additional...
-
Page 163: Symbols, Abbreviations, Sounds
SYMBOLS, ABBREVIATIONS, SOUNDS Symbols, Symbol Meaning Abbreviations, Serial number Sounds Medical device 17.1 Symbols Single patient multiple use The following symbols appear on the packaging and on the micropump system Unique Device Identifier components: Single sterile barrier Symbol Meaning system Consult instructions for use Complies with the or consult... - Page 164 SYMBOLS, ABBREVIATIONS, SOUNDS Symbol Meaning Symbol Meaning Keep dry Non-ionizing radiation Do not use if package is Warning against device use damaged and consult in electromagnetic or high instructions for use electrical fields or environments Humidity limitation Device of protection class II Atmospheric pressure limitation Suitable for indoor use only...
-
Page 165: Abbreviations
SYMBOLS, ABBREVIATIONS, SOUNDS 17.2 Abbreviations Abbreviation Meaning Kilopascal Abbreviation Meaning Personal Computer Ante meridiem: Before Personal Identification midday (12-hour clock Number (secret code) notation for times before Post meridiem: After 12 noon) midday (12-hour clock Broteinheit (bread notation for times after 12 equivalent) noon) Blood Glucose... -
Page 166: Sounds
SYMBOLS, ABBREVIATIONS, SOUNDS 17.3 Sounds Both the diabetes manager and the micropump can issue sounds. The diabetes manager can issue the following sounds: Designation Occurrence Start Turning on the diabetes manager Error Issuing error messages Maintenance Issuing maintenance messages Warning Issuing warnings Connect USB Establishing a USB... - Page 167 SYMBOLS, ABBREVIATIONS, SOUNDS The micropump can issue the following sounds: Designation Occurrence Tone sequence Start º Plugging together pump base and 5 short, ascending tones reservoir Quick bolus º Start of programming a quick bolus 7 short, ascending tones Quick bolus º...
-
Page 168: Appendix
Any changes or modifications to the Moreover, all configurations must comply micropump system not expressly approved with the normative requirements for medical by Roche could render your operating systems (see section 16 of the latest edition guarantee for the Accu-Chek Solo of IEC 60601-1). Anyone who connects micropump system invalid. -
Page 169: Supplies And Accessories
Accu-Chek Customer Careline Supplies for the micropump system UK Freephone number: 0800 701 000 º The Accu-Chek Solo reservoir assembly ROI Freephone number: 1 800 709 600 º The Accu-Chek Solo cannula assembly calls may be recorded for training purposes... -
Page 170: Disposing Of The Micropump System
APPENDIx operated according to the instructions for 18.7 Disposing of the use. Micropump System w WARNING 18.8 Bolus Calculation All objects which can come into contact The bolus that is recommended by the bolus with human bodily fluids carry a potential advice feature consists of two components: risk of infection. - Page 171 APPENDIx 18.8.4 Correction Bolus After a BG thresholds Meal After a meal, it is normal for your glucose level to increase even if you delivered the correct meal bolus. The allowed increase in the glucose level is called “meal rise”. After a certain period of time, the so-called offset time, the glucose level drops from the peak value until it reaches the target level again.
-
Page 172: Glossary
GLOSSARY Glossary Term Definition The acting time is the period of time from the start of bolus delivery Acting time until the glucose level is expected to return to the target value. The acting time includes the offset time. A calculated value representing the amount of insulin currently in the body that still has a lowering effect on the glucose level after a Active insulin correction bolus. - Page 173 GLOSSARY Term Definition Bluetooth wireless Wireless transfer technology that digital devices use to exchange technology data The insulin amount required to cover the intake of food or correct an elevated glucose level. The bolus type and bolus amount are Bolus determined by your healthcare professional’s guidelines, your glucose level, the food you ate, your current state of health or your physical activity.
- Page 174 GLOSSARY Term Definition The time you set via the Settings menu on the Time and date Current time screen. Delivery lag time Period of time before delivery of a programmed bolus begins. End time Time at which a time block ends Error messages are displayed when relevant malfunctions of the micropump system are registered.
- Page 175 GLOSSARY Term Definition The insulin sensitivity (U : mmol/L) defines the insulin amount Insulin sensitivity required to lower your glucose level by a certain value. The upper limit value and lower limit value together define the glucose target range. Limit value For bolus calculation, the mean value from the upper limit value and lower limit value is used as the glucose target value.
- Page 176 GLOSSARY Term Definition A feature the diabetes manager can use to remind you of an event, Reminder a task or a planned activity. Settings are individually adjustable values and parameters that Settings define the way the micropump system works. The snack size defines a carbohydrate threshold; when this is exceeded, a meal rise should be taken into account for bolus Snack size advice.
- Page 177 GLOSSARY Term Definition Time blocks help you to set the target range and the parameters insulin sensitivity and carbohydrate ratio for bolus advice for specific Time block times of day. Time blocks allow you to divide the day into different time periods according to your individual lifestyle.
-
Page 178: Index
INDEx Index Language, 111 Logbook, 92 Abbreviations, 163 Main menu, 20, 122 Acting time, 172 Maintenance messages, 139 Active insulin, 58, 172 Meal bolus, 76 Aeroplane mode, 113, 172 Meal rise, 175 Automatic off, 172 Messages, 133 Micropump, 13, 44, 46, 126, 154 Mute warnings and reminders, 110 Basal rate, 19, 32, 80, 172 Basal rate profile, 172... - Page 179 INDEx Time blocks, 66, 177 Tone, 109, 167 Total daily dose, 22, 102, 177 Travelling, 18, 107, 113 Troubleshooting, 133, 147 Vibration, 21, 109 Warning limit, 30, 105, 123, 177...
- Page 181 Bluetooth SIG, Inc. ® and any use of such marks by Roche is under licence. Teflon is a registered trademark of E. I. du Pont de Nemours and Company or its affiliates.
Need help?
Do you have a question about the Accu-Chek Solo and is the answer not in the manual?
Questions and answers