
Related Manuals for Roborock Auto-Empty Dock Pure


Summary of Contents for Roborock Auto-Empty Dock Pure
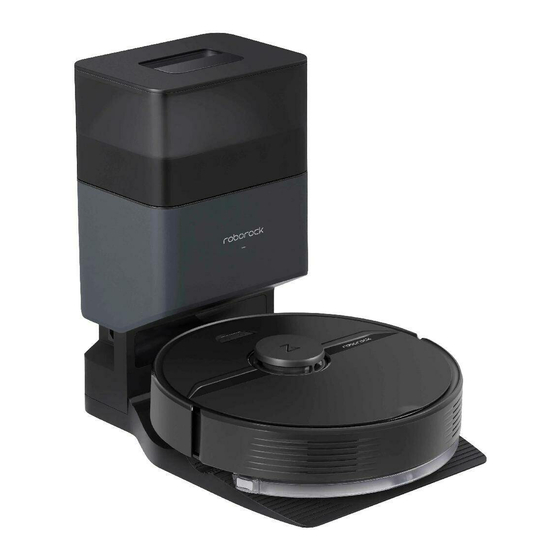
- Page 1 Roborock Auto-Empty Dock Pure User Manual Read this user manual carefully before using this product and store it properly for future reference.
- Page 3 English Français Deutsch Italiano Español Polski Norsk Svenska...
-
Page 4: Table Of Contents
English Contents Safety Information Accessories Product Introduction Getting Started Routine Maintenance Basic Parameters FAQs & Troubleshooting EU Declaration of Conformity WEEE Information Warranty Information... -
Page 5: Safety Information
Safety Information Restrictions • This product is designed for indoor use only, do not use it outdoors (such as on an open-ended terrace), on any surface other than the ground (such as a sofa), or in any commercial or industrial environment. •... - Page 6 Safety Information Battery and Charging WARNING • Do not charge non-rechargeable batteries. • In order to avoid a hazard due to inadvertent resetting of the thermal cut-out, this appliance must not be supplied through an external switching device, such as a timer, or connected to a circuit that is regularly switched on and off by the utility. •...
-
Page 7: Accessories
Accessories Dustbin Cover Dustbin (Disposable Dust Base Bag Pre-Installed) Power Cable Screwdriver Disposable Dust Bag... -
Page 8: Product Introduction
Product Introduction Auto-Empty Dock Base Status Indicator Light Air Duct Cover • Steady white: Standby Screws (10) • Flashing white: Emptying • Steady red: Malfunction Dustbin • Light off: Charging Robot/ Cover Not Powered On Dustbin Air Duct Cover Dock Location Beacon Screwdriver Base Charging Contacts... - Page 9 Product Introduction Power Cable Storage Auto-Empty Dock (Cover Removed) Dust Bag Slot Filter Power Cable Storage Slot Cable Outlet Dust Bag Power Port Note: Power cable can be pulled out at both sides.
-
Page 10: Getting Started
Getting Started Assembly 3. Connect the power cable to the dock, and keep the excess cable inside the storage slot. 1. Take the screwdriver from its storage bin at the bottom of the base. 4. Place the dock on a hard and flat floor (wood/tile/concrete etc.). Keep at least 0.5 m (1.6 ft) of clearance on either side, 1.5 m (4.9 2. -
Page 11: Routine Maintenance
Getting Started Routine Maintenance Emptying Dust Bag Replacement * Replace as needed Auto-emptying will begin when the robot returns to the dock after 1. Remove the dustbin cover vertically as shown. cleaning. Press the Dock button to trigger emptying manually. Press any button to stop emptying. - Page 12 Routine Maintenance Air Duct 3. Clean the filter with a dry cloth. * Clean as needed 1. Unscrew the screws (10) and remove the cover. 4. Install a new dust bag in place along the slot and put the dustbin 2.
-
Page 13: Basic Parameters
Routine Maintenance Basic Parameters 3. Re-install the cover and screw it back in place. Auto-Empty Dock Name Auto-Empty Dock Model AED03HRR, AED04HRR Rated Input Voltage 220-240VAC Rated Frequency 50-60Hz Rated Input (Dust Collection) Rated Input (Charge) 0.5A Charging Area Cleaning * Clean as needed Rated Output 20VDC 1.2A... -
Page 14: Faqs & Troubleshooting
2. The dock is not connected to a power supply. Make sure the power cable is securely plugged in and power is on. cannot be charged. 3. Poor contact. Clean charging contacts. If the problem persists after using the recommendations in the table above, email our after-sales service team: Europe Support: support@roborock-eu.com Australia Support: service@roborock.com.au... -
Page 15: Eu Declaration Of Conformity
EU Declaration of Conformity We Beijing Roborock Technology Co., Ltd., hereby, declares that this equipment is in compliance with the applicable Directives and European Norms, and amendments. The full text of the EU declaration of conformity is available at the following internet address: https://global.roborock.com/pages/compliance...
Need help?
Do you have a question about the Auto-Empty Dock Pure and is the answer not in the manual?
Questions and answers
I have the Roborock auto empty dock model # AED03LRR and I need replacement bags. Which bags fit this model and where can I buy them.