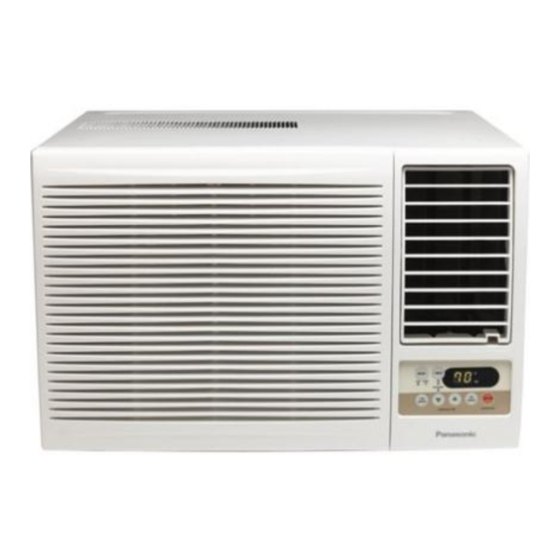
Panasonic CW-XC103VU Service Manual
Hide thumbs
Also See for CW-XC103VU:
- Operating instructions manual (16 pages) ,
- Installation and operating instructions manual (36 pages)
Table of Contents
Advertisement
Quick Links
SPECIFICATIONS
Model
Phase
Voltage
Frequency
Cooling Capacity
Running Current
Input Power
EER
Starting Current
Compressor Output
Fan Motor Output
Noise Level
Moisture Removal
Air Circulation
CW-XC103VU / CW-XC123VU
Specification
CW-XC103VU
Single
115 V
60 Hz
2.93 kW
10,000 Btu/h
8.7 A
0.98 kW
10.2 Btu/W.h
35 A
700 W
45 W
Indoor (High / Low):
50 / 46 dB(A)
Outdoor (High / Low):
57 / 54 dB(A)
1.2 Ltr/h
2.5 Pint/h
9.1 m 3 /min.
320 Ft 3 /min.
Order No. MAC0108052C1
Room Air Conditioner
CW-XC123VU
Single
115 V
60 Hz
3.37 kW
11,500 Btu/h
9.8 A
1.12 kW
10.2 Btu/W.h
48 A
750 W
45 W
Indoor (High / Low):
51 / 47 dB(A)
Outdoor (High / Low):
58 / 55 dB(A)
1.4 Ltr/h
3.0 Pint/h
9.3 m 3 /min.
330 Ft 3 /min.
E9
Advertisement
Table of Contents

Related Manuals for Panasonic CW-XC103VU


Summary of Contents for Panasonic CW-XC103VU
- Page 1 Order No. MAC0108052C1 Room Air Conditioner CW-XC103VU / CW-XC123VU SPECIFICATIONS Specification Model CW-XC103VU CW-XC123VU Phase Single Single Voltage 115 V 115 V Frequency 60 Hz 60 Hz Cooling Capacity 2.93 kW 3.37 kW 10,000 Btu/h 11,500 Btu/h Running Current 8.7 A 9.8 A...
- Page 2 Model CW-XC103VU CW-XC123VU Dimensions Height: 375 mm Height: 375 mm (14-25/32 inches) (14-25/32 inches) Width: 560 mm Width: 560 mm (22-1/16 inches) (22-1/16 inches) Depth: 606 mm Depth: 606 mm (23-27/32 inches) (23-27/32 inches) Net Weight 35 kg 35 kg...
- Page 3 1.2. Main Unit...
- Page 4 2. Dimensions 2.1. CW-XC103VU / CW-XC123VU / 2.1.1. Top View, Front View and Side View.
-
Page 5: Refrigeration Cycle Diagram
14-25/32” (375) C - Depth 23-27/32” (606) 11-9/16” (294) 1-13/16” (46) 11-3/32” (281.6) 11-3/32” (281.6) 3. Refrigeration Cycle Diagram 3.1. CW-XC103VU / CW-XC123VU / 3.2. CW-XC103VU Item Pressure (PSI) Temperature (°F) 278.47 ~ 285.72 150 ~ 158 274.12 ~ 281.37 97 ~ 105 84.02 ~ 94.27... -
Page 6: Block Diagram
46 ~ 54 76.87 ~ 84.12 50 ~ 58 Note: Indoor temperature at 80°F (DB), 67°F (WB) and Outdoor at 95°F (DB), 75°F (WB). 4. Block Diagram 4.1. CW-XC103VU / CW-XC123VU / 5. Wiring Diagram 5.1. CW-XC103VU / CW-XC123VU /... -
Page 7: Air Conditioner Performance Evaluation
5.2. Resistance of Fan Motor windings and the rated Capacitor. Model CW-XC103VU & CW- XC123VU Connection CWA951177 Blue - Yellow 36.7 Yellow - Brown 6.91 Brown - Orange 7.69 Red - Yellow 36.0 Capacitor CWA981062 F, 230VAC) 5.3. Resistance of Compressor windings and the rated Capacitor. -
Page 8: Troubleshooting Guide
Suction & Discharge Current Determination Remedy Air Temperature Difference 8°C and over (14.4°F) As specified. Nothing wrong. None. 8°C and over (14.4°F) Higher than specified. Nothing wrong, outdoor Improve heat radiation. temperature is too high, heat radiation is not efficient. Under 8°C (14.4°F) Higher than specified. -
Page 9: Operation Details
Trouble Check Result Cause Remedy Noise. Source of Noise Vibration. Faulty installation. Reinstall unit or Reinforce installation. Intermittent Noise. Fan hitting objects. Adjust Fan position or Refrigerant tubing touching foreign materials. each other. About 1/2” Clearance Fan splashing Drain Water. Remove drain plug and a drain pan to remove Set the Drain outlet downward,... - Page 10 8.2.3. Starting Current Control - When the compressor and fan motor are simultaneously started, the fan motor will operate 1.6 seconds later. 8.2.4. Freeze Prevention Control - If the temperature of the indoor heat exchanger falls continuously below 34°F for 3 minutes or more, the compressor turns off to protect the heat exchanger from freezing.
- Page 11 8.2.6. Cooling Operation Time Diagram 8.3. Economy Operation - Purpose of this operation is for electricity cost saving. - When Economy button is pressed, target temperature is shifted up 1°F, this will reduce operating time of the compressor and therefore reduce power consumption. It may, however, take a little longer for the compressor to cycle on and thereby increase the room temperature slightly.
- Page 12 - Stopped by ON/OFF operation. - Timer OFF activates. 8.4. Random Auto Restart Control - If there is a power failure, operation will be automatically restarted after 3 to 4 minutes when the power is resumed. It will start with previous operation mode and airflow direction (Time Delay Safety Control is valid) as the operation was not stopped by Remote Control or Main Unit (Touch Control Panel).
- Page 13 Main Unit (Touch Control Panel) in the Auto Airflow, the airflow direction louver swings side to side within the full swing range as shown in the “Diagram”. - The louver can be adjusted by pressing the Button/Pad again at the Remote Control or Main Unit (Touch Control Panel) to the desired louver position.
- Page 14 - To switch off the beep sound. Press the “Operation OFF/ON Pad“ at the main unit continuously for 10 second or more. Repeat the above if you want to switch ON the “beep” sound. *However, if the “Operation OFF/ON Pad” have been pressed, the previous operation mode will be activated.
- Page 15 3. Remove two screws at the back of the chassis. 4. Remove three screws (dotted circle) and release both piping and intake air temperature sensor. Then, take out the side plate as shown below:...
- Page 16 5. Hold the top part of horizontal vane and pull it out as shown in the below figure. Then, remove the shaft (dotted circle) inside the compartment. 6. Pull out the control board as shown in below figure:...
- Page 17 7. Electronic controller is inside the control board. Remove the screw (dotted circle), release the hook and the bend the side plate out the electronic controller. - Control Board part location.
-
Page 18: Exploded View
11. Exploded View (Note) - The above exploded view is for the purpose of parts disassembly and replacement. - The non-numbered parts are not kept as standard service parts. 12. Replacement Part List... - Page 19 Remarks Ref. No. Part Name & Description Qty. CW-XC103VU CW-XC123VU Base Pan Complete CWD52K1048A <---- Bulkhead Complete CWD531010 <---- Air Guide - Propeller Fan CWD311015 <---- Bracket - Fan Motor CWD541037 <---- Ventilation Lever CWH221005 <---- Control Board (Indicator) CWH102142...
-
Page 20: Electronic Circuit / Indicator Complete
- The above parts are kept for seven years in accordance with MEI service policy. - However, longer lead time will be taken in supplying the non- numbered parts. - All parts are supplied from MAICO, Malaysia (Vendor Code: 061). - (A): Optional part. - Page 21 15.1.1. CW-XC103VU. - Cooling Characteristics Vs. Outdoor Temperature. 15.1.2. CW-XC123VU. 15.2. Thermostat Characteristics. - Cooling.
-
Page 22: Electronic Circuit Diagram
16. Electronic Circuit Diagram 16.1. Electronic Circuit Diagram (Main Unit). - Page 24 16.2. Electronic Circuit Diagram (Remote Control).
- Page 25 16.3. How to use electronic circuit diagram. Before using the circuit diagram, read the following carefully. - Voltage measurement Voltage has been measured with a digital tester when the fan is set at high fan speed under the following conditions without setting the timer.
- Page 26 Carbon resistor indicated Tolerance (+-) 5% Metal oxide resistor Tolerance (+-) 1% - Indications for capacitor Unit P...pF Type Not indicated...ceramic capacitor (S)...S series aluminium electrolytic capacitor (Z)...Z series aluminium electrolytic capacitor (SU)...SU series aluminium electrolytic capacitor (K)...K series aluminium electrolytic capacitor (P)...P series polyester system (SXE)...SXE series aluminium electrolytic capacitor (SRA)...SRA series aluminium electrolytic capacitor...
-
Page 27: Side View
Please observe these following safety precautions when using OPERATION PRECAUTIONS your air conditioner. • Failure or negligence in observing these safety precautions This sign warns of risk of death or serious injury. WARNING could cause fire, electrical shock or personal injury. •... - Page 28 WINDOW REQUIREMENTS CHASSIS INSTALLATION INTO THE CABINET • Hot sun rays hitting the outside surface Slide the chassis into the cabinet. of the cabinet will create considerable Reinstall the cabinet screws. heat load. If the outside of the cabinet is exposed to direct sunlight, consider Secure the cabinet to chassis by using screws (from building an awning to shade the cabinet...
-
Page 29: Removal Of Front Grille
REMOVAL OF FRONT GRILLE Remove the air filter. Remove the front intake grille. Pull up the front intake Air filter Tilt up and pull grille about 90° and slide out the air filter it slightly to the left to by the holder. unhook the tabs. -
Page 30: Remote Control
6 MODE selection button AIR SWING FAN SPEED unit or other heat sources. 7 ECONOMY Button Panasonic 8 AIR SWING button • Maximum distance : 10 m 9 Fan Speed Selection Button NOTES WARNING •... - Page 31 The SET/CANCEL CANCEL timer. indicator light will turn off. However the SET/ OPERATION • Press the OPERATION button to turn on CANCEL temperature remains displayed. the unit. Model CW-XC103VU CW-XC123VU COOLING CAPACITY Btu/h 10,000 11,500 ELECTRICAL RATING Phase Single Frequency (Hz)
- Page 32 If the trouble persists after you have checked all of these, Condition 3 If the unit does not cool properly. call your authorized Panasonic dealer or servicenter. • The room is too big for the unit’s cooling capacity. Service information can be obtained 24 hours/day by calling: •...
Need help?
Do you have a question about the CW-XC103VU and is the answer not in the manual?
Questions and answers