Table of Contents
Advertisement
Quick Links
BATTCAR SWITCH SYSTEM
INSTALLATION MANUAL
Installation Manual - Intended for specialized personnel or expert users
Please read these instructions carefully before installing, servicing, or operating the equipment.
This manual may be modified without notice. See: www.harken.com/manuals for updated versions.
18 mm
Introduction
Preassembly
Assembly-Drill and Tap Track
PLEASE SAVE THESE INSTRUCTIONS
4679 11/14
2
2
3 - 4
5
6
6
7
7
8 - 9
10 - 11
12
12
12
13
14 - 15
15
16
16
16
17
17
18
18
19
19
20 - 21
22
Advertisement
Table of Contents

Subscribe to Our Youtube Channel
Related Manuals for Harken HC7906


Summary of Contents for Harken HC7906
-
Page 1: Table Of Contents
Distance between attachment points Setting reef points Replacement Parts 20 - 21 Troubleshooting/Warranty Please read these instructions carefully before installing, servicing, or operating the equipment. This manual may be modified without notice. See: www.harken.com/manuals for updated versions. PLEASE SAVE THESE INSTRUCTIONS... -
Page 2: Safety Precautions
Purpose Harken Battcars are designed to reduce the size of, or to completely drop the mainsail on a sailboat so wind has little effect on the sail. Use of this product for other than normal sailboat applications is not covered by the limited warranty. -
Page 3: Parts
Preassembly Parts HEADBOARD CAR BATTEN CARS (ASSEMBLY) WITHOUT RECEPTACLE HC8537 HC7906 HC7906HL HC7904HL HC8537HL INTERMEDIATE SPARE CAR SCREWS CARS HC7905 HC7905HL Important! Do not overtighten screw and nut. Car will bind and may warp permanently. Cars Part No. Description System... - Page 4 Preassembly Parts Switch (slug mount) Switch (drill and tap) Track mounting kit (slug mount) Slug mount track HC9106, HC9107, HC9108 HC9702, HC9703, HC9704 HC8800 HC8811 18 mm " 4 mm ( ") 15 mm " HC8800 HC8811 Switch mounting kit (slug mount) HC8918 Drill and tap track HC7827...
-
Page 5: Sizing/Sail Modification/Switch Height
Part No. System Headboard car Batten car Intermediate car Monohull Multihull 41 m (450 ft 30 m (325 ft 18 mm HC7906 HC8537 HC7905 HC8537HL, 56 m (600 ft 46 m (500 ft 18 mm HL HC7906HL HC7905HL HC7904HL Track Length and Switch Allow 63 mm (2 ") below track to remove car. -
Page 6: Top Track Length
Preassembly Track Length Layout system using charts to plan track location and lengths. Total Track Length __________ Top track—variable-length Length Hole Spacing - SUM __________ Top Track Length A __________ Length Quantity Standard track—slug-mount Length Hole Spacing 2051 Standard track—drill and tap Length Hole Spacing 3000... -
Page 7: Assembly-Slug-Mount Track
Assembly—Slug-Mount Cut Top Track to Length 10 mm ( ") Drill 5.5 mm ( ") hole in cut end Cut variable length top track. Deburr cut. of track for endstop. Slightly round track corners that will slide against mast. Check Fit of Mounting Slugs and Car CORRECT INCORRECT CORRECT... -
Page 8: Install Track
Assembly—Slug-Mount Install Track Note: When using HC8811 track, put slugs at 50 mm intervals at sail headboard location at full hoist and when sail is reefed. Otherwise skip holes so slugs are at 100 mm hole spacing. Full hoist High-load track with 50 mm hole spacing. - Page 9 Assembly—Slug-Mount Install Track Slide tracks up enough to fit next track. Repeat until full-length tracks installed. Hold full-length track piece up to mast. Loosely install top screw. Mast-up: Hold upper tracks. Loosen screw that holds tracks. Slide track up. If screws Use putty knife to slide additional slugs bind in mast groove opening, loosen them and splice slug into place.
- Page 10 Assembly—Slug-Mount Install Track Back of switch Wide section Back of switch Narrow section Switch bottom Flat slug: Load slug into mast so plastic Round slug: Load slug into mast so plastic Note location of bottom of switch and locator screw is at bottom. locator screw is at top.
-
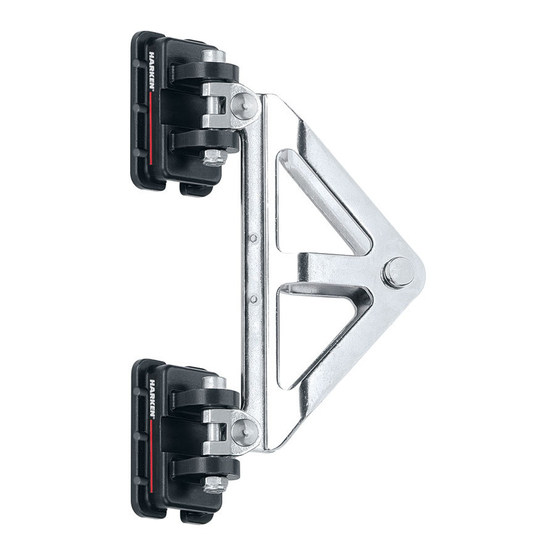
Page 11: Install Switch
Assembly—Slug-Mount Install Switch Install switch over slugs so plastic locator Install connector screw using blue Loctite ® Install screw in open slug hole using blue screw is through center hole. adhesive on screw. If necessary loosen Loctite adhesive. plastic locator screws. Round slug will go below/flat slug above. -
Page 12: Removing Old Track
Assembly—Drill and Tap Mount General Instructions Drill and Tap Sizes Part No. Comments Track Drill 4.2 mm Length: 3000 mm (118 ") Determine track length. See page 6. HC7827 5 x .80 mm 10-32 Do not use HC8800 or HC8811 for drill and tap. Track Fasteners —... -
Page 13: Install Switch
Assembly—Drill and Tap Mount Install Switch Insert splice link into switch track. Using a plastic hammer, tap link into place. Carefully align track and tape in place. Use a transfer punch to mark a single hole. Remove track. Drill and tap. Fasten with single screw, no adhesive. -
Page 14: Install Track
Assembly—Drill and Tap Mount Install Track HC10417 only If shortening is required, use lines scribed on switch track to indicate cut line. Make sure you add 254 mm (10") to the upper track length. Before mounting track, move endstops and tether to new locations. -
Page 15: Install Top Stop
Assembly—Drill and Tap Mount Install Track With track off mast, tap upper splice link into track using procedures outlined above. Follow general instructions (page 15) for drilling and taping a single hole. Always make sure tracks are aligned. Install Top Stop Use H-42662 as top stop. -
Page 16: Commissioning
Commissioning Slug-Mount / Drill and Tap Mount Lubricate cars onshore before loading. Loading headboard assembly. Loading cars. Before bringing headboard assembly or Note location of guide pegs on the feet Pegs on foot of car guide it to correct cars onboard boat, spray underbody track of cars. -
Page 17: Lazy Jacks
Commissioning Lazy Jacks Use shockcord to hold Lazy Jacks open so Battcars and battens will not catch on them. This will also help stop slapping of Lazy Jacks on sail. Attach one end to lower spreader tips and other to Lazy Jacks. Make sure shockcord is long enough so boom can swing all the way out without damaging spreaders. -
Page 18: Sailmakers Instructions
Sailmakers Instructions Slug-Mount / Drill and Tap Mount HC7906 HC7906HL HC7905 HC7905HL HC7904HL HC8537HL HC8537 Dimensions (measured from aft face of mast) Mounted on slug mount track C boltrope setback E pin Ø F stud Ø Part No. Description HC7906 Headboard car —... -
Page 19: Distance Between Attachment Points
Instruct operators not to raise or lower sails with high loads on cars while in the switch area. Harken is not responsible for damage to the switch area due to reef loads, or for raising or... -
Page 20: Replacement Parts
Replacement Parts HC8537 HC7906 HC7905 HC7906 HC7905 Part No. Description Part No. Description H-40882 H-40882 H-36184B Headboard receptacle MP-0708 Delrin roller ® HFS1059 Screw SHCS M6 x 40 mm* HFS1059 Screw SHCS M6 x 40 mm* HFS852 Nut M6 locking... - Page 21 M6 x 40 mm* H-37120A Threaded stud HFS852 Nut M6 locking Screw SHCS HFS1059 H-45064 Igus bushing M6 x 40 mm* 4913 Harken label HFS852 Nut M6 locking HFS181 Cotter pin x 1.1" H-45064 Igus bushing H-24211A Clevis pin 4913 Harken label *SHCS = Socket head cap screw.
-
Page 22: Troubleshooting/Warranty
Harken equipment is designed for minimal maintenance, but some maintenance is required for optimum and safest possible operation and to comply with the Harken limited warranty. In general, the most important aspect of maintenance is to keep your equipment clean by frequently flushing with fresh water. - Page 23 You can have total sail shape and reefing control from your cockpit by adding ball bearing genoa lead cars to your low-friction Harken furling system. Our Tech Service Team is ready to answer your furling questions. Call 262-691-3320 or email harken@harken.com...
- Page 24 Main Office and Harken Brandstore: Västmannagatan 81B SE-113 26 Stockholm Sweden Telephone: (46) 0303 61875 • Fax: (46) 0303 61876 Mailing address: Harken Sweden AB, Box 64, SE -440 30 Marstrand Web: harken.se • Email: harken@harken.se Harken UK, Ltd. Bearing House, Ampress Lane, Lymington, Hampshire S041 8LW, England Telephone: (44) 01590-689122 •...
Need help?
Do you have a question about the HC7906 and is the answer not in the manual?
Questions and answers